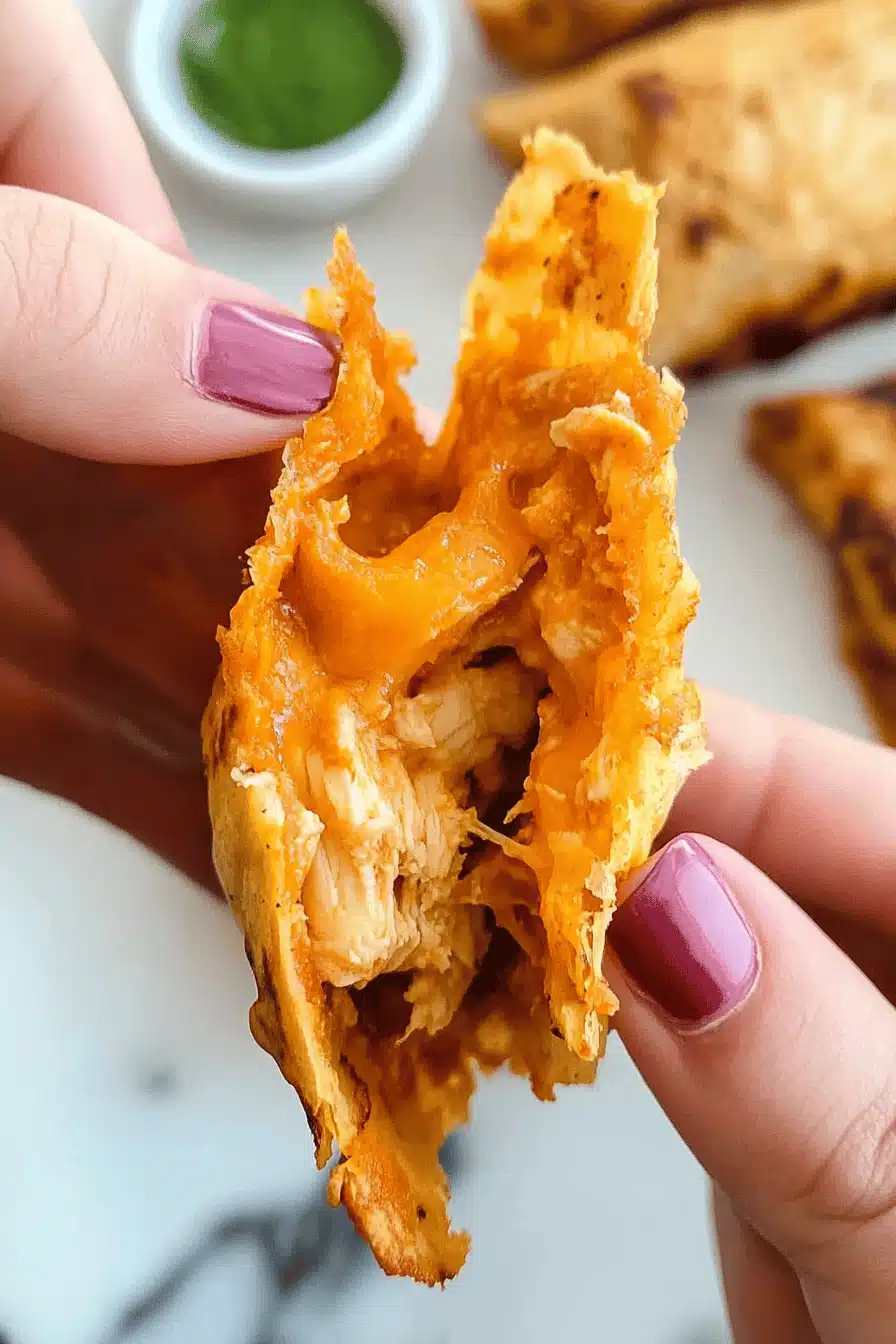
chicken taquitos
Oh, you know those nights, right? The ones where the clock is ticking, everyone’s stomach is rumbling, and the thought of chopping, sautéing, and simmering feels like climbing Mount Everest in flip-flops. Yeah, I live for those nights because that’s when my trusty chicken taquitos recipe swoops in like a culinary superhero. Seriously, these crispy little wonders are my absolute saving grace. They’re not just easy; they’re ridiculously flavorful and use up those leftover bits of chicken like magic. When my family asks, “What’s for dinner?” and I can whip up a batch of these in what feels like no time, I always get those happy little sighs of relief. They’re a bit like elegant little taquitos, but with a comforting, homestyle twist that makes them feel incredibly special, even on a Tuesday. If you’re looking for something that’s going to impress without stressing you out, you’ve stumbled onto something truly wonderful. This is the recipe I send to friends when they’re new to cooking and want something impressive but approachable. It’s a total winner, every single time.
What are chicken tacos?
So, what exactly are these magical little rolls of deliciousness? Think of them as a more portable, infinitely more satisfying cousin to a regular taco or enchilada. We’re talking about tender, seasoned chicken, snugly wrapped inside a corn tortilla, then crisped up to golden perfection. The name “taquito” itself basically means “little taco” in Spanish, and that’s exactly what we’ve got here – small, delightful packages of joy. Unlike a soft taco, these are designed to be crunchy. The magic happens when the tortilla gets all beautifully golden and slightly brittle in the oven or when pan-fried. It’s that satisfying crunch that just makes everything better. It’s a concept that’s been around forever, really, but I’ve tweaked it over the years to make it ridiculously simple for busy weeknights while still packing a serious flavor punch. It’s essentially a hug in a tortilla, ready to solve your dinner dilemmas.
Why you’ll love this recipe?
Honestly, where do I even begin with why I adore this chicken taquitos recipe? It’s a trifecta of pure culinary win: incredible flavor, unbelievable simplicity, and surprising cost-efficiency. Let’s dive in! First, the flavor. Oh my goodness, the flavor! We’re talking savory, seasoned chicken nestled in that warm corn tortilla, with a hint of lime and maybe a touch of spice depending on how you season your chicken. When they come out of the oven, piping hot and perfectly crisp, they smell absolutely divine. It’s the kind of aroma that makes everyone gather in the kitchen, asking, “Are those ready yet?”
Then there’s the simplicity. This is where this recipe truly shines. I’ve streamlined it so much that it’s honestly hard to mess up. You can use leftover cooked chicken, rotisserie chicken, or even quickly poach some breasts if you’re starting from scratch. The assembly is quick, and baking them means less hands-on time. It’s the kind of meal that feels like a gourmet treat but takes minimal effort. Seriously, this one’s a lifesaver on busy nights when you want something homemade but don’t have hours to spend.
And let’s talk about the budget-friendly aspect. Chicken taquitos are incredibly economical. Corn tortillas are usually super cheap, and chicken, especially when you’re using up leftovers, is often one of the more affordable proteins. It’s a way to stretch a meal and make everyone feel like they’re eating something special without breaking the bank. What I love most about this is its versatility. You can jazz up the filling with different cheeses, a sprinkle of cilantro, or a dash of your favorite hot sauce. It’s a fantastic base recipe that you can really make your own. Plus, it’s a crowd-pleaser. My kids ask for this all the time, and when I bring it to potlucks, it disappears in minutes!
How do you make chicken tacos?
Quick Overview
This recipe is all about making your life easier while delivering maximum flavor and crunch. We’re basically going to mix up some seasoned shredded chicken, wrap it in corn tortillas, and bake them until they’re irresistibly crispy. The beauty of this method is that it’s nearly foolproof and results in beautifully golden taquitos without the mess of deep-frying. You’ll be amazed at how quickly these come together, making them perfect for a weeknight dinner or even a fun appetizer.
Ingredients
What is the recipe for chicken filling?
Here’s what you’ll need to get that delicious filling ready:
- 2 cups shredded cooked chicken (rotisserie chicken is a dream here!)
- 1/4 cup finely diced onion (optional, but adds a nice bite)
- 1-2 cloves garlic, minced (or 1/2 teaspoon garlic powder if you’re in a hurry)
- 1/4 cup salsa (your favorite kind, mild or spicy!)
- 1/2 teaspoon cumin
- 1/4 teaspoon chili powder (adjust to your spice preference)
- Salt and freshly ground black pepper to taste
- 1/4 cup shredded cheese (Monterey Jack, cheddar, or a Mexican blend are great choices!)
For the Taquitos:
These are the stars of the show:
- 12-15 corn tortillas (the smaller taco size work best)
- 2 tablespoons olive oil or melted butter (for brushing)
For Serving (Optional but Highly Recommended!):
These toppings take them over the top:
- Sour cream or plain Greek yogurt
- Salsa or pico de gallo
- Guacamole or sliced avocado
- Shredded lettuce
- Chopped cilantro
- A squeeze of fresh lime juice
Step-by-Step Instructions
Step 1: Preheat & Prep Pan
First things first, let’s get our oven preheated to 400°F (200°C). This is the perfect temperature for getting that beautiful golden crispness without overcooking. While the oven heats up, grab a large baking sheet. I like to line mine with parchment paper for super easy cleanup, but a lightly greased sheet works too. Now, this is a crucial step for getting that perfect crunch: gently warm your corn tortillas. You can do this a few ways. The easiest for me is a quick zap in the microwave between damp paper towels for about 30-60 seconds, just until they’re pliable. Alternatively, you can warm them individually for a few seconds on each side in a dry skillet over medium heat. The goal is to make them bendy so they don’t crack when you roll them, but not so hot that they’re difficult to handle.
Step 2: Mix Dry Ingredients
While the tortillas are warming, let’s whip up the heart of our taquitos – the chicken filling. In a medium bowl, add your shredded cooked chicken. If you’re using fresh onion, add that finely diced onion and the minced garlic now. Next, spoon in your salsa. Don’t be shy with it; it adds moisture and fantastic flavor. Now for the spices! Add the cumin and chili powder. These are my go-to spices for a classic taquito flavor, but feel free to add a pinch of smoked paprika or a dash of cayenne if you like things a bit spicier. Season generously with salt and freshly ground Black Pepper. Give everything a really good stir with a fork or a spoon until the chicken is evenly coated with the salsa and spices. Make sure there are no dry pockets!
Step 3: Mix Wet Ingredients
Actually, for this recipe, we don’t have a separate “wet ingredients” mixture to create. All the wet components – the salsa and any moisture from the chicken itself – are already incorporated directly into the filling in the previous step. This is part of what makes this recipe so wonderfully simple! We’re essentially combining everything in one go for the filling.
Step 4: Combine
Now we bring it all together for the filling. Add your shredded chicken to a bowl. If you’re using fresh onion and garlic, toss them in now. Pour in your salsa, add the cumin, chili powder, salt, and pepper. Stir everything together really well. You want the chicken to be thoroughly coated in the salsa and spices. It should look moist and flavorful. If it seems a little dry, you can add another tablespoon of salsa. Once it’s all mixed, stir in your shredded cheese. The cheese helps bind everything together and adds a lovely gooey element when baked. Mix until just combined; we don’t want to overwork it.
Step 5: Prepare Filling
You’ve actually already prepared the filling in the previous steps! You’ve mixed your shredded chicken with salsa, spices, and cheese, ensuring it’s perfectly seasoned and moist. This is the delicious filling that will go inside our tortillas. Give it one last gentle stir to make sure the cheese is evenly distributed. It should be a lovely, cohesive mixture that’s easy to spoon into the tortillas.
Step 6: Layer & Swirl
This is where the taquito magic really happens! Lay a warmed corn tortilla flat on your work surface. Spoon about 2-3 tablespoons of the chicken filling down the center of the tortilla. Don’t overfill, or it will be hard to roll and might burst. Now, starting from one end, carefully but firmly roll the tortilla up. You want it snug, but don’t press so hard that you break the tortilla. Once rolled, place the taquito seam-side down on your prepared baking sheet. Repeat this process with the remaining filling and tortillas. Arrange them snugly side-by-side on the baking sheet. This helps them stand up and get nice and crispy.
Step 7: Bake
Now, let’s give those taquitos the golden treatment. Lightly brush the tops and sides of each rolled taquito with Olive oil or melted butter. This is key for achieving that beautiful, crispy, golden-brown exterior. Pop the baking sheet into your preheated 400°F (200°C) oven. Bake for about 20-25 minutes, or until the tortillas are golden brown and crispy. You might want to flip them halfway through if you want even browning on all sides, though I often find they get plenty crispy just as they are. Keep an eye on them as ovens can vary; you’re looking for that perfect crunchy texture!
Step 8: Cool & Glaze
Once they’re out of the oven, let the taquitos rest on the baking sheet for just a few minutes. This helps them firm up a little. Now is the time for the *optional* glaze, but I highly recommend it! Some people like to drizzle a little bit of the remaining salsa or a crema over the top. I often whip up a quick lime crema by mixing sour cream with a squeeze of lime juice and a tiny pinch of salt. Drizzle this over the warm taquitos. The heat will slightly melt it, creating a wonderful, creamy counterpoint to the crispiness. If you’re not glazing, you can skip this step and go straight to serving.
Step 9: Slice & Serve
These are best served immediately while they are piping hot and super crispy! Carefully transfer the chicken taquitos from the baking sheet to a serving platter. Arrange them nicely, maybe standing up if they’re sturdy enough, or just lined up. Garnish with fresh cilantro, a little extra drizzle of salsa, or a dollop of guacamole if you like. The contrast of the crunchy taquito with cool, fresh toppings is just perfection. Serve with your favorite sides, and watch them disappear!
What to Serve It With
These chicken taquitos are so wonderfully versatile; they can seriously fit into any Meal Plan you’ve got going on. For a cozy start to your day, I love serving them with a simple side of scrambled eggs and maybe some fresh fruit. The savory taquito is a delightful change from the usual breakfast fare, and the slight spice from the filling just wakes up your palate. Think of it as a more exciting breakfast burrito, all rolled up and crispy!
When it comes to brunch, these taquitos can absolutely hold their own. I like to plate them up nicely, perhaps standing them up in a small holder, and surround them with a colorful array of pico de gallo, guacamole, and maybe a small bowl of Mexican street corn salad. A refreshing mimosa or a light, crisp sangria would be the perfect beverage pairing to make it feel like a true celebration.
As a dessert? Okay, maybe not a traditional dessert, but hear me out! If you’ve got a craving for something savory and satisfying after dinner, these hit the spot. I often make a smaller batch just for this purpose. I’ll skip the spicier chili powder and maybe add a touch of smoked paprika instead, and serve them with a dollop of plain Greek Yogurt mixed with a little honey and a sprinkle of cinnamon. It’s an unconventional sweet-and-savory treat that’s surprisingly addictive!
And for those quintessential cozy snack occasions – movie nights, impromptu get-togethers, or just when you need a little pick-me-up – these are perfect. Serve them on a casual platter with a variety of dips like salsa, queso, and sour cream. They’re easy to share, fun to eat, and always a guaranteed hit. My family tradition is to have them with a big bowl of tortilla chips and some homemade guacamole. It’s simple, comforting, and always makes everyone happy.
Top Tips for Perfecting Your Chicken Taquitos
Over the years, I’ve learned a few tricks that take these chicken taquitos from good to absolutely spectacular. Let me share some of my hard-won wisdom with you!
Zucchini Prep: (Oops, that was for a different recipe! Let’s get back to the chicken taquitos.)
Chicken Prep: The key to a great filling is the chicken itself. If you’re using rotisserie chicken, make sure to shred it finely. You want small, manageable pieces that will tuck easily into the tortilla. If you’re poaching chicken breasts, don’t overcook them – just until they’re no longer pink in the center. Let them cool slightly before shredding. The salsa you use is also important; a good quality, flavorful salsa will make a big difference. I personally love a chunky, medium-spiced salsa for a good balance.
Mixing Advice: When you’re mixing the chicken, salsa, and spices, be thorough. You want every strand of chicken to be coated in that delicious seasoning. However, avoid overmixing once the cheese is added, as this can make the filling a bit greasy. Just combine until everything is nicely incorporated. The goal is a cohesive mixture that holds together well.
Rolling Technique: The trick to rolling perfect taquitos is having pliable tortillas. If they crack, it’s usually because they weren’t warmed enough. When you’re rolling, start from one end and tuck the filling in snugly. Don’t pack it so tight that the tortilla might burst, but aim for a firm roll. Placing them seam-side down on the baking sheet is crucial; it helps them stay together and ensures the seam gets nice and crispy without being the only part touching the pan.
Baking Tips: Preheat your oven thoroughly! A hot oven is essential for crispiness. Don’t overcrowd the baking sheet; give the taquitos a little breathing room. This allows the hot air to circulate, ensuring they all get evenly golden and crunchy. I usually check mine around the 20-minute mark and rotate the pan if needed. If they’re not quite crispy enough for your liking, you can always pop them under the broiler for a minute or two, but watch them like a hawk – they can go from golden to burnt in seconds!
Ingredient Swaps: Feel free to experiment! If you don’t have cumin, a little coriander can work. If chili powder is too mild, try a pinch of cayenne pepper or some chipotle powder for a smoky kick. For the cheese, any good melting cheese works – cheddar, pepper jack, or a blend are all delicious. You can also add a tablespoon of finely chopped jalapeño to the filling for extra heat, or a sprinkle of corn kernels for texture. I once tried adding a tiny bit of cream cheese to the filling for extra richness, and it was surprisingly good!
Storing and Reheating Tips
I know we usually devour these chicken taquitos the moment they’re ready, but sometimes, life happens, and you might have a few leftovers (a rare occurrence in my house!). Here’s how I handle storing and reheating them to keep them as delicious as possible.
Room Temperature: Honestly, I don’t recommend leaving them out at room temperature for too long, especially if you’ve added cheese. For food safety, it’s best to enjoy them freshly made or refrigerate them within a couple of hours.
Refrigerator Storage: Once they’ve cooled down a bit, store any leftovers in an airtight container in the refrigerator. They usually keep well for about 3-4 days. I like to place a piece of parchment paper between layers if I’m stacking them to prevent them from sticking together too much. The key is to keep them sealed so they don’t dry out.
Freezer Instructions: If you want to make a big batch ahead of time, these taquitos freeze beautifully! Once baked and completely cooled, arrange them in a single layer on a baking sheet and freeze until solid. This prevents them from clumping together. Then, transfer the frozen taquitos to a freezer-safe bag or container. They’ll last for about 2-3 months in the freezer. To reheat, you can place them directly on a baking sheet (no need to thaw) and bake at around 375°F (190°C) for 10-15 minutes, or until heated through and crispy again. You might need to add a few extra minutes depending on how frozen they are.
Glaze Timing Advice: If you’re planning on storing leftovers, it’s usually best to apply the glaze *after* reheating. If you glaze them before storing, the moisture from the glaze can sometimes make the taquitos a bit soggy, especially if they’re going into the fridge. So, reheat your taquitos until they’re nicely crisp, then add your fresh glaze or toppings.
Frequently Asked Questions
Final Thoughts
So there you have it – my absolute favorite recipe for chicken taquitos. It’s more than just a meal; it’s a solution, a comfort, and a little bit of weeknight magic all rolled into one. I truly hope you give these a try, especially on those nights when you’re feeling the dinner scramble. What I love most is that it’s a recipe that feels both special enough for guests and simple enough for just us at home. It’s that perfect balance that makes a recipe a keeper.
If you enjoy this recipe, you might also want to explore some other quick and easy Mexican-inspired dishes that can save your weeknights, like my Speedy Chicken Fajitas or my One-Pan Enchilada Casserole. They all share that same spirit of big flavor with minimal fuss. I can’t wait to hear how your chicken taquitos turn out! If you make them, please leave a comment below and let me know your favorite way to serve them or any fun twists you tried. Your feedback truly makes my day, and I love seeing how you all adapt these recipes!