Garlic Parmesan Chicken
Oh, where do I even begin with this Garlic Parmesan Chicken? If there’s one recipe that’s become an absolute cornerstone in my kitchen, this is it. It’s the kind of dish that makes my house smell absolutely heavenly, instantly drawing everyone in like a delicious siren song. I remember the first time I made it, trying to impress my in-laws with something new, and let’s just say it was a roaring success! It’s funny, because at first glance, it might seem like just another chicken dish, but trust me, there’s a magic to it. It’s sophisticated enough for company but so ridiculously easy that it’s become my secret weapon on those crazy weeknights when I’m running on fumes and the last thing I want is a complicated meal. It’s got that irresistible savory punch, that comforting warmth, and that delightful crispiness that just makes you happy. It’s definitely a step up from your average weeknight chicken, but without any of the fuss you might expect. Think of it as your shortcut to feeling like a culinary rockstar, even when you’re just trying to get dinner on the table!
What is Garlic Parmesan Chicken?
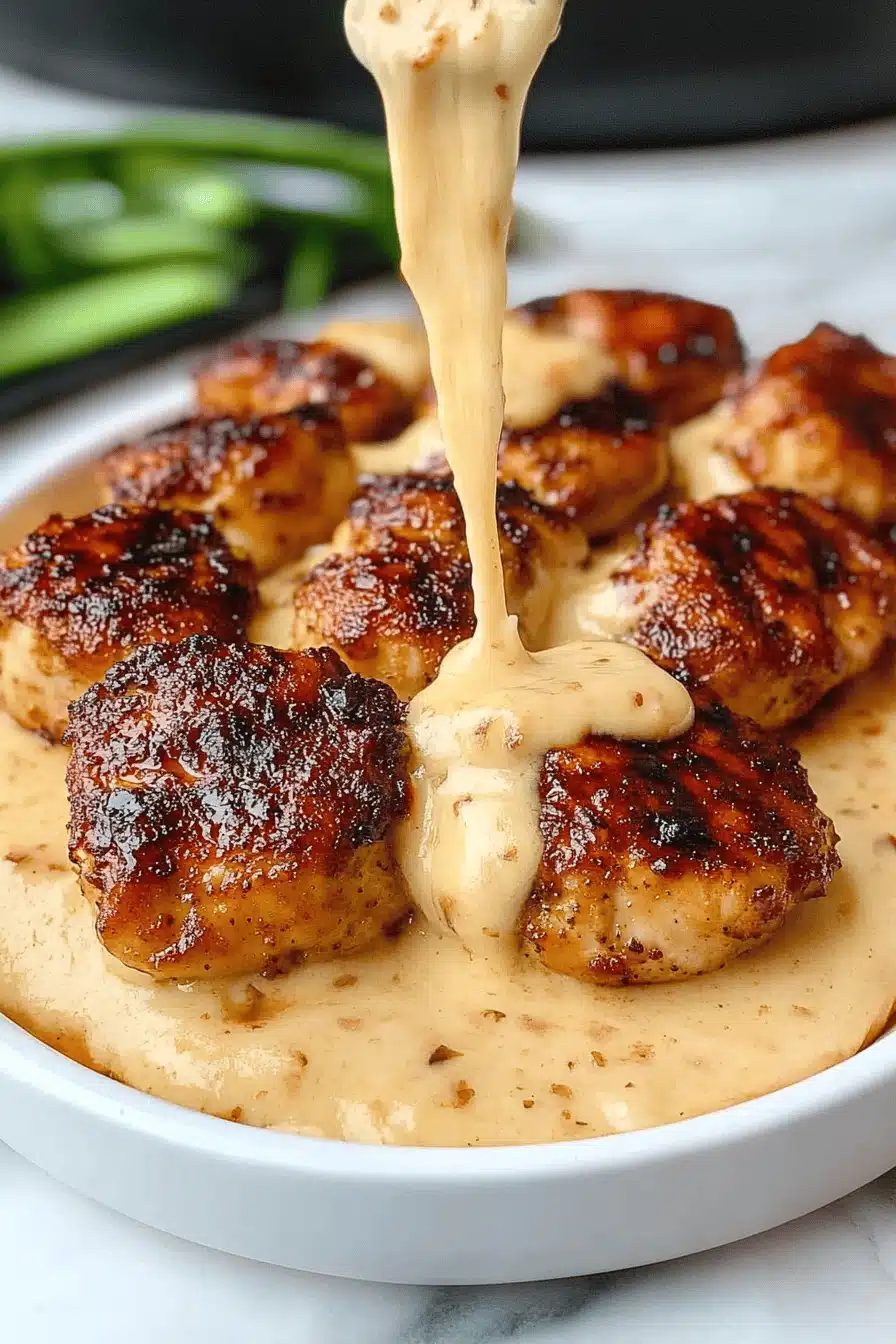
So, what exactly *is* this glorious Garlic Parmesan Chicken? At its heart, it’s wonderfully simple: tender pieces of chicken, usually breasts or thighs, coated in a luscious, savory sauce bursting with garlic and the nutty, salty goodness of Parmesan cheese. It’s not a breaded fried chicken, nor is it a simple pan-sear. The beauty of this particular recipe is the way the chicken becomes incredibly moist and flavorful, infused with that incredible garlic-Parmesan essence. The name itself says it all, doesn’t it? It’s a celebration of two of the most universally loved flavors in the culinary world. It’s the kind of dish that feels both familiar and excitingly new with every bite. It’s less about intricate techniques and more about letting good, honest ingredients shine. It’s essentially a hug in chicken form, bathed in a sauce that’s so good, you’ll want to lick the plate clean.
Why you’ll love this recipe?
What is the secret behind this Garlic Parmesan Chicken recipe?flavor. Oh my goodness, the flavor! It’s this incredible balance of sharp, zesty garlic that’s not overpowering (unless you want it to be, which you totally can be!), mellowed out by the rich, umami-packed Parmesan cheese. It clings to the chicken in the most delightful way, creating this savory, slightly crispy, utterly irresistible coating. It’s the kind of flavor that makes you close your eyes with every bite. Then there’s the simplicity. This is not a recipe that requires advanced culinary degrees or a pantry full of obscure ingredients. It’s genuinely straightforward, making it perfect for anyone, from a beginner cook to a seasoned pro looking for a reliable, delicious meal. I’ve even made it with a toddler “helping” me in the kitchen, and it still turned out perfectly. It’s also surprisingly cost-efficient. Chicken breasts and thighs are usually budget-friendly, and the other ingredients like garlic, butter, and Parmesan are pantry staples for most home cooks. You get restaurant-quality flavor without the restaurant price tag! And let’s not forget its versatility. This Garlic Parmesan Chicken is a chameleon. It can be served over pasta for a hearty weeknight dinner, alongside a fresh salad for a lighter meal, tucked into wraps for lunches, or even as a star appetizer. My personal reason for loving it so much is that it’s a guaranteed crowd-pleaser. Whether it’s for a busy Tuesday night or a casual weekend get-together, it always hits the spot and gets rave reviews. It’s the kind of dish that makes me feel good about feeding my family and friends.
How do I make Parmesan Chicken with Garlic?
Quick Overview
Making this Garlic Parmesan Chicken is a breeze, really. You’ll quickly sear the chicken to get a beautiful golden-brown color, then let it simmer gently in a fragrant garlic-Parmesan sauce until it’s perfectly cooked through and incredibly tender. The whole process is designed to be fuss-free, allowing those incredible flavors to meld together beautifully. What makes this method so special is how it ensures the chicken stays juicy and absorbs all that delicious sauce, unlike some other methods where it can dry out. You’ll be amazed at how quickly you can go from raw ingredients to a stunning, flavorful meal!
Ingredients
For the Main Dish:
1.5 lbs boneless, skinless chicken breasts or thighs: I usually opt for thighs because they’re a bit more forgiving and stay incredibly moist, but breasts work beautifully too! Just make sure they’re not too thick, or you might want to pound them slightly for even cooking.
2 tablespoons olive oil: For searing. A good quality extra virgin olive oil adds a nice subtle flavor.
2 tablespoons unsalted butter: This helps with browning and adds a lovely richness to the sauce.
4-6 cloves garlic, minced: Don’t be shy with the garlic! This is the star. I like to mince mine very finely so it distributes evenly. If you’re a super garlic lover like me, feel free to add an extra clove or two!
1 cup chicken broth: This forms the base of our luscious sauce. Low-sodium is great so you can control the saltiness yourself.
1/2 cup heavy cream: This is what makes the sauce so wonderfully creamy and decadent. It’s pure indulgence!
1/2 cup grated Parmesan cheese, plus more for serving: Freshly grated is always best here. It melts so much better and has a superior flavor to pre-shredded.
1/4 cup chopped fresh parsley: For a burst of freshness and a pop of color. It really brightens up the dish.
Salt and freshly ground Black Pepper to taste: Season generously, but taste as you go, especially with the salty Parmesan!
Optional: A pinch of red pepper flakes for a little warmth.
Step-by-Step Instructions
Step 1: Preheat & Prep Pan
First things first, let’s get our pan ready. Grab a large skillet or Dutch oven that has a lid – this is crucial for simmering later. Place it over medium-high heat. We want it nice and hot before we add our oil and chicken, which helps create a beautiful golden-brown sear. While the pan heats up, go ahead and pat your chicken pieces completely dry with paper towels. This is a super important step for getting a good sear; wet chicken just steams, it doesn’t brown. Season your chicken generously on both sides with salt and pepper. Don’t be timid here – this is our first layer of flavor!
Step 2: Mix Dry Ingredients
This step is less about “mixing” and more about preparing your chicken for the pan. As mentioned, ensure your chicken is patted dry and seasoned well with salt and freshly ground black pepper. If you like a little heat, this is also the time to sprinkle on a tiny pinch of red pepper flakes, if you’re using them. The key here is simply ensuring each piece of chicken is ready to hit the hot pan and develop that gorgeous exterior crust.
Step 3: Mix Wet Ingredients
This is where the magic sauce starts to come together, but we build it in stages. In a small bowl, you’ll want to whisk together the chicken broth and heavy cream. This simple combination is the foundation of our creamy sauce. If you’re using a pinch of red pepper flakes, you can also add them into this liquid mixture now, or sprinkle them directly into the pan with the garlic later – either works!
Step 4: Combine
Okay, now we’re ready to actually cook! Add the olive oil to your preheated skillet. Once it’s shimmering, carefully place the seasoned chicken pieces into the pan, making sure not to overcrowd it. You might need to do this in batches. Sear the chicken for about 3-4 minutes per side, until it’s beautifully golden brown. Don’t worry about cooking it through just yet; we’re just building flavor and color. Once seared, remove the chicken from the pan and set it aside on a plate. Don’t clean the pan – those browned bits are pure gold!
Step 5: Prepare Filling
In the same skillet where you seared the chicken (don’t wipe it out!), reduce the heat to medium. Add the butter. Once melted, toss in your minced garlic and sauté for about 1 minute, until fragrant. Be careful not to burn it – burnt garlic is bitter! Now, pour in your pre-mixed chicken broth and heavy cream mixture. Stir it well, scraping up any delicious browned bits from the bottom of the pan. Let this mixture simmer gently for about 2-3 minutes, allowing it to thicken slightly. Stir in the grated Parmesan cheese until it’s melted and the sauce is smooth and creamy. Season with salt and pepper to your liking. This is your glorious sauce!
Step 6: Layer & Swirl
Nestle the seared chicken pieces back into the skillet, ensuring they are submerged in the sauce as much as possible. Spoon some of the sauce over the top of each piece. If you’re using fresh parsley, sprinkle about half of it over the chicken and sauce at this stage. It’s not really a “swirl” step in this particular recipe, but rather about ensuring the chicken is bathed in that incredible sauce.
Step 7: Bake
Cover the skillet with a lid. If your skillet doesn’t have a lid, you can use aluminum foil, making sure it’s sealed tightly around the edges. Reduce the heat to low and let the chicken simmer gently for about 15-20 minutes, or until the chicken is cooked through and tender. The exact time will depend on the thickness of your chicken pieces. You want to make sure the internal temperature reaches 165°F (74°C). Avoid high heat, as this can make the sauce bubble too aggressively and cook the chicken unevenly.
Step 8: Cool & Glaze
Once the chicken is cooked through, remove the skillet from the heat. Let it rest, covered, for about 5 minutes. This allows the juices to redistribute, making the chicken even more tender. While it rests, you can finish the sauce. If it’s not quite as thick as you’d like, you can remove the chicken to a plate, turn the heat up slightly under the sauce for a minute or two, stirring constantly, until it reaches your desired consistency. Then, nestle the chicken back in. The “glaze” in this recipe is essentially the rich sauce itself.
Step 9: Slice & Serve
Garnish with the remaining fresh parsley and an extra sprinkle of Parmesan cheese. This Garlic Parmesan Chicken is absolutely divine served immediately. You can serve it whole, or slice the chicken breasts into medallions before serving for a more elegant presentation. The sauce is so good, you’ll want to make sure there’s plenty of it to spoon over the chicken and whatever you’re serving it with.
What to Serve It With
This Garlic Parmesan Chicken is so versatile, it’s a joy to pair with different sides depending on the meal and the mood! For a simple and comforting Breakfast, it’s actually surprisingly good served alongside some fluffy scrambled eggs or a simple piece of buttered toast. The savory notes really complement breakfast flavors beautifully. For a more elegant Brunch, I love plating it with a side of roasted asparagus and some small, crusty rolls for soaking up all that delicious sauce. A mimosa or a sparkling rosé would be perfect with this. As a main course for Dessert (or rather, the main event before dessert!), it’s incredible served over a bed of al dente pasta – fettuccine or linguine are my favorites. Alternatively, serve it with creamy mashed potatoes or a simple side of rice. For those moments when you just need a warm, satisfying bite, it’s perfect for Cozy Snacks. I often serve smaller portions with some crusty bread for dipping, or even just a forkful of sauce on its own! My family also adores it with a big, fresh green salad tossed with a light vinaigrette – the richness of the chicken and sauce contrasts perfectly with the crisp greens. It’s truly a dish that can adapt to any occasion.
Top Tips for Perfecting Your Garlic Parmesan Chicken
Over the years, I’ve picked up a few tricks that take this Garlic Parmesan Chicken from good to absolutely unforgettable. First, when it comes to the Chicken Prep, I can’t stress enough how important it is to pat your chicken completely dry. Seriously, use those paper towels until the chicken feels almost papery. This is the secret to achieving that beautiful, golden-brown sear. If you’re using chicken breasts, I often find that pounding them gently to an even thickness (about 1/2 inch) ensures they cook evenly and quickly, preventing the outer edges from drying out while the center finishes. For Mixing Advice, the biggest pitfall is overcooking the chicken. Remember, we’re searing it first to build flavor, then letting it simmer gently in the sauce to finish. You don’t want to rush this simmering stage, but you also don’t want to cook it so long that it becomes tough. Look for the chicken to be opaque all the way through and spring back slightly when you gently press it. If your sauce isn’t thickening enough in Step 5, don’t panic! You can easily thicken it by removing the chicken, bringing the sauce to a simmer, and letting it reduce for a few more minutes, stirring frequently. For Swirl Customization (though this recipe isn’t a “swirl” type, the sauce is what we focus on!), focus on the richness. Ensure you’re using good quality Parmesan cheese; freshly grated makes a world of difference in melting and flavor. And don’t be afraid to taste and adjust your seasoning! Saltiness can vary with Parmesan, so a final taste before serving is a must. For Ingredient Swaps, if you’re out of heavy cream, a good substitute is half-and-half, though the sauce might be a little less rich. You can also use milk with a tablespoon of cornstarch mixed in to help thicken it. For a dairy-free version, unsweetened cashew cream or a good quality oat cream can work, but the flavor profile will shift a bit. When it comes to Baking Tips, use a heavy-bottomed skillet, like cast iron or enameled cast iron. These retain heat evenly, which is crucial for gentle simmering. If your skillet doesn’t have a lid, a piece of parchment paper tented with foil works well to trap moisture. For Glaze Variations, while our “glaze” is the sauce itself, you can amp it up. A squeeze of lemon juice at the end can add a lovely brightness, or a sprinkle of finely chopped sun-dried tomatoes can add another layer of savory depth. My personal favorite variation is adding a tablespoon of Dijon mustard to the sauce for a subtle tang that cuts through the richness beautifully. I learned that trick after a particularly rich meal and it’s been a staple ever since!
Storing and Reheating Tips
One of the best things about this Garlic Parmesan Chicken is how well it stores and reheats, making it perfect for meal prep or enjoying leftovers. If you have any (and I sometimes intentionally make extra just for this reason!), storing it properly is key to maintaining its deliciousness. For Room Temperature storage, it’s best to cool the chicken completely before covering it tightly. It should be okay at room temperature for no more than 2 hours. Beyond that, it’s best to move it to the refrigerator. For Refrigerator Storage, I like to keep the chicken and its sauce in an airtight container. It should stay fresh and delicious in the fridge for up to 3-4 days. The sauce will thicken considerably as it cools, which is completely normal. When it comes to Freezer Instructions, this dish freezes surprisingly well! Let it cool completely, then transfer it to a freezer-safe airtight container or a heavy-duty freezer bag. It’s best to freeze it in portions so you can thaw only what you need. Frozen Garlic Parmesan Chicken will last for about 2-3 months. To thaw, transfer it to the refrigerator overnight. The Glaze Timing Advice is pretty simple: for both refrigerator and freezer storage, it’s best to reheat the chicken *with* the sauce. This helps rehydrate the chicken and ensures the sauce coats it beautifully. When reheating, you can do it gently on the stovetop over low heat, adding a splash of chicken broth or water if the sauce seems too thick, or microwave it in short intervals, stirring occasionally. Avoid high heat when reheating, as this can toughen the chicken. Honestly, the leftovers are almost as good as the fresh batch!
Frequently Asked Questions
Final Thoughts
So there you have it – my beloved Garlic Parmesan Chicken recipe! It’s more than just a meal to me; it’s a guarantee of comfort, flavor, and ease, all wrapped up in one incredibly satisfying dish. It’s the kind of recipe that proves you don’t need hours in the kitchen to create something truly special. The way the garlic and Parmesan meld together with the tender chicken is pure culinary harmony. If you’re looking for more simple yet impressive chicken dishes, you might also enjoy my Lemon Herb Roasted Chicken or my Creamy Tuscan Chicken – they have that same spirit of big flavor with manageable effort! I genuinely can’t wait for you to try this Garlic Parmesan Chicken and experience that same joy I get every time I make it. I’d be absolutely thrilled if you’d leave a comment below to let me know how yours turned out, or if you have any amazing variations you’d like to share! Happy cooking, and I hope this recipe brings as much deliciousness to your table as it does to mine!