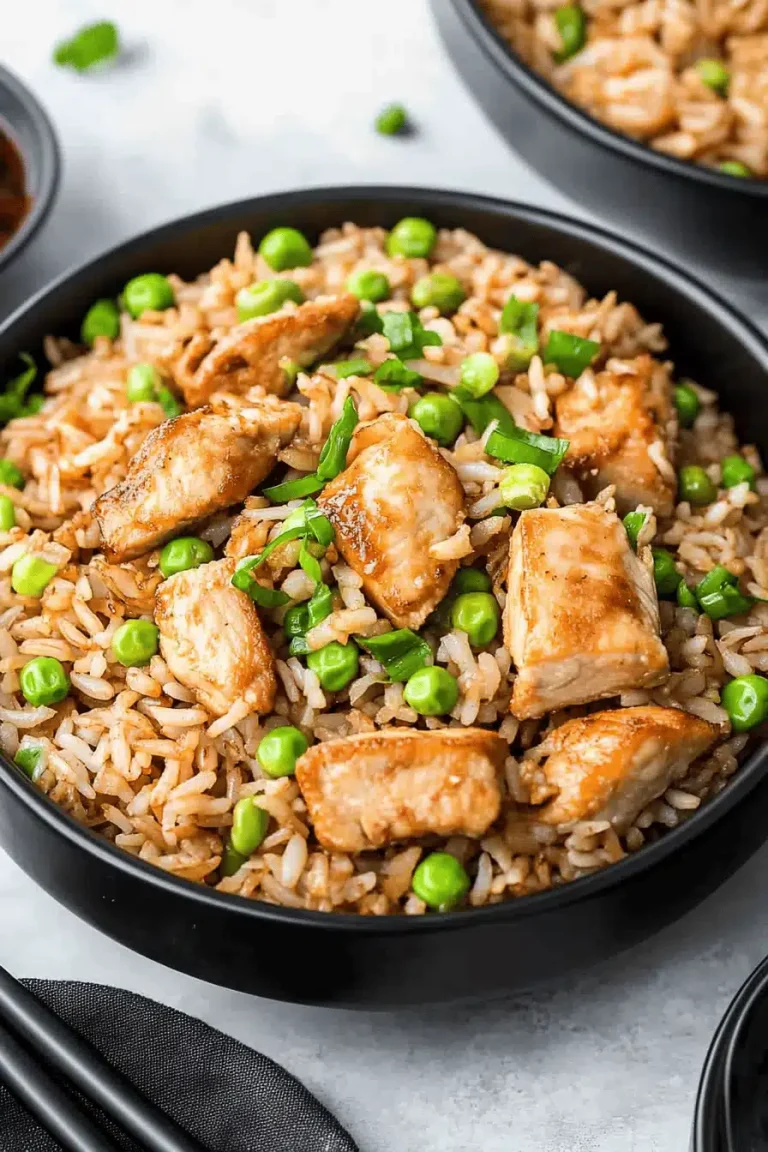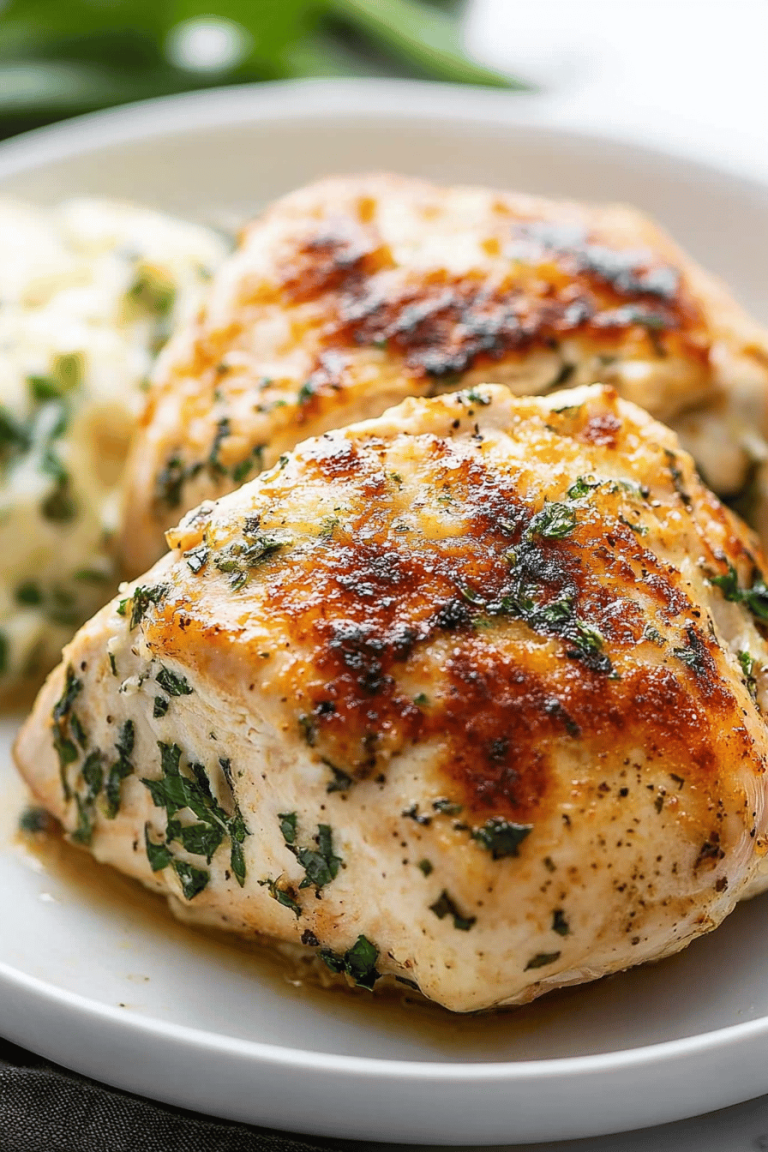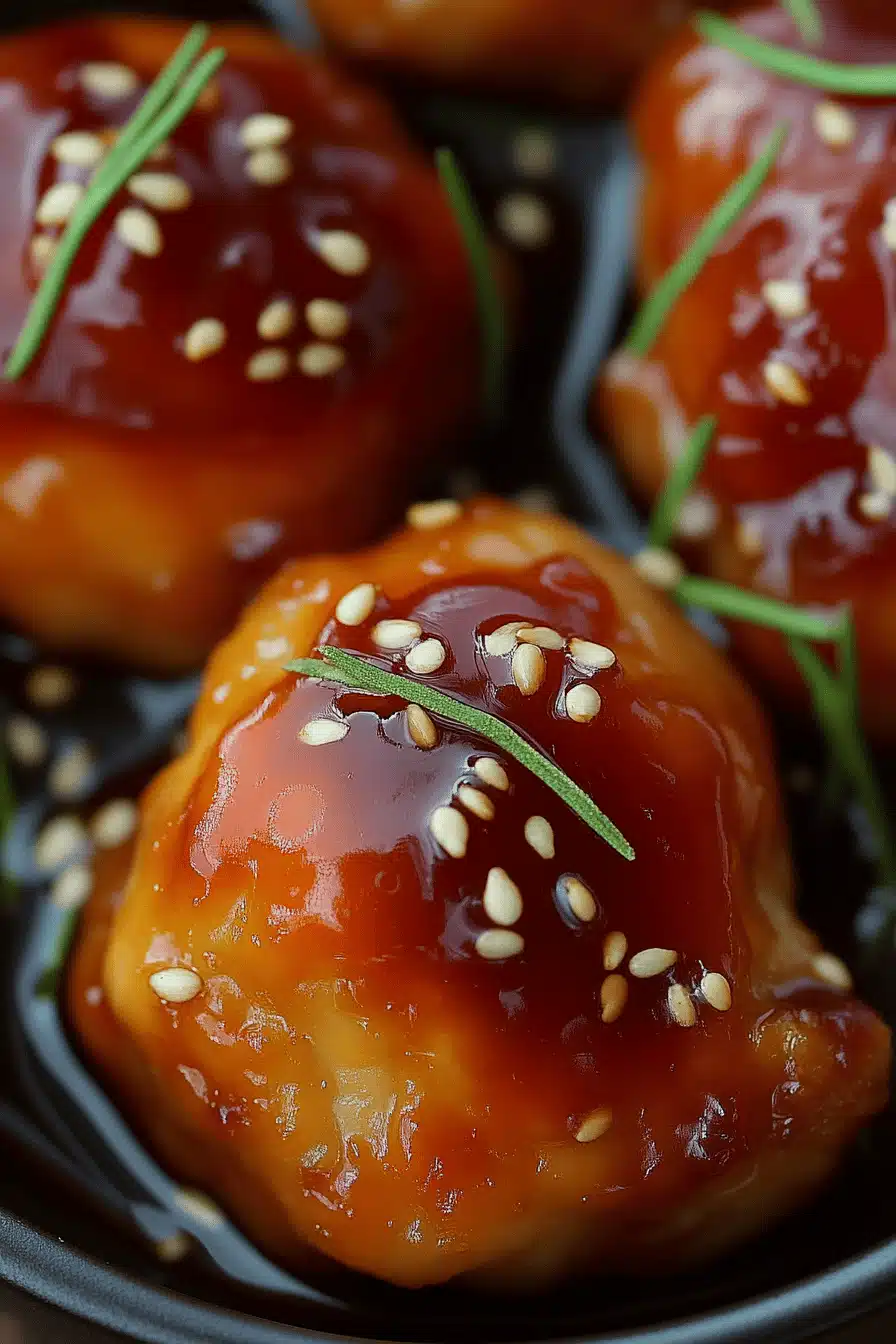
sweet and sour chicken
You know those dishes that just feel like home? The ones that instantly bring back a flood of happy memories and always, *always* hit the spot? For me, that’s this sweet and sour chicken. It’s not just dinner; it’s a hug in a bowl. I remember my mom making something similar when I was a kid, and while hers was amazing, I’ve tinkered with this version over the years, adding little touches here and there to make it truly mine. It’s that perfect balance of tangy, sweet, and savory, with tender chicken and vibrant veggies, all coated in a sticky, irresistible glaze. Honestly, it puts those sad, soggy takeout versions to shame every single time. If you’ve ever found yourself staring into the fridge, craving something comforting yet exciting, this sweet and sour chicken is your answer. It’s surprisingly simple, and the result is just… well, it’s pure magic. It’s the kind of meal that makes everyone at the table happy, from the pickiest eaters to the most discerning foodies.
What is sweet and sour chicken?
So, what exactly is this glorious dish we call sweet and sour chicken? At its heart, it’s a classic Chinese-American stir-fry that’s become a global phenomenon. Think tender pieces of chicken, often lightly battered and fried to a perfect crisp, tossed with colorful vegetables like bell peppers and onions, all enrobed in a vibrant, glossy sauce. The name says it all, right? It’s that beautiful dance between the bright tang of vinegar and the mellow sweetness of sugar, creating a flavor profile that’s incredibly addictive. It’s essentially comfort food with a zesty kick! It’s not overly complicated, but it delivers a punch of flavor that’s far more satisfying than you might expect. It’s the kind of dish that feels special enough for a weekend treat but is easy enough to whip up on a Tuesday when you need a win.
Why you’ll love this recipe?
Let me tell you, there are a million reasons why this sweet and sour Chicken Recipe has earned a permanent spot in my weekly rotation, and I think you’ll fall in love with it for all the same reasons. First and foremost, the flavor. Oh, the flavor! It’s that perfect harmony of sweet and tart that just sings on your palate. It’s not cloying, it’s not overwhelmingly sour; it’s just… *right*. It’s like a party in your mouth! Then there’s the sheer simplicity of it all. I know “sweet and sour chicken” might sound intimidating, like something you can only get from a restaurant, but trust me, this is totally doable in your own kitchen. I’ve streamlined it over the years, and it’s become a lifesaver on busy weeknights. You can have this on the table in under an hour, and it tastes so much better than anything you’d get delivered. And speaking of value, the ingredients are all incredibly budget-friendly. You probably have most of them in your pantry right now! Plus, it’s so versatile. I love it served over fluffy jasmine rice, but you can also toss it with noodles, use it as a filling for wraps, or even serve it alongside some simple steamed greens. What I love most about this recipe is that it’s completely adaptable. If you’re not a fan of bell peppers, swap them out for broccoli or snap peas. Want a little heat? Add a pinch of red pepper flakes to the sauce. It truly is a recipe that welcomes your personal touch. It’s become a go-to for potlucks and family gatherings because everyone always asks for seconds (and thirds!).
How do I make sweet and sour chicken?
Quick Overview
Making this sweet and sour chicken is a breeze! It’s all about prepping your ingredients efficiently and then letting the magic happen in the pan. We’ll start by getting our chicken ready, then whip up a simple, yet flavorful sauce, stir-fry our veggies, and finally bring it all together. The beauty of this recipe is that it’s forgiving and incredibly rewarding. You’ll be amazed at how quickly you can transform everyday ingredients into something so spectacular. It’s the perfect example of how a few simple steps can lead to an explosion of deliciousness. Don’t be intimidated by the steps; they’re all straightforward and designed to make your cooking experience enjoyable.
Ingredients
For the Main Batter:
1.5 lbs boneless, skinless chicken thighs or breasts, cut into 1-inch pieces (Thighs are my favorite because they stay so tender and juicy, even after cooking. If you use breasts, just be extra careful not to overcook them!)
1/2 cup all-purpose flour
1/4 cup cornstarch (This is key for that wonderfully crisp exterior!)
1 teaspoon salt
1/2 teaspoon Black Pepper
1/4 cup water, or just enough to make a thick batter
Vegetable oil, for frying (You’ll need enough to generously coat the bottom of your pan, about 1/2 inch deep.)
For the Filling:
1 tablespoon vegetable oil
1 medium onion, cut into chunks
1 red bell pepper, cut into chunks
1 green bell pepper, cut into chunks (The colors are so pretty together, aren’t they? It just makes the dish more appealing!)
1/2 cup pineapple chunks (Fresh or canned, both work beautifully. If using canned, drain them well. The little bit of pineapple juice can be saved for the sauce if you like!)
For the Glaze:
1/2 cup ketchup (Don’t skimp on the ketchup quality here; it really makes a difference!)
1/3 cup granulated sugar (You can adjust this slightly if you prefer it sweeter or tarter.)
1/4 cup rice vinegar (This gives that classic sweet and sour tang. White vinegar can work in a pinch, but rice vinegar is my preference.)
2 tablespoons soy sauce (Low-sodium is fine if you’re watching your salt intake.)
1 tablespoon cornstarch (To thicken our glorious sauce!)
2 tablespoons water (To help dissolve the cornstarch.)
Step-by-Step Instructions
Step 1: Preheat & Prep Pan
First things first, let’s get our frying situation ready. Pour your vegetable oil into a large skillet or wok. You want enough oil to come up about 1/2 an inch on the sides. Place this over medium-high heat. We’re looking for the oil to shimmer, but not smoke. A good test is to drop a tiny piece of chicken batter in; if it sizzles immediately and floats, your oil is ready!
Step 2: Mix Dry Ingredients
In a medium bowl, whisk together the all-purpose flour, cornstarch, salt, and Black Pepper. Make sure it’s all nicely combined. This is our dry coating that will make the chicken nice and crispy. You want a good, even mixture.
Step 3: Mix Wet Ingredients
Now, add just enough water to the dry ingredients to create a thick batter. Think consistency similar to pancake batter, but maybe a touch thicker. You don’t want it too runny, or it won’t coat the chicken properly. Just add water a tablespoon at a time until you get it right. It should cling to the chicken nicely without being gloopy.
Step 4: Combine
Toss your chicken pieces into the batter. Use a spoon or your hands (my preferred method for better coating!) to make sure each piece is thoroughly coated. Gently lift each piece and let any excess batter drip off before carefully placing it into the hot oil. Don’t overcrowd the pan! You’ll likely need to do this in batches. Fry for about 3-5 minutes per batch, or until golden brown and cooked through. Use a slotted spoon to remove the chicken and place it on a plate lined with paper towels to drain any excess oil. Keep the cooked chicken warm while you prepare the rest.
Step 5: Prepare Filling
While the chicken is frying (or after the first batch is done), heat 1 tablespoon of vegetable oil in a separate large skillet or wok over medium-high heat. Add the chopped onion and bell peppers. Stir-fry for about 3-4 minutes, until they’re tender-crisp. We want them still to have a little bite, not mushy. If you’re using pineapple, add it in during the last minute of cooking.
Step 6: Layer & Swirl
This is where the magic happens! In a small bowl, whisk together the ketchup, sugar, rice vinegar, and soy sauce. In a separate tiny bowl, mix the 1 tablespoon of cornstarch with 2 tablespoons of water to create a slurry. Pour the ketchup mixture into the skillet with the vegetables. Bring it to a simmer, then slowly whisk in the cornstarch slurry. Keep stirring until the sauce thickens to a lovely, glossy consistency. This usually takes about a minute or two. Once it’s thickened, add your fried chicken back into the pan. Toss everything gently to coat the chicken and vegetables evenly in that luscious sweet and sour glaze.
Step 7: Bake
Actually, we’re not baking this dish! My apologies, sometimes I get ahead of myself thinking about other recipes. We’re done with the stovetop magic!
Step 8: Cool & Glaze
Let the chicken and veggies sit in the thickened glaze for just a minute or two to let the flavors meld. The glaze should be coating everything beautifully. No need to cool it down; we’re serving this hot and fresh!
Step 9: Slice & Serve
Serve your glorious sweet and sour chicken immediately. It’s best enjoyed piping hot! Spoon it over fluffy white rice, quinoa, or even noodles. A sprinkle of sesame seeds or some chopped green onions on top makes for a pretty finish. Dig in and enjoy that amazing flavor!
What to Serve It With
This sweet and sour chicken is a star on its own, but the right accompaniments can elevate it to a truly memorable meal. For a classic breakfast, I love serving a small portion over some fluffy white rice. It’s a surprisingly satisfying start to the day, especially if you’re craving something a little savory and sweet. Think of it as a delightful twist on breakfast fried rice! For brunch, I often serve it with a side of steamed bok choy or a light Asian-inspired slaw. The freshness of the greens cuts through the richness of the chicken beautifully. If you’re feeling fancy, a delicate, slightly sweet white wine or even a sparkling sake pairs wonderfully. As a dessert, while not traditional, I’ve found that a small scoop of this sweet and sour chicken can be surprisingly delightful after a lighter meal, especially if you’ve got a sweet tooth that needs satisfying. It’s like a savory-sweet appetizer that wakes up your taste buds! For those cozy snack moments, this is perfection. A warm bowl alongside some crispy fortune cookies or a small side of my homemade ginger-sesame snap peas makes for a delightful afternoon treat. My family also loves having this with some simple steamed edamame – it’s a fun way to eat and the saltiness of the edamame is a great contrast.
Top Tips for Perfecting Your Sweet and Sour Chicken
Over the years, I’ve picked up a few tricks that make this sweet and sour chicken recipe consistently amazing. Here are my absolute must-knows! First, for the chicken prep: don’t be tempted to chop your chicken too small. If the pieces are too tiny, they can dry out quickly during frying. Aim for roughly 1-inch pieces. Also, make sure your chicken is dry before you toss it in the batter. Excess moisture can prevent the batter from sticking well. For the mixing advice, the batter consistency is key. Too thin and it won’t coat; too thick and it’ll be gummy. Aim for that perfect thick, pancake-like batter. If it feels too thick, add water a tablespoon at a time. If it’s too thin, add a little more flour and cornstarch. When you’re frying, remember the batches! Overcrowding the pan lowers the oil temperature, leading to greasy, soggy chicken. Cook in batches and let the oil reheat between each one. For the sauce, patience is your friend. Whisking in the cornstarch slurry slowly allows it to thicken evenly without lumps. And taste, taste, taste! Adjust the sugar and vinegar to your liking. My glaze variations often involve a tiny splash of sesame oil at the very end for an extra layer of nutty aroma, or even a pinch of red pepper flakes for a subtle kick. If you’re feeling adventurous, try adding a teaspoon of fresh grated ginger to the sauce for an extra zing. I’ve also learned that using a mix of bell pepper colors – red, yellow, green – not only makes the dish visually stunning but also offers slightly different flavor notes. And for ingredient swaps, if you don’t have rice vinegar, apple cider vinegar can work, but it’s a bit sharper. For a vegan version, extra-firm tofu, pressed very well and fried the same way, is a fantastic substitute for the chicken!
Storing and Reheating Tips
Leftovers are a beautiful thing, especially with this sweet and sour chicken! If you find yourself with any (which is rare in my house!), here’s how to keep it tasting its best. Stored at room temperature, it’s best to keep it covered for no more than two hours, purely for food safety. For proper refrigerator storage, let the chicken cool down completely first. Then, transfer it to an airtight container. It should stay fresh and delicious in the fridge for about 3-4 days. The glaze helps keep everything moist, which is a bonus! If you need to freeze it, wrap the cooled chicken and sauce tightly in plastic wrap, then in aluminum foil, or place it in a freezer-safe container. It will last in the freezer for up to 2-3 months. When you’re ready to reheat, for refrigeration leftovers, the best method is to gently reheat it in a skillet over medium-low heat, stirring occasionally, until warmed through. You can also microwave it, but give it a stir halfway through to ensure even heating. For frozen leftovers, thaw them in the refrigerator overnight, then reheat as you would the refrigerated leftovers. I usually avoid adding the glaze until just before serving if I know I’ll be reheating, as it can sometimes make the chicken a bit softer upon reheating. However, this recipe’s batter holds up pretty well!
Frequently Asked Questions
Final Thoughts
So there you have it – my absolute favorite sweet and sour chicken recipe! It’s more than just a meal; it’s a vibrant explosion of flavors and textures that I know you’ll adore. I hope this recipe brings as much joy to your kitchen as it does to mine. It’s proof that you can create incredibly delicious, restaurant-worthy dishes right at home without a fuss. If you love this recipe, you might also enjoy my recipe for General Tso’s Chicken or my Honey Garlic Salmon – they’re all part of that amazing category of easy, flavor-packed weeknight dinners. I truly can’t wait to hear how your sweet and sour chicken turns out! Don’t be shy, leave a comment below and tell me what you think, or share any fun variations you come up with. Happy cooking!