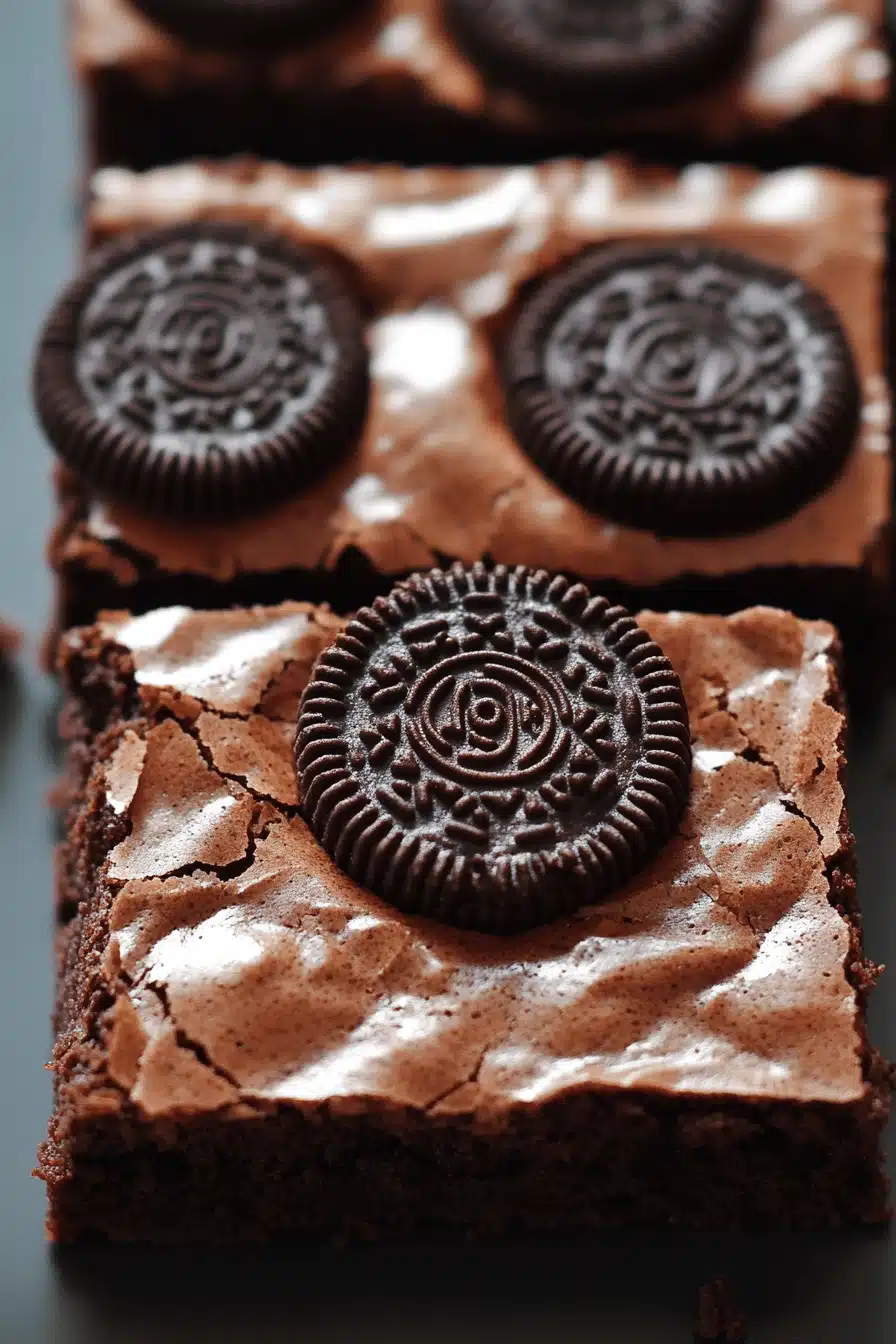
Chewy Brownies Recipe
Oh, brownies! Just the word itself makes my heart do a little happy dance. For years, I’ve been on a quest for that perfect chewy brownie – the kind that has a slight crackle on top, a deep, rich chocolate flavor, and a dense, fudgy interior that practically melts in your mouth. Forget those cakey imposters that leave you feeling… well, just *meh*. I’m talking about the real deal, the kind that whispers sweet nothings to your soul with every bite. This What are some of the best chewy brownies recipes? isn’t just another dessert; it’s a memory maker, a crowd-pleaser, and honestly, my go-to when I need a serious chocolate fix without all the fuss of a fancy cake. It’s the kind of recipe that makes people ask for the secret, and I’m finally ready to spill the beans with you!
What is the ultimate Chewy Brownies recipe?
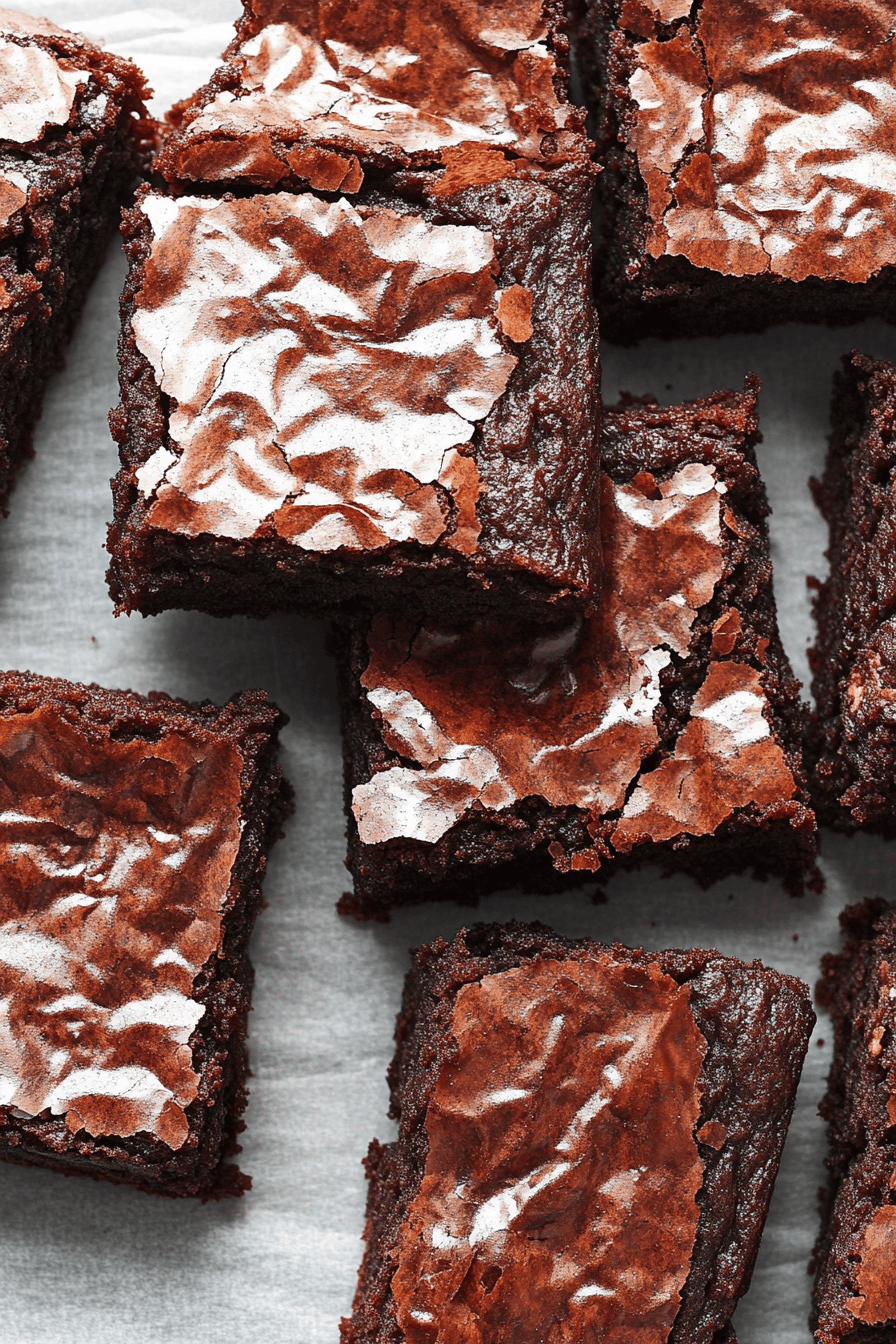
What makes this a good thing?What are some of the best chewy brownies recipes? so special? Think of it as the platonic ideal of a brownie. It’s not too sweet, not too bitter, but a perfect harmony of deep cocoa and rich chocolate. The “chewy” part is key here – it means we’re aiming for that satisfying, slightly elastic texture that clings to your fork, rather than a crumbly cake. It’s essentially a dense chocolate hug in bar form. The name itself, “The Ultimate Chewy Brownies,” isn’t just for show; it’s a promise. This recipe is designed to deliver that consistently delicious, fudgy texture that brownie lovers crave, making it stand out from all the others I’ve tried (and believe me, I’ve tried *a lot*).
Why You’ll Love This Recipe
Honestly, there are so many reasons why this chewy brownies recipe has earned a permanent spot in my recipe binder (and my heart!). First off, the flavor is just out of this world. It’s intensely chocolatey, using both unsweetened cocoa powder and good quality melted chocolate for a double dose of deliciousness. The balance is just right, making it satisfying without being cloying. Then there’s the simplicity. Despite the incredible results, this recipe is surprisingly straightforward. You don’t need any fancy equipment or complicated techniques. It comes together in one bowl (well, mostly!) and the active baking time is minimal, which is a lifesaver on busy weeknights when a serious sweet craving strikes. It’s also incredibly cost-efficient; the ingredients are pantry staples for most bakers, and you get a whole pan of pure joy for very little outlay. What I love most about this recipe, though, is its versatility. While it’s perfect on its own, it’s also fantastic with a scoop of vanilla ice cream, a dusting of powdered sugar, or even a handful of chocolate chips folded in. It’s a bit like a blank canvas for your chocolate dreams! If you loved my Fudgy Chocolate Chip Cookie Bars, you’ll adore these too, as they share that same commitment to rich flavor and satisfying texture. This is the brownie I bring to potlucks, bake for birthdays, and whip up when I just need a little moment of pure, unadulterated happiness. It’s the recipe I always go back to, and I have a feeling it’ll become a favorite for you too.
How to Make The Ultimate Chewy Brownies
Quick Overview
Making these ultimate chewy brownies is a breeze! The magic happens by melting butter and chocolate together, then whisking in sugar and eggs until glossy. We’ll combine this with our dry ingredients just until mixed, pour it into a prepared pan, and bake until just set. The key is not overmixing and not overbaking, which is what guarantees that perfect chewy texture. It’s seriously that simple – from pantry to pan to perfection in under an hour of active time.
Ingredients
For the Main Batter:
Let’s talk about what goes into making these brownies truly amazing. I’ve tested this recipe more times than I can count, and these are the ingredients that consistently deliver the best results. For the butter, I always opt for unsalted; it gives you more control over the saltiness of the final product. Using good quality dark chocolate, at least 60-70% cacao, is crucial for that deep, rich flavor. Don’t skimp here if you can help it! For the cocoa powder, I find Dutch-processed gives a smoother, richer flavor, but natural cocoa powder works too if that’s what you have on hand. Granulated sugar and Brown Sugar together create that signature chewiness and moisture. Make sure your eggs are at room temperature; they emulsify better and create a smoother batter. A teaspoon of good vanilla extract really enhances the chocolate flavor. And of course, a pinch of salt is essential to balance out all that sweetness and richness. You’ll need:
- 1 cup (2 sticks or 227g) unsalted butter, melted
- 4 ounces (113g) good quality semi-sweet or dark chocolate (60-70% cacao), finely chopped
- 1 ½ cups (300g) granulated sugar
- ½ cup (100g) packed light brown sugar
- 3 large eggs, at room temperature
- 1 teaspoon vanilla extract
- 1 cup (120g) all-purpose flour
- ½ cup (45g) unsweetened cocoa powder (Dutch-processed recommended)
- ½ teaspoon salt
For Optional Mix-ins (because who doesn’t love extras?):
While these brownies are divine on their own, sometimes you just need a little something extra. Chocolate chips are a classic, of course! I love using a mix of semi-sweet and dark chocolate chips for depth. Chopped nuts like walnuts or pecans add a lovely crunch. For something a bit more decadent, think chopped chocolate-covered pretzels or even a swirl of Peanut Butter. Just be mindful not to add too much, as it can affect the texture of the brownies. I usually stick to about 1 cup of mix-ins total.
- 1 cup chocolate chips (semi-sweet, dark, or milk)
- ½ cup chopped nuts (walnuts or pecans)
For the Simple Chocolate Glaze (optional, but highly recommended!):
This glaze is the crowning glory for these brownies. It adds an extra layer of gloss and chocolatey goodness. It’s super easy – just a few ingredients whisked together until smooth. It’s optional, of course, but it really takes these brownies from fantastic to absolutely show-stopping.
- 1 cup (120g) powdered sugar
- 2 tablespoons unsweetened cocoa powder
- 2-3 tablespoons milk (or water)
- ½ teaspoon vanilla extract

Step-by-Step Instructions
Step 1: Preheat & Prep Pan
First things first, preheat your oven to 350°F (175°C). This is the magic temperature for chewy brownies. While the oven heats up, you need to prepare your Baking Pan. I recommend an 8×8 inch square pan for that perfect thick brownie. Line it with parchment paper, leaving some overhang on the sides. This is a total lifesaver for lifting the brownies out easily once they’re baked and cooled, and it makes cleanup a dream. Make sure the parchment paper goes up the sides a bit so you can get a good grip later. Some people grease their pan first, but I find the parchment paper method gives you the cleanest edges and is less messy.
Step 2: Mix Dry Ingredients
In a medium bowl, whisk together the all-purpose flour, unsweetened cocoa powder, and salt. Give it a really good whisk to make sure everything is evenly distributed. This step is important because it prevents pockets of unmixed cocoa powder in your finished brownies, which nobody wants! You want a uniform color and texture in your dry mix.
Step 3: Mix Wet Ingredients
Now for the decadent part! In a large, heatproof bowl, melt the butter. You can do this in the microwave in 30-second intervals, stirring in between, or over a double boiler. Once the butter is melted, stir in the finely chopped chocolate until it’s completely melted and smooth. Let this mixture cool slightly for about 5 minutes – you don’t want it piping hot when you add the eggs. Then, whisk in the granulated sugar and Brown Sugar until well combined. It might look a little grainy, and that’s okay! Add the room temperature eggs, one at a time, whisking well after each addition until the mixture is glossy and slightly thickened. Finally, stir in the vanilla extract.
Step 4: Combine
Now, it’s time to bring the wet and dry ingredients together. Pour the dry ingredients into the wet ingredients. Here’s the crucial part for chewy brownies: use a spatula to gently fold everything together until *just* combined. You want to see only a few streaks of flour left. Seriously, do NOT overmix. Overmixing develops the gluten in the flour, which leads to tough, cakey brownies. We’re going for fudgy and chewy, so less is more here. If you’re adding chocolate chips or nuts, this is when you’d gently fold them in.
Step 5: Prepare Filling (Optional Mix-ins)
If you’re adding any optional mix-ins like extra chocolate chips or nuts, this is the stage where you gently fold them into the batter. Make sure they are evenly distributed throughout the batter. Don’t overwork the batter at this stage; just a few gentle folds will do the trick.
Step 6: Layer & Swirl
Spoon the batter into your prepared 8×8 inch pan. It will be thick! Use your spatula to spread it evenly into the corners and across the surface. If you’re feeling fancy and want a marbled effect, you can add dollops of extra chocolate chips or even a swirl of dulce de leche or peanut butter on top and gently swirl it in with a knife or toothpick. Just be careful not to over-swirl, as it can make the brownies look messy.
Step 7: Bake
Bake in your preheated oven for 25-30 minutes. This is where you need to be a little bit careful, as overbaking is the enemy of chewy brownies. You’re looking for the edges to be set and slightly pulled away from the sides of the pan, and the center should still look a little soft and gooey. A toothpick inserted into the center should come out with moist crumbs attached, not wet batter. If it comes out completely clean, they might be overbaked! I usually check mine around the 25-minute mark and go from there. Ovens vary, so keep an eye on them.
Step 8: Cool & Glaze
This is perhaps the hardest part: letting them cool! Remove the pan from the oven and let the brownies cool completely in the pan on a wire rack. I know, I know, the smell is intoxicating, but this cooling time is absolutely essential for them to set properly and achieve that perfect chewy texture. Once they are completely cool, you can prepare the glaze. In a small bowl, whisk together the powdered sugar and cocoa powder. Gradually whisk in the milk (or water) and vanilla extract until you reach a smooth, pourable consistency. You might need a little more or less liquid depending on how thick or thin you like your glaze. Drizzle or spread the glaze evenly over the cooled brownies. Let the glaze set for about 30 minutes before slicing.
Step 9: Slice & Serve
Once the glaze has set, use the parchment paper overhang to lift the entire slab of brownies out of the pan. Place it on a cutting board. For the cleanest slices, I recommend using a sharp knife that you wipe clean between cuts. Slice into 16 squares for a good balance of size and indulgence, or 9 larger squares if you’re feeling extra generous! Serve them at room temperature for the best chewy texture. They are absolutely perfect on their own, but a glass of cold milk is always a classic companion.
What to Serve It With
These chewy brownies are incredibly versatile and make a statement no matter when or how you serve them. For a delightful breakfast treat (yes, I’m a firm believer in dessert for breakfast!), a small square with a hot cup of coffee is pure bliss. The rich chocolate and the bitterness of the coffee are a match made in heaven. They’re also wonderful with a more casual pour of almond milk or even a fruity smoothie. When it comes to brunch, these brownies can be elevated with a sprinkle of flaky sea salt on top of the glaze, or served alongside fresh berries like raspberries or strawberries to add a pop of color and a touch of tartness. They look beautiful arranged on a tiered stand with other pastries. As a more formal dessert, they are sublime served slightly warm with a scoop of high-quality vanilla bean ice cream and a drizzle of raspberry coulis. The contrast of warm brownie and cold ice cream is divine. For those cozy snacks that just hit the spot, a brownie enjoyed with a cup of tea or hot chocolate is comfort in a bite. I often cut them into smaller bite-sized pieces for sharing during movie nights, and they disappear in minutes. My family tradition is to have these on Friday nights after a long week, always with a big glass of milk for everyone.
Top Tips for Perfecting Your Chewy Brownies
I’ve learned a few things over the years of making these, and I’m happy to share my hard-won wisdom with you! For the Zucchini Prep, if you decide to add some grated zucchini for extra moisture (a trick I sometimes use, though it’s not in this primary recipe), make sure to wring out as much liquid as possible! Use a cheesecloth or a fine-mesh sieve. Grating on the larger holes of a box grater usually yields the best texture, and it should be fresh for optimal flavor. When it comes to Mixing Advice, I can’t stress enough how important it is to avoid overmixing. As soon as you don’t see large streaks of flour, stop! Overmixing is the number one culprit for tough brownies. Also, ensure your eggs are at room temperature; they incorporate much better and create a smoother, glossier batter, which is key for that fudgy texture. For Swirl Customization, if you decide to add a swirl of something like caramel or peanut butter, use a light hand. Too much swirling can muddy the flavors and textures. Aim for distinct ribbons of flavor, not a complete mashup. For Ingredient Swaps, if you’re out of all-purpose flour, a good quality 1-to-1 gluten-free baking blend can often work, but results might vary slightly in texture. If you can’t find Dutch-processed cocoa, regular unsweetened cocoa powder will work, but the color will be lighter and the flavor a touch less intense. For Baking Tips, my oven runs a little hot, so I often set my timer for 5 minutes less than the recipe suggests and check for doneness. The toothpick test is your best friend here – moist crumbs are perfect, but wet batter means they need more time. Too dry, and you risk cakey brownies. And for Glaze Variations, if you prefer a thinner glaze, just add a touch more milk or water. If you want a richer glaze, whisk in a tablespoon of melted chocolate. You can also add a pinch of espresso powder to the glaze to deepen the chocolate flavor even further!
Storing and Reheating Tips
One of the best things about these brownies is how well they keep, making them perfect for making ahead! For Room Temperature storage, once the brownies (and glaze, if using) have fully cooled and set, you can store them in an airtight container for up to 3-4 days. They’ll maintain their chewy texture beautifully. Just make sure they’re completely cool before sealing them up, otherwise, condensation can make them soggy. If you live in a warm climate or find they’re getting a bit soft, Refrigerator Storage is your best bet. Store them in an airtight container for up to a week. The chill actually enhances their fudgy density, and they become wonderfully firm. When you’re ready to enjoy them from the fridge, I highly recommend letting them sit at room temperature for about 20-30 minutes to soften up slightly, or you can even give them a quick zap in the microwave for 10-15 seconds for a warm, gooey treat. For Freezer Instructions, these brownies freeze like a dream! You can freeze the entire pan (once completely cooled and glazed) or individual slices. Wrap them tightly in plastic wrap, then in aluminum foil, and store them in a freezer-safe bag or container for up to 3 months. To thaw, simply unwrap them and let them come to room temperature for a few hours, or thaw overnight in the refrigerator. The Glaze Timing Advice is simple: always glaze after the brownies have completely cooled. If you glaze warm brownies, the glaze will melt and run off. If you’re freezing them, you can choose to glaze after thawing, or even skip the glaze and dust with powdered sugar once defrosted.
Frequently Asked Questions
Final Thoughts
So there you have it – my absolute favorite chewy brownies recipe! I truly hope you give these a try. They represent the perfect balance of rich chocolate flavor, that irresistible chewy texture, and simple, honest baking. They’re the kind of treat that makes you pause, close your eyes, and savor every single bite. Whether you’re a seasoned baker or just starting out, this recipe is a winner and I can’t wait to hear how yours turn out! If you loved these, you might also enjoy my recipe for Double Chocolate Zucchini Bread, which also packs a serious chocolate punch. Please let me know in the comments below if you made these, what your favorite mix-ins were, or if you have any special family traditions for enjoying brownies. Happy baking, and happy indulging!
Chewy Brownies Recipe
Ingredients
Main Ingredients
- 0.5 cup unsalted butter melted
- 1 cup granulated sugar
- 0.5 cup packed light brown sugar
- 2 large eggs
- 1 teaspoon vanilla extract
- 0.5 cup all-purpose flour
- 0.25 cup unsweetened cocoa powder
- 0.5 teaspoon salt
- 0.5 cup chocolate chips semi-sweet
Instructions
Preparation Steps
- Preheat oven to 350°F (175°C). Grease and flour a 9-inch square baking pan.
- In a large bowl, whisk together melted butter, granulated sugar, and brown sugar until well combined.
- Beat in the eggs one at a time, then stir in the vanilla extract.
- In a separate bowl, whisk together the flour, cocoa powder, and salt.
- Gradually add the dry ingredients to the wet ingredients, mixing until just combined. Do not overmix.
- Fold in the chocolate chips.
- Pour the batter into the prepared baking pan and spread evenly.
- Bake for 25-30 minutes, or until a toothpick inserted into the center comes out with moist crumbs attached (not wet batter).
- Let the brownies cool completely in the pan before cutting into squares.