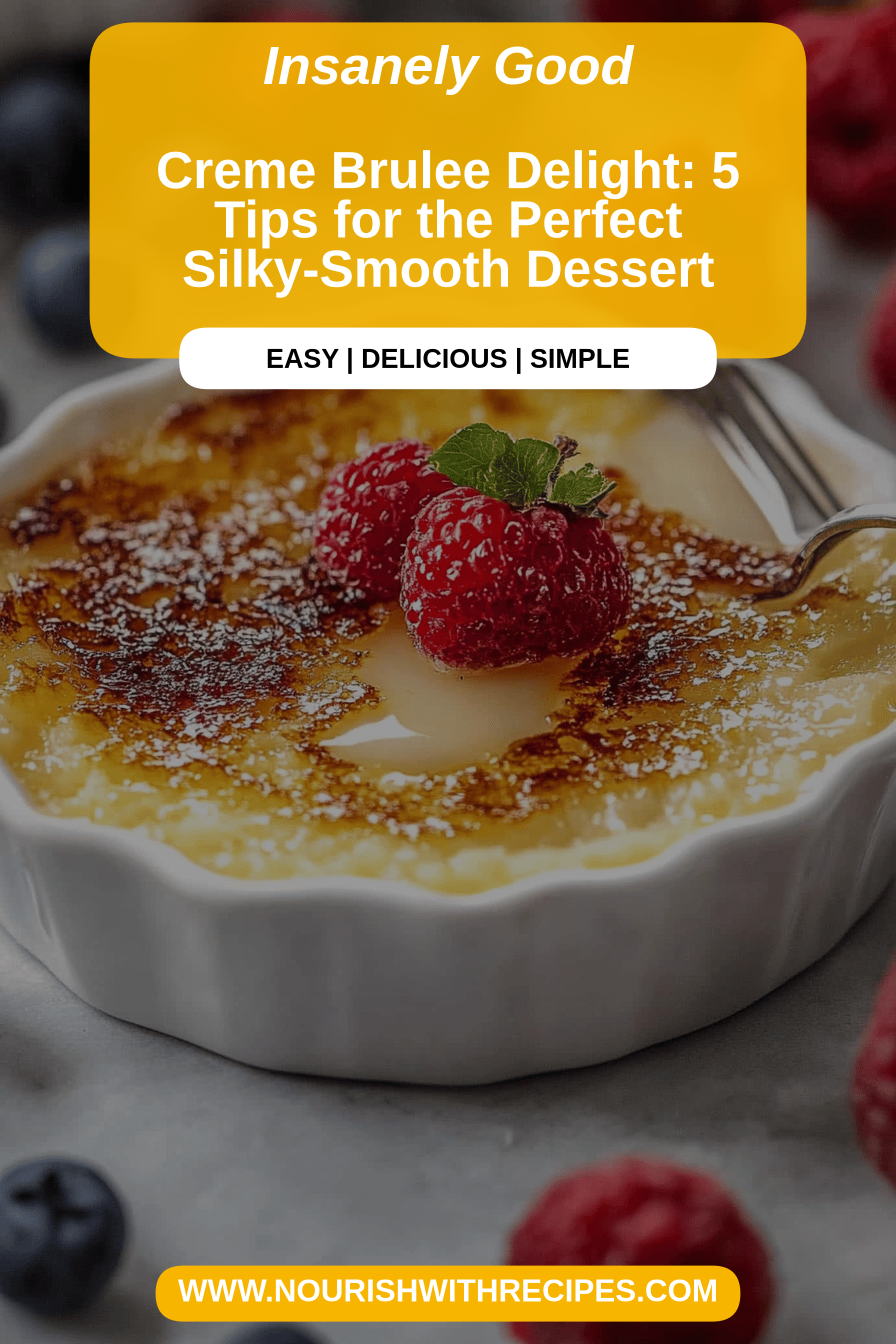
Creme Brulee Tips
Oh, creme brulee. Just saying the words makes me feel a little bit fancy, doesn’t it? There’s something so utterly delightful about that crisp, caramelized sugar shell shattering under your spoon, revealing the silken, creamy custard beneath. It’s the kind of dessert that feels like a special occasion, even if you’re just having it on a Tuesday night. I remember my first attempt at making it at home years ago. I was so intimidated! I thought it was this super complicated French pastry reserved for fancy restaurants. But guess what? It’s honestly way simpler than you think, and once you nail a few key creme brulee tips, you’ll be making this elegant treat like a pro in no time. It’s become a bit of a go-to for me when I want to impress without spending hours in the kitchen, and my family absolutely adores it. Forget those boxed puddings; this is the real deal, and I can’t wait to share my secrets with you!
What is Creme Brulee?
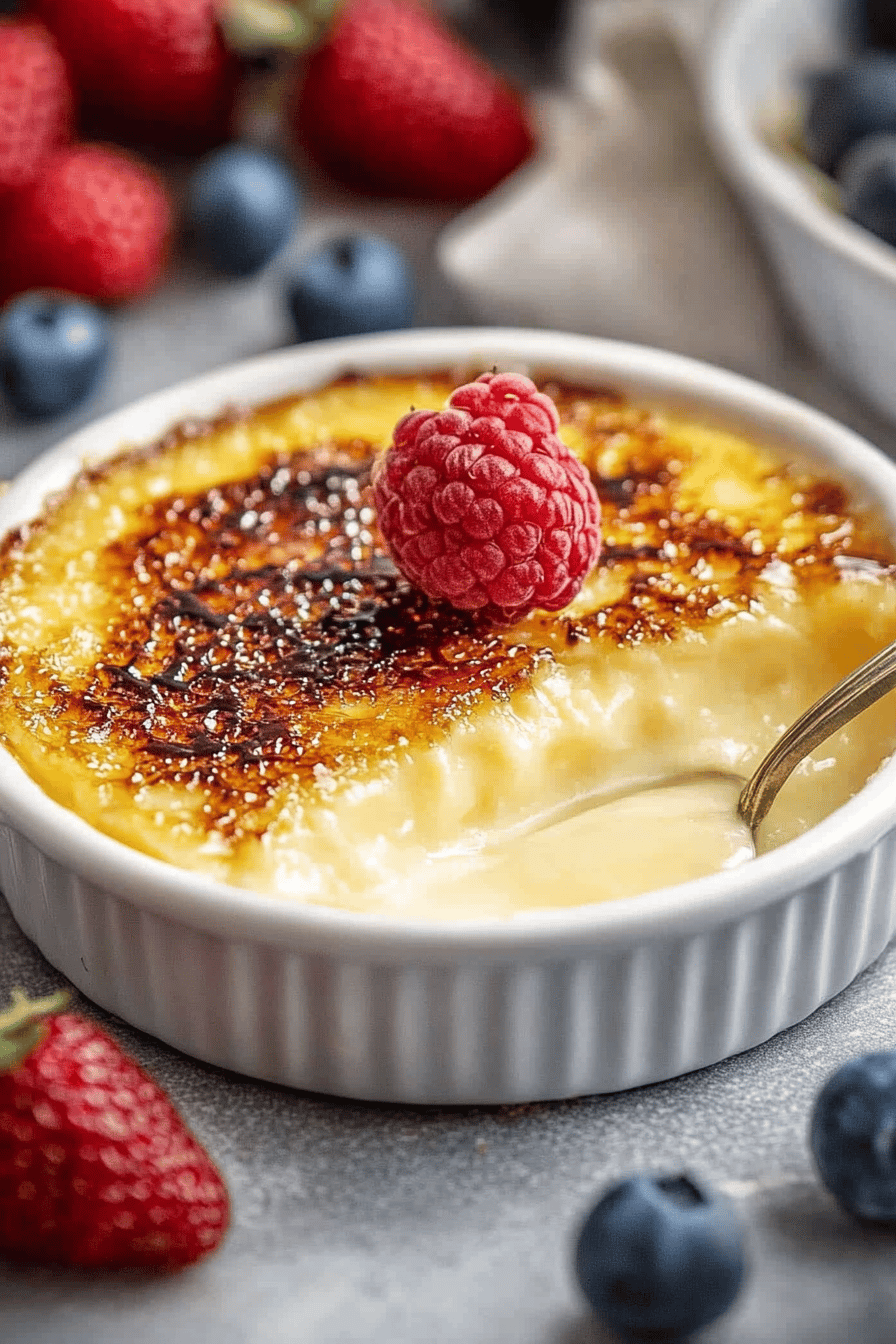
So, what exactly is this magical dessert? Creme brulee, which literally translates to “burnt cream” in French, is a deceptively simple dessert. At its heart, it’s a rich custard made from a base of heavy cream, egg yolks, sugar, and vanilla. The magic happens in the final step: a thin layer of sugar is sprinkled over the chilled custard and then caramelized with a torch (or sometimes the broiler, though I’ll get to why a torch is usually my preference!) to create that signature brittle, glassy top. Think of it as a sophisticated cousin to pudding, but with an unforgettable crunch. It’s all about the contrast – the cool, smooth creaminess against the warm, crisp sugar. It’s pure bliss in every spoonful!
Why you’ll love this recipe?
Honestly, there are so many reasons to fall head over heels for making creme brulee at home. First and foremost, the flavor is just divine. That rich, velvety custard infused with real vanilla bean is pure decadence. It’s not overly sweet, and the subtle eggy richness is just perfect. Then there’s the simplicity factor, which is a huge win for me. Once you’ve got the basic technique down, it’s incredibly straightforward. You can even make the custard base ahead of time, which is a lifesaver on busy nights. And speaking of budget-friendly, the ingredients are pretty basic – cream, eggs, sugar, vanilla. You likely have most of them in your pantry right now! What I love most about this is its versatility. It’s elegant enough for a dinner party, but comforting enough for a quiet night in. It reminds me a little of the simple custards my grandmother used to make, but with that incredible crackly topping that takes it to a whole new level. It’s perfect when you’re craving something sweet but don’t want to bake a whole cake.
How do I make Creme Brulee?
Quick Overview
The process is really about gently cooking a creamy custard base, chilling it until firm, and then creating that iconic caramelized sugar crust. We’ll be using a water bath (bain-marie) for baking, which is key to achieving that super smooth, even texture. Then, it’s all about the torch magic to get that perfect brittle topping. It sounds like a lot, but each step is quite simple, and I’ll walk you through it!
Ingredients
For the Main Custard Batter:
4 cups heavy cream (this is non-negotiable for that luxurious texture!)
1 vanilla bean, split lengthwise, seeds scraped (or 2 teaspoons pure vanilla extract, but the bean is *chef’s kiss*)
8 large egg yolks (save those whites for meringues or an omelet later!)
3/4 cup granulated sugar, plus more for topping
For the Filling:
This is your base custard. No separate filling ingredients needed as it’s all in the main batter!
For the Glaze:
About 2 tablespoons of granulated sugar per ramekin, for torching.
Step-by-Step Instructions
Step 1: Preheat & Prep Pan
First things first, preheat your oven to 325°F (160°C). You’ll need a large, shallow Baking Pan – a roasting pan works perfectly. Have your ramekins (about 6-8 ounce size) ready. We’ll place these inside the larger pan, and then carefully pour hot water into the larger pan to come halfway up the sides of the ramekins. This water bath, or bain-marie, is crucial for gentle, even cooking.
Step 2: Mix Dry Ingredients
In a medium bowl, whisk together your 3/4 cup of granulated sugar and the egg yolks until they are just combined and slightly lighter in color. Don’t over-whisk here; we don’t want a ton of air incorporated yet. The goal is just to break up the yolks and incorporate the sugar.
Step 3: Mix Wet Ingredients
In a heavy-bottomed saucepan, combine the heavy cream and the scraped seeds from the vanilla bean (and the pod itself, you can fish it out later). Heat this mixture over medium heat, stirring occasionally, until it’s just steaming and small bubbles appear around the edges. Don’t let it boil! We’re just gently warming it to infuse that glorious vanilla flavor.
Step 4: Combine
Now, we temper the eggs. Slowly ladle about half a cup of the hot cream mixture into the egg yolk and sugar mixture, whisking constantly. This gradually warms up the eggs without scrambling them. Once that’s incorporated, pour the tempered egg mixture back into the saucepan with the remaining cream. Whisk gently to combine everything. You can remove the vanilla bean pod now if you like.
Step 5: Prepare Filling
This is your luxurious custard base! It should be smooth and creamy. If you want to ensure absolute silkiness, you can strain the mixture through a fine-mesh sieve into a pitcher or bowl with a spout. This catches any bits of cooked egg or stray vanilla bean bits. Using a pitcher makes pouring into the ramekins much neater.
Step 6: Layer & Swirl
Carefully pour the custard mixture into your prepared ramekins, filling them almost to the top. Make sure your ramekins are sitting securely in the larger baking pan. Very gently, pour the hot water into the larger pan around the ramekins. Be careful not to splash any water into the custard!
Step 7: Bake
Pop the whole setup into your preheated oven. Bake for about 30-40 minutes. The exact time will depend on your oven and the size of your ramekins. You’re looking for the custards to be mostly set but still have a slight jiggle in the center – think of a very gentle tremor, not a liquid slosh. If they’re too firm, they can become rubbery.
Step 8: Cool & Glaze
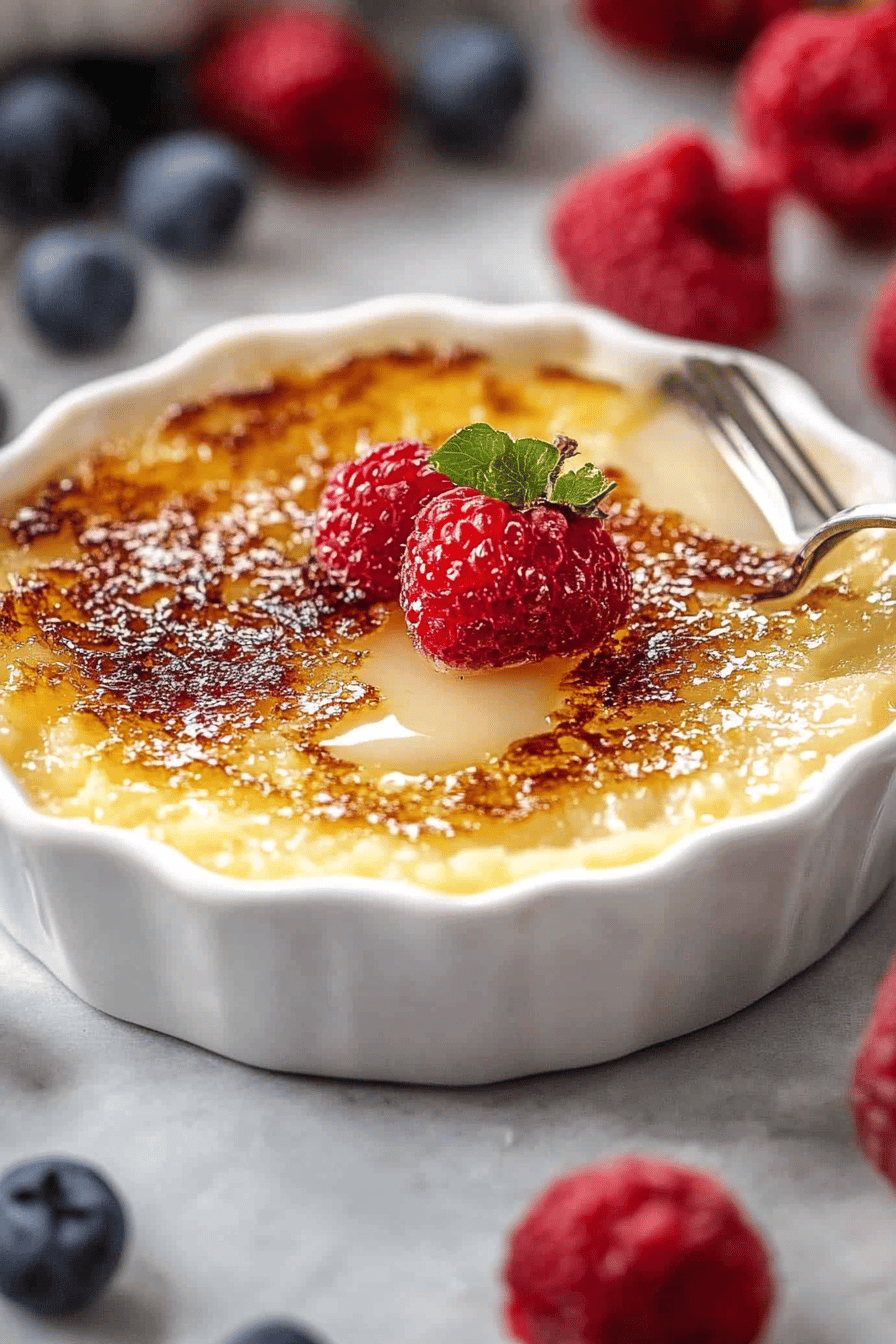
Once baked, carefully remove the baking pan from the oven. Let the ramekins sit in the water bath for about 10-15 minutes before carefully removing them from the water and placing them on a wire rack to cool completely. Once cooled, cover them tightly with plastic wrap and refrigerate for at least 4 hours, or ideally overnight. This chilling step is vital for setting the custard and getting it ready for that glorious sugar crust. Just before serving, sprinkle about 2 tablespoons of granulated sugar evenly over the top of each chilled custard. Use a kitchen torch to melt and caramelize the sugar until it forms a beautiful, deep amber, glassy crust. Work in circles to ensure even browning.
Step 9: Slice & Serve
Let the caramelized sugar sit for a minute or two to harden up. Then, it’s ready! Serve immediately and enjoy that satisfying crack as you break through the sugar shell. The contrast between the warm, crispy topping and the cool, creamy custard is simply divine.
What to Serve It With
Creme brulee is a fantastic standalone dessert, but it can also play nicely with other things! For breakfast, I sometimes enjoy a tiny ramekin with a strong cup of black coffee – it feels like such a treat to start the day. For a more elaborate brunch, I might serve it alongside some Fresh Berries, like raspberries or blueberries, which add a lovely tartness that cuts through the richness. The vibrant colors look so pretty on a plate! If you’re serving it as dessert after a meal, it’s wonderful on its own, but sometimes a small scoop of raspberry sorbet or a few fresh mint leaves can add a nice touch. And for those moments when you just need a little something sweet without a fuss? A warm creme brulee is perfect with a cozy mug of tea or hot chocolate. My kids always love it with a side of whatever fruit is in season!
Top Tips for Perfecting Your Creme Brulee
You know, I’ve made this dish more times than I can count, and I’ve definitely learned a thing or two along the way. Here are my absolute favorite creme brulee tips that have saved me from countless kitchen mishaps and helped me achieve that restaurant-quality perfection:
Custard Consistency is Key: The secret to a silky smooth creme brulee is gentle, even cooking. That water bath (bain-marie) is your best friend here. It insulates the ramekins and prevents the eggs from cooking too quickly and becoming rubbery or curdled. Always use hot, not cold, water when setting up your bain-marie. It helps the oven maintain a consistent temperature.
Don’t Overbake: This is probably the most common mistake people make. The custards should have a slight wobble in the center when you take them out. They will continue to set as they cool. If you bake them until they are completely firm, you’ll end up with a texture that’s more like a dense cheesecake or even scrambled eggs. Trust the wobble!
Patience with Chilling: Seriously, let it chill! This isn’t a dessert to rush. Refrigerating overnight is ideal. It allows the custard to fully set and develop its flavor. Trying to torch the sugar on a warm or unset custard will result in a melted mess. Give it time to firm up!
The Art of the Sugar Topping: When it comes to caramelizing the sugar, a kitchen torch is your best friend. It gives you the most control and creates that perfect, glass-like shell. Sprinkle the sugar evenly in a thin layer. Don’t pile it too high, or it might not melt properly. Hold the torch a few inches away and move it in a circular motion. Watch it closely – it goes from perfectly golden to burnt very quickly!
Troubleshooting the Sugar Crust: If you don’t have a torch, the broiler can work in a pinch, but it’s trickier. Place the ramekins on a baking sheet and put them under a preheated broiler, watching them constantly. Rotate them frequently. The risk here is that the custard can heat up too much and start to cook. Alternatively, you can buy pre-made caramel shards or even just sprinkle a little extra sugar on top of the chilled custard and serve it with a Shortbread Cookie – still delicious!
Vanilla Power: While extract works, using a real vanilla bean makes a world of difference. Scrape out those tiny seeds and infuse them into the cream. You can even throw the scraped pod into the cream while it heats for extra flavor. The little black specks in the custard are beautiful!
Ingredient Swaps (with caution!): While heavy cream is ideal, if you’re in a bind, you can try a mix of half-and-half and heavy cream, but your custard won’t be quite as rich. I’ve also experimented with a touch of almond extract along with the vanilla for a different flavor profile, which is lovely if you enjoy that nutty sweetness. Just remember that ingredient changes can affect texture and cooking times.
Ramekin Choice Matters: Shallow, wide ramekins tend to cook more evenly than deep, narrow ones. It allows for a better ratio of custard to caramelized topping, which I think is the best part!
Storing and Reheating Tips
Storing creme brulee is pretty straightforward, but there are a few things to keep in mind, especially concerning that delicate sugar crust.
Room Temperature: Generally, creme brulee is best served fresh after torching the sugar. It’s not ideal to leave it at room temperature for extended periods, especially after the sugar has been caramelized, as the crust can soften.
Refrigerator Storage: Un-torched creme brulee can be stored in the refrigerator, tightly covered with plastic wrap, for up to 2-3 days. The custard will continue to set and the flavors will meld beautifully. For best results, I recommend torching the sugar just before you plan to serve them. If you’ve already torched them and have leftovers, cover them loosely (so the crust doesn’t stick to the wrap) and try to eat them within a day, as the crust will soften over time.
Freezer Instructions: I generally don’t recommend freezing creme brulee. The delicate custard texture can be compromised by the freezing and thawing process, and the sugar crust will definitely not survive. It’s a dessert best enjoyed fresh!
Glaze Timing Advice: The golden rule here is to add the sugar and torch it *just before* serving. If you torch it too far in advance, the heat from the custard will start to melt the sugar, and you’ll lose that satisfying crunch. So, make the custard, chill it, and then, when you’re ready to eat, bring out the torch!
Frequently Asked Questions
Final Thoughts
There you have it – my personal journey and all the best creme brulee tips I’ve gathered to help you create this exquisite dessert at home. It’s truly one of those recipes that looks and tastes far more complicated than it is, and the satisfaction of hearing that spoon crack through that perfect sugar crust is just unmatched. I really hope you give this a try, especially if you’ve been a little intimidated by it like I was. It’s a dessert that brings joy, a touch of elegance, and is perfect for making any day feel a little more special. If you loved this, you might also enjoy my recipe for [Link to a similar decadent Dessert Recipe, e.g., Chocolate Lava Cakes] or my [Link to a simple yet elegant no-bake dessert, e.g., Lemon Posset]. I can’t wait to hear how your creme brulee turns out! Please leave a comment below and share your experience, or any of your own amazing creme brulee tips. Happy baking!
Creme Brulee Tips
Ingredients
Main Ingredients
- 2.5 cups heavy cream
- 0.5 cup granulated sugar plus more for topping
- 5 large egg yolks
- 1 teaspoon vanilla extract
- 0.25 teaspoon salt
Instructions
Preparation Steps
- Preheat oven to 325°F (160°C). Arrange six 4-ounce ramekins in a large baking dish.
- In a medium saucepan, heat the heavy cream and 0.5 cup of granulated sugar over medium heat until the sugar dissolves and the cream is just simmering. Do not boil.
- In a separate bowl, whisk together the egg yolks, vanilla extract, and salt.
- Temper the egg yolks by gradually whisking about half of the hot cream mixture into the yolks. Then, pour the tempered egg yolk mixture back into the saucepan with the remaining cream.
- Cook the custard mixture over low heat, stirring constantly, until it thickens enough to coat the back of a spoon. Do not let it boil.
- Strain the custard through a fine-mesh sieve into the prepared ramekins.
- Pour hot water into the baking dish around the ramekins, filling it halfway up the sides of the ramekins. This creates a water bath for even cooking.
- Bake for 30-40 minutes, or until the edges are set but the centers are still slightly wobbly.
- Remove the ramekins from the water bath and let them cool completely on a wire rack. Then, cover with plastic wrap and refrigerate for at least 4 hours, or preferably overnight.
- Just before serving, sprinkle about 1-2 teaspoons of granulated sugar evenly over the top of each custard. Using a kitchen torch, caramelize the sugar until it forms a hard, glassy crust. Let sit for a minute before serving.