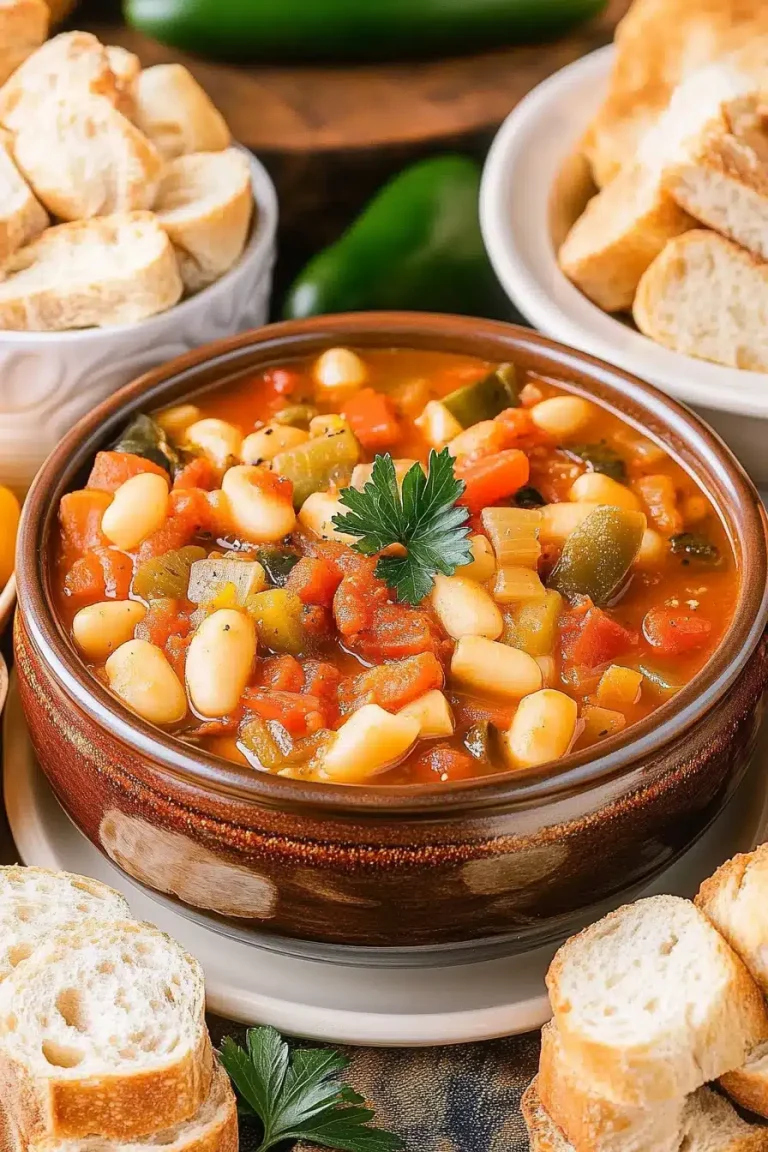
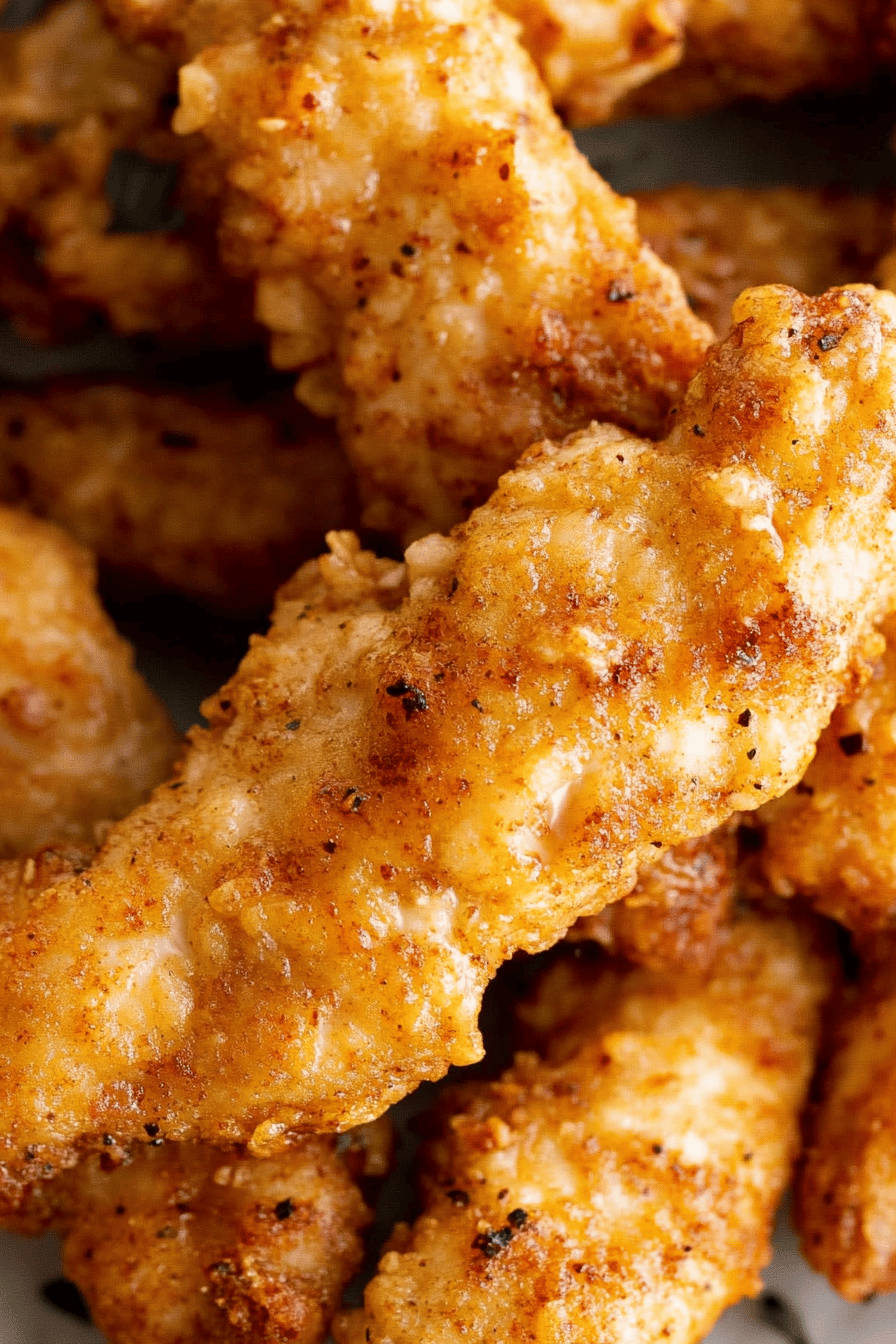
Cajun Chicken Tenders
You know those nights? The ones where everyone’s asking “What’s for dinner?” at least three times before you’ve even thought about it? Yeah, me too. And on those nights, this recipe for Cajun Chicken Tenders is my absolute superhero. It’s not just about the convenience, though that’s a huge part of it. It’s about the flavor explosion. Seriously, these aren’t your average bland chicken strips. These are *Cajun Chicken Tenders*, kissed with a little bit of heat and a whole lot of soul. They’re crispy, tender, and seasoned to perfection. I’ve tried so many store-bought versions and even some other homemade recipes, but nothing quite compares to the punch these pack. Think of them as the cooler, spicier cousin of the classic chicken tender, with a flavor profile that’ll make you want to lick your fingers. And the best part? They’re surprisingly easy. You’ll see!

What are Cajun Chicken Tenders?
So, what exactly are Cajun Chicken Tenders? At their heart, they’re chicken tenderloins, but they get a serious upgrade with a bold, spicy, and savory Cajun-inspired seasoning blend. We’re talking paprika, cayenne, garlic powder, onion powder, and a few other secret weapons that give them that unmistakable kick. Instead of just a plain breading, these get a dredge that’s packed with flavor, ensuring every single bite is a taste sensation. It’s not about being overwhelmingly hot (though you can totally crank up the cayenne if you’re feeling brave!), it’s about a complex, layered flavor that’s both comforting and exciting. Think of it as a flavor party in your mouth, with the tender chicken as the perfect host. It’s a dish that’s both rustic and refined, and honestly, it’s just plain delicious. It’s essentially a weeknight savior that tastes like you spent hours in the kitchen!
Why you’ll love this recipe?
Honestly, where do I even begin? There are so many reasons why this Cajun Chicken Tenders recipe has become a staple in my kitchen. First and foremost, the FLAVOR. Oh my goodness, the flavor. That signature Cajun spice blend is just magical. It’s savory, a little smoky, has a gentle warmth that builds, and it’s just so incredibly satisfying. My kids, who can sometimes be a little picky, gobble these up every single time. They’re not just “good for chicken tenders,” they’re just plain good. And then there’s the SIMPLICITY. I know some people hear “Cajun” and think it’s complicated, but this recipe is surprisingly straightforward. The spice mix comes together in minutes, and the coating process is really just a few easy steps. I’ve whipped these up when I’ve had less than an hour before everyone’s starving, and they’ve come out perfectly. They’re also incredibly COST-EFFECTIVE. Chicken tenders are usually pretty budget-friendly, and the spices are mostly pantry staples. So, you get a restaurant-quality meal without the restaurant price tag – a win-win in my book! And let’s talk VERSATILITY. These aren’t just for dinner! They’re amazing tucked into sandwiches, tossed into salads, served with your favorite dipping sauces, or even as an appetizer. They truly do it all. What I love most about this recipe, though, is how it elevates something as simple as chicken tenders into something truly special. It’s a recipe that’s guaranteed to impress, whether you’re serving it for a casual family dinner or a gathering of friends.
How do I make Cajun Chicken Tenders?
Quick Overview
This recipe is all about building layers of flavor for absolutely incredible Cajun Chicken Tenders. We start by creating a vibrant, spice-infused coating that gets the chicken perfectly crispy. Then, we bake them to golden-brown perfection. It’s a process that’s designed for maximum flavor with minimum fuss, meaning you get amazing results without spending hours in the kitchen. You’ll be amazed at how simple it is to achieve that authentic Cajun taste right in your own home. Trust me, once you try these, you won’t go back to the plain old kind!
Ingredients
For the Main Batter:
1.5 pounds boneless, skinless chicken tenderloins (about 6-8 tenders). Look for tenders that are roughly the same size so they cook evenly. If you can only find chicken breasts, just slice them into strips. It’s important that the chicken is trimmed of any excess fat or sinew for the best texture.
1 cup all-purpose flour. This is our base for the crispy coating. Make sure it’s plain flour, not self-rising.
1 teaspoon baking powder. This little addition is my secret weapon for extra crispiness! It helps create little air bubbles in the coating.
1 teaspoon salt. Don’t skip this! It’s crucial for bringing out all those delicious flavors.
1 teaspoon smoked paprika. For that lovely smoky depth.
1 teaspoon garlic powder. A must-have in any good seasoning blend.
1 teaspoon onion powder. Adds another layer of savory goodness.
1/2 teaspoon cayenne pepper. This is where the heat comes in! Adjust this to your spice preference. If you like it mild, start with a quarter teaspoon, or go wild with a full teaspoon if you love it hot!
1/2 teaspoon dried oregano. Adds a subtle herbaceous note that complements the other spices beautifully.
1/2 teaspoon dried thyme. Another classic herb that pairs wonderfully with chicken.
1/4 teaspoon Black Pepper. Freshly ground is always best for maximum flavor.
2 large eggs. These are going to help our seasoned flour mixture stick to the chicken.
1/4 cup milk (any kind works, but I love whole milk for richness). This helps create a slightly wet base for the dry coating to adhere to.
Vegetable oil or cooking spray for greasing the baking sheet. We want these to get nice and crispy, not stick!
For the Filling:
This part is technically optional, but it’s what I often do when I have a little extra time and want to elevate these even further. It’s not a filling *inside* the tenders, but more of a flavorful marinade or dip to coat them in before the final breading, or even a sauce to serve with them. For a super simple flavor boost, I like to marinate the chicken tenders for at least 30 minutes (or up to a few hours) in a mixture of:
1/4 cup buttermilk. This is a classic for tenderizing chicken, and it adds a slight tang that’s lovely with the spices.
1 tablespoon hot sauce (like Frank’s RedHot or your favorite). This adds a background warmth and vinegar note that’s quintessential Cajun.
1 teaspoon Worcestershire sauce. For a little umami depth.
If you’re short on time, you can absolutely skip this marinating step and just go straight to the dredging and baking. The tenders will still be incredibly flavorful!
For the Glaze:
This is another optional, but highly recommended, step that takes these over the top. It’s a simple glaze that adds a touch of sweetness and shine.
2 tablespoons melted butter. The base for our glaze.
1 tablespoon honey or maple syrup. For a touch of sweetness that balances the spice.
1 teaspoon Cajun seasoning (use the same blend as your dry coating). This ties the glaze right back into the main flavor profile.
1/2 teaspoon paprika. For color and a little extra depth.

Step-by-Step Instructions
Step 1: Preheat & Prep Pan
First things first, get that oven preheating to 400°F (200°C). This is a nice hot oven that will give us that lovely crispy exterior. While the oven heats up, grab a large baking sheet and either lightly grease it with vegetable oil or give it a good spray of cooking spray. If you want to be absolutely sure nothing sticks, you can also line the baking sheet with parchment paper. Having everything ready means you can move quickly once the chicken is coated.
Step 2: Mix Dry Ingredients
In a shallow dish or a large resealable plastic bag, combine the flour, baking powder, salt, smoked paprika, garlic powder, onion powder, cayenne pepper, oregano, thyme, and Black Pepper. Whisk them all together really well. You want to make sure all those spices are evenly distributed through the flour. This is what’s going to give our chicken tenders that amazing flavor. If you’re using a bag, just seal it up and give it a good shake!
Step 3: Mix Wet Ingredients
In a separate medium bowl, whisk together the eggs and milk until they’re well combined and slightly frothy. This is your wet dredge. Make sure there are no streaks of egg white left. The milk helps to create a light batter that the seasoned flour can cling to beautifully.
Step 4: Combine
Now, if you opted for the optional marinade (buttermilk, hot sauce, Worcestershire), go ahead and add your chicken tenders to that mixture. Toss them around to coat, then let them sit for at least 30 minutes in the fridge. If you’re skipping the marinade, you’ll just be going straight from the egg mixture to the flour. This is where the magic happens! Take your chicken tenders (drained if you marinated them) and dip them one by one into the egg mixture, letting any excess drip off. Then, immediately transfer them to the seasoned flour mixture. Toss them around, pressing gently to ensure they’re fully coated. You want a nice, even layer of the seasoned flour. Place the coated tenders onto your prepared baking sheet. Try to give them a little space between each one so they can crisp up nicely. You can do this in batches if your baking sheet isn’t large enough.
Step 5: Prepare Filling
As mentioned, this “filling” is more of an optional flavor boost or a dipping sauce component. If you decide to marinate, this step is done before coating. If you’re not marinating, you can simply get your favorite dipping sauces ready for serving!
Step 6: Layer & Swirl
This step isn’t really about layering and swirling for these tenders, but rather about arranging them on the baking sheet. Make sure they are in a single layer, not overlapping, so they get that glorious crispiness all around. You can gently press down on them a bit to help the coating adhere.
Step 7: Bake
Pop that baking sheet into your preheated oven. Bake for about 20-25 minutes. You’ll want to flip them halfway through (around the 10-12 minute mark) to ensure they get golden brown and crispy on both sides. They’re done when they’re cooked through, golden brown, and have a nice crunch. The internal temperature should reach 165°F (74°C).
Step 8: Cool & Glaze
Once the tenders are baked to perfection, remove them from the oven. Let them rest on the baking sheet for just a couple of minutes. While they’re resting, quickly whisk together the melted butter, honey or maple syrup, Cajun seasoning, and paprika for the glaze. As soon as the tenders come out of the oven, you can brush this warm glaze over them. It adds a beautiful sheen and an extra layer of flavor. The residual heat will help the glaze meld perfectly.
Step 9: Slice & Serve
Serve these beauties hot! They are absolutely divine right out of the oven. If you like, you can slice one in half to show off that perfectly cooked tender inside. They are fantastic on their own, but even better with your favorite dipping sauces. Ranch, blue cheese, honey mustard, or even a spicy remoulade are all winners. Enjoy the magic!
What to Serve It With
Oh, the possibilities are endless once you’ve got these amazing Cajun Chicken Tenders on hand! For a hearty BREAKFAST, you could chop them up and add them to a breakfast hash with potatoes and scrambled eggs. The spice adds a wonderful kick to your morning. For BRUNCH, I love serving them as part of a larger spread. Imagine them alongside some fluffy pancakes, fresh fruit salad, and maybe some mimosas. They bring a savory element that balances out the sweet. They also make a surprisingly elegant DESSERT – I know, I know, hear me out! If you’ve got friends over for a more casual dessert situation, a platter of these with a honey-dijon dipping sauce can be a fun, unexpected treat. It’s a bit playful and definitely a conversation starter. And for those COZY SNACKS, these are just perfect. Whether it’s game night, movie night, or just a general craving for something delicious, a plate of these tenders with some ranch or a creamy blue cheese dip is pure comfort. My family also loves these stuffed into warm pita bread with some shredded lettuce and a drizzle of a spicy mayo. It’s like a super-powered chicken sandwich! And don’t forget classic pairings like coleslaw, potato salad, or a simple green salad to round out the meal. They’re just so adaptable!
Top Tips for Perfecting Your Cajun Chicken Tenders
Over the years, I’ve picked up a few tricks that really make these Cajun Chicken Tenders sing. For the chicken itself, the most important thing is to make sure it’s trimmed of any tough membranes or excess fat. This ensures a tender bite every time. If you’re using chicken breasts and slicing them, try to get them as uniform in size as possible. This helps them cook evenly, preventing some pieces from drying out while others are still cooking. When it comes to the Zucchini Prep – oops, I mean the flour coating – the key is proper mixing of the dry ingredients. Make sure all those spices are distributed evenly throughout the flour. I always give it a good whisk or a thorough shake in a bag to avoid any bland bites. Don’t be afraid to really press the chicken into the flour to get a good, thick coating. For the wet ingredients, I like to use whole milk for its richness, but any milk works. The egg and milk mixture helps the seasoned flour stick, so don’t skimp on coating the chicken well here. When it comes to Mixing Advice, the biggest pitfall is overmixing the flour coating once it’s on the chicken. You want it to be a nice, thick coating, but not a paste. If it gets too wet, you can always add a tablespoon more flour. My personal favorite part of this recipe is the spice blend itself. Don’t be shy with the cayenne! You can always start with less and add more if you want it spicier, but that gentle heat is what makes these so addictive. If you don’t have all the individual spices, you can find pre-made Cajun seasoning blends, but I find making your own gives you so much more control over the flavor. Baking Tips are crucial for that crispy exterior. Make sure your oven is fully preheated. Placing the tenders on a wire rack set inside the baking sheet can also help air circulate for extra crispiness, though a well-greased baking sheet works just fine. Flipping them halfway through is non-negotiable for even browning. And finally, for Glaze Variations, if you’re not a fan of sweet glazes, you can totally skip it or make a savory one by adding a bit more garlic powder and a pinch of smoked paprika to melted butter. Or, just serve them with your favorite hot sauce for an extra kick!
Storing and Reheating Tips
This is the part where we make sure you can enjoy these delicious Cajun Chicken Tenders even after the initial meal. For Room Temperature storage, honestly, I try not to leave them out for more than two hours, just for food safety reasons. They’re best enjoyed fresh, but if you have leftovers, get them into the fridge fairly quickly. For Refrigerator Storage, once they’ve cooled completely, pop them into an airtight container. They’ll stay good in the fridge for about 3 to 4 days. I’ve found that they retain their crispiness pretty well, especially if you don’t stack them too high. If you want to get fancy, you can place parchment paper between layers. When it comes to Freezer Instructions, these are great for making ahead! Let them cool completely, then wrap them tightly in plastic wrap, followed by a layer of aluminum foil or placing them in a freezer-safe bag. They should last for about 2 to 3 months in the freezer. To reheat, the best method for restoring crispiness is usually in a preheated oven or a toaster oven. I like to spread them on a baking sheet at around 375°F (190°C) for about 8-12 minutes, or until heated through and crispy again. You can also use an air fryer for about 5-7 minutes. Avoid the microwave if you want to keep them from getting soggy. For Glaze Timing Advice, if you’re planning to store or freeze them, it’s best to apply the glaze *after* reheating. Reheating with the glaze on can sometimes make them a bit sticky and less crispy. So, reheat them first, then brush on a fresh glaze or your favorite dipping sauce.
Frequently Asked Questions
Final Thoughts
There you have it – my tried-and-true recipe for Cajun Chicken Tenders that I promise will become a favorite in your home too. It’s more than just a recipe; it’s about those moments around the table, the happy sighs after the first bite, and the fact that you can create something so incredibly flavorful with such relative ease. These tenders are proof that weeknight dinners don’t have to be boring. They’re a little bit of spice, a whole lot of comfort, and a guaranteed crowd-pleaser. If you loved this recipe, you might also enjoy my Spicy Garlic Shrimp Pasta or my Sheet Pan Sausage and Peppers for more easy, flavorful meals. I can’t wait to hear how yours turn out! Please leave a comment below and let me know your thoughts, any variations you tried, or how your family enjoyed them. Happy cooking!

Cajun Chicken Tenders
Ingredients
Main Ingredients
- 0.5 kg Chicken breast cut into strips
- 1 cup All-purpose flour
- 2 large Eggs
- 0.5 cup Breadcrumbs
- 2 tablespoons Cajun seasoning adjust to taste
- 0.5 teaspoon Salt
- 0.25 teaspoon Black pepper
- Vegetable oil for frying
Instructions
Preparation Steps
- In a shallow dish, combine the flour, Cajun seasoning, salt, and black pepper. In another shallow dish, whisk the eggs. In a third shallow dish, place the breadcrumbs.
- Dip each chicken tender first into the flour mixture, then into the beaten eggs, and finally coat generously with breadcrumbs.
- Heat about 1-2 inches of vegetable oil in a large skillet or pot over medium-high heat until it reaches around 175°C (350°F).
- Carefully place the coated chicken tenders into the hot oil, being careful not to overcrowd the pan. Fry for 3-4 minutes per side, or until golden brown and cooked through.
- Remove the chicken tenders from the oil and place them on a wire rack set over a baking sheet to drain any excess oil. Serve hot with your favorite dipping sauce.