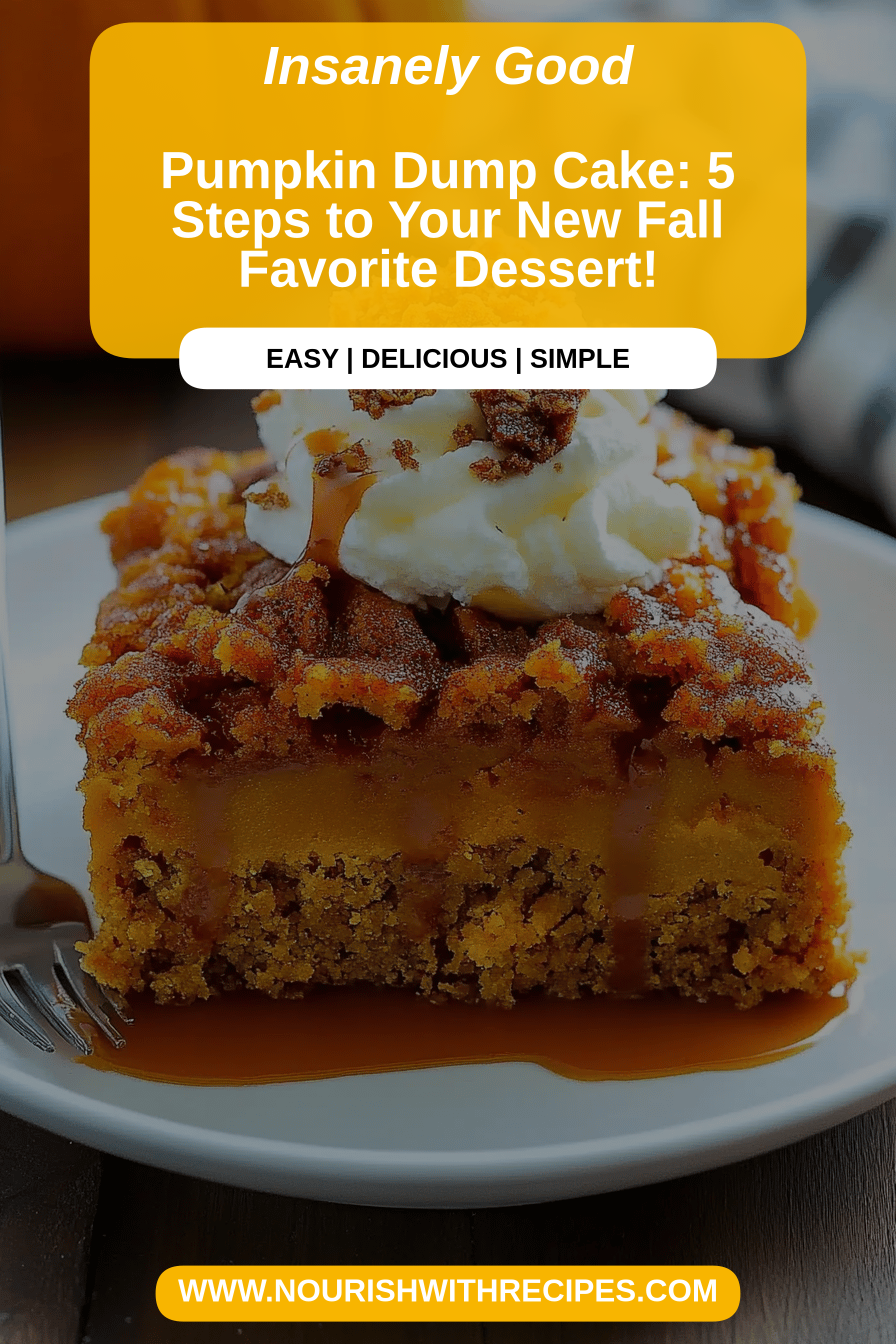
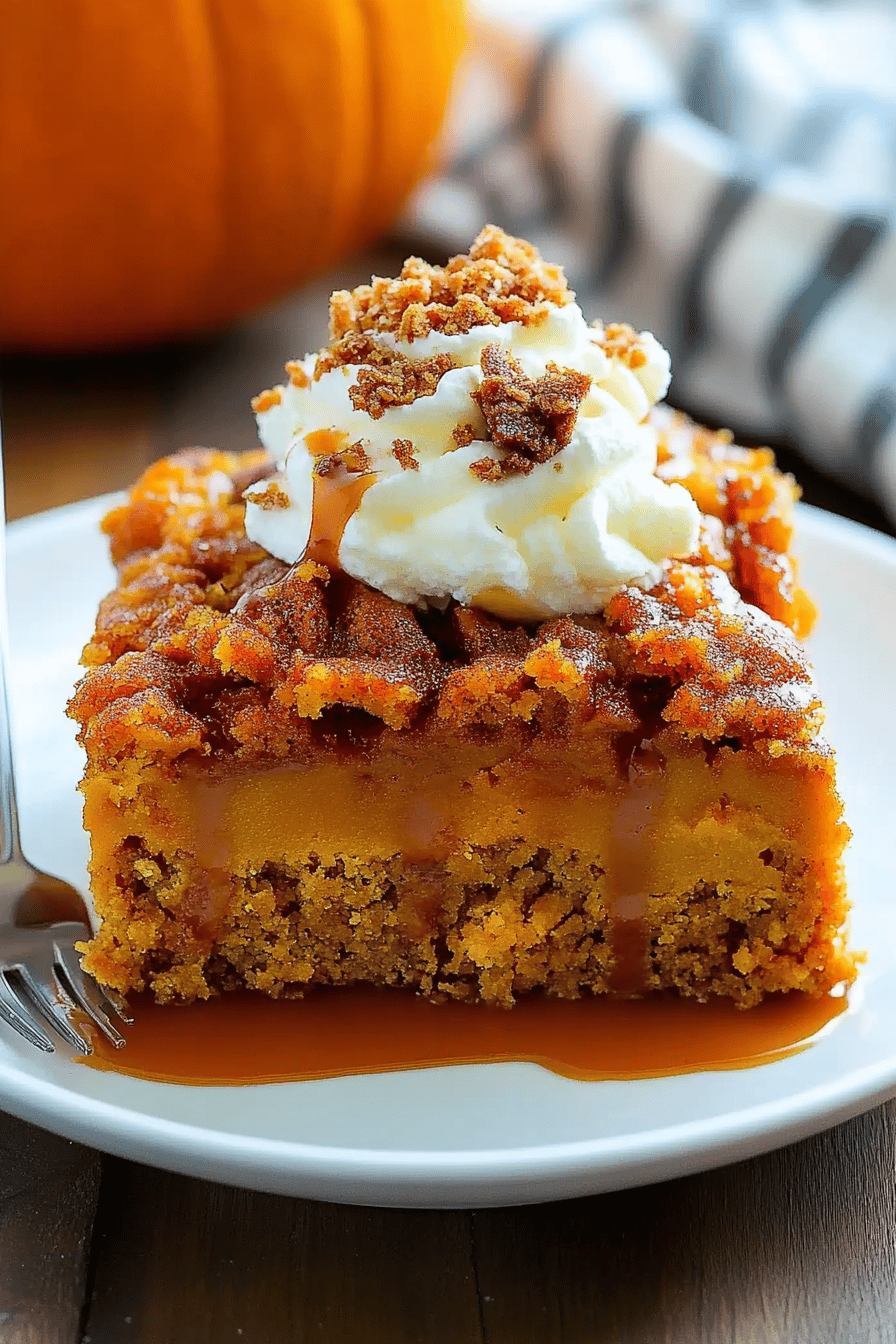
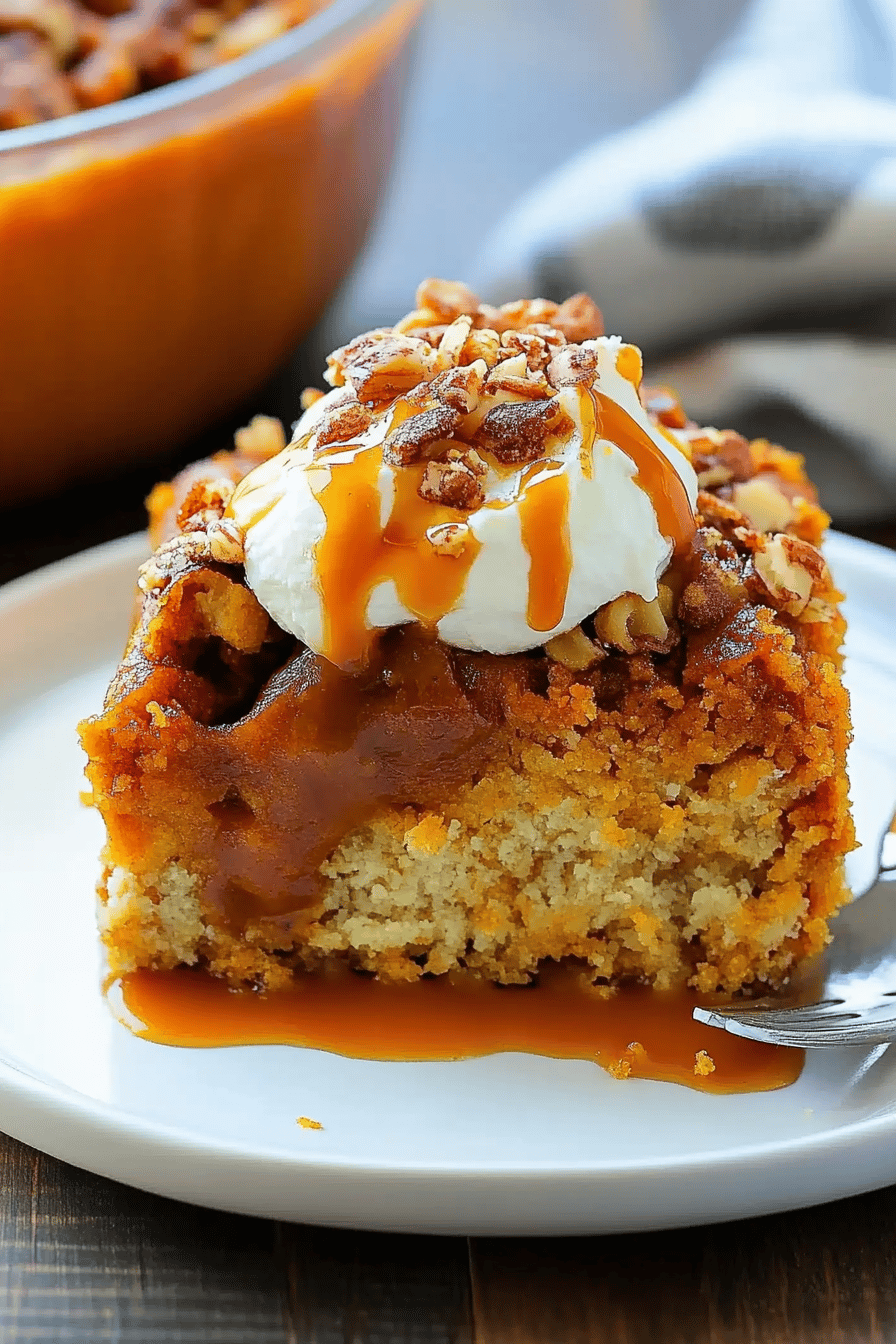
Pumpkin Dump Cake
Oh, where do I even begin with this pumpkin Dump Cake? It’s one of those recipes that feels like a warm hug on a chilly afternoon. You know, the kind that instantly transports you back to your grandma’s kitchen, or maybe just reminds you of those frantic fall evenings when you desperately wanted something sweet but didn’t have the energy for a full-blown baking project? That’s this dump cake for me. It’s ridiculously simple, surprisingly decadent, and always, *always* a crowd-pleaser. My kids practically beg for it, and honestly, it’s my secret weapon when unexpected guests pop by. Forget complicated layered cakes or fussy pies; this pumpkin dump cake is the ultimate shortcut to pure comfort and deliciousness. It’s like the culinary equivalent of pulling on your favorite cozy sweater, but for your taste buds.
What is a pumpkin dump cake?
So, what exactly *is* a pumpkin Dump Cake? The name might sound a little… well, dumpy, but trust me, it’s a good thing! Think of it as a super-easy, deconstructed pumpkin pie meets cake. Instead of creaming butter and sugar or meticulously layering crust, you literally “dump” the ingredients into a baking dish. You start with a creamy pumpkin mixture at the bottom, then layer on a cake mix, and top it with butter. When it bakes, the cake mix gets sort of toasty and caramelized on top, while the bottom stays moist and luscious, creating these incredible textures and flavors. It’s essentially magic in a pan, and the “dump” method is what makes it so unbelievably fuss-free. It’s the perfect solution when you’re craving that classic pumpkin pie flavor without all the traditional fuss.
Why you’ll love this recipe?
What are some of the best reasons to make pumpkin dump cake?flavor is just out of this world. It’s got that warm, spiced pumpkin goodness you expect, but the baked cake topping adds a delightful buttery, slightly crisp texture that’s just heavenly. It’s like the best parts of pumpkin pie and a spice cake had a delicious baby. Then there’s the simplicity. I’m not kidding when I say this is one of the easiest desserts you will ever make. There’s no mixer required, no fancy techniques, just measuring and layering. It’s a lifesaver on busy weeknights or when you’re hosting friends last minute. Plus, it’s incredibly cost-efficient. Most of the ingredients are pantry staples, making it a budget-friendly way to satisfy your sweet tooth. And talkversatility! This dump cake is fantastic served warm with a scoop of vanilla Ice Cream or a dollop of whipped cream, but it’s also surprisingly good at room temperature as a breakfast treat or a midday snack. What I love most about this is that it delivers maximum flavor and comfort with minimum effort. It truly is the best of all worlds for any pumpkin lover.
How to Make Pumpkin Dump Cake
Quick Overview
Making this pumpkin dump cake is about as straightforward as it gets! You’ll simply mix a few ingredients for the creamy pumpkin base, spread that into your baking dish, sprinkle a box of cake mix over the top, and then drizzle melted butter all over. Pop it in the oven, and in less than an hour, you’ll have a warm, gooey, and utterly delicious dessert. It’s the perfect recipe for beginners or anyone who wants a guaranteed win with minimal stress. The magic really is in how little effort it takes to achieve such a comforting and satisfying result.
Ingredients
For the Main Batter:
You’ll need a standard 15-ounce can of pumpkin puree – make sure it’s the pure pumpkin, not pumpkin Pie Filling, as we want to control our own spices! I always grab a couple of cans when they’re on sale in the fall. You’ll also need evaporated milk (the small 5-ounce can works perfectly and gives it that lovely richness), two large eggs to bind everything together, and a good amount of your favorite pumpkin pie spice. Don’t be shy with the spices; they’re what give this dump cake its signature cozy flavor. A little granulated sugar helps balance the flavors, and a pinch of salt always enhances everything. I’ve also found that adding a touch of vanilla extract makes a world of difference, really rounding out the sweet, spiced notes.
For the Filling:
This is where the magic of the “dump” comes in! You’ll grab one box of Spice Cake mix or yellow cake mix. Honestly, either works beautifully. The spice cake mix adds an extra layer of warmth, but the yellow cake mix lets the pumpkin flavor shine through even more. The key is to use an undoctored cake mix – no need for added ingredients like eggs or oil if the box says so, as it’s going to bake into our pumpkin mixture. Some people like to add chopped pecans or walnuts on top of the cake mix, and while that’s delicious, I usually keep it simple to let the pumpkin flavor be the star.
For the Topping:
This is super simple: one stick (half cup) of unsalted butter, melted. That’s it! The melted butter is drizzled evenly over the dry cake mix, and it works wonders to create that golden, slightly crisp, caramelized topping as it bakes. It’s the element that brings it all together and gives it that irresistible texture.
Step-by-Step Instructions
Step 1: Preheat & Prep Pan
First things first, get your oven preheated to 350 degrees Fahrenheit (175 degrees Celsius). This is crucial for even baking. Then, grab a 9×13 inch baking dish. You don’t necessarily need to grease it, but I often give it a light spritz of cooking spray or a quick rub with butter, just to be on the safe side. It ensures that nothing sticks, especially around the edges, and makes cleanup a breeze. A little prep goes a long way!
Step 2: Mix Dry Ingredients
In a medium bowl, whisk together the pumpkin puree, evaporated milk, eggs, granulated sugar, pumpkin pie spice, salt, and vanilla extract. Make sure everything is really well combined. You’re looking for a smooth, consistent batter. I like to give it a good vigorous whisk for about 30 seconds to make sure there are no pockets of unmixed ingredients. The consistency should be like a thick pancake batter.
Step 3: Mix Wet Ingredients
Okay, this step is super simple. In a separate, small bowl, melt your stick of butter in the microwave. It usually takes about 45-60 seconds depending on your microwave’s power. You want it fully melted but not browned or sizzling.
Step 4: Combine
Pour the pumpkin mixture into your prepared baking dish and spread it out evenly. Don’t worry if it’s not perfectly smooth; it will settle as it bakes. This forms the gooey, flavorful base of our dump cake.
Step 5: Prepare Filling
Now, evenly sprinkle the dry cake mix over the pumpkin layer. Just pour it right out of the box and try to cover the entire surface as best as you can. Don’t stir it in; it’s supposed to be a distinct layer.
Step 6: Layer & Swirl
Drizzle the melted butter evenly over the dry cake mix. Make sure you get it into all the nooks and crannies. This is what helps the cake mix get golden brown and delicious. If you’re adding nuts, sprinkle them over the top now. Some people like to swirl a bit of caramel sauce on top before baking for extra decadence, but I find it perfect as is!
Step 7: Bake
Place the dish in your preheated oven and bake for 50-60 minutes. You’ll know it’s done when the topping is golden brown and bubbly around the edges, and a toothpick inserted into the center comes out mostly clean (a few moist crumbs are okay, but no wet batter). The edges should be set and slightly puffed.
Step 8: Cool & Glaze
Let the pumpkin dump cake cool for at least 15-20 minutes before serving. This is important because the filling is very hot and will continue to set as it cools. If you’re using a glaze (which I’ll talk about later!), this is when you’d prepare and drizzle it over the top. The warm, gooey filling is perfect for soaking up a sweet glaze.
Step 9: Slice & Serve
Once slightly cooled, cut into squares and serve warm. It’s absolutely divine with a scoop of vanilla bean ice cream, a dollop of whipped cream, or even a drizzle of caramel sauce. The contrast between the warm cake and cool ice cream is just heavenly.
What to Serve It With
This pumpkin dump cake is wonderfully versatile, making it a fantastic option for pretty much any occasion. For breakfast, I love it warm with a strong cup of coffee. It feels like a real treat, a little bit indulgent, but still somehow feels acceptable because, hey, it has pumpkin! I’ll often cut a small square and have it with my morning brew before the day really gets going. For a more elegant brunch spread, I’ll serve it alongside fresh fruit salad and perhaps some savory breakfast sausages. It adds that cozy, autumnal charm that’s perfect for fall gatherings. Plating it nicely with a dusting of powdered sugar or a light drizzle of cream makes it feel a bit more special. And of course, as a dessert, it’s a showstopper. After dinner, I’ll serve generous warm portions with a scoop of rich vanilla ice cream or a cloud of freshly whipped cream. It’s the perfect sweet ending to any meal. For those moments when you just need a quick, comforting cozy snack, this dump cake is your best friend. It’s hearty, warm, and satisfying without being overly complicated. My family’s tradition is to have it warm after a chilly evening walk, usually with a big mug of apple cider. It’s simple, but it’s pure comfort in a bowl.
Top Tips for Perfecting Your Pumpkin Dump Cake
I’ve made this pumpkin dump cake more times than I can count, and along the way, I’ve picked up a few tricks that I think really elevate it. For the pumpkin prep, always use 100% pure pumpkin puree, not pie filling. The pie filling already has sugar and spices, which would throw off the balance of this recipe. Also, make sure your pumpkin isn’t watery; if it looks a little loose, give it a quick stir. When it comes to mixing advice, the key is not to overmix the wet ingredients. You just want everything combined smoothly. For the cake mix layer, don’t stir it into the pumpkin mixture at all! It’s supposed to bake on top, creating that lovely caramelized crust. If you like a bit of crunch, adding chopped pecans or walnuts on top of the cake mix before drizzling the butter is fantastic. Some people also like to do a second drizzle of melted butter or even add a swirl of caramel. For swirl customization, if you’re feeling adventurous, you can dollop some sweetened condensed milk or caramel sauce over the pumpkin layer before adding the cake mix, then gently swirl it with a knife – but honestly, it’s divine without any of that. When it comes to ingredient swaps, if you can’t find evaporated milk, you can substitute with half-and-half or even whole milk, though it might be a little less rich. For the cake mix, a yellow or even white cake mix works in a pinch, but spice cake is my personal favorite for that extra warmth. And for baking tips, always bake on the center rack of your oven for the most even heat distribution. If your topping is browning too quickly, you can loosely tent the dish with aluminum foil for the last 15-20 minutes of baking. Trust me on this one – the smell alone is worth it! If you want to add a final touch, a drizzle of cream cheese glaze or a simple powdered sugar glaze after it cools slightly is wonderful. My kids actually prefer it without the glaze, just with ice cream, so it’s really up to your personal preference!
Storing and Reheating Tips
So, you’ve made this amazing pumpkin dump cake, and there are leftovers (a rare but happy occasion!). Here’s how to keep it tasting delicious. If you have a small amount left and plan to eat it within a day or two, you can leave it covered on the counter at room temperature. Just make sure it’s properly covered with plastic wrap or foil to keep it from drying out. It’s still pretty tasty at room temp! For longer storage, I always opt for the refrigerator. Transfer any leftovers to an airtight container or cover the baking dish tightly with plastic wrap and then a layer of foil. It will stay fresh and delicious in the fridge for about 3-4 days. The texture might change slightly after a day or two, becoming a bit denser, but it’s still wonderful. If you know you won’t get through it all quickly, you can absolutely freeze portions or the entire cake. Let it cool completely first. Then, wrap it tightly in plastic wrap, followed by a layer of aluminum foil, or place it in a freezer-safe container. It should keep well in the freezer for up to 2-3 months. When you’re ready to enjoy it, you can thaw it overnight in the refrigerator. For reheating, I find that gently warming it up is best. You can pop individual slices in the microwave for about 30-60 seconds, or if you have a larger portion, you can warm it in a low oven (around 300°F or 150°C) for about 10-15 minutes until heated through. The glaze timing is important too. If you plan to glaze it before storing, I’d recommend glazing just before serving. A glaze added too early might soak in too much and make the topping soggy during storage, especially in the fridge. It’s often best to add a fresh glaze right before you serve any leftovers for the best texture.
Frequently Asked Questions
Final Thoughts
There you have it – the simplest, most comforting pumpkin dump cake that I promise will become a regular in your baking rotation. It’s a testament to the fact that you don’t need complicated steps or fancy ingredients to create something truly special and delicious. The way the flavors meld together, the delightful contrast in textures between the gooey pumpkin base and the slightly crisp cake topping… it’s just pure autumnal bliss. I really hope you give this one a try. It’s perfect for potlucks, holiday gatherings, or just those cozy nights when you need a little sweet escape. If you love this recipe, you might also enjoy my Easy Apple Crisp or my Spiced Pear Crumble for more fall-inspired treats. I can’t wait to hear what you think! Please let me know in the comments below how yours turned out and any fun variations you tried. Happy baking!
Pumpkin Dump Cake
Ingredients
Main Ingredients
- 1 can pumpkin puree 15 ounce can
- 0.5 cup evaporated milk
- 0.75 cup granulated sugar
- 0.5 teaspoon salt
- 1 teaspoon pumpkin pie spice
- 1 box spice cake mix 15.25 ounce box
- 0.75 cup butter melted
- 1 cup chopped pecans optional
Instructions
Preparation Steps
- Preheat oven to 350°F (175°C). Grease a 9x13 inch baking dish.
- In a large bowl, whisk together pumpkin puree, evaporated milk, granulated sugar, salt, and pumpkin pie spice until well combined.
- Pour the pumpkin mixture into the prepared baking dish and spread evenly.
- Evenly sprinkle the dry cake mix over the pumpkin mixture.
- Drizzle the melted butter over the dry cake mix, ensuring it's covered as much as possible.
- Sprinkle chopped pecans over the top, if desired.
- Bake for 45-50 minutes, or until the topping is golden brown and the pumpkin filling is set.
- Let cool slightly before serving. Serve warm, optionally with vanilla ice cream or whipped cream.