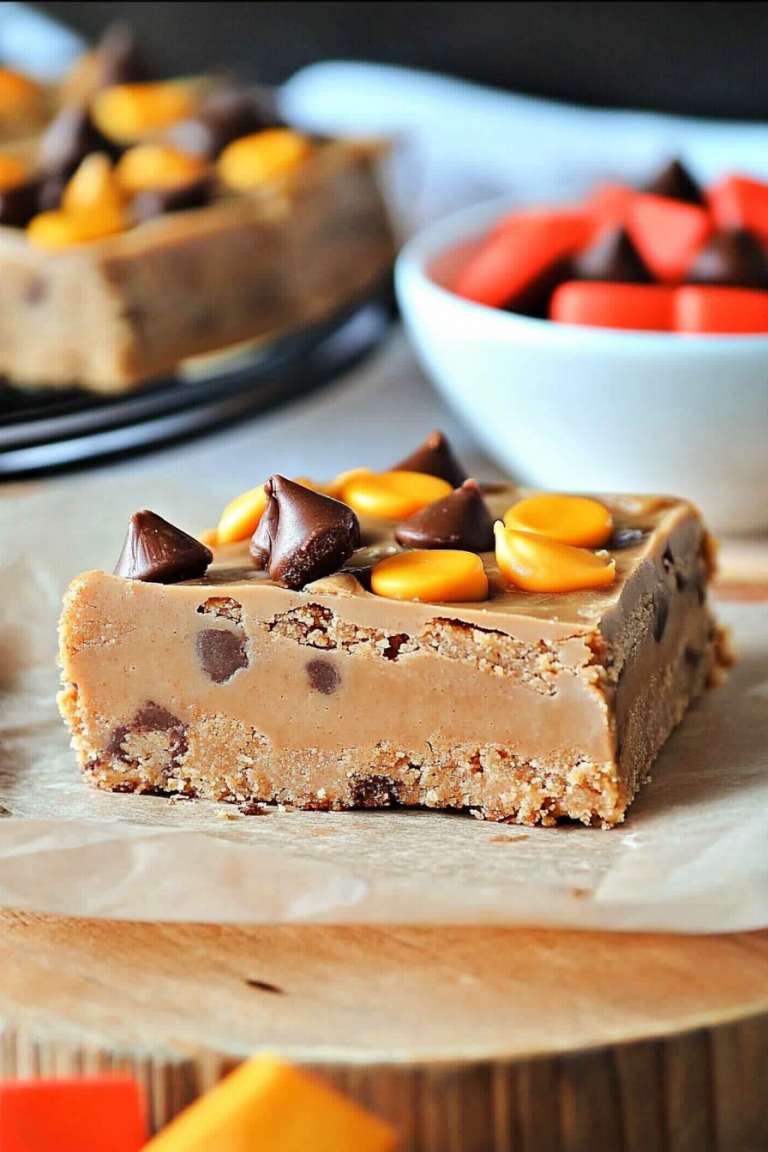
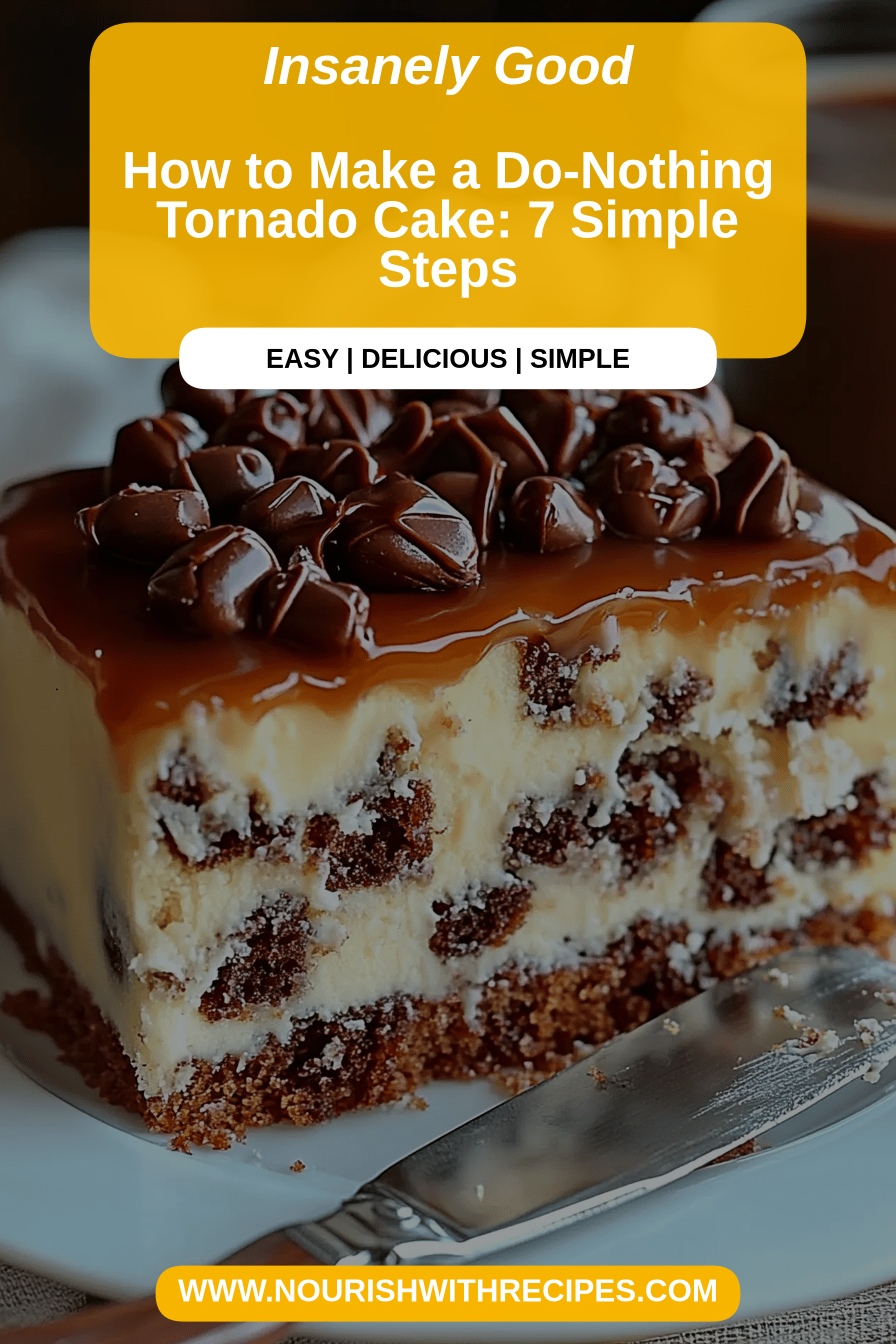
Tornado Cake Recipe
There are some recipes that just feel like a warm hug, aren’t there? The kind you can whip up without even looking at the recipe card because you’ve made it so many times. For me, that’s this Tornado Cake Recipe. It’s not just a cake; it’s pure comfort, a little bit of magic, and honestly, a lifesaver on those days when you need something sweet but don’t have hours to dedicate to baking. I remember the first time I made it, I was a bit intimidated by the “tornado” aspect, thinking it would be complicated. Boy, was I wrong! It’s surprisingly simple, and the result is a beautifully marbled cake that looks way more impressive than it is to make. If you’ve ever loved a good zucchini bread or a bundt cake with a decadent swirl, you’re going to adore this. It’s got that perfect balance of moistness and flavor that just makes you close your eyes and sigh with happiness. It’s a bit like a super-charged, fancier version of a coffee cake, but so much easier to pull off!
What is Tornado Cake?
So, what exactly is a Tornado Cake? Well, the name comes from the beautiful, swirling pattern you get when you layer a rich cake batter with a decadent filling and then gently swirl them together before baking. Think of it as a marbled cake, but with a bit more intention and a lot more deliciousness packed into that swirl. It’s essentially a moist, tender cake base – often enriched with something like sour cream or yogurt to keep it incredibly soft – combined with a ribbon of spiced, sugary goodness. It’s the kind of cake that’s perfect for any time of day, really. It’s not overly fussy, which I love, and it always seems to impress. It’s not a dense Pound Cake, nor is it a super light and airy sponge. It sits in that wonderful middle ground of utterly satisfying. The swirl is the star, making each slice a little surprise of flavor and texture!
Why you’ll love this recipe?
Honestly, where do I even begin with why you’ll fall head over heels for this Tornado Cake Recipe? First off, the flavor profile is just divine. It’s not overwhelmingly sweet, but it has this lovely warmth from spices, especially if you decide to add cinnamon or nutmeg to the swirl. The cake itself is incredibly moist and tender, a result of a few key ingredients that I’ll get into later – trust me, they make all the difference. And the simplicity? Oh, the simplicity! You don’t need any fancy equipment or techniques. It comes together in a single bowl for the batter, and the swirling part is more fun than difficult. My kids actually ask for this all the time, especially when they have friends over. It looks so impressive, and they love watching me swirl it. Plus, it’s surprisingly budget-friendly. Most of the ingredients are pantry staples, which makes it a go-to for me when I need a treat without a big grocery bill. What I love most, though, is its versatility. It’s fantastic for breakfast with a cup of coffee, elegant enough for dessert with a dollop of whipped cream or a scoop of Ice Cream, and perfect for a cozy afternoon snack. It’s a step up from your average coffee cake or loaf, but it doesn’t demand hours in the kitchen like some elaborate layered cakes. It truly is the best of all worlds!
How do I make Tornado Cake?
Quick Overview
Making this Tornado Cake is surprisingly straightforward! You’ll whisk together a simple, moist Cake Batter, prepare a sweet, spiced filling, layer them in your prepared pan, swirl gently to create that signature “tornado” effect, and then bake until golden and fragrant. The magic really happens in the swirl – it infuses the cake with pockets of concentrated flavor and a beautiful visual appeal that’s sure to wow. It’s a process that’s forgiving, so even if your swirl isn’t perfect, the end result will still be incredibly delicious.
Ingredients
For the Main Batter:
- 2 cups all-purpose flour: This is your standard base. Make sure it’s fresh!
- 1.5 teaspoons baking powder: For that perfect lift.
- 1/2 teaspoon baking soda: Works with any acidic ingredients to give extra tenderness.
- 1/4 teaspoon salt: Balances the sweetness and enhances flavors.
- 1 cup granulated sugar: For sweetness, but not too much so the swirl shines.
- 1/2 cup unsalted butter, softened: Crucial for moisture and richness. Make sure it’s truly softened, not melted!
- 2 large eggs: Room temperature eggs incorporate better.
- 1 teaspoon vanilla extract: The classic flavor enhancer we all love.
- 1 cup sour cream or full-fat plain yogurt: This is the secret to its incredible moistness! I’ve tested both, and they work beautifully. Yogurt might make it slightly tangier, which I sometimes prefer.
- 1/2 cup milk (any kind): Helps achieve the perfect batter consistency.
For the Filling:
- 1/2 cup packed light brown sugar: Adds a lovely caramel note.
- 2 tablespoons all-purpose flour: To thicken the filling slightly.
- 1 teaspoon ground cinnamon: Or add a pinch of nutmeg too for extra warmth!
- 1/4 teaspoon ground cloves (optional): Just a whisper for complexity.
- 2 tablespoons unsalted butter, melted: To bind everything together.
For the Glaze:
- 1 cup powdered sugar: For that classic sweet drizzle.
- 2-3 tablespoons milk or cream: Adjust to reach your desired drizzling consistency.
- 1/2 teaspoon vanilla extract (optional): Adds a little extra flavor.
Step-by-Step Instructions
Step 1: Preheat & Prep Pan
First things first, get that oven preheating to 350°F (175°C). It’s so important to have your oven at the right temperature from the start. While it’s heating, generously grease and flour a 9-inch round cake pan or a bundt pan. I like to use butter and then a dusting of flour; it ensures the cake releases beautifully. You can even use baking spray with flour for an extra easy release. Make sure you get into all the nooks and crannies, especially with a bundt pan!
Step 2: Mix Dry Ingredients
In a medium bowl, whisk together the 2 cups of all-purpose flour, 1.5 teaspoons of baking powder, 1/2 teaspoon of baking soda, and 1/4 teaspoon of salt. Whisking them together thoroughly ensures that your leavening agents and salt are evenly distributed throughout the flour, which means your cake will rise evenly and have a consistent flavor. No one wants a bite that’s too salty or doesn’t quite rise!
Step 3: Mix Wet Ingredients
In a large bowl, cream together 1 cup of granulated sugar and 1/2 cup of softened unsalted butter. You can use an electric mixer for this, or a good old-fashioned whisk and some elbow grease. You want it to be light and fluffy. Then, beat in the 2 large eggs, one at a time, making sure each is fully incorporated before adding the next. Stir in the 1 teaspoon of vanilla extract. Next, add the 1 cup of Sour Cream (or yogurt) and 1/2 cup of milk. Mix until just combined. Don’t worry if it looks a little curdled at this stage; it will smooth out when you add the dry ingredients.
Step 4: Combine
Now, it’s time to bring those wet and dry ingredients together. Gradually add the dry ingredients from Step 2 to the wet ingredients from Step 3. Mix on low speed, or by hand, until just combined. The key here is NOT to overmix! Overmixing develops the gluten in the flour, which can lead to a tough cake. Mix until you no longer see streaks of dry flour. A few small lumps are perfectly fine.
Step 5: Prepare Filling
In a small bowl, combine the 1/2 cup packed light brown sugar, 2 tablespoons of all-purpose flour, 1 teaspoon of ground cinnamon, and the optional 1/4 teaspoon of ground cloves. Stir this dry mixture together. Then, pour in the 2 tablespoons of melted unsalted butter and mix until it forms a crumbly paste. This filling is where all that wonderful spiced flavor comes from!
Step 6: Layer & Swirl
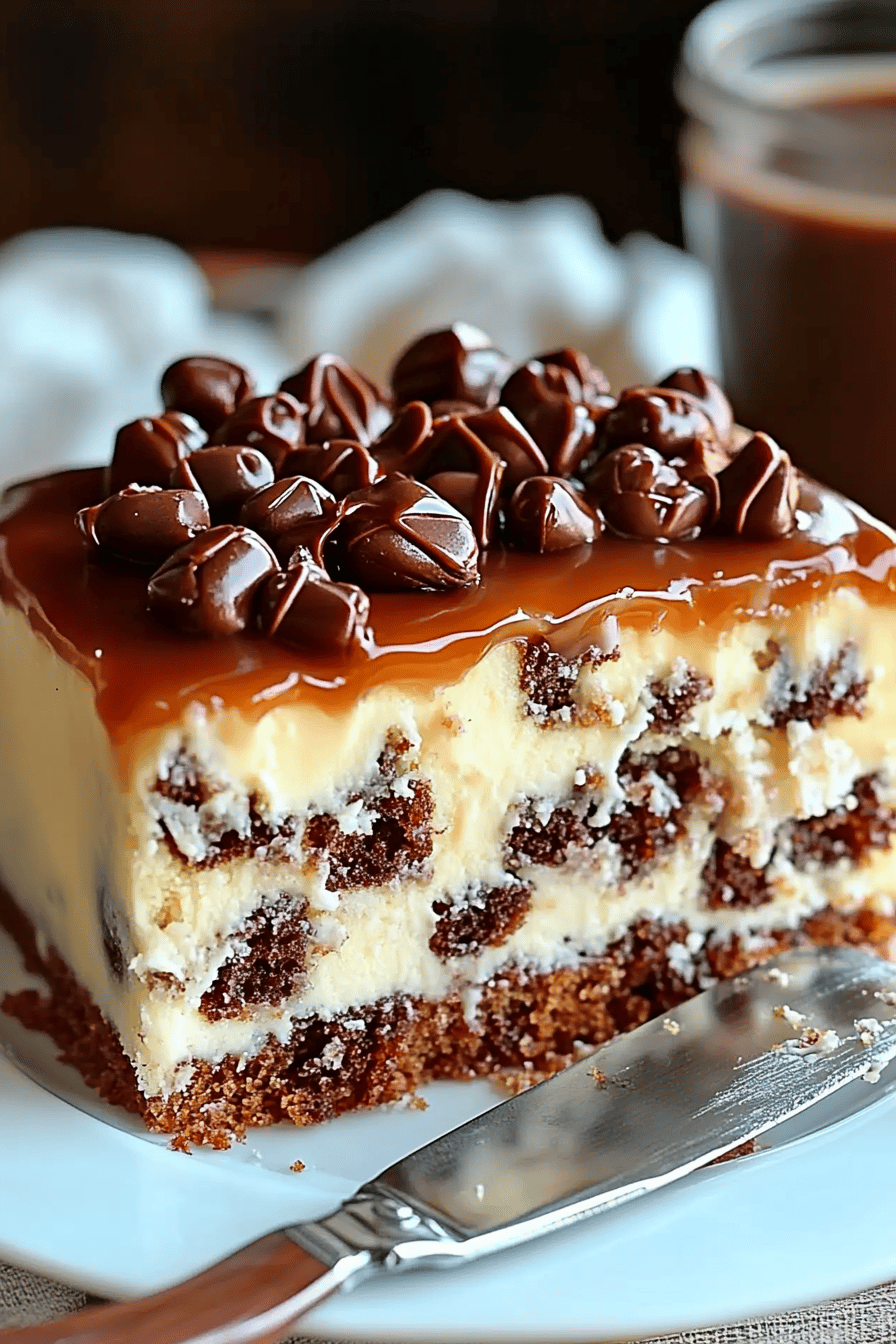
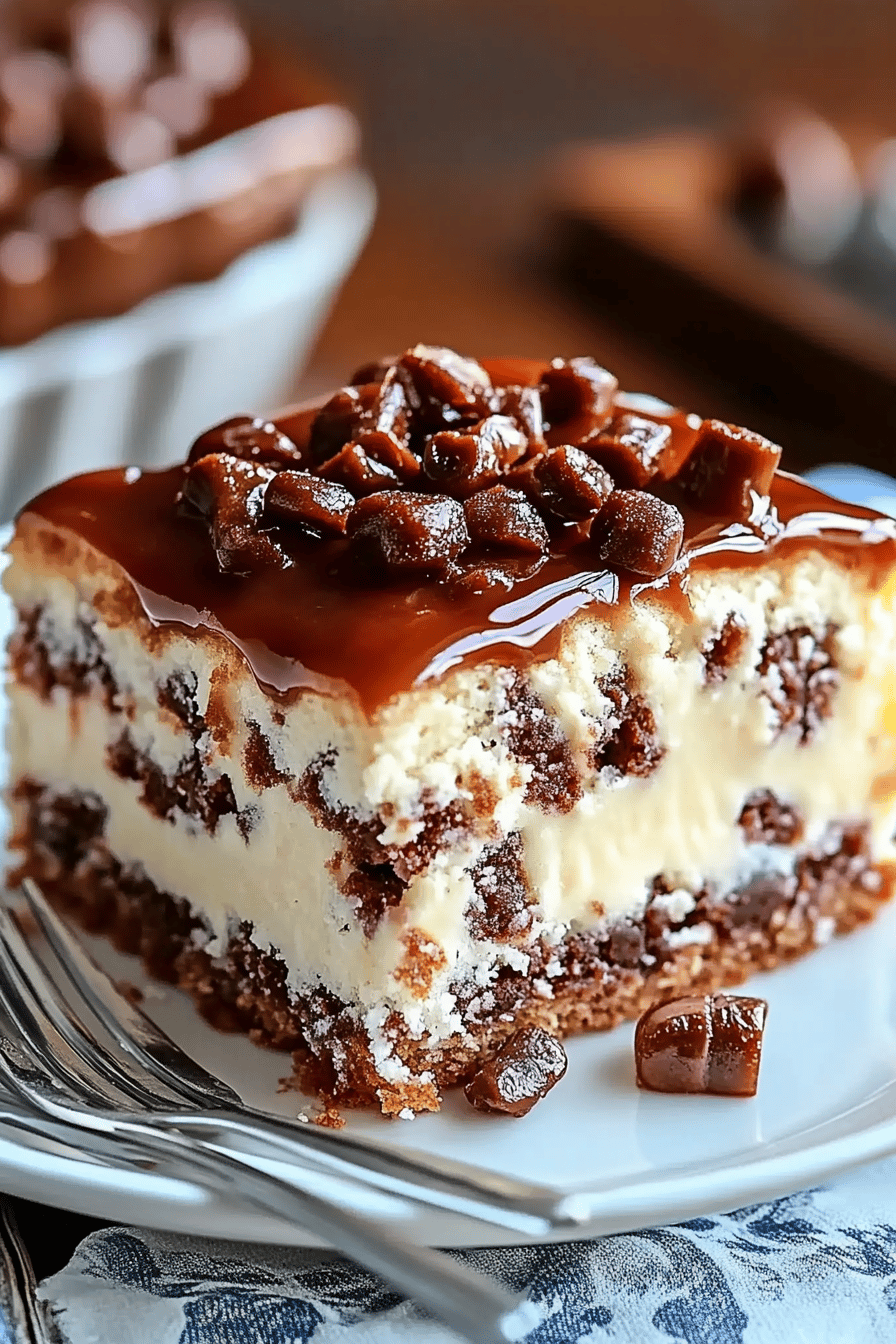
Now for the fun part! Spoon about half of the cake batter into your prepared pan. Sprinkle about half of the filling mixture evenly over the batter. Then, spoon the remaining cake batter over the filling. Finally, sprinkle the rest of the filling mixture on top. To create the “tornado” effect, insert a knife or a skewer into the batter and gently swirl it around in a few places, going down to the bottom of the pan. Don’t over-swirl; you want distinct layers and pockets of filling, not a uniform mix. A few figure-eights or gentle zig-zags are perfect.
Step 7: Bake
Place the pan in the preheated oven and bake for 30-40 minutes for a round cake pan, or 40-50 minutes for a bundt pan. Baking time will vary depending on your oven. You’ll know it’s done when a wooden skewer or toothpick inserted into the center of the cake comes out clean, or with just a few moist crumbs attached (but no wet batter). The edges should be golden brown and slightly pulling away from the sides of the pan.
Step 8: Cool & Glaze
Let the cake cool in the pan for about 10-15 minutes before inverting it onto a wire rack to cool completely. It’s important to let it cool sufficiently before glazing, otherwise, the glaze will just melt off. Once it’s completely cool, whisk together the 1 cup of powdered sugar with 2-3 tablespoons of milk (or cream) and the optional 1/2 teaspoon of vanilla extract until you have a smooth, pourable glaze. Drizzle this generously over the cooled cake.
Step 9: Slice & Serve
Once the glaze has set a little, it’s time to slice and enjoy! The best way to cut this cake is with a serrated knife to get through the tender crumb cleanly. Serve at room temperature for the best flavor and texture. It’s delicious on its own, but even better with a cup of coffee or tea. And of course, a dollop of fresh whipped cream or a scoop of vanilla ice cream is never a bad idea!
What to Serve It With
This Tornado Cake Recipe is so versatile, it’s practically a chameleon! It adapts beautifully to any occasion. For a cozy morning, I love serving it as is, maybe with a simple dusting of powdered sugar instead of the glaze if I’m in a rush. It pairs wonderfully with a strong cup of black coffee or a creamy latte – the richness of the coffee cutting through the sweetness of the cake is just heavenly. If you’re planning a leisurely brunch, this cake really shines. I like to slice it and arrange it on a pretty platter, perhaps with some fresh berries on the side for a pop of color and freshness. A mimosa or a sparkling rosé would be the perfect beverage to complement its flavors. When it comes to dessert, well, this Tornado Cake is a star! A warm slice with a scoop of good quality vanilla bean ice cream is pure bliss, or you could add a dollop of lightly sweetened whipped cream. For those moments when you just need a sweet treat to get you through the afternoon slump, it’s perfect with a glass of milk or a soothing cup of herbal tea. My family tradition is to have a slice with hot chocolate on a rainy day – it’s pure comfort food!
Top Tips for Perfecting Your Tornado Cake
I’ve made this Tornado Cake Recipe more times than I can count, and over the years, I’ve picked up a few tricks that I think really make a difference. For starters, when it comes to the filling, don’t skimp on pressing the brown sugar into that measuring cup! Packed brown sugar is key for that caramel-y depth. Also, make sure your melted butter for the filling is just melted, not piping hot, so it coats the sugar mixture nicely. When you’re prepping the pan, I can’t stress enough how important it is to grease and flour it thoroughly, especially if you’re using a bundt pan. Those intricate designs can be tricky, and you want your beautiful cake to release perfectly. I’ve had a few stuck cakes in my past, and it’s always because I rushed this step! For the swirling, my biggest tip is to be gentle and don’t overdo it. You want distinct ribbons of the filling, not a muddy mess. Think of it as creating a beautiful marbled effect, not homogenizing the batter. A simple back-and-forth motion with a knife inserted about halfway down the batter usually does the trick. If you’re nervous, just do a few gentle swirls. For ingredient swaps, I’ve found that you can easily substitute gluten-free all-purpose flour for the regular flour in the batter if you need to. You might need a little more liquid, maybe an extra tablespoon or two of milk, to get the right consistency, but it usually works out beautifully. I’ve also experimented with different spices in the filling – a little cardamom can be lovely, or a pinch of ginger. The recipe calls for cinnamon, which is classic, but feel free to play around! And finally, for baking, always rely on the skewer test. Ovens can vary wildly, so that visual cue of a clean skewer is your best friend for ensuring a perfectly baked cake. Don’t be afraid to let it bake a minute or two longer if needed – a slightly overbaked cake is better than an underbaked one!
Storing and Reheating Tips
This Tornado Cake Recipe is quite forgiving when it comes to storage, which is another reason I love it so much. If you happen to have any leftovers (which is rare in my house!), you can store the unfrosted cake at room temperature for up to 2-3 days. Just make sure it’s covered tightly with plastic wrap or in an airtight container. This keeps it from drying out. If you’ve already glazed it, it’s still fine at room temperature, but the glaze might get a little sticky after a day. For longer storage, or if your kitchen is particularly warm, the refrigerator is your friend. Store the cake (frosted or unfrosted) in an airtight container in the fridge for up to 5 days. The texture might firm up slightly in the fridge, but it will still be delicious. When you’re ready to enjoy a slice from the fridge, I recommend letting it come to room temperature for about 30 minutes beforehand to regain its lovely soft texture. Now, if you’re thinking about freezing this beauty, you absolutely can! It freezes really well. If you’re freezing the unfrosted cake, wrap it tightly in plastic wrap, then in a layer of aluminum foil, and place it in a freezer-safe bag or container. It will keep for up to 3 months. Thaw it overnight in the refrigerator, then let it sit at room temperature for a bit before glazing. If you want to freeze the glazed cake, that’s perfectly fine too, just be aware that the glaze might soften a bit upon thawing. For reheating, honestly, I rarely need to reheat this cake because it’s so good at room temperature. But if you prefer a slightly warm slice, you can microwave a piece for about 10-15 seconds. Don’t overdo it, or it can become rubbery. The key is gentle warming.
Frequently Asked Questions
Final Thoughts
So there you have it – my tried-and-true Tornado Cake Recipe! It’s a recipe that truly brings joy to my kitchen, and I hope it does the same for yours. It’s a beautiful reminder that delicious, impressive-looking treats don’t have to be complicated. The swirling technique is simple, the flavors are comforting yet exciting, and the texture is just perfect. It’s the kind of cake that makes people ooh and aah, and then ask for seconds. If you enjoyed making this Tornado Cake, I think you’ll also love my Moist Zucchini Bread Recipe or my Easy Chocolate Swirl Coffee Cake, as they share that wonderful balance of flavor and ease. Don’t be afraid to make this your own – maybe add some chopped nuts to the filling, or a hint of orange zest to the batter. I can’t wait to hear how yours turns out, so please leave a comment below and tell me all about your Tornado Cake adventures! Happy baking, everyone!

Tornado Cake Recipe
Ingredients
Cake Batter
- 2 cups all-purpose flour
- 1.5 cups granulated sugar
- 0.5 teaspoon baking soda
- 0.25 teaspoon salt
- 0.5 cup unsalted butter, softened
- 2 large eggs
- 1 teaspoon vanilla extract
- 1 cup buttermilk
Tornado Swirl
- 0.25 cup unsweetened cocoa powder
- 0.75 cup granulated sugar
- 0.5 teaspoon ground cinnamon
Instructions
Preparation Steps
- Preheat your oven to 350°F (175°C). Grease and flour a 9x13 inch baking pan.
- In a large bowl, whisk together the flour, 1.5 cups sugar, baking soda, and salt.
- Add the softened butter, eggs, and vanilla extract to the dry ingredients. Mix until just combined.
- Gradually add the buttermilk, mixing until the batter is smooth. Be careful not to overmix.
- In a small bowl, combine the cocoa powder, 0.75 cup sugar, and cinnamon for the tornado swirl.
- Pour about two-thirds of the cake batter into the prepared baking pan.
- Sprinkle the tornado swirl mixture evenly over the batter.
- Carefully pour the remaining one-third of the cake batter over the swirl mixture.
- Using a knife or skewer, gently swirl the batter to create a tornado effect. Do not over-swirl.
- Bake for 30-35 minutes, or until a wooden skewer inserted into the center comes out clean.
- Let the cake cool in the pan for 10 minutes before inverting it onto a wire rack to cool completely.