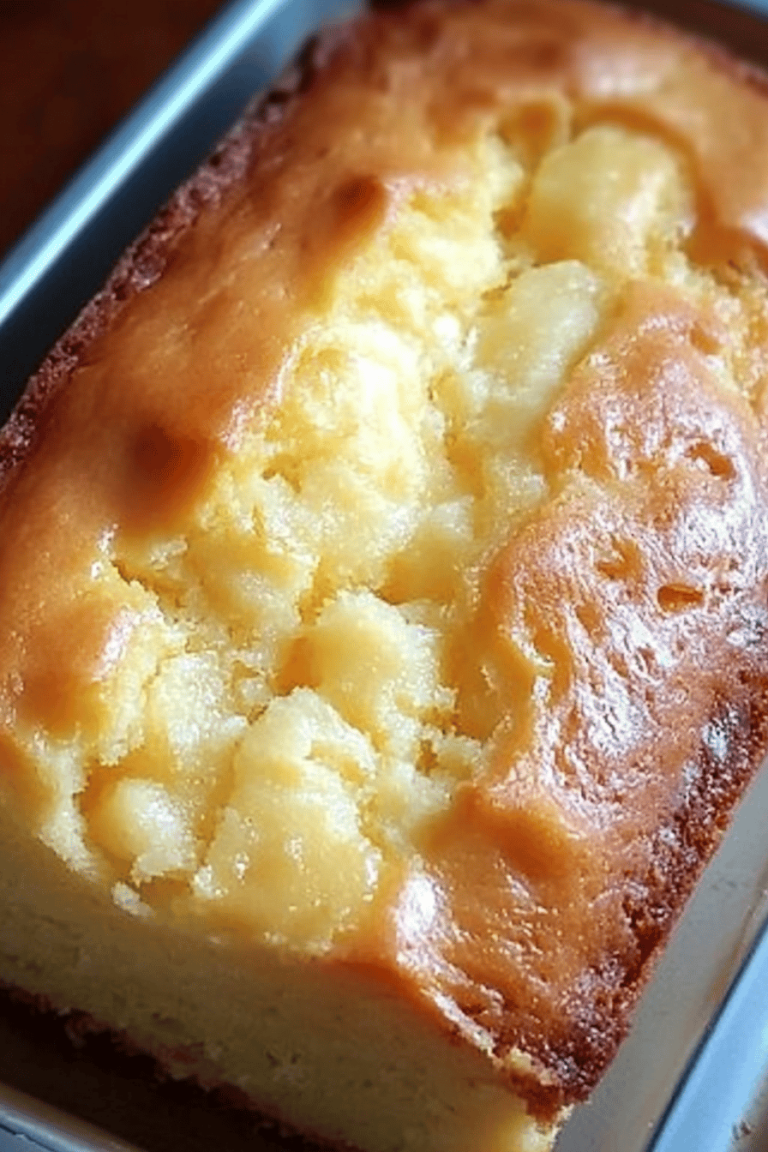
brownie cookie bars
Do you ever find yourself torn between a chewy brownie and a soft, gooey cookie? I’ve been there a thousand times—and that’s why I absolutely adore brownie cookie bars. Imagine biting into something with the fudgy richness of a brownie but the soft, buttery texture of a cookie, all in one easy bar. I first stumbled upon this combination during a late-night baking session when I didn’t want to commit to a whole cake but needed a serious chocolate fix. The smell of melting chocolate and vanilla wafting from the oven instantly became my kitchen’s new signature scent. This recipe honestly feels like a warm hug from my childhood, and it’s one my kids ask for all the time (sometimes, they don’t even wait for it to cool). If you love chocolate chip cookies and brownies alike, trust me, these brownie cookie bars will become your new go-to sweet treat.
What is Brownie Cookie Bar?
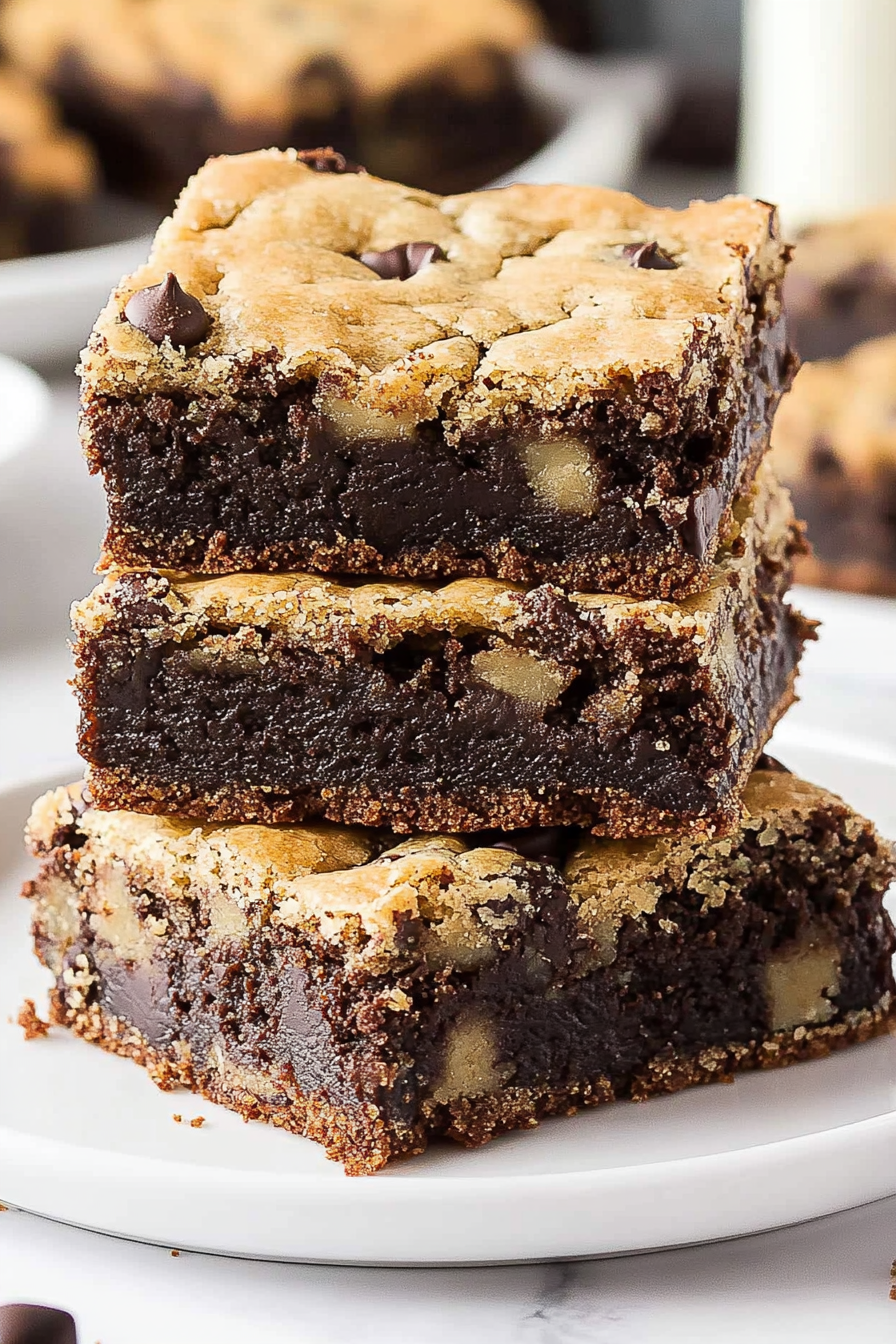
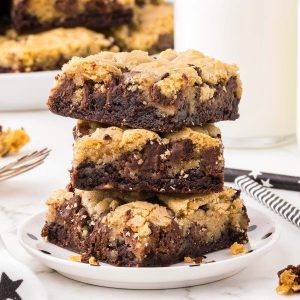
If you haven’t heard of brownie cookie bars before, think of it as the delicious lovechild of two classic desserts. It’s essentially a dessert bar that marries the dense, fudgy texture of a brownie with the buttery, chewy goodness of a cookie. The name “brownie cookie bars” comes from how it’s baked in a pan like brownies but tastes like a cookie that’s been jazzed up with a rich, chocolatey twist. It’s a fantastic in-between dessert—you get the deeper cocoa flavor and fudgy bite of a brownie, but it’s soft and tender like biting into your favorite cookie dough. Honestly, it’s the dessert that solves the eternal debate between brownie or cookie. You’ll see why once you have that first decadent bite.
Why you’ll love this recipe?
What I love about this brownie cookie recipe is how it blends so many different things into one simple treat.
- Flavor:The chocolate here is almost sinful—deep, rich cocoa paired with melty chocolate chips that sprinkle throughout the bars, creating little burst
- Simplicity: Honestly, this recipe couldn’t be easier. It’s basically a mix-and-go batter that you slap into a pan, swirl with some cream cheese filling, then pop into the oven. No complicated folding or multi-step processes. If you can stir, you can make this.
- Cost-efficiency: You don’t need fancy ingredients, just the basics like flour, sugar, butter, cocoa powder, and a couple of other staples. It’s a perfect last-minute sweet fix when you’re low on time and cash but high on cravings.
- Versatility: The beauty of brownie cookie bars is how adaptable they are. I’ve swapped out chocolate chips for white chocolate or even added some espresso powder for a mocha twist. Sometimes I double the cream cheese swirl for an extra tang, or sprinkle a handful of nuts on top. This recipe plays well with just about anything.
Plus, it’s that kind of dessert where you feel like you’re treating yourself, but really, it’s just everyday baking magic. My family often fights over the last bar, and I have to admit, I usually “accidentally” eat one after dinner when no one’s looking. Give it a try—even if you usually lean more toward classic brownies or cookies, this hybrid will surprise you!
How to Make Brownie Cookie Bars
Quick Overview
This recipe comes together in three main parts—mix your brownie-cookie batter, whip up a simple cream cheese filling, and then layer the two with a beautiful swirl. The combination bakes into gooey, tender bars that are easy to slice and share (or not). I love this method because it’s straightforward but feels totally luxurious when it’s done. You don’t need fancy gadgets or hours in the kitchen, just some patience for the baking time and the rewarding aroma that fills your house while it cooks.
Ingredients
For the Main Batter:
- 1 cup all-purpose flour (I always sift mine to keep it light)
- ⅓ cup unsweetened cocoa powder (go for Dutch-processed if you want deeper flavor)
- ½ teaspoon baking powder
- ¼ teaspoon salt (balances the chocolate perfectly)
- ½ cup (1 stick) unsalted butter, melted and slightly cooled (butter quality makes a difference!)
- ½ cup granulated sugar
- ½ cup packed light brown sugar (for that chewy, caramel-like undertone)
- 1 large egg, room temperature
- 1 teaspoon pure vanilla extract (don’t skimp here!)
- ½ cup semi-sweet chocolate chips (or swap for chunks if you want a more rustic bar)
For the Filling:
- 8 oz cream cheese, softened (I let it sit out for at least an hour for smooth blending)
- ¼ cup granulated sugar (or less if you want a tangier swirl)
- 1 large egg yolk
- 1 teaspoon vanilla extract
For the Glaze:
- ½ cup powdered sugar
- 1 tablespoon milk or heavy cream (adjust for preferred drizzle thickness)
- ½ teaspoon vanilla extract or espresso for a fun twist
Step-by-Step Instructions
Step 1: Preheat & Prep Pan
Heat your oven to 350°F (175°C). Line an 8×8-inch square baking pan with parchment paper or grease it well—this step saved me from frustrating sticking problems more times than I can count. I like to let the parchment hang over the edges so lifting the bars out is a breeze once cooled.
Step 2: Mix Dry Ingredients
In a medium bowl, whisk together the flour, cocoa powder, baking powder, and salt. I find that evenly mixing the dry ingredients first helps avoid lumps and ensures that chocolate flavor is spread evenly throughout the batter.
Step 3: Mix Wet Ingredients
In a large bowl, combine melted butter, granulated sugar, and brown sugar with a spatula or whisk until smooth. Beat in the egg and vanilla extract until fully incorporated. Taking a moment here ensures your batter will be silky and rich.
Step 4: Combine
Slowly add the dry mixture to the wet ingredients, folding gently until just combined. Overmixing makes the bars tough, so stop as soon as you don’t see flour. Then fold in the chocolate chips—this is what makes every bite a little treasure.
Step 5: Prepare Filling
Beat together softened cream cheese, sugar, egg yolk, and vanilla until smooth and creamy. I’ve learned that starting with fully room-temp cream cheese makes this step so much easier; it results in a velvety filling that swirls effortlessly without lumps.
Step 6: Layer & Swirl
Spread half of the brownie cookie batter into the pan in an even layer. Dollop spoonfuls of the cream cheese filling all over the batter, then gently spread. Top with the remaining batter, and using a butter knife or skewer, swirl the layers together in a figure-eight pattern for a beautiful marbled look. This step is fun—you can be as neat or wild as you want here.
Step 7: Bake
Bake for 30-35 minutes. The bars are done when the centers are just set but still look a bit soft—think fudge rather than cake. A toothpick inserted in the middle should come out with moist crumbs, not wet batter. I sometimes rotate the pan halfway through for even baking, especially with older ovens.
Step 8: Cool & Glaze
Let the bars cool completely—this is key for clean slicing and firming up the texture. Once cooled, whisk together powdered sugar, milk or cream, and vanilla until smooth. Drizzle over the bars just before serving. The glaze adds a pretty finish and an extra layer of sweetness without overwhelming the chocolate.
Step 9: Slice & Serve
Use a sharp knife for neat bars—warming the blade under hot water and wiping it dry before each cut works wonders for clean edges. Serve at room temperature or slightly chilled. These brownie cookie bars are delicious on their own or paired with a scoop of vanilla ice cream. My kids and I love grabbing a bar with a glass of cold milk—it’s simple nostalgia on a plate!
What to Serve It With
For Breakfast: I know, it might sound crazy, but a small brownie cookie bar with your morning coffee is a treat I sometimes indulge in when I need a bit of weekend luxury. It pairs wonderfully with a strong dark roast or a creamy latte.
For Brunch: Imagine a platter with sliced bars, fresh berries, and a dollop of whipped cream—elegant but easy. A chilled mimosa or a fruity iced tea complements the richness beautifully.
As Dessert: These bars shine when served warm or at room temp with a scoop of vanilla bean or salted caramel ice cream. A drizzle of extra chocolate or caramel sauce and a few crunchy nuts on top make it feel like a restaurant treat at home.
For Cozy Snacks: Late-night cravings, homework breaks, or an afternoon pick-me-up—these bars are perfect. Pair them with a cup of hot cocoa or your favorite herbal tea, and you can’t go wrong. My family has an unspoken tradition: when someone’s feeling off, a plate of these bars shows up magically. It’s comfort that tastes like love.
Top Tips for Perfecting Your Brownie Cookie Bars
Zucchini Prep: Okay, so while this version doesn’t have zucchini, I’ve tried adding grated zucchini in the past to jazz it up with a moist texture. The trick? Grate it finely and squeeze out all the moisture with a clean towel to avoid soggy bars.
Mixing Advice: Don’t skip the “just combined” rule. Overmixing develops gluten and turns bars cakey, which isn’t what you want here. I always fold gently and stop the moment flour disappears. You’ll know—it looks fudgy and thick but still silky.
Swirl Customization: Feel free to get creative with your swirling tool. My favorite is a simple butter knife, but using a toothpick or skewer in small circles creates mesmerizing patterns. If you want more cream cheese flavor, swirl twice or dollop extra filling on top before baking.
Ingredient Swaps: Tried almond flour once—it made the bars lighter but less fudgy, which was a nice twist. If you substitute coconut oil for butter, expect a slightly fruity undertone. For dairy-free, almond or oat milk works well in the glaze; I tested it, and it actually made it creamier.
Baking Tips: Because ovens vary, start checking at 28 minutes. Remember, the bars will firm up as they cool, so err on the side of slightly underbaked rather than overbaked. Centre rack placement works best for even heat distribution.
Glaze Variations: If you’re short on time, a simple dusting of powdered sugar works beauties. For a punch, add espresso powder or orange zest to the glaze—both bring out different but wonderful notes in the chocolate.
I’ve learned so many little tricks from years of baking these that take them from good to unforgettable. Like chilling the cream cheese filling if your kitchen’s warm or putting the bars in the fridge for 15 minutes before slicing for perfect squares. Trust me, these tweaks really make a difference.
Storing and Reheating Tips
Room Temperature: You can safely keep these brownie cookie bars covered in an airtight container for up to 2 days. Just be sure to protect them from drying out by wrapping tightly or storing in a cake keeper. They stay soft and delicious that way.
Refrigerator Storage: Wrapped airtight or in a sealed container, I’d keep them for up to a week. Chilling changes the texture a bit, making them denser and chewier—which my family surprisingly loves. Just bring them to room temp before serving for best flavor.
Freezer Instructions: These bars freeze wonderfully. Cut them into individual squares, wrap each in plastic wrap, then place in a freezer bag or airtight container. They last up to 3 months this way. Thaw in the fridge overnight or at room temp for a quick treat.
Glaze Timing Advice: If you plan to freeze or store bars for a while, I recommend glazing just before serving. Glaze applied too early can get sticky or crack, especially out of the fridge. For a last-minute drizzle, whisk the glaze right before you serve—so fresh and shiny!
Frequently Asked Questions
Final Thoughts
I hope by now you’re picturing these brownie cookie bars sitting on your counter, smelling like warm chocolate heaven, just waiting to be devoured. I make these often when I want a clever dessert that feels fancy but comes together quickly. They’ve become a go-to for bringing smiles at family gatherings and quiet Sunday afternoons alike. If you end up loving this hybrid as much as I do, be sure to explore similar desserts—like chocolate swirl blondies or classic cream cheese brownies—to keep your baking adventures exciting. I really can’t wait to hear how your version turns out—please drop a comment and tell me all about your tweaks and favorite ways to enjoy these bars. Happy baking and here’s to many chocolatey, gooey moments ahead!
Brownie Cookie Bars How to Make Them
Ingredients
Main Ingredients
- 18.3 oz boxed fudge brownie mix (Duncan Hines brand) mixed according to box directions (eggs, water, and vegetable oil)
- 0.5 cup unsalted butter melted and cooled slightly
- 0.5 cup light brown sugar packed
- 0.5 cup granulated sugar
- 1 large egg room temperature
- 1 large egg yolk room temperature
- 1 tsp vanilla extract
- 1.33 cup all-purpose flour
- 2 tsp cornstarch
- 0.25 tsp baking soda
- 0.25 tsp salt
- 0.75 cup semi-sweet chocolate chips
Instructions
Preparation Steps
- Preheat the oven to 325°F. Line a 9x13 inch metal baking pan with parchment paper and lightly spray with non-stick spray. Set aside.
- Prepare the brownie mix according to the package directions (eggs, water, and vegetable oil). Stir until combined.
- Pour the prepared brownie batter into the baking pan and spread evenly.
- In a separate bowl, beat melted butter with light brown sugar and granulated sugar until fully combined.
- Add the egg, egg yolk, and vanilla extract to the butter and sugar mixture. Beat until smooth.
- Add flour, cornstarch, baking soda, and salt to the wet ingredients and mix on low speed until no dry spots remain.
- Fold in the semi-sweet chocolate chips evenly into the cookie dough batter.
- Using two spoons, drop dollops of cookie dough evenly over the brownie batter layer.
- Bake covered with aluminum foil for 20 minutes. Remove foil and bake for an additional 15-20 minutes until a toothpick comes out with a few moist crumbs and the cookie layer is golden brown.
- Remove from oven and allow to cool completely at room temperature.
- Lift the brookie out of the pan using the parchment overhang and slice into 12 large servings or 24 small servings.