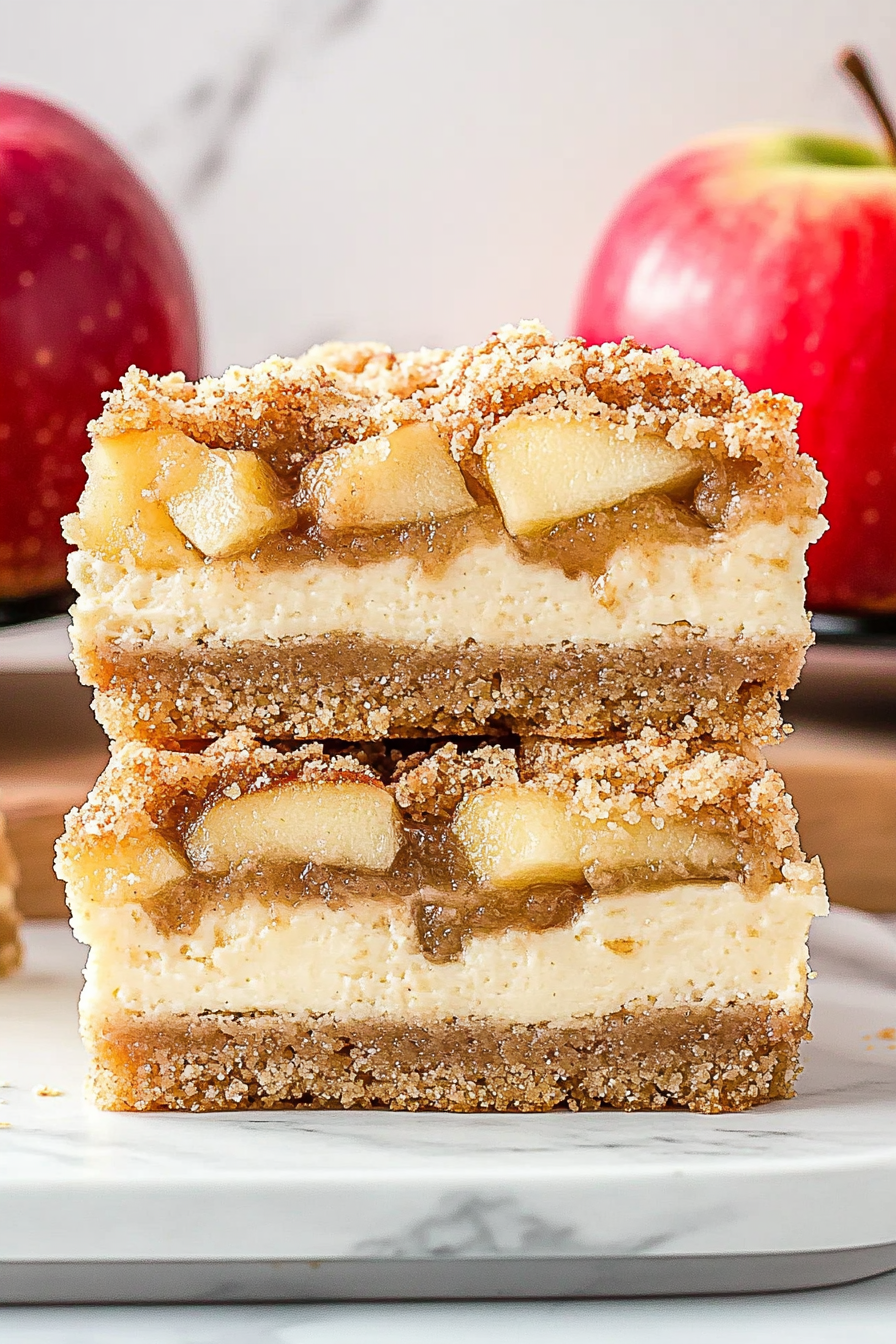
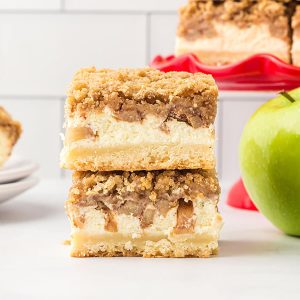
apple cheesecake bars
There’s something about the smell of cinnamon-spiced apples and creamy cheesecake wafting through the kitchen that instantly takes me back to my childhood. My mom used to make these apple cheesecake bars every fall, and honestly, they’d disappear faster than I could slice them. It’s the kind of recipe that doesn’t ask for fancy skills or a whole afternoon in the kitchen, yet somehow manages to capture all that cozy warmth you want in a dessert. If you’ve ever loved a good apple pie or a luscious cheesecake, imagine combining the two in a bar that’s easy to slice, share, and savor whenever the craving hits. That’s exactly what these apple cheesecake bars are all about—simple, comforting, and sneaky enough to have your kids asking for seconds before dinner.
What is Apple Cheesecake Bars?
Think of apple cheesecake bars like the best mash-up of two classic desserts, baked into a handy pan. It’s essentially a buttery crust topped with a rich, creamy cheesecake layer that’s dotted with cinnamon-spiced apple chunks—then baked until just set and golden around the edges. The name might sound fancy, but don’t be intimidated; it’s just cheesecake and apples getting along in a bar form that’s perfect for cutting into big squares or little bites. Since it’s not a full-on pie or a big cheesecake wheel, it’s easier to bake, easier to store, and perfect whenever you want dessert without committing to a whole cake. It’s like apple pie and cheesecake had a delicious love child, and I promise you, it’s worth every bite.
Why you’ll love this recipe?
I swear, this recipe is like that trusty old sweater you reach for when you want to feel comforted. First, the flavor combo—warm, spiced apples with that creamy, tangy cheesecake layer—is ridiculously addictive. The apples bring the perfect balance of sweetness and soft bite, while the cheesecake makes every forkful melt in your mouth. What I love the most is that it’s surprisingly simple to whip up. You don’t need to fuss with multiple bowls or perfect piping skills, which means even if you’re juggling dinner or a busy day, you can throw this together and have your kitchen smelling like fall in under an hour. Plus, it’s budget-friendly — fresh apples, cream cheese, pantry staples—you probably already have everything on hand. It’s great for breakfast on the go, a casual snack with coffee, or a quick dessert when you want to impress without stressing. Honestly, my family begs me to make it, and it’s saved many last-minute gatherings!
How do I make Apple Cheesecake Bars?
Quick Overview
Here’s the gist: you start with a simple crust base that acts as the sturdy “home” for our layers. After prepping your dry and wet ingredients (always the easy kind with minimal fuss), you fold in some fresh apples tossed in warming spices. The cheesecake layer is straightforward—just a few ingredients mixed until silky smooth. We build it up by layering the crust and the cheesecake filling, then swirl some apple goodness on top for that beautiful marbled look. Bake it off until the edges are golden, let it cool, drizzle a light glaze over, and you’re ready to cut into perfect little bars of chewy, creamy, fruity goodness. It’s easy enough for a weeknight treat but special enough for holiday sharing.
Ingredients
For the Main Batter:
- 1 1/2 cups all-purpose flour – use good quality flour for the flakiest base
- 1/2 cup granulated sugar – feel free to swap some for brown sugar if you like a touch of molasses hint
- 1/2 teaspoon baking powder – just enough for a slight lift
- 1/4 teaspoon salt – to balance out all that sweetness
- 1/2 cup unsalted butter (cold, cut into cubes) – key for a tender, buttery crust
For the Filling:
- 8 oz cream cheese (softened) – I always use full-fat for the creamiest texture
- 1/4 cup granulated sugar
- 1 large egg
- 1 teaspoon vanilla extract – the real stuff if you can, it makes a difference
- 2 medium apples, peeled and diced small (I love Fuji or Honeycrisp for their sweet-crisp bite)
- 1 teaspoon ground cinnamon – this is my go-to warming spice
- 1/4 teaspoon ground nutmeg – optional, but it adds a lovely depth
- 1 tablespoon lemon juice – keeps the apples bright and fresh
For the Glaze:
- 1 cup powdered sugar
- 2 tablespoons milk (or almond milk for a subtle twist)
- 1/2 teaspoon vanilla extract
- Pinch of cinnamon (optional for extra kick)
Step-by-Step Instructions
Step 1: Preheat & Prep Pan
Start by heating your oven to 350°F (175°C). Line an 8×8-inch square baking pan with parchment paper or lightly grease it. This helps when it comes to cutting out those crisp edges without sticking—nothing worse than breaking your beautiful bars!
Step 2: Mix Dry Ingredients
In a medium bowl, whisk together the flour, sugar, baking powder, and salt until evenly combined. This step might seem small, but it ensures your crust bakes evenly and has a nice crumbly texture.
Step 3: Mix Wet Ingredients
Using a fork or hand mixer, beat the softened cream cheese and sugar in a separate bowl until smooth and creamy. Add the egg and vanilla, then mix again until fully combined. You want the filling to be velvety without lumps—a sign it’s ready to meet the apples.
Step 4: Combine
Cut in the cold butter cubes into the dry mixture with a pastry cutter or your fingers, working quickly so the butter doesn’t melt. It should resemble coarse crumbs. This step is what makes the crust so tender and flaky, so don’t skip or overheat your butter!
Step 5: Prepare Filling
Toss your diced apples with cinnamon, nutmeg (if using), and lemon juice in a small bowl. This not only flavors your fruit but stops it from browning before baking. Fold half of the apple mixture gently into your cheesecake batter—just enough to spread apples evenly without breaking up the cream cheese too much.
Step 6: Layer & Swirl
Press about two-thirds of your crust mixture firmly into the bottom of the pan. Pour the cheesecake-apple filling over the crust and spread it evenly with a spatula. Sprinkle the remaining apples over the top, then crumble the leftover crust over that. To get a fun marbled look, use a butter knife to gently swirl the ingredients together—it doesn’t need to be perfect; in fact, the rustic swirls give it that homemade charm.
Step 7: Bake
Pop the pan in the oven for about 40-45 minutes, or until the top is lightly golden and the filling is mostly set but still slightly jiggly in the middle. Don’t worry if it’s not rock solid—it will firm up as it cools, and that creamy texture is exactly what you want. I like to check by inserting a toothpick near the edges; it should come out mostly clean with a few moist crumbs.
Step 8: Cool & Glaze
Once out of the oven, let the bars cool completely in the pan—this takes about an hour. While you wait, whisk together the powdered sugar, milk, vanilla, and cinnamon to make a smooth glaze. Drizzle the glaze in a thin zigzag pattern over the cooled bars for a sweet finish that’s not overpowering. If the glaze feels too thin, add a bit more sugar; if it’s thick, thin it with a few drops more milk.
Step 9: Slice & Serve
Use a sharp knife to cut into squares, cleaning the blade between cuts for the cleanest lines. Serve at room temperature or chilled, depending on what you like. These bars are wonderful with a cup of coffee or a scoop of vanilla ice cream for an extra indulgent treat. Just warning you—my kids have been known to sneak these right out of the fridge!
What to Serve It With
For Breakfast: These bars pair wonderfully with a hot, strong coffee or chai tea. They make a great grab-and-go morning treat, especially when sliced thin. I sometimes warm mine for 10 seconds in the microwave and add a dollop of Greek yogurt for a slightly tangy contrast that wakes up my taste buds.
For Brunch: Plate the bars alongside fresh fruit and maybe a light spinach salad for a sweet and savory balance. A mimosa or sparkling apple cider complements the autumn flavors beautifully, making it feel like a celebration even on a lazy weekend.
As Dessert: Dress these up with a scoop of vanilla bean ice cream or a drizzle of caramel sauce. The texture contrast between the creamy cheesecake and warm apples makes it especially cozy after dinner. A dusting of powdered sugar right before serving adds a pretty finishing touch, perfect for guests.
For Cozy Snacks: Nothing beats a casually served square with a glass of cold milk or a mug of hot cocoa on a chilly afternoon. My family often enjoys these while curled up with a good book or watching a movie. The bars are filling without being too heavy, which is a rare win for a sweet snack in our house.
Top Tips for Perfecting Your Apple Cheesecake Bars
Apple Prep: I always peel my apples for a smoother bite, but if you want a bit of texture and extra nutrition, leave the skin on—just be sure to wash and dry them well. Dicing them small helps them cook evenly and blend better into the cheesecake layer without sinking to the bottom.
Mixing Advice: Resist the urge to overmix after adding the flour and butter—you want a crumbly texture that presses well but isn’t dense. Similarly, keep the cheesecake batter smooth but don’t whisk it too aggressively or it might trap air and crack during baking.
Swirl Customization: When swirling, think gentle and playful. Use a butter knife or skewer to make large swoops or tiny tight curls for varying designs. It’s usually best when you don’t overdo it—a few neat swirls are visually appealing and keep the layers intact.
Ingredient Swaps: Cream cheese can be swapped with mascarpone for a richer finish, or use a dairy-free cream cheese to make it vegan-friendly (just add a flax egg or your preferred binder). For flour, I’ve experimented with half whole wheat or oat flour—it adds a nice nutty flavor but can make the crust less tender, so balance with a little extra butter.
Baking Tips: Keep your bars on the middle rack to bake evenly. If your oven tends to run hot, tent loosely with foil halfway through baking to prevent overbrowning. Don’t be tempted to cut them too soon; patience pays off with creamier, neater slices.
Glaze Variations: I like adding a pinch of cinnamon or a splash of bourbon to the glaze for an adult twist. If you want to skip the glaze, a dusting of powdered sugar or even a light spread of cream cheese frosting works beautifully. Just keep your icing light so it doesn’t overpower the apple-cheesecake harmony.
Storing and Reheating Tips
Room Temperature: You can keep the bars out on the kitchen counter for up to a day, covered loosely with a clean tea towel or cake dome to keep them from drying out. They remain soft and flavorful, perfect when you want to serve them fresh without fridge chill.
Refrigerator Storage: Store bars in an airtight container or cover tightly with plastic wrap—this keeps the glaze intact and the bars fresh for up to 4 days. I often find that the flavors deepen a bit overnight in the fridge, so they taste even better the next day.
Freezer Instructions: Wrap bars individually in wax paper and then place them in a freezer-safe bag or container. They freeze well for up to 3 months. Thaw overnight in the fridge and warm gently in a low oven or microwave before serving for that freshly baked feel.
Glaze Timing Advice: If you’re freezing, it’s best to glaze after thawing so the drizzle stays fresh and doesn’t crystalize. For short-term storage or serving the same day, glaze after cooling but before slicing, to keep the top looking perfect.
Frequently Asked Questions
Final Thoughts
I can’t stress enough how these apple cheesecake bars have become a family favorite—whether for a quick weekday pick-me-up or a cozy weekend treat. They strike that perfect balance of creamy, fruity, and sweet with just the right hint of spice. If you like this one, you might want to check out my apple crumb bars or classic cheesecake recipes that are every bit as satisfying but bring their own charm. These bars are some of those rare desserts that feel homemade, wholesome, and indulgent all at once. I’m really excited for you to try them and hear what your family thinks. There’s nothing better than swapping home-baked favorites, so drop a comment or share your tweaks—I love a good kitchen chat. Happy baking, friends!
Sweet Apple Cheesecake Bars Recipe
Ingredients
Main Ingredients
- 1.25 cups all-purpose flour
- 1 cup unsalted butter slightly melted
- 3 tablespoons granulated sugar
- 0.25 teaspoon salt
- 16 ounces cream cheese softened to room temperature
- 2 large eggs room temperature
- 0.5 cup granulated sugar
- 2 large Granny Smith apples peeled, cored, chopped (about 2.5 cups)
- 2 tablespoons granulated sugar
- 1 teaspoon ground cinnamon
- 1 cup light brown sugar packed
- 0.75 cup all-purpose flour
- 6 tablespoons unsalted butter slightly melted
- 1 teaspoon ground cinnamon
Instructions
Preparation Steps
- Preheat oven to 325 degrees F.
- Grease an 8x8 inch baking pan with non-stick cooking spray, then line with parchment paper leaving edges higher than the pan. Spray parchment paper lightly with non-stick spray. Set aside.
- In a medium bowl, beat together 1.25 cups flour, 1 cup melted butter, 3 tablespoons granulated sugar, and 0.25 teaspoon salt until mixture comes together with no dry flour remaining.
- Press crust evenly into the bottom of the prepared pan. If dough is sticky, spray spatula lightly with cooking spray to help spread dough evenly.
- Bake crust for 20 minutes until edges are slightly browned. If crust bubbles, poke holes with a fork to release air. Let cool for 20 minutes on top of oven.
- In a large bowl, beat 16 ounces softened cream cheese until smooth (about 1-2 minutes).
- Beat in 2 eggs and 0.5 cup sugar just until combined.
- Pour cheesecake layer over cooled crust.
- In a medium bowl, stir together chopped apples, 2 tablespoons sugar, and 1 teaspoon ground cinnamon. Apple pieces should be smaller than bite-sized but larger than diced.
- Sprinkle the apple mixture evenly over the raw cheesecake layer.
- In a medium bowl, beat together 1 cup brown sugar, 0.75 cup flour, 6 tablespoons melted butter, and 1 teaspoon cinnamon until crumbly. If necessary, use hands to mix until evenly crumbled.
- Evenly sprinkle the crumble topping over the unbaked apple layer.
- Place pan in oven and bake for 55 to 60 minutes until cheesecake center is no longer jiggly and does not look sunken.
- Cool at room temperature for 1 hour, then cover with plastic wrap and refrigerate at least 7 hours or overnight for best results.
- Once fully cooled, cut into 16 bars and store leftovers in an airtight container in the refrigerator for up to 4 days.