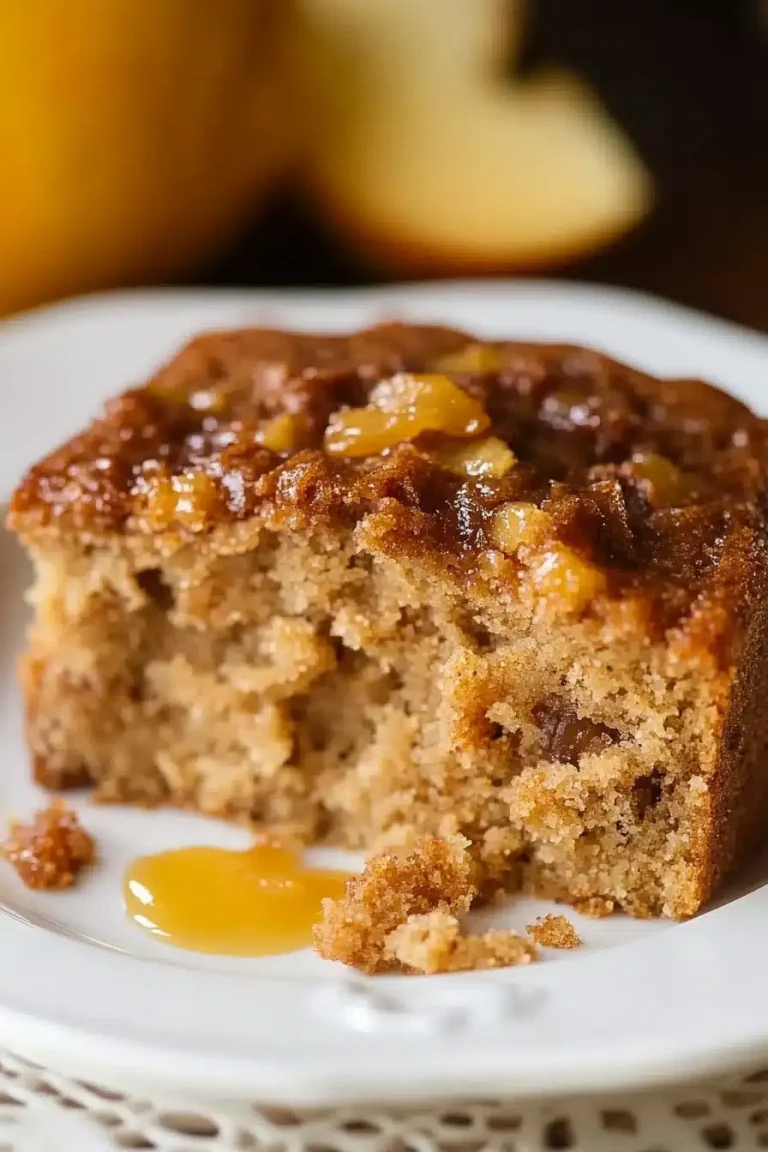
Kentucky Butter Cake
There’s something about the smell of butter melting into warm cake that instantly transports me to grandma’s kitchen on a lazy Sunday afternoon. That’s exactly what Kentucky Butter Cake does—it’s like a warm hug wrapped up in a golden slice of history. I remember the first time I tried this butter-soaked dessert; it was at a friend’s family reunion, and honestly, I couldn’t stop sneaking bites long before anyone served the main course. If you love the rich, tender crumb of a classic butter cake but want something that’s just a little more decadent—think of this as your buttery soulmate. The first time I made it at home, my family devoured it so fast I ended up making a double batch the very next week. Trust me, once you get a taste of this Kentucky Butter Cake, it’ll be the centerpiece on your dessert table for years to come.
What is Kentucky Butter Cake?
Okay, so Kentucky Butter Cake is basically the lovechild of a classic butter cake and a buttery glaze that seeps straight into every crumb. Think of it as a simple but oh-so-rich cake that’s soaked in a warm butter-sugar glaze right after baking, making it incredibly moist and tender inside. The name itself hints at its roots—this treat hails from the Bluegrass state, where good ol’ southern hospitality means welcoming everyone with something ridiculously delicious and made with lots of butter. It’s often described as a butter cake with a buttery “pudding-like” topping once it’s glazed. Really, it feels like a dessert and a comfort food wrapped in one, and if Southern cakes or pound cakes excite you, then this recipe will become your go-to. The best part? You don’t need fancy ingredients or decades of baking experience to pull this off.
Why you’ll love this recipe?
The first thing you’ll notice is the incredible buttery flavor that doesn’t just sit on top, but really soaks into the cake like it was meant to be part of every bite. What I love most about this Kentucky Butter Cake is that it marries simplicity with showstopping flavor—the batter is no-fuss, but the glaze takes it to a new level of indulgence. It’s like the cake is whispering, “Eat me, you deserve it.” Plus, this recipe uses everyday ingredients you probably already have in your pantry, making it a budget-friendly sweet treat that’s perfect for those last-minute dessert emergencies or weekend coffee dates.
And let me tell you, versatility is another huge bonus here. You can dress it up with a sprinkle of powdered sugar, pair it with fresh berries, or even add a scoop of vanilla ice cream on top when you want to wow your guests. It’s great for everything from a casual family snack to a fancy brunch centerpiece. Honestly, it’s one of those cakes that has become a family tradition at my house—my kids ask for it all the time, and it’s the first thing I bake when friends come over. If you’re a fan of that sticky, buttery charm you get from a good sticky bun or the nostalgic comfort of a homemade pound cake, this Kentucky Butter Cake is going to be your new obsession.
How do I make Kentucky Butter Cake?
Quick Overview
Here’s the simple scoop: you whip up a classic butter cake batter, bake it until golden and tender, and then pour a warm, buttery glaze right over the hot cake so it seeps in and makes it insanely moist and flavorful. The process is straightforward enough for any home cook, but the magic is in that glaze soak. I always find that the cake’s crumb holds onto the buttery goodness so well—it’s like it was made to cuddle up with that glaze. Honestly, I’ve made this dozens of times and never once did it turn out dry or boring. The secret? Timing your glaze just right so it absorbs perfectly without drowning the cake.
Ingredients
For the Main Batter:
- 1 ½ cups all-purpose flour (use fresh, good-quality flour for the best texture)
- 1 cup granulated sugar (not too fine, regular sugar adds a nice crunch)
- 2 tsp baking powder (too much will make the cake too airy, so measure carefully)
- ½ tsp salt (balances the sweetness beautifully)
- ½ cup unsalted butter, softened (room temp is key—don’t rush it with the microwave)
- 2 large eggs (farm-fresh if possible, adds richness)
- ½ cup whole milk (I’ve tried almond milk and it actually made it creamier!)
- 1 tsp vanilla extract (fresh and pure really makes a difference here)
For the Filling (optional but oh-so-good):
- ½ cup unsalted butter, melted (for that luscious middle layer)
- ½ cup brown sugar, packed (adds that deep caramel flavor)
- 1 tbsp cinnamon (optional, but adds warmth if you’re feeling fancy)
For the Glaze:
- ½ cup unsalted butter
- ½ cup granulated sugar
- ¼ cup heavy cream or whole milk (to keep it extra silky)
- 1 tsp vanilla extract
Pro tip: The glaze should be warm but not boiling when poured—too hot and it can make the cake soggy, too cool and it won’t soak in right.
Step-by-Step Instructions
Step 1: Preheat & Prep Pan
Start by preheating your oven to 350°F (175°C). Grease a 9×9-inch square baking pan with butter, then lightly dust it with flour or use parchment paper for an easy release. I’ve learned the hard way that skipping this step means a sticky mess—nothing ruins a buttery cake like a ruined bottom crust!
Step 2: Mix Dry Ingredients
In a medium bowl, whisk together the flour, baking powder, and salt thoroughly. This step ensures even distribution so your cake rises evenly without any surprise salty pockets. It’s good to mix this a bit longer than you think because baking powder can clump up sometimes.
Step 3: Mix Wet Ingredients
In a large bowl, cream the softened butter and sugar with an electric mixer until light and fluffy—this can take about 3 to 5 minutes. Then beat in the eggs one at a time, making sure each one blends in completely before adding the next. Stir in the vanilla and milk slowly. The batter should be beautifully smooth and glossy.
Step 4: Combine
Gradually add the dry ingredients to the wet, mixing on low speed just until everything is combined. Overmixing is the enemy here; it makes the cake tough, so stop as soon as the flour disappears into the batter. The batter will be thick but pourable, kind of like a rich pancake batter.
Step 5: Prepare Filling
If you’re using the filling, mix the melted butter, brown sugar, and cinnamon (if using) in a small bowl. This will create a lovely ribbon of caramel-y sweetness inside the cake, giving it a delightful surprise layer.
Step 6: Layer & Swirl
Pour half the batter into the pan in an even layer. Spoon the filling over the batter, then dollop the rest of the batter on top. Use a butter knife or skewer to gently swirl the filling into the batter, creating a marbled effect. Don’t overdo it, though—you want those dreamy swirls, not a completely mixed-in filling.
Step 7: Bake
Bake in the preheated oven for about 35 to 40 minutes, or until a toothpick inserted in the center comes out mostly clean with just a crumb or two. The edges should be golden and set. Every oven is a little different, so start checking around 30 minutes. I once pulled it out too early and the middle was gooey—still delicious but not quite the texture I wanted.
Step 8: Cool & Glaze
Let the cake cool in the pan for 10 minutes while you prepare the glaze. Melt the butter, sugar, cream, and vanilla together in a small saucepan, stirring until smooth and warm (not boiling). Pour the glaze evenly over the warm cake, letting it soak in. This is where the magic happens—the cake practically drinks the glaze right up!
Step 9: Slice & Serve
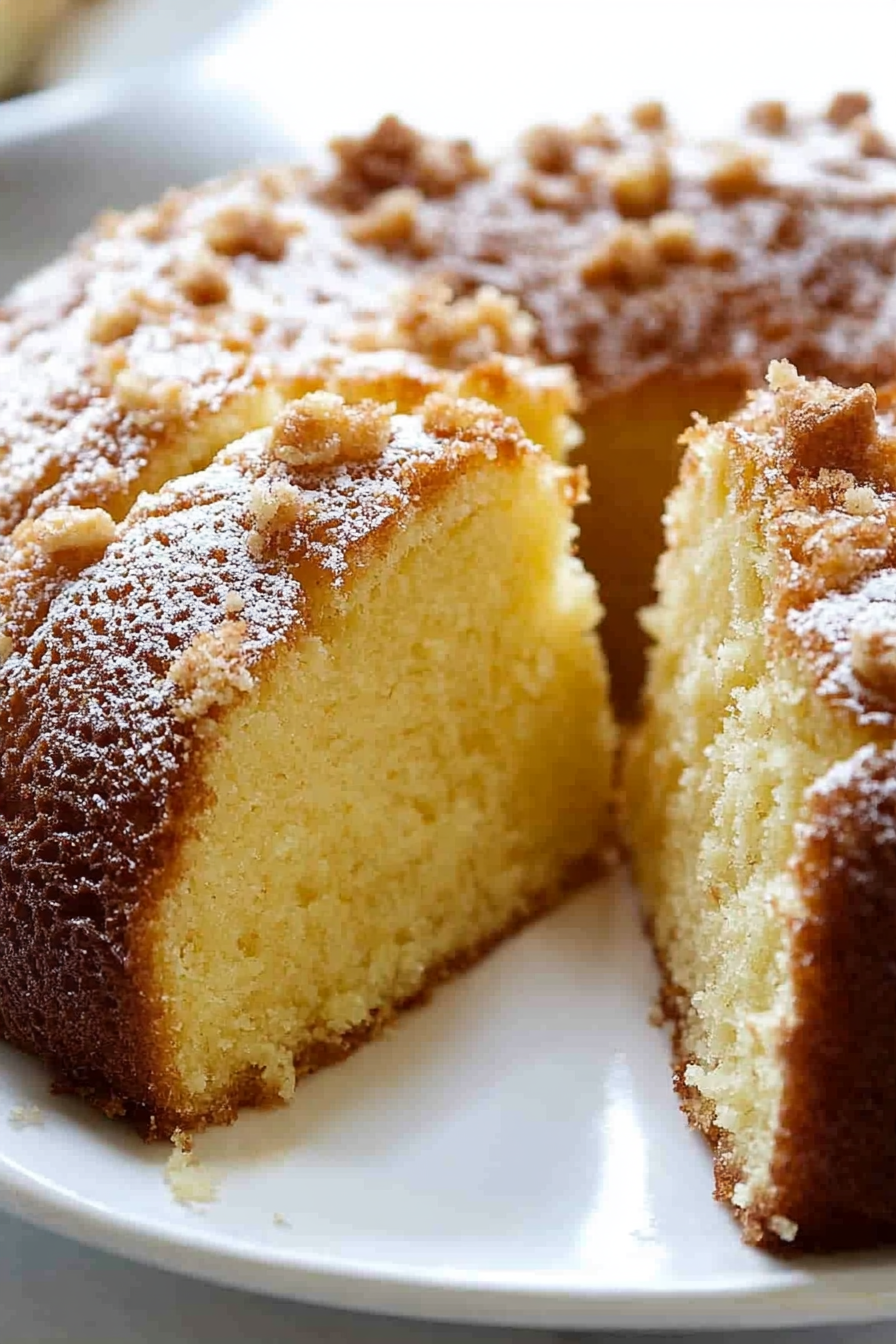
After the glaze has soaked in for about 15 minutes, slice the cake with a sharp knife. Serve warm or at room temperature—you’ll find it’s insanely good either way. I like to add a small scoop of vanilla ice cream or a dusting of powdered sugar for extra charm. This cake really shines when shared with friends and family over cups of coffee or tea.
What to Serve It With
For Breakfast: Nothing beats a warm slice with your morning coffee or a hot cup of black tea. I like to add fresh berries and a drizzle of honey on the side. My kids love it with a cold glass of milk—it’s like a special treat to start the day.
For Brunch: Plate it elegantly with whipped cream and sliced peaches or strawberries. A mimosa or a fresh-squeezed orange juice rings in that brunch vibe perfectly. This cake pairs well with light salads and quiches for a balanced spread.
As Dessert: Serve warmed with a scoop of ice cream or a dollop of homemade whipped cream. Sprinkle a little toasted pecans or drizzle caramel sauce for added texture and sweetness. It’s the kind of dessert that makes guests ask for the recipe right before the last bite.
For Cozy Snacks: It’s incredible just on its own with a cup of tea when you’re curled up with a good book or watching a movie. If you want a little extra, I sometimes toast leftovers lightly for a crunchy top—like a mini dessert crouton.
At family gatherings, this cake has become a tradition; it’s always the one offering that brings smiles and sometimes a few tears (happy, remember-the-past kind of tears). It fits every mood from celebratory to casual, and that’s why it’s so special to me.
Top Tips for Perfecting Your Kentucky Butter Cake
Butter Prep: Always use real unsalted butter and make sure it’s softened—not melted. Softened butter traps air when creamed with sugar, making the cake lighter and fluffier.
Mixing Advice: Don’t overmix once you add the dry ingredients. The batter should be just combined. Overdoing it can make the cake dense and chewy in a way you don’t want for this style.
Swirl Customization: When swirling the filling, go slow and easy. You want those pretty marbled streaks, not a fully integrated mix. It creates a nice visual and flavor contrast with each bite.
Ingredient Swaps: For dairy intolerance, I’ve swapped milk for almond milk, which actually gave the cake a richer, creamier taste. Coconut oil can substitute butter but will change the flavor noticeably, so I recommend sticking with butter for classic authenticity.
Baking Tips: Place the pan in the center rack of the oven to bake evenly. If your oven tends to run hot, lower the temperature by 10 degrees and bake a bit longer. Always test doneness with a toothpick—not by the color alone.
Glaze Variations: Want to change up the glaze? Try adding a splash of bourbon or a teaspoon of almond extract for a clear Southern twist. If you prefer a lighter glaze, cut back on the butter and sugar, but remember it’s the glaze that makes this cake truly memorable.
I learned early on that patience is key—waiting those extra minutes for the glaze to soak in changes the entire experience. Once, I got impatient and poured it over a hot cake and ended up with glaze dripping everywhere—lesson learned! Now that I know the right timing, it’s hands-down the best part of making this recipe.
Storing and Reheating Tips
Room Temperature: You can keep Kentucky Butter Cake covered tightly with foil or in an airtight container at room temperature for up to 2 days. It stays moist and buttery, although the texture softens slightly—kind of like homey comfort food should.
Refrigerator Storage: If you want to extend its life, store it in the fridge for up to 4 days. Use a glass or airtight container to keep it from drying out. When chilled, the cake firms up so it can be sliced neater, but I always bring it back to room temp before serving.
Freezer Instructions: For longer storage, wrap the cake tightly in plastic wrap and then in foil, or use a freezer-safe container. Freeze for up to 3 months. Thaw overnight in the fridge or at room temperature. If you want to get fancy, briefly warm slices in the microwave for 15 seconds to revive that buttery softness.
Glaze Timing Advice: For storing, I recommend glazing the cake just before serving for the best texture. However, if storing after glazing, keep it well-covered to prevent the glaze from hardening too much or becoming sticky. If reheating, a quick warm-up will soften the glaze back into that luscious buttery liquid.
Frequently Asked Questions
Final Thoughts
Kentucky Butter Cake is one of those timeless recipes that never gets old. The way that buttery glaze melds with the cake, creating a tender, moist, buttery slice that’s rich without being heavy—that’s the kind of baking magic I love to share. It’s always been a family favorite here, and I hope it becomes that for you too. Whether you’re baking for a special occasion or just because the craving hits at midnight, this cake won’t let you down. If you end up loving it as much as I do, try exploring other southern classics like chess pie or hummingbird cake—they pair beautifully if you’re in the mood for more baking adventures. Don’t forget to drop a comment and share how your version turned out. Happy baking!

Kentucky Butter Crunch Cake
Ingredients
Main Ingredients
- 8 ounce cream cheese room temperature
- 1.25 cups butter room temperature
- 3 cups granulated sugar
- 6 large eggs room temperature
- 2 teaspoons vanilla extract
- 3 cups cake flour
- 0.25 cups buttermilk or whole milk, room temperature
- 0.5 cup butter
- 1 cup granulated sugar
- 1 tablespoon vanilla
- 0.5 cup chopped pecans
Instructions
Preparation Steps
- Preheat oven to 325°F. Prepare a large bundt pan with butter and flour or spray with non-stick spray.
- In a stand mixer bowl fitted with the paddle attachment, beat cream cheese and 1.25 cups butter until smooth, about 3 minutes.
- Gradually add 3 cups sugar and beat until lighter and fluffy.
- Add eggs one at a time, beating well after each addition.
- Add vanilla extract and mix well.
- Add the cake flour all at once and mix until just combined.
- With mixer on low, add buttermilk and mix until incorporated.
- Remove bowl and scrape down sides with spatula to incorporate all ingredients fully.
- Pour batter into prepared bundt pan. Bake for 1 hour to 1 hour 20 minutes, until a toothpick inserted comes out with crumbs but no wet batter.
- Allow cake to cool slightly in pan while preparing glaze.
- In a saucepan over medium heat, combine 0.5 cup butter, 1 cup sugar, and 1 tablespoon vanilla. Stir until melted and smooth.
- Remove glaze from heat and set aside.
- Using a fork, poke holes all over the warm pound cake to break up the bottom crust.
- Pour half of the butter pecan glaze over the cake and let cool to room temperature, but not cold.
- After about 30 minutes, carefully flip the cake onto a serving platter.
- Reheat remaining glaze, add chopped pecans, and stir well.
- Pour pecan glaze over the top of the cake.
- Serve immediately; cake is best served slightly warm.