caramel coffee
You know those mornings? The ones where the alarm feels like a personal attack, and the thought of facing the day feels… well, impossible? I swear, on days like that, the only thing that gets me out of bed is the promise of something utterly delicious waiting for me. And this Caramel Coffee Swirl Bread? It’s my secret weapon. It’s not just a quick bread; it’s like a warm hug in loaf form, with the most incredible aroma that fills the whole house and instantly makes everything feel a little bit better. It’s way easier than it looks, and honestly, it’s become my go-to when I need a little something special without all the fuss. If you’ve ever loved a good coffee cake, imagine that flavor profile baked into a soft, tender loaf with swirls of gooey caramel running through it. Yep, it’s that good. My family devours it, and honestly, I often have to hide a slice for myself before it vanishes!
What is Caramel Coffee Swirl Bread?
So, what exactly is this magical creation? Think of it as the love child of a classic coffee cake and a comforting quick bread. It’s got that moist, tender crumb you expect from a good quick bread, but it’s infused with the warm, comforting flavors of coffee and, of course, those irresistible swirls of rich caramel. The “coffee” part isn’t about a super strong coffee flavor that punches you in the face; it’s more subtle, just enough to enhance the sweetness and add a lovely depth that pairs perfectly with the caramel. It’s designed to be approachable, meaning you don’t need any fancy techniques or a pastry degree to make it. It’s essentially a batter you whip up, layer with a caramel mixture, swirl it all together, and bake. Simple, right? It’s the kind of thing that makes you feel like a baking superstar even on your most chaotic days. It’s that perfect balance of a treat and something comforting.
Why you’ll love this recipe?
Honestly, there are so many reasons why this Caramel Coffee Swirl Bread has earned a permanent spot in my recipe binder, and I just know you’re going to adore it too. First off, the flavor is just out of this world. Imagine waking up to the scent of warm caramel and coffee filling your kitchen – it’s pure bliss. The combination of the soft, tender bread with those pockets of gooey, melted caramel is just heavenly. It’s not overly sweet, either; the coffee really balances everything out beautifully. But what I love most is how incredibly *easy* it is. Seriously, I can whip this up on a busy Saturday morning and have it ready to enjoy before my kids even finish their cartoons. There’s no yeast, no complicated steps, just straightforward mixing and baking. It’s a lifesaver when you’re craving something special but don’t have hours to dedicate to baking. Plus, it’s surprisingly budget-friendly! Most of the ingredients are pantry staples, making it an economical way to enjoy a decadent treat. And the versatility! You can enjoy it as a quick breakfast, a delightful brunch centerpiece, or even a comforting dessert. It’s perfect for those moments you need a little pick-me-up, a sweet treat with your afternoon tea, or a comforting end to a meal. It truly stands out because it delivers all that amazing flavor and comforting texture without any of the usual baking stress. It’s the kind of recipe that makes people say, “Wow, you made this?” and you get to smile and say, “Yep, it was so easy!”
How do I make caramel coffee swirl bread?
Quick Overview
This recipe is all about simple layering and swirling to create a beautiful, flavorful loaf. You’ll start by mixing up a quick batter, then create a simple caramel mixture. The magic happens when you layer these together and swirl them before baking. It’s a straightforward process that takes less than 20 minutes of active prep time, leaving you with a stunning and delicious bread that’s perfect for any occasion. It’s designed for busy home cooks who want impressive results with minimal effort. Trust me, the aroma alone while it bakes is worth it!
Ingredients
For the Main Batter:
2 ½ cups all-purpose flour: I always opt for a good quality unbleached all-purpose flour. It gives the bread a nice structure without being too dense. If you’re looking to go gluten-free, I’ve had success using a 1:1 gluten-free baking blend, though you might need a tiny bit more liquid.
1 ½ teaspoons baking powder: This is crucial for that lovely lift and tender texture. Make sure it’s fresh for the best results!
½ teaspoon baking soda: This works with the acidity in the recipe to give it an extra tender crumb.
½ teaspoon salt: It might seem small, but salt is a flavor enhancer, balancing out the sweetness and bringing out all the other yummy notes.
1 cup granulated sugar: For sweetness and moisture. We’ll add more in the swirl, so this keeps the base just right.
½ cup unsalted butter, softened: Use good quality butter, and make sure it’s softened to room temperature – not melted! This makes it so much easier to cream with the sugar.
2 large eggs: At room temperature, please! They incorporate much better into the batter when they’re not cold.
1 teaspoon vanilla extract: A must-have for that classic baked good aroma and flavor.
1 cup buttermilk: Buttermilk is my secret ingredient for an ultra-moist and tender crumb. If you don’t have any, you can make a quick substitute: just add 1 tablespoon of white vinegar or lemon juice to 1 cup of milk, let it sit for 5-10 minutes until it curdles slightly. It works like a charm!
2 tablespoons instant coffee granules or espresso powder: Dissolved in 2 tablespoons of hot water. This is where the subtle coffee flavor comes from. Don’t skip this! It really elevates the caramel. Make sure it’s fully dissolved.
For the Caramel Swirl:
¾ cup packed light brown sugar: The brown sugar gives the caramel that lovely deep flavor and soft texture.
2 tablespoons all-purpose flour: This acts as a thickener for the caramel so it doesn’t all just melt into the batter.
1 ½ teaspoons ground cinnamon: Cinnamon and caramel are a match made in heaven. It adds such a wonderful warmth.
6 tablespoons unsalted butter, melted: This is what makes the caramel spreadable and so luscious within the bread.
For the Simple Glaze:
1 cup powdered sugar: Sifted, if you want it super smooth, but I often don’t bother and it’s still delicious.
2-3 tablespoons milk or cream (or strong brewed coffee!): Start with 2 tablespoons and add more until you reach your desired drizzling consistency. Using coffee here really amps up the caramel coffee flavor!
½ teaspoon vanilla extract: Just a touch to round out the glaze flavor.
Step-by-Step Instructions
Step 1: Preheat & Prep Pan
First things first, get that oven preheated to 350°F (175°C). This ensures an even bake right from the start. Then, grab a standard 9×5 inch loaf pan. I like to grease mine really well with butter or cooking spray, and then give it a light dusting of flour. Tap out any excess flour. This little step is my insurance policy against a bread that sticks – nobody wants that frustration!
Step 2: Mix Dry Ingredients
In a large bowl, whisk together the 2 ½ cups of all-purpose flour, 1 ½ teaspoons of baking powder, ½ teaspoon of baking soda, and ½ teaspoon of salt. Give it a good whisk until everything is well combined. This makes sure your leavening agents are evenly distributed, which means a better rise and a more consistent texture. It’s a simple step, but it’s worth doing!
Step 3: Mix Wet Ingredients
In a separate medium bowl, cream together the 1 cup of granulated sugar and ½ cup of softened unsalted butter until light and fluffy. This is best done with an electric mixer, but you can absolutely do it by hand if you’re feeling ambitious! Beat in the 2 large eggs, one at a time, making sure to incorporate each one fully before adding the next. Stir in 1 teaspoon of vanilla extract. Now, gradually add in the 1 cup of buttermilk, alternating with the dissolved coffee mixture (the instant coffee dissolved in hot water). Mix on low speed just until combined. Don’t overmix here!
Step 4: Combine
Pour the wet ingredients into the bowl with the dry ingredients. Now, this is important: mix *just* until the flour streaks disappear. Seriously, a few lumps are perfectly fine! Overmixing develops the gluten too much, which can lead to a tough, dense bread. I usually switch to a spatula for this part to get a better feel for the batter.
Step 5: Prepare Filling
In a small bowl, combine the ¾ cup packed light brown sugar, 2 tablespoons of all-purpose flour, and 1 ½ teaspoons of ground cinnamon. Whisk this together until well combined. Then, pour in the 6 tablespoons of melted unsalted butter. Stir until it forms a thick, paste-like mixture. It should be spreadable but not too runny. This is your glorious caramel swirl!
Step 6: Layer & Swirl
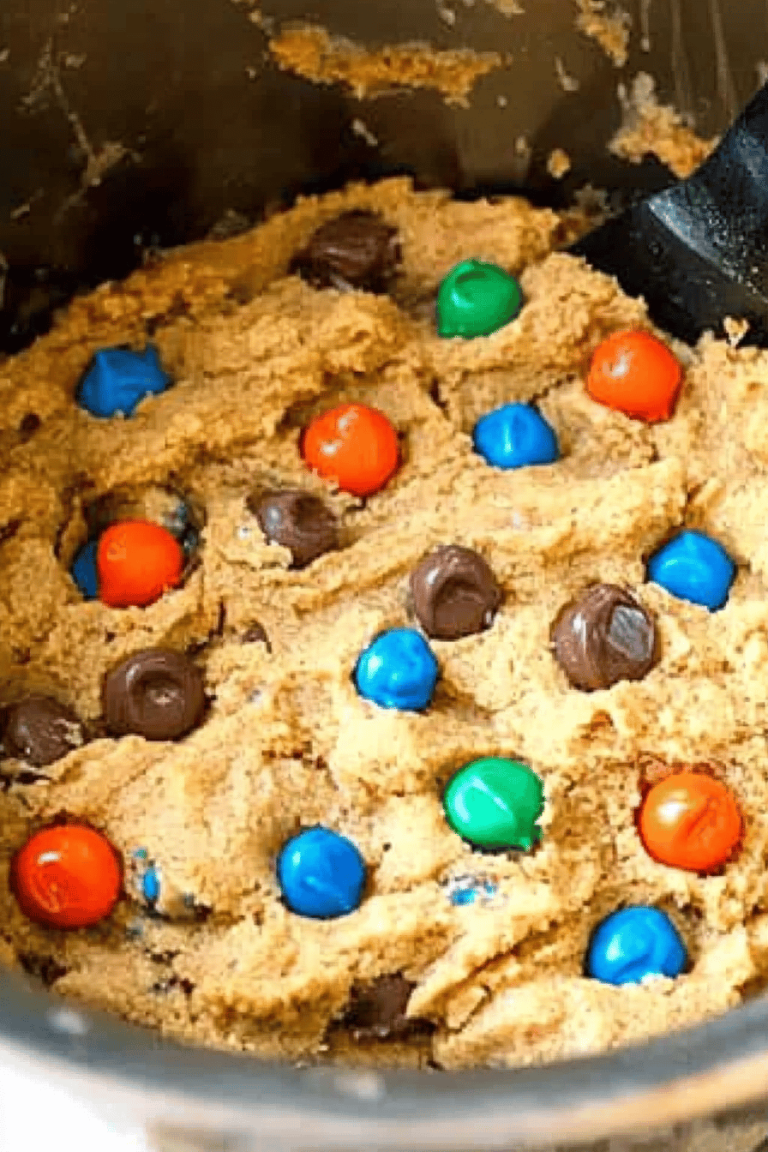
Pour about half of your batter into your prepared loaf pan and spread it out evenly. Dollop about half of the caramel mixture over the batter. Now, repeat with the remaining batter, spreading it over the caramel. Dollop the rest of the caramel mixture on top. Grab a butter knife or a skewer and gently swirl the caramel into the batter. Don’t go crazy and mix it all up; you want distinct ribbons of caramel. A few simple figure-eights or swirls is all you need to create beautiful marbling.
Step 7: Bake
Pop that beautiful loaf into your preheated oven. Bake for 50-60 minutes. The exact time can vary depending on your oven, so keep an eye on it. You’ll know it’s done when a wooden skewer or toothpick inserted into the center comes out clean, or with just a few moist crumbs attached (not wet batter!). The top should be a lovely golden brown.
Step 8: Cool & Glaze
Once baked, let the bread cool in the pan on a wire rack for about 10-15 minutes. This allows it to set up a bit before you attempt to remove it. Then, carefully invert the pan onto the wire rack to release the loaf. Let it cool *completely* before glazing. This is super important; if you glaze a hot loaf, the glaze will just melt off. While it cools, whisk together 1 cup of powdered sugar, 2-3 tablespoons of milk (or coffee!), and ½ teaspoon of vanilla extract in a small bowl. Add the liquid a tablespoon at a time until you get a nice, pourable consistency. Once the bread is totally cool, drizzle that glaze all over the top. Let the glaze set for a bit before slicing.
Step 9: Slice & Serve
Once the glaze has set, you’re ready to slice into this masterpiece! Use a serrated knife for the cleanest cuts. Serve it at room temperature for the best texture and flavor. This bread is fantastic on its own, but it’s also wonderful with a pat of butter or a dollop of whipped cream if you’re feeling extra decadent.
What to Serve It With
This Caramel Coffee Swirl Bread is so versatile, it really shines in so many different ways. For a simple weekday
For Breakfast:
I love it toasted lightly and served with a steaming mug of my favorite coffee. The slight crispness from toasting is divine. A smear of butter is all it needs to start the day off right.
For Brunch:
This loaf makes a stunning centerpiece for any brunch spread. Serve thick slices alongside fresh fruit salad, a quiche, or even some crispy bacon. A side of yogurt or a light cream cheese frosting would also be a lovely addition.
As Dessert:
If you’re craving something sweet after dinner, this bread is perfect. A warm slice with a scoop of vanilla bean ice cream is pure indulgence. You could also serve it with a dollop of whipped cream or a drizzle of extra caramel sauce for a truly decadent experience.
For Cozy Snacks:
This is my go-to when I just need a little something comforting. It’s perfect with a cup of tea or a glass of cold milk. My kids especially love it as an after-school treat. It’s simple, satisfying, and always a hit.
My family traditions often involve this bread on Sunday mornings. We’ll slice it up, pour ourselves some coffee or hot chocolate, and just enjoy a quiet moment together before the hustle of the week begins. It’s those simple moments that make this recipe so special to us.
Top Tips for Perfecting Your Caramel Coffee Swirl Bread
I’ve made this bread more times than I can count, and over the years, I’ve picked up a few tricks that really make a difference. Hopefully, these tips help you achieve bread perfection too!
Zucchini Prep: Oops, I meant to say **Batter Consistency:** Okay, so this isn’t a zucchini bread, but the principle of not overworking the batter is similar! When you combine the wet and dry ingredients, remember: less is more. A few tiny lumps are your friends. Overmixing will lead to a tough loaf, and nobody wants that. I always stop mixing as soon as I don’t see any big streaks of dry flour. Trust me on this one – a slightly lumpy batter bakes up so much more tender!
Mixing Advice: As I just mentioned, the key is to mix the batter *just* until combined. Use a spatula if you can, as it gives you a better feel for when to stop. You want a thick, pourable batter, not something you have to fight to get out of the bowl. If your batter seems too thick, you can stir in another tablespoon or two of buttermilk. If it seems too thin, a tablespoon of flour might help, but be cautious not to overmix after adding it.
Swirl Customization: The swirl is where you can get creative! When you dollop the caramel mixture on top of the first layer of batter, don’t worry about making it perfect. Then, after adding the second layer of batter, take your knife and gently swirl. You don’t need to dig deep or mix it all together. Think of it as drawing a few artistic lines. You want distinct ribbons of caramel running through the bread, not a muddy mess. A few simple passes are all you need for beautiful visual appeal and pockets of caramel goodness.
Ingredient Swaps: As mentioned, for gluten-free, a good 1:1 baking blend works well. For the buttermilk, the homemade substitute is a lifesaver. If you don’t have instant coffee granules, you can dissolve 1-2 teaspoons of espresso powder in the hot water for a more intense coffee flavor. And for the glaze, using strong brewed coffee instead of milk adds another layer of coffee flavor that’s just divine. Don’t be afraid to experiment with your favorite flavor extracts too – a touch of almond extract in the batter or glaze can be lovely.
Baking Tips: Every oven is different! I always recommend using an oven thermometer to ensure your oven is actually at 350°F (175°C). Place your loaf pan in the center of the oven for the most even heat distribution. If the top is browning too quickly before the center is cooked, you can loosely tent the loaf with aluminum foil for the last 15-20 minutes of baking. Check for doneness with a toothpick inserted into the thickest part of the bread. A few moist crumbs are fine, but raw batter means it needs more time.
Glaze Variations: The simple glaze is fantastic, but you can get creative! For a richer flavor, use half-and-half or heavy cream instead of milk. If you like a thinner glaze, just add a little more liquid. For a fancier finish, you can sprinkle some chopped toasted pecans or walnuts over the glaze while it’s still wet. Some people also prefer no glaze at all, which is perfectly fine; the bread is delicious on its own!
Storing and Reheating Tips
Proper storage is key to keeping this delicious Caramel Coffee Swirl Bread fresh and moist. I’ve found these methods work best:
Room Temperature: Once the bread is completely cool and the glaze has set, you can store it in an airtight container or wrap it tightly in plastic wrap at room temperature. It should stay fresh and delicious for about 2-3 days. I usually keep it on the counter if we plan to finish it within that time frame. The moisture from the caramel helps keep it from drying out.
Refrigerator Storage: If you live in a very warm climate, or if you want to keep it for a bit longer, the refrigerator is your friend. Wrap it tightly in plastic wrap, then in foil, or place it in an airtight container. It will keep well in the fridge for up to 5-7 days. Just be aware that chilling can slightly firm up the caramel, but it’s still perfectly enjoyable.
Freezer Instructions: This bread freezes beautifully, which is a lifesaver for future cravings! Once completely cooled and glazed, wrap the entire loaf (or individual slices) very tightly in plastic wrap, followed by a layer of aluminum foil. You can also use a freezer-safe bag or container. It will keep well in the freezer for up to 2-3 months. For the best quality, try to use it within that timeframe.
Glaze Timing Advice: I always recommend glazing the bread *after* it’s completely cooled. If you’re freezing the bread, it’s best to freeze it *without* the glaze. Once you thaw it, then you can prepare a fresh glaze and add it. If you do glaze it before freezing, the glaze might become a bit sticky or lose its pristine finish upon thawing. For room temperature or refrigerated storage, glazing after cooling is the way to go for the best appearance and texture.
Reheating: If your bread has been refrigerated or is slightly stale, a few minutes in a warm oven (around 300°F or 150°C) or a toaster oven can revive it beautifully. You can also gently warm individual slices in the microwave for about 10-15 seconds. It brings out that wonderful aroma and makes the caramel gooey again.
Frequently Asked Questions
Final Thoughts
So there you have it – my absolute favorite Caramel Coffee Swirl Bread! I really hope you give this recipe a try. It’s the kind of bake that just brings a smile to everyone’s face, and it’s proof that you don’t need to be a master baker to create something truly special. It’s perfect for those cozy mornings, a sweet treat with afternoon tea, or even a simple dessert. If you love the comforting flavors of coffee and caramel, this bread is going to be right up your alley. It’s a recipe that’s been tested and loved countless times in my kitchen, and I’m so excited for it to become a favorite in yours too!
If you try this out, I would absolutely *love* to hear how it turns out for you! Leave a comment below and tell me what you think, or share your own favorite variations. And if you’re a fan of comforting, flavorful bakes like this, you might also enjoy my [Link to another relevant recipe, e.g., “Moist Chocolate Chip Banana Bread”] or my [Link to another relevant recipe, e.g., “Easy Cinnamon Swirl Coffee Cake”]. Happy baking, everyone!
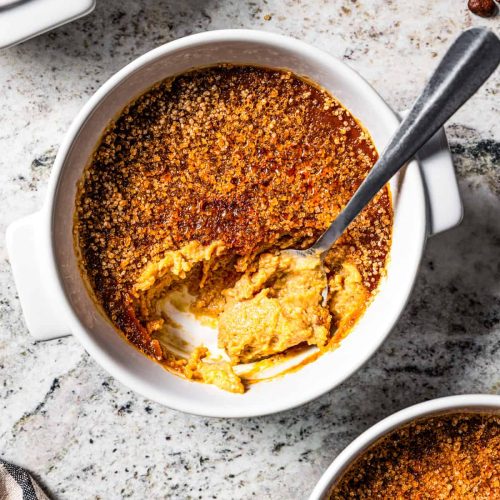
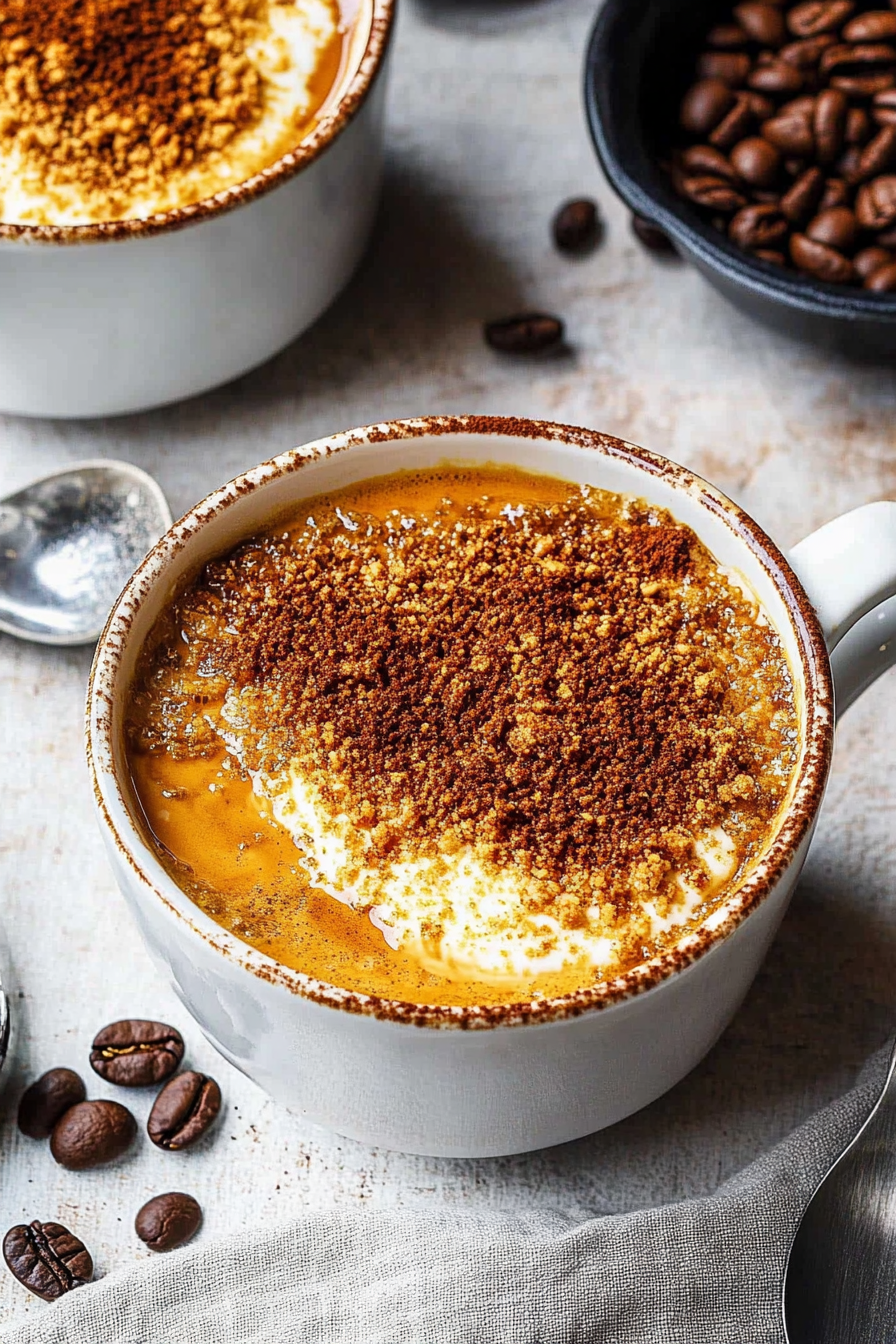
How Coffee Caramel Crème Brûlée Charms
Ingredients
Main Ingredients
- 0.5 cup heavy whipping cream
- 2 teaspoons dark-roast instant coffee grounds
- 6 large egg yolks
- 0.33 cup granulated sugar
- 0.125 teaspoon salt
- 1.5 cups heavy whipping cream
- 0.33 cup caramel sauce
- 4 teaspoons raw sugar
- cups boiled water for water bath
Instructions
Preparation Steps
- Prepare the coffee cream by pouring 0.5 cup of heavy cream and 2 teaspoons of instant coffee grounds into a small saucepan. Heat until it simmers, then remove from heat and cover to steep for 30 minutes.
- Preheat the oven to 325°F.
- In a large bowl, whisk together 6 egg yolks, 0.33 cup granulated sugar, and 0.125 teaspoon salt until well blended.
- Mix the coffee and caramel cream by combining 0.33 cup caramel sauce with 1.5 cups heavy whipping cream. Strain the steeped coffee cream into the caramel cream, discarding coffee grounds.
- Slowly whisk the coffee-caramel cream mixture into the egg yolk mixture until fully combined.
- Arrange four 6-ounce ramekins in a roasting pan and divide the custard mixture evenly among them.
- Pour enough boiled water into the roasting pan to reach halfway up the sides of the ramekins.
- Bake the custards for 1 hour and 15 minutes. Remove from the oven and refrigerate the ramekins for 40 minutes.
- Sprinkle 1 teaspoon of raw sugar on top of each custard. Broil the ramekins for 2 minutes or until the sugar melts and caramelizes.
- Refrigerate the brûlées for at least 3 hours before serving chilled.