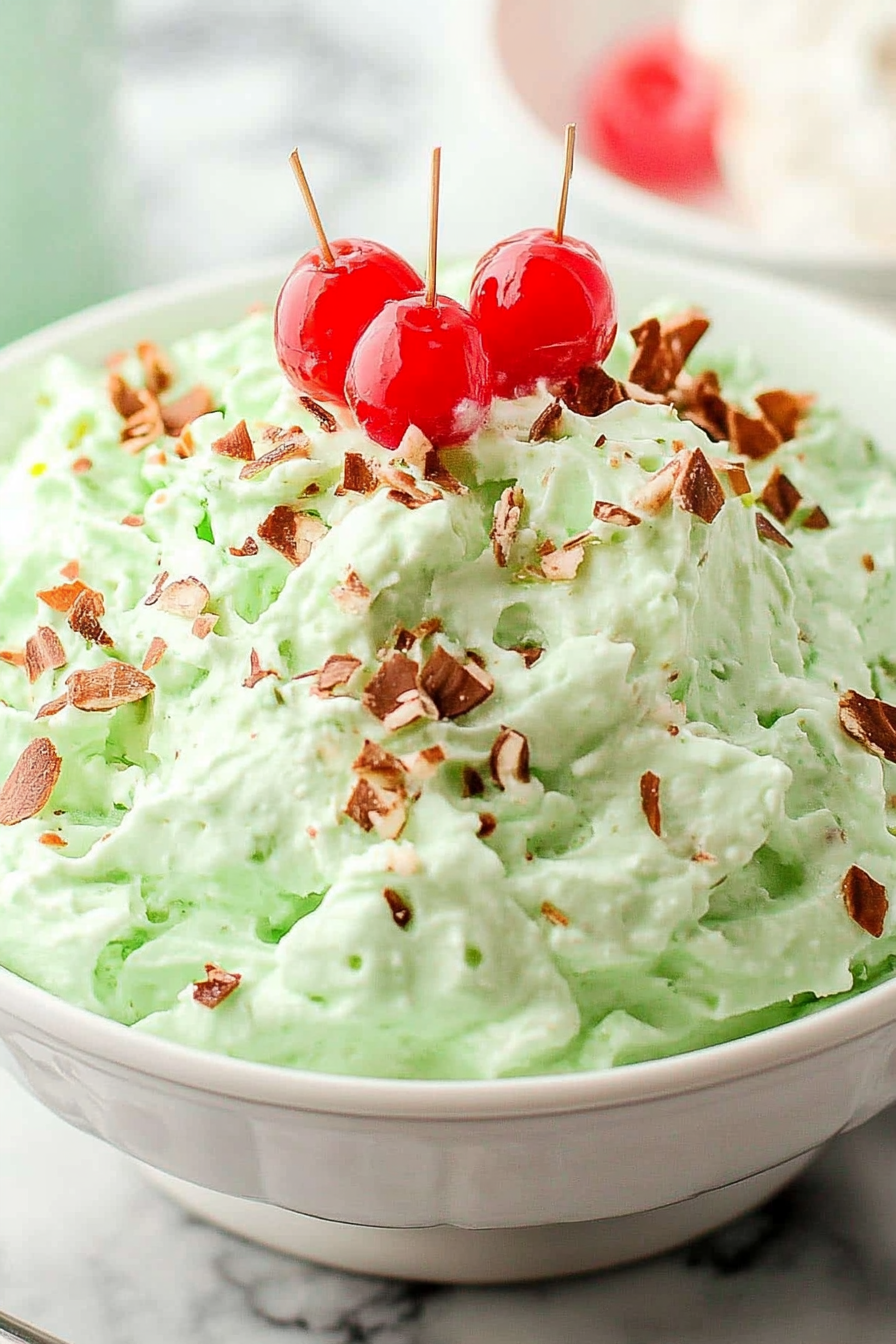
Watergate Salad
Whenever the summer garden blesses me with a mountain of zucchini, I know it’s time to pull out this cherished zucchini bread recipe. I swear, the moment I slice into this loaf, the smell alone pulls me right back to my grandma’s kitchen — warm, cozy, and filled with the laughter of family. It’s not just any zucchini bread; it’s that perfect blend of moist, tender, and lightly sweet that has my kids sneaking slices before dinner. If you’re thinking, “I could go for a sweet treat without the fuss of a full-on cake,” this one’s a lifesaver. It’s simpler than banana bread but just as comforting, and honestly, it disappeared within minutes during my last Sunday bake-off. Trust me on this one — once you make it, you’ll keep coming back to it for those cozy mornings or quick, feel-good snacks.
What is Grandma’s Zucchini Bread?
Think of this as your classic homemade quick bread, with all the goodness and tenderness packed into each slice. It’s essentially a soft, tender loaf loaded with grated zucchini, giving it natural moisture and a subtle earthiness that balances perfectly with the sweetness. The “moist” part is no accident — over the years, I’ve mastered the balance so your bread never turns dry or crumbly. The zucchini hides so well you don’t even notice it’s there, making it a sneaky way to sneak some veggies into your kiddos’ diets. My grandma named it just like that: “moist” — because that was always her top priority. She’d bake a batch almost every weekend, and it was the family’s pick-me-up or gift whenever someone needed cheering up. It’s a humble loaf, but one with heart.
Why you’ll love this recipe?
What I love most about this zucchini bread is how it feels like a warm hug from the inside out. The flavor profile is so well-rounded — lightly sweet with hints of cinnamon and nutmeg, and the zucchini gives it a tender crumb that’s unlike any other quick bread I’ve tried. Plus, it’s incredibly forgiving; even if you’re new to baking, this recipe never judges. It’s a lifesaver on busy nights when you want to whip up something from scratch without fussing over complicated steps or fancy ingredients. I love how budget-friendly it is, too. A couple of garden zucchinis, pantry staples like flour and sugar, and a few spices you probably already have in your kitchen — done. It’s incredibly versatile as well. Sometimes, I add walnuts or chocolate chips when I’m feeling adventurous, or swap out the regular sugar for maple syrup to give it a richer twist. I also enjoy pairing it with my favorite morning coffee, but it’s just as wonderful as an afternoon pickup with a glass of cold milk. Every time I make this, it feels like I’m carrying on a lovely family tradition, and honestly, hearing my kids ask for seconds just makes my day.
How do I make my grandmother’s Zucchini bread?
Quick Overview
This zucchini bread is a breeze to make, combining fresh grated zucchini with a blend of warm spices into a batter that comes together in one bowl. What’s great about this method is it’s quick, with minimal mess, and doesn’t require any fancy equipment — just a good old mixing bowl and a loaf pan. The magic really happens when the zucchini and spices meet, creating a fragrant, moist loaf that bakes up beautifully golden on the outside and tender inside. Baking it low and slow guarantees that perfect texture every time, even if your oven runs a bit hot or cool. I love thinking about how this simple loaf brings a little calm and sweetness right into my busy day.
Ingredients
For the Main Batter:
– 2 cups grated zucchini (about 2 medium zucchinis), packed loosely — make sure to grate fresh and avoid watery squishy ones for best texture.
– 1¾ cups all-purpose flour — I stick with unbleached if I can find it.
– 1 tsp baking soda — helps keep it light.
– ½ tsp baking powder — just a little extra lift.
– 1 tsp ground cinnamon — the warm spice that pairs wonderfully with zucchini.
– ½ tsp ground nutmeg — use fresh if you’ve got it; it makes such a difference.
– ½ tsp salt — enhances all the flavors.
– 1 cup granulated sugar — you can swap half with brown sugar for a deeper taste.
– ½ cup vegetable oil — but I’ve tested this with melted coconut oil and it was surprisingly good.
– 2 large eggs — room temperature helps with better mixing.
– 1 tsp vanilla extract — don’t skip this, it adds a lovely aroma.
Optional Add-ins:
– ½ cup chopped walnuts or pecans — for some hearty crunch.
– ½ cup mini chocolate chips — because sometimes you just gotta.
For the Glaze:
– 1 cup powdered sugar — sifted to avoid clumps.
– 2–3 tbsp milk (dairy or almond milk works beautifully) — start with less and add more to reach a drizzling consistency.
– ½ tsp vanilla extract — to keep that warm flavor going.
> Note: You can swap vanilla for almond extract or lemon zest for a bright twist.
Step-by-Step Instructions
Step 1: Preheat & Prep Pan
Start by preheating your oven to 325°F (160°C) — the lower temp helps the bread bake evenly and stay moist. Grease a 9×5-inch loaf pan with butter or non-stick spray, then dust with a little flour to ensure your bread slides out effortlessly. I always line mine with parchment paper so I get perfect edges every time.
Step 2: Mix Dry Ingredients
In a large bowl, whisk together the flour, baking soda, baking powder, cinnamon, nutmeg, and salt until evenly combined. The spices should be dispersed throughout, and your kitchen will start smelling delightful already. This step ensures your bread gets that consistent flavor and texture from slice to slice — don’t skip it.
Step 3: Mix Wet Ingredients
In a separate bowl, beat the sugar with oil and eggs until silky and smooth. Add in the vanilla extract, capturing that sweet scent as you go. The key here is to get everything blended without overbeating, which can make the bread dense. I find using a hand mixer on low works best.
Step 4: Combine
Gently fold the dry ingredients into the wet mixture until just combined — don’t overmix! It’s okay if it looks a bit lumpy. Then fold in your grated zucchini and any optional nuts or chocolate chips. The zucchini should be evenly distributed but reserve some moisture to keep the bread from drying out.
Step 5: Prepare Filling
No special filling needed here — it’s the zucchini itself that’s the star. But sometimes, I toss the nuts or chocolate chips with a teaspoon of flour before folding them in to prevent sinking. It’s a small trick that really works!
Step 6: Layer & Swirl
Pour the batter evenly into your prepared loaf pan and gently smooth the top with a spatula. If you want to get fancy, you can swirl in a cinnamon sugar mixture before baking — just sprinkle and use a knife to create a marbled effect. It looks extra pretty and gives a crunchy top layer that my kids adore.
Step 7: Bake
Bake for about 60–70 minutes, or until a toothpick inserted in the center comes out clean. Ovens vary, so start checking around 55 minutes. Avoid opening the oven too often, or the bread might get dense. You’ll know it’s done when the edges pull away slightly from the pan and it feels springy to gentle touch.
Step 8: Cool & Glaze
Let the bread cool in the pan for about 15 minutes, then carefully transfer it to a wire rack. Once it’s mostly cool (warm but not hot), drizzle your glaze over the top. If you glaze too soon, it might melt off; too late, and it won’t soak in. This timing is my little secret to that perfect glossy finish.
Step 9: Slice & Serve
Use a serrated knife for clean cuts, and slice thick or thin depending on your mood. This bread tastes delightful warm with a pat of butter or just as it is. I prefer it slightly warm with my afternoon tea, but my kids love it cold straight from the fridge.
What to Serve It With
For Breakfast: Pair a thick slice with your morning coffee or a hot latte. Adding a smear of cream cheese or almond butter turns it into a filling start to your day.
For Brunch: Serve it alongside fresh fruit and scrambled eggs for an effortless yet elegant spread. A splash of orange juice or a mimosa complements the cinnamon-spiced flavor beautifully.
As Dessert: Top warm slices with vanilla ice cream or a drizzle of honey for a cozy, simple dessert after dinner. The nutmeg in the bread pairs wonderfully with a glass of spiced tea or apple cider.
For Cozy Snacks: This zucchini bread is my go-to for a late-night nibble or an afternoon pick-me-up. I love it with a cozy blanket and a cup of herbal tea when I need a quiet moment. It also travels well — great for school lunches or picnic snacks.
At family gatherings, this bread is always the first to disappear. We’ve made it tradition to bring it along whenever we visit relatives, and it’s become synonymous with sharing stories and laughter. Honestly, with a recipe this easy and tasty, it’s no wonder it’s become a household favorite!
Top Tips for Perfecting Your Grandma’s Moist Zucchini Bread
Zucchini Prep: Use fresh, firm zucchinis. I’ve learned the hard way that watery zucchinis turn your bread soggy. After grating, gently squeeze out some excess moisture with a clean kitchen towel — but don’t overdo it! You want the bread moist but not mushy.
Mixing Advice: Resist the urge to overmix after combining wet and dry ingredients. Overmixing activates gluten and can make the bread tough. Stop once you see no more dry flour. This keeps your bread tender every single time.
Swirl Customization: For a beautiful cinnamon swirl, sprinkle a mix of cinnamon, sugar, and a pinch of salt over half the batter, then gently swirl it with a knife. You can also get creative with cocoa powder or pumpkin spice blends to switch things up visually and in flavor.
Ingredient Swaps: I’ve swapped all-purpose flour halfway with whole wheat flour — it adds a nice nuttiness, but the bread turns a bit denser. For oils, melted butter or coconut oil works well, though the flavor varies slightly. Feel free to reduce sugar by ¼ cup if you prefer less sweetness; just remember those spices brighten everything nicely.
Baking Tips: Place your loaf pan on the middle rack for even heat distribution. If you have a convection oven, lower temperature by 25°F. Use a toothpick test for doneness, and if edges brown too fast, tent with foil halfway through baking.
Glaze Variations: The simple vanilla glaze is classic, but you can jazz it up by adding lemon zest or swapping vanilla for almond extract. For a thicker glaze, add more powdered sugar; for a thinner drizzle, add more milk — I usually eyeball it to get the perfect flow.
One personal lesson I’ve learned: letting the bread cool a bit before glazing truly prevents a mess and keeps your icing shining. Don’t rush it; patience pays off in the final look and taste!
Storing and Reheating Tips
Room Temperature: Wrapped tightly in plastic wrap or stored in an airtight container, this bread stays fresh for about 2 days on the counter. I usually keep it on my kitchen counter, covered, and it retains that fresh-baked feel without drying out.
Refrigerator Storage: To keep it longer, refrigerate in an airtight container for up to a week. The bread firms up but warms up nicely in a toaster oven or microwave. I recommend slicing before refrigerating for easy grab-and-go snacks.
Freezer Instructions: For longer storage, wrap slices individually in plastic wrap and place in a freezer-safe bag. It lasts up to 3 months this way. To thaw, pop slices in the microwave for about 20 seconds, or let thaw at room temp for an hour — either way brings it back to near-fresh.
Glaze Timing Advice: If freezing, it’s best to glaze after thawing, as freezing may affect the texture of the icing. If you want to glaze before serving, keep the bread unglazed during storage, and drizzle fresh glaze when ready to enjoy.
Frequently Asked Questions
Final Thoughts
This zucchini bread isn’t just another loaf; it’s the sum of all those warm afternoons and shared smiles in my family kitchen. Every bite carries comfort, simplicity, and a little bit of magic from those fresh zucchinis. It holds a special place in my heart, and it’s one of those recipes I hope you treasure as much as I do. If you give it a try, please come back and share how it turned out! Maybe you’ll find your own spin or secret add-ins to make it yours. And if you enjoy this kind of homey bake, you might want to check out my cinnamon apple muffins or homemade banana bread — both are big hits in my house. Happy baking and warm hugs to you from my kitchen to yours!

Retro Pistachio Delight A Simple Watergate Salad
Ingredients
Main Ingredients
- 2 boxes pistachio pudding mix
- 20 oz crushed pineapple drained
- 12 oz whipped topping
- 0.5 cup chopped pecans
- 1.5 cups mini marshmallows white
- 1 cup shredded coconut optional
- maraschino cherries for garnish
Instructions
Preparation Steps
- In a large bowl, stir together the crushed pineapple and pistachio pudding mix until the pudding mix is fully dissolved and the mixture thickens.
- Add the mini marshmallows, chopped pecans, and shredded coconut to the bowl and stir to combine.
- Fold in the whipped topping gently until everything is evenly mixed.
- Transfer the salad to a serving bowl and garnish with additional chopped pecans and maraschino cherries on top.