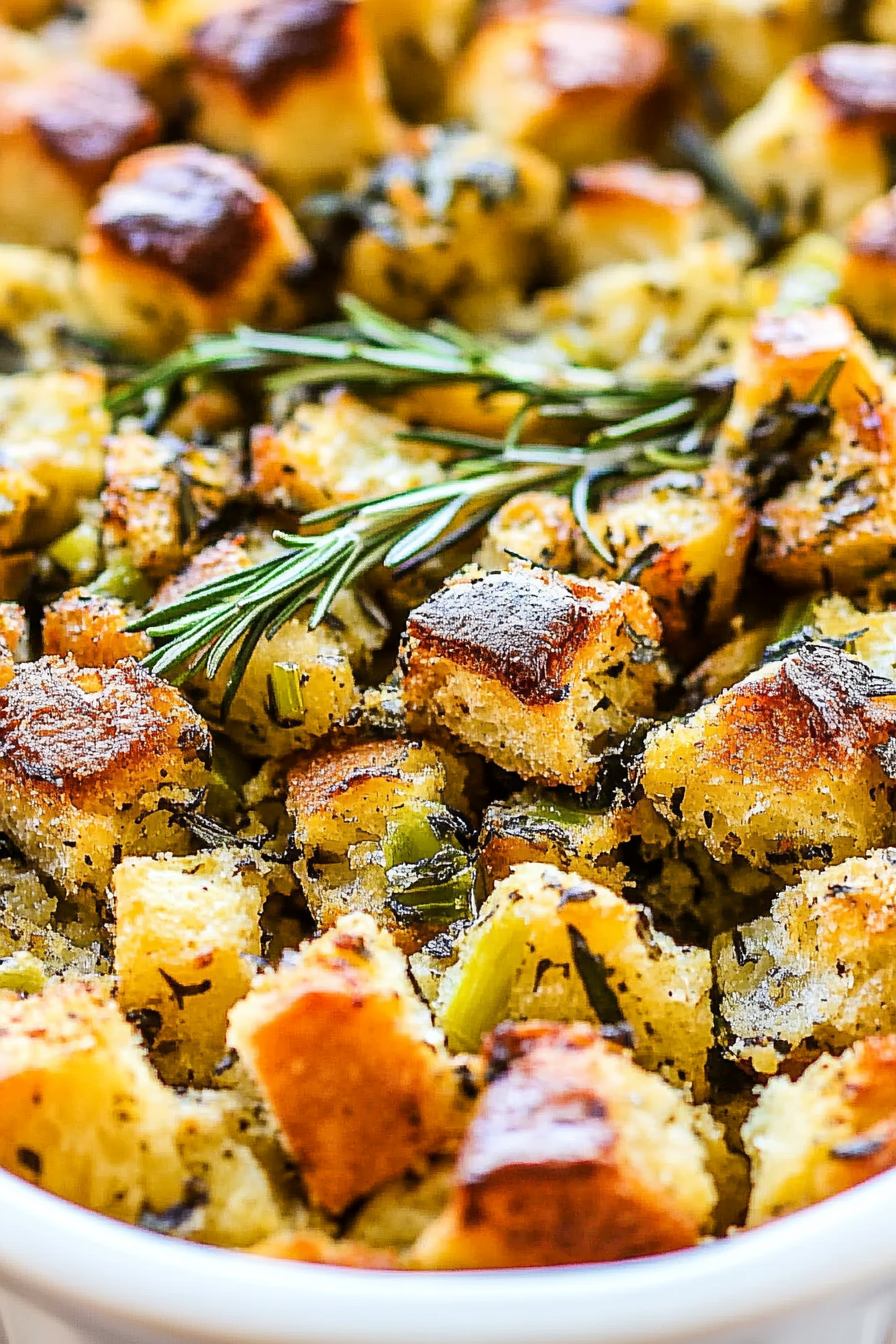
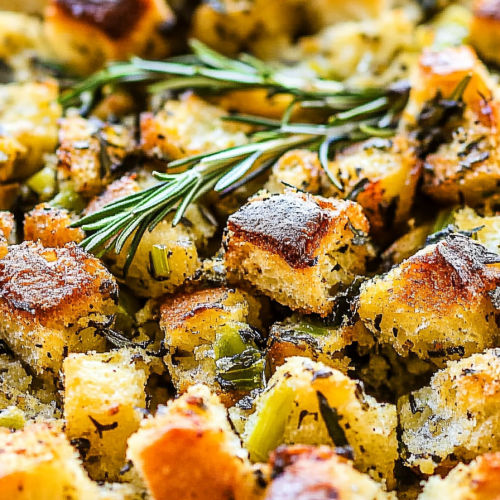
Thanksgiving stuffing
Oh, Thanksgiving stuffing. It’s more than just a side dish, isn’t it? For me, it’s the edible embodiment of cozy gatherings, the comforting aroma that signals family is near, and that first incredible bite that just screams “holiday.” I remember being a kid, peering over my mom’s shoulder as she prepped the stuffing, the scent of sage and butter filling our tiny kitchen. It was always the star of the show for me, even more than the turkey sometimes! This recipe, well, it’s my absolute favorite. It’s a classic, sure, but it has this little something extra that makes it truly special. It’s not overly fussy, which is a lifesaver during the holiday rush, but the flavor is just out-of-this-world good. Honestly, it’s miles beyond those boxed mixes you might be tempted to grab in a pinch – and I say that with all the love in my heart for those quick fixes when you need them, but this one… this one is for the memories.
What is Thanksgiving stuffing?
So, what exactly is this glorious creation? At its heart, Thanksgiving stuffing is a dish made primarily from bread, usually cubed and dried, mixed with aromatics like onions and celery, herbs (sage is a must for me!), and some sort of fat like butter or broth. It’s then baked, either inside the turkey (hence “stuffing”) or, more commonly these days to ensure even cooking and food safety, in a separate baking dish (making it “dressing,” though I still lovingly call it stuffing no matter what!). Think of it as a savory bread pudding, but way more exciting and steeped in tradition. My version leans towards that classic, heartwarming flavor profile that instantly transports you to Thanksgiving dinner tables of yesteryear. It’s humble, yes, but when done right, it’s absolutely divine. It’s the culinary equivalent of a warm hug!
Why you’ll love this recipe?
I love this Thanksgiving stuffing recipe. I know you will too. I’m going to love it too.flavor is just phenomenal. It hits all the right notes: savory, herbaceous, a little bit rich from the butter, and that subtle sweetness from the bread. It’s a symphony of deliciousness! But what really seals the deal for me is the simplicity. Even if you’re not a seasoned chef, this recipe is incredibly approachable. The steps are straightforward, and the ingredients are easy to find. It’s the kind of dish that makes you look like a culinary wizard without you actually having to break a sweat. And let’s talk about Cost-efficiency: What is the best way to measure cost-efficiency?. Using day-old bread and common pantry staples makes this a budget-friendly way to elevate your holiday feast. You get so much amazing flavor for such a low cost! The versatility is another huge plus. While it’s perfect for Thanksgiving, I’ve also made this for potlucks, family dinners, or even just a cozy weeknight meal when I’m craving something hearty. It pairs beautifully with roasted chicken, pork chops, or just about anything! I’ve experimented with adding different nuts or even some dried cranberries, and it always turns out fantastic. But honestly, what I love most about this recipe is the comfort it brings. It’s familiar, it’s delicious, and it’s made with love – and that’s the secret ingredient that truly makes any dish shine.
How to Make Thanksgiving Stuffing
Quick Overview
Making this Thanksgiving stuffing is surprisingly easy! We’ll start by getting our bread ready, then sautéing some classic aromatics, combining everything with savory broth and herbs, and finally baking it until it’s golden and delicious. The key is to not rush the bread drying process and to get those flavors really melded together. It’s a simple process that yields incredibly rewarding results. You’ll be amazed at how a few basic ingredients can transform into something so spectacular.
Ingredients
For the Bread Base:
1 loaf (about 1 pound) of sturdy bread, like French baguette, challah, or sourdough, cut into 1-inch cubes. Day-old or slightly dried-out bread is best! It gives the stuffing that perfect texture so it doesn’t turn mushy. If your bread is super fresh, you can spread the cubes on a baking sheet and let them air dry for a few hours, or pop them in a low oven (around 250°F / 120°C) for about 10-15 minutes until they feel a bit dry to the touch.
For the Savory Aromatics:
1 cup (2 sticks) unsalted butter. This is where a lot of that rich flavor comes from, so don’t skimp!
2 cups finely chopped yellow onion (about 1 large onion). Yellow onions have a nice sweetness that softens beautifully.
1 ½ cups finely chopped celery (about 3-4 stalks). This adds that essential crunch and earthy flavor.
2-3 cloves garlic, minced. Because, well, garlic!
For the Herbaceous Flavor Boost:
2 tablespoons chopped fresh sage. This is non-negotiable for me! Fresh sage makes all the difference.
1 tablespoon chopped fresh thyme. Adds a lovely earthy, peppery note.
1 teaspoon chopped fresh rosemary (optional, but lovely). If you use it, be a little judicious; it’s potent!
For the Binding Broth:
4-5 cups low-sodium chicken or vegetable broth. You might need a little more or less depending on how dry your bread is. I always start with 4 cups and add more as needed.
For Seasoning:
1 ½ teaspoons salt, or to taste. Remember your broth is low-sodium, so you’ll need to season well.
¾ teaspoon black pepper, or to taste.
Step-by-Step Instructions
Step 1: Preheat & Prep Pan
First things first, get your oven preheating to 375°F (190°C). I like to use a good-sized baking dish, something like a 9×13 inch pan. Butter it generously or give it a good spray of cooking oil. This helps prevent any sticking and gives the bottom a nice little crisp.
Step 2: Toast the Bread Cubes (if needed)
If your bread isn’t already nicely dried out, now’s the time to get it ready. Spread your bread cubes in a single layer on a large baking sheet. If you’re using the oven method, pop them in the preheated oven for about 10-15 minutes, just until they feel a little firm and not squishy. Keep an eye on them so they don’t burn! Once they’re ready, transfer them to a very large mixing bowl.
Step 3: Sauté the Aromatics
In a large skillet or Dutch oven, melt the butter over medium heat. Add the chopped onion and celery. Cook, stirring occasionally, until they’re softened and the onion is translucent, about 8-10 minutes. You want them tender, not browned. Add the minced garlic and cook for another minute until fragrant. Be careful not to burn the garlic!
Step 4: Add Herbs and Seasoning
Stir in the fresh sage, thyme, and rosemary (if using) into the softened vegetables. Cook for about 1 minute more, until the herbs are fragrant. This really wakes up their flavor. Now, pour this glorious mixture over the dried bread cubes in your large bowl.
Step 5: Combine with Broth
Add 4 cups of the broth to the bowl, along with the salt and pepper. Gently toss everything together until the bread cubes are moistened. You want everything to be coated, but not swimming in liquid. If it seems a bit dry, add another ½ cup of broth at a time until it reaches the consistency you like. Some people prefer their stuffing a little more moist, others a bit drier – it’s all personal preference!
Step 6: Transfer to Baking Dish
Spoon the stuffing mixture into your prepared baking dish. Don’t pack it down too tightly; you want to leave some air pockets so it bakes up nice and fluffy. You can spread the top out evenly.
Step 7: Bake to Golden Perfection
Cover the baking dish loosely with aluminum foil. Bake for 20 minutes. Then, remove the foil and bake for another 20-25 minutes, or until the top is beautifully golden brown and slightly crisp, and the edges are set. The smell that will fill your kitchen at this point is just pure magic!
Step 8: Rest and Serve
This is probably the hardest part: letting it rest! Once it’s out of the oven, let it sit for about 5-10 minutes before serving. This allows the flavors to meld even further and makes it easier to serve. Then, just scoop it out and enjoy!
What to Serve It With
This Thanksgiving stuffing is truly a chameleon when it comes to pairings! For a classic Thanksgiving feast, it’s the perfect companion to roast turkey, cranberry sauce, mashed potatoes, and green bean casserole. It’s the savory anchor that ties everything together. On a less traditional note, I often make a batch just for a cozy weeknight dinner. It’s amazing alongside pan-seared pork chops or a simple roasted chicken. The savory flavors of the stuffing complement the richness of the meat so well. If you’re looking for a hearty vegetarian option, it’s incredible with a mushroom Wellington or stuffed bell peppers. And don’t underestimate it as a brunch star! Serve a scoop alongside scrambled eggs, some crispy bacon, and a glass of mimosa. It’s surprisingly delicious and so satisfying. For a more elegant affair, I like to serve it as a side with a beautifully roasted prime rib. The robust flavors of the stuffing stand up perfectly to the rich beef. My kids also love it as a little side to their favorite chicken tenders when we’re having a more casual meal. It’s just one of those dishes that makes everything feel a bit more special, no matter the occasion.
Top Tips for Perfecting Your Thanksgiving Stuffing
Over the years, I’ve picked up a few tricks that I think make this Thanksgiving stuffing recipe truly shine. For the bread, I can’t stress enough how important it is to use bread that’s at least a day old, or even better, a couple of days old. If it’s too fresh, it’ll just absorb all the liquid and turn into mush. If you’re in a pinch and only have fresh bread, spreading it on a baking sheet and letting it air dry for a few hours is a lifesaver. Or, you can pop it in a low oven for about 10-15 minutes – just until it feels a little dry to the touch. When you’re mixing the wet and dry ingredients, be gentle! You don’t want to mash everything together. A light toss is all it needs. Overmixing can lead to a dense, heavy stuffing, and we definitely don’t want that. The goal is a light and fluffy texture. If you’re feeling adventurous with your flavors, I’ve found that adding a handful of toasted pecans or walnuts towards the end of the mixing process adds a wonderful crunch and nutty depth. You could also stir in some dried cranberries or chopped apples for a touch of sweetness and tang. For the broth, start with the lower amount and add more gradually. Everyone has a different idea of how moist they like their stuffing, so it’s best to adjust as you go. I usually end up using about 4.5 cups. When it comes to baking, covering it with foil for the first part of the baking time steams it and keeps it moist inside, while uncovering it for the last 20-25 minutes lets that beautiful top get golden and crispy. If you like an extra crispy topping, you can always broil it for a minute or two at the very end, but watch it like a hawk so it doesn’t burn! If you don’t have fresh sage, you can use about 1 teaspoon of dried sage, but fresh really does have a brighter, more vibrant flavor. Trust me on this one!
Storing and Reheating Tips
This Thanksgiving stuffing is a wonderful make-ahead candidate, which is a lifesaver during busy holidays! For refrigerator storage, let the stuffing cool completely in its baking dish. Once cooled, cover it tightly with plastic wrap or aluminum foil, or transfer it to an airtight container. It should stay fresh in the refrigerator for about 3-4 days. When you’re ready to reheat, the best way is to pop it back into a baking dish (you can add a splash more broth if it seems dry) and cover it with foil. Bake it in a preheated oven at around 350°F (175°C) for about 20-25 minutes, or until heated through. For an extra crispy top, remove the foil for the last 5-10 minutes of reheating. If you’re short on time, you can reheat individual portions in the microwave, but you might want to cover it with a damp paper towel to keep it from drying out. If you plan to freeze this stuffing, it’s best to do it before it’s baked. Prepare it right up to the point of baking, then transfer it to a freezer-safe container or baking dish, cover it very well with plastic wrap and then foil, and freeze for up to 2-3 months. When you’re ready to bake it from frozen, add about 10-15 minutes to the initial covered baking time, then proceed with the recipe as usual. You can also freeze leftovers; let them cool completely, wrap portions tightly in plastic wrap, then foil, and place in a freezer bag for up to 2 months. Thaw overnight in the refrigerator before reheating.
Frequently Asked Questions
Final Thoughts
I truly hope you give this Thanksgiving stuffing recipe a try. It’s more than just a side dish to me; it’s a connection to my family’s traditions and a source of pure comfort and joy. The balance of flavors, the satisfying texture, and the incredible aroma make it a standout on any table. It’s simple enough for a weeknight but special enough for your most important holiday feasts. If you love this recipe, you might also enjoy my Cornbread Stuffing with Sausage for a different flavor profile, or my Herbed Biscuit Stuffing for another delicious twist. Both offer that same comforting, homemade feel that I adore. I can’t wait to hear how your Thanksgiving stuffing turns out! Please leave a comment below and let me know your favorite part, or any special additions you’ve made. Happy baking, and more importantly, happy eating!
How to Make the Best Thanksgiving Bread Stuffing
Ingredients
Main Ingredients
- 1 cup unsalted butter divided
- 1 pound day-old white French bread diced into 0.5-inch cubes and dried
- 2.5 cups sweet Vidalia onion diced small
- 1.5 cups celery diced small
- 0.67 cup Italian flat-leaf parsley leaves finely minced
- 0.25 cup fresh sage leaves finely minced
- 3 tablespoons fresh rosemary sticks discarded, finely minced
- 2 tablespoons fresh thyme sticks discarded, finely minced
- 1 teaspoon salt
- 1 teaspoon black pepper
- 2.5 cups low-sodium chicken broth divided
- 2 large eggs
Instructions
Preparation Steps
- Preheat oven to 250°F. Place cubed bread on a baking sheet and bake, stirring occasionally, until dried out, about 45 minutes. Begin with very dry bread to avoid soggy stuffing. You can dry the bread the night before.
- Transfer dried bread cubes to a very large bowl and set aside.
- Preheat oven to 350°F and spray a 9x13-inch baking dish with cooking spray; set aside.
- In a large skillet, melt 0.75 cups (1.5 sticks) of butter over medium-high heat.
- Add diced onions and celery and cook until softened and beginning to brown, about 10 minutes, stirring frequently. Transfer vegetables to the bowl with bread.
- Add parsley, sage, rosemary, thyme, salt, pepper, and 1.25 cups chicken broth; toss to combine and set aside.
- In a small bowl, whisk remaining 1.25 cups chicken broth with eggs. Pour over bread mixture and toss well. Transfer mixture to prepared baking dish.
- Dice remaining 0.25 cup (half stick) butter into pieces and evenly dot on top of the stuffing.
- Cover with foil and bake for 40 minutes. Remove foil and bake uncovered for an additional 40-45 minutes or until the top is lightly golden brown. Serve immediately.