Southwest Chicken
Oh, you know those nights, right? The ones where the clock is ticking, the kids are buzzing around like little tornadoes, and the thought of actually *cooking* feels like climbing Mount Everest? Yeah, me too. That’s precisely why this Southwest Chicken Casserole is practically my culinary superhero. It’s the dish I run to when life gets a little crazy, but I still want to put something truly delicious and satisfying on the table. It’s got all those warm, comforting flavors that just hug you from the inside, with a little kick that wakes everything up. Honestly, I think it’s even better than some of the fancier casseroles out there, because it’s so incredibly easy but tastes like you slaved over it for hours. My family devours it every single time, and I’m willing to bet your family will too.
What is Southwest Chicken Casserole?
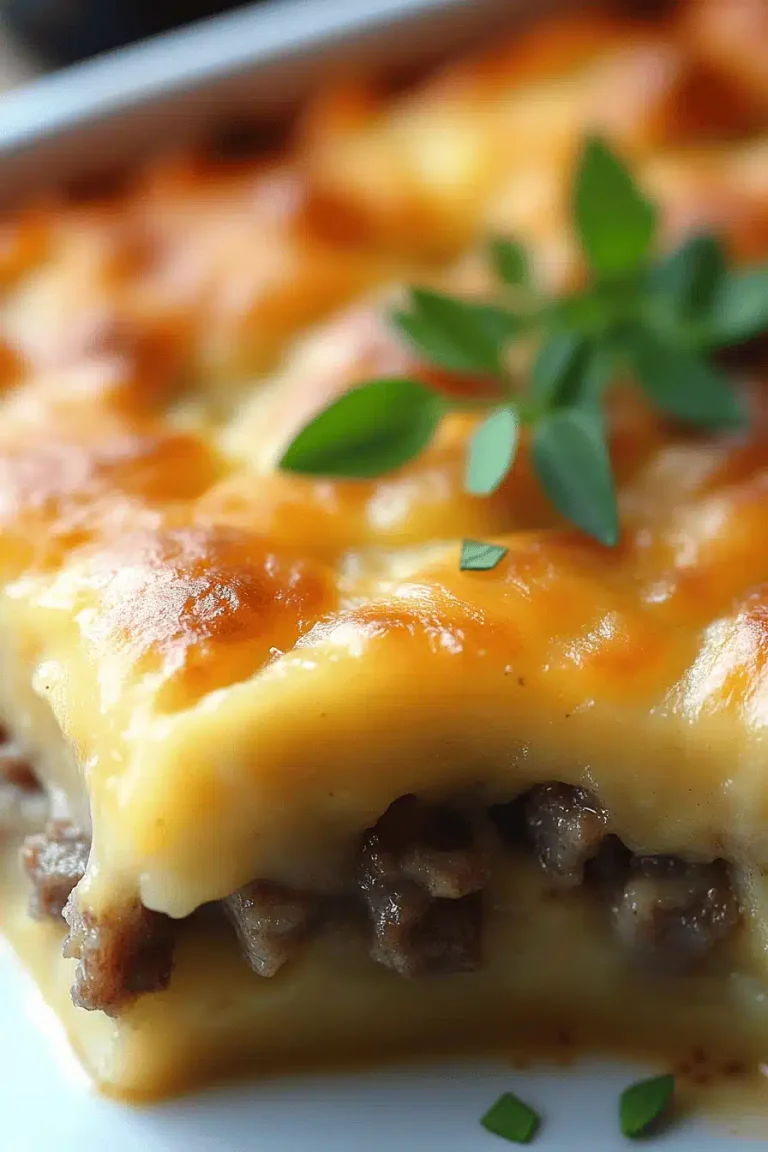
So, what exactly *is* this magical dish? Think of it as the ultimate comfort food, but with a vibrant, zesty personality. It’s a hearty, baked casserole loaded with tender shredded chicken, a creamy, slightly spicy sauce, and usually a medley of corn, beans, and peppers, all topped with a golden, cheesy crust. The “Southwest” part comes from those classic flavors we all love: cumin, chili powder, maybe a hint of lime, and often some diced green chilies or jalapeños to bring the heat. It’s not overly complicated, and the beauty of it is that you can really customize it to your liking. It’s essentially a one-dish wonder that’s perfect for busy weeknights, potlucks, or even just a cozy Sunday supper. It’s the kind of meal that makes your kitchen smell amazing and your taste buds sing.
Why you’ll love this recipe?
There are so many reasons why this Southwest Chicken Casserole has earned a permanent spot in my recipe rotation, and I’m so excited to share them with you! Firstly, the flavor profile is just out of this world. It’s savory, creamy, a little smoky, and has just enough spice to be exciting without being overwhelming. The combination of tender chicken, sweet corn, hearty beans, and that luscious sauce is pure harmony. What I love most is how incredibly simple it is to throw together. Seriously, you can have it prepped and ready for the oven in about 20 minutes. This has been a lifesaver on nights when I get home late. And let’s talk about cost-efficiency! Most of the ingredients are pantry staples or are super budget-friendly. Chicken thighs, canned corn, beans – they don’t break the bank, which is a huge plus for me. Beyond that, the versatility is fantastic. You can serve it over rice, with tortillas, or just scoop it right out of the dish. It’s adaptable, forgiving, and always a crowd-pleaser. I’ve even made a lighter version using Greek yogurt instead of sour cream, and while it’s a bit different, it’s still incredibly tasty! It’s that go-to recipe you can always count on.
How do I make Southwest Chicken Casserole?
Quick Overview
This casserole is all about layering delicious flavors and textures without a lot of fuss. We’ll start by getting our chicken ready, then mix up a quick, creamy sauce infused with those signature Southwest spices. Then, it’s just a matter of combining everything with corn and beans, topping it with cheese, and letting the oven do its magic. It’s designed to be straightforward, even for beginners, and the result is a deeply satisfying, flavor-packed meal that tastes like it took hours. The goal is maximum flavor with minimum effort, and this recipe absolutely delivers.
Ingredients
For the Chicken:
2-3 cups cooked shredded chicken (rotisserie chicken is your best friend here! Otherwise, boil or bake a couple of chicken breasts or thighs until tender and shred them with two forks. I always have some pre-shredded chicken in the freezer for nights like these.)
For the Creamy Southwest Sauce:
1 can (10.5 oz) condensed cream of chicken soup (or cream of mushroom for a slightly different depth)
1/2 cup sour cream (full-fat gives the best creaminess, but light works too if you prefer)
1/4 cup milk (any kind works, even unsweetened almond milk makes it surprisingly creamy!)
1 teaspoon chili powder (adjust to your spice preference)
1/2 teaspoon cumin
1/4 teaspoon garlic powder
Salt and freshly ground black pepper to taste (start with about 1/4 tsp salt and a pinch of pepper, you can always add more!)
Optional: 1-2 tablespoons diced green chilies (from a can, drained) for an extra layer of flavor and a touch of heat.
For the Mix-ins:
1 can (15 oz) corn, drained (frozen corn works great too, just thaw it first)
1 can (15 oz) black beans, rinsed and drained (kidney beans are a good substitute if you’re not a fan of black beans)
For the Topping:
1.5 cups shredded Monterey Jack cheese (or a Mexican blend, or even cheddar if that’s what you have on hand! Just something melty.)
Step-by-Step Instructions
Step 1: Preheat & Prep Pan
First things first, get that oven preheating to 375°F (190°C). This ensures it’s nice and hot when your casserole is ready to go in, meaning more even cooking and that lovely bubbly top. Grab a 9×13 inch baking dish. I like to give it a quick spray with non-stick cooking spray, or you can grease it lightly with butter or oil. This just makes cleanup a breeze, and nobody likes scrubbing baked-on cheese!
Step 2: Mix Dry Ingredients (Flavor Base!)
In a medium bowl, you’re going to combine the heart of our sauce. This is where the magic really starts to happen. Add your shredded chicken, drained corn, and rinsed black beans. This might seem simple, but this initial mix gets everything distributed so every bite has a bit of everything.
Step 3: Mix Wet Ingredients (The Creamy Dream)
Now for the creamy goodness! In a separate, larger bowl, whisk together the condensed cream of chicken soup, sour cream, and milk. This is your base for that luscious, savory sauce. Once those are nicely combined and smooth, stir in the chili powder, cumin, garlic powder, and your optional diced green chilies if you’re using them. Give it a good mix until all the spices are evenly distributed. Taste it here! This is your chance to adjust the salt, pepper, or spice level. I always add a little extra pepper if I’m feeling it.
Step 4: Combine (Bringing It All Together)
Pour that glorious creamy sauce mixture over the chicken, corn, and beans in your baking dish. Gently fold everything together with a spatula or large spoon. You want to make sure all the chicken and veggies are nicely coated in that rich sauce. Don’t overmix; just ensure everything is well-combined. The goal here is even distribution so every forkful is perfectly balanced.
Step 5: Prepare Filling (It’s Already Here!)
Honestly, the “filling” is already incorporated in Step 4! That’s the beauty of a casserole like this – it’s all mixed together in one harmonious dish. The chicken, corn, and beans are the heart of our filling, and they’re now swimming in that delicious, spiced sauce.
Step 6: Layer & Swirl (Cheese Time!)
Now comes the best part for many people: the cheese! Evenly sprinkle the shredded Monterey Jack cheese (or your chosen blend) over the top of the chicken and vegetable mixture. Make sure you get it all the way to the edges so you get a lovely golden, cheesy crust all around. There’s no need to swirl here, just a good, even layer is perfect.
Step 7: Bake (The Waiting Game!)
Pop that assembled casserole into your preheated oven. Bake for about 25-30 minutes, or until the casserole is hot, bubbly around the edges, and the cheese on top is melted and lightly golden brown. If you like your cheese a little more browned, you can pop it under the broiler for the last minute or two, but watch it VERY carefully – broiler times are tricky and things can burn quickly!
Step 8: Cool & Glaze (Patience, Grasshopper!)
Once it’s out of the oven, resist the urge to dig in immediately! Let it sit for about 5-10 minutes. This allows the casserole to set up a bit, making it easier to serve and preventing it from being too soupy. There’s no specific “glaze” for this type of casserole in the traditional sense, but that melted cheese on top is our delicious, golden topping!
Step 9: Slice & Serve
After its short rest, cut it into generous squares and serve hot. The aroma alone will have everyone gathered around the table in no time. Enjoy the fruits of your (minimal) labor!
What to Serve It With
This Southwest Chicken Casserole is wonderfully self-contained, but it’s also a fantastic base for a meal that can be dressed up or down. For a simple, hearty breakfast (yes, I’ve totally had leftovers for breakfast!), a small scoop alongside some scrambled eggs is surprisingly satisfying. For a more elaborate brunch, I love serving it with a dollop of sour cream or Greek yogurt, some fresh salsa, and maybe a side of avocado slices. It feels a bit more refined that way. As a dessert… well, this isn’t exactly a dessert, but it can be the star of a casual supper! For those cozy snack moments, I often serve it simply with tortilla chips for scooping. My family also loves it served over a bed of fluffy white rice, which soaks up all that extra creamy sauce beautifully. Another favorite is to serve it with warm tortillas on the side, making it almost like a deconstructed taco bake. It’s just so adaptable!
Top Tips for Perfecting Your Southwest Chicken Casserole
I’ve made this Southwest Chicken Casserole more times than I can count, and over the years, I’ve picked up a few tricks that I think really elevate it. First, about the chicken: using rotisserie chicken is an absolute game-changer for speed, but if you’re cooking it yourself, don’t overcook it! You want it tender and moist so it shreds easily and doesn’t become dry in the casserole. For the sauce, a little taste-test before it goes into the oven is key. Canned soups can vary in saltiness, and your personal spice preference is important. Don’t be afraid to add a tiny bit more chili powder or cumin if you want a bolder flavor. I’ve also learned that using good quality canned corn and beans makes a difference – fresh or frozen corn can also be great if you have it! When it comes to mixing, just be gentle. You don’t want to mash up the beans or break down the chicken too much. You’re just aiming for everything to be coated in that creamy sauce. For the cheese topping, I find that shredding your own cheese from a block melts much better and is less likely to get greasy than pre-shredded. If you like a little extra crunch, you can always add some crushed tortilla chips on top in the last 10 minutes of baking, or mix some in with the cheese. For ingredient swaps, if you’re out of black beans, kidney beans or even pinto beans work wonderfully. And if cream of chicken soup isn’t your thing, cream of mushroom or even a can of diced tomatoes (drained well!) can add a different kind of flavor profile, though it will change the creaminess. Baking is pretty straightforward, but ovens can be quirky. Just keep an eye on it after the 25-minute mark to make sure it’s not browning too quickly. The cheese should be melted and bubbly, and the casserole should be heated through.
Storing and Reheating Tips
One of the things I adore about this Southwest Chicken Casserole is how well it stores and reheats. If you happen to have any leftovers (which is rare in my house, but it happens!), let the casserole cool completely before storing. You can cover the baking dish tightly with plastic wrap or foil, or transfer portions into airtight containers. At room temperature, it’s generally best to eat leftovers within two hours, as with any cooked dish. In the refrigerator, it will keep beautifully for about 3-4 days. The flavors actually tend to meld and deepen overnight, so sometimes it tastes even better the next day! For reheating, the oven is my preferred method for the best texture. You can reheat individual portions or the whole dish at around 350°F (175°C) until heated through, usually about 15-25 minutes for a larger amount, or 5-10 minutes for individual servings. If you’re in a real hurry, you can microwave individual portions, but be aware that the texture might change slightly, becoming a bit softer. The cheese topping is best if you can pop it back under a broiler for a minute or two after reheating in the oven to crisp it up again. If you’re planning on freezing portions, I highly recommend baking the casserole *without* the cheese topping, letting it cool completely, and then wrapping it tightly in plastic wrap and foil. You can freeze it for up to 2-3 months. When you’re ready to eat it, thaw it in the refrigerator overnight, then add your cheese topping and bake as directed, or until heated through. This way, the cheese stays fresh and doesn’t get a weird texture from freezing.
Frequently Asked Questions
Final Thoughts
Honestly, this Southwest Chicken Casserole is one of those recipes that just makes life a little bit easier and a whole lot tastier. It’s the kind of dish that brings a smile to everyone’s face, and the best part is how adaptable it is. Whether you’re a seasoned cook or just starting out, you can’t really go wrong with this one. It’s proof that simple ingredients can come together to create something truly special and comforting. If you love this recipe, you might also enjoy my Speedy Chicken Enchilada Casserole or my One-Pan Lemon Herb Roasted Chicken and Veggies – they have that same weeknight-friendly vibe! I truly hope you give this Southwest Chicken Casserole a try. I’m already excited to hear how much your family loves it! Please, tell me all about your cooking adventures in the comments below, and don’t be shy about sharing any of your own amazing variations!
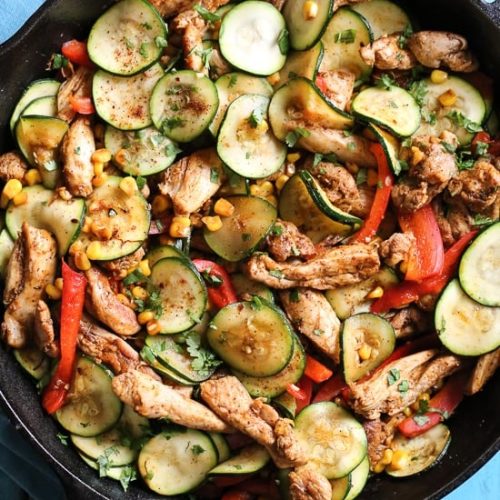
Zesty Southwestern Chicken Skillet Recipe
Ingredients
Main Ingredients
- 1.5 lb boneless skinless chicken thighs cut into 1-inch thin strips
- 2 tsp olive oil
- 1 tbsp Mexican seasoning mix see below for recipe
- 0.5 tsp kosher salt
- 1 large red bell pepper sliced into thin matchsticks
- 1 cup corn kernels frozen or fresh
- 2 cloves garlic minced
- 14 oz zucchini or summer squash sliced 1/8-inch thick (about 2 medium)
- 2 tbsp fresh lime juice about 2 small limes
- 2 tbsp fresh cilantro chopped
- Cotija cheese crumbled (optional)
- 2 tbsp chili powder
- 0.5 tsp red pepper flakes
- 0.125 tsp cayenne pepper
- 0.5 tsp oregano
- 1 tsp smoked paprika
- 1 tbsp ground cumin
- 0.5 tsp garlic powder
- 0.5 tsp onion powder
- 0.5 tbsp kosher salt
- 0.5 tbsp freshly ground black pepper
Instructions
Preparation Steps
- In a medium bowl, drizzle chicken with 1 teaspoon of olive oil and season with 1 tablespoon of the Mexican seasoning mix and 0.5 teaspoon salt.
- Heat a large skillet over high heat. Add the remaining 1 teaspoon olive oil to the skillet.
- Add the chicken and toss to coat. Cook for 4 minutes, stirring constantly, until chicken is browned and cooked through. Transfer to a plate and tent with foil to keep warm.
- Add the sliced red bell pepper, corn, and minced garlic to the empty skillet. Sprinkle with remaining Mexican seasoning mix. Cook over medium-high heat, stirring frequently, for 5 to 8 minutes until peppers soften.
- Add the zucchini slices, season with 0.5 teaspoon kosher salt, and cook, stirring often, until zucchini softens, about 4 minutes.
- Return the chicken to the skillet, add fresh lime juice, and scrape up any browned bits from the bottom of the skillet. Stir to combine juices with chicken and vegetables.
- Remove from heat, sprinkle with chopped cilantro and crumbled Cotija cheese if desired, and serve immediately.