mushroom
There’s something so cozy and satisfying about a mushroom galette — the flaky, buttery crust, the rich, earthy filling, and the way the herbs brighten everything up just enough without overpowering it. I remember making this for holiday gatherings and watching my family’s eyebrows raise in surprise before they dove in for seconds. It’s that kind of recipe: simple enough for a weeknight meal but special enough to impress guests. If you’re anything like me, you adore mushrooms not just for their taste but for the warm, forest-y vibe they bring to any dish. This galette is my little secret for making those umami lovers feel right at home. It’s a bit like a savory pie but with less fuss and way more personality—plus, it comes together faster than you’d expect. Trust me when I say, once you’ve had this, you’ll want to keep one in the freezer just in case those “I want something comforting” moments sneak up on you.
What is a Rustic Mushroom and Herb Galette?
Think of a galette as a love letter to rustic baking. It’s essentially a free-form tart—no pie dish necessary—that lets you wrap beautiful, fresh ingredients inside a flaky pastry crust. This mushroom galette features sautéed mushrooms mingling with fresh herbs like thyme and parsley, all nestled in a buttery, golden shell that crisps up just right. The name “galette” comes from French baking, where it means a flat, round cake or tart, but don’t let that make you nervous. Unlike elaborate tarts, this one feels homey and approachable—perfect for someone like me who’s more “get in the kitchen and cook” than “fancy French chef.” It’s a dish that says, “Hey, here’s something humble made unforgettable with a few simple touches.” Every time I make it, it reminds me of weekend strolls in the woods, gathering wild mushrooms or dreaming of those flavors in my kitchen.
Why you’ll love this recipe?
First off, the flavor in this mushroom galette is downright addictive. The mushrooms get caramelized just enough to bring out their meaty, nutty notes, and the herbs give a fresh lift that stops any heaviness from weighing you down. I always do a mix of wild mushrooms when I can find them—shitakes, creminis, maybe a little porcini powder if I’m feeling fancy—and it really elevates the depth. What I love most about this recipe is how deceptively simple it is. The crust comes together quickly, and the filling cooks in one pan. No multiple bowls, no special equipment. It’s one of those dishes that looks like you spent hours working, but all you did was a little chopping and stirring.
Cost-wise, it’s a winner too. Mushrooms can be pricey in some places, but you really only need a few cups, and the rest is pantry staples: butter, flour, herbs you probably have lying around. Plus, this galette is incredibly versatile. Serve it up as a main dish with a cozy green salad, cut it into smaller pieces for cocktail parties, or even enjoy leftovers cold for an easy lunch on the go. I sometimes swap in other fillings like caramelized onions or add a touch of goat cheese for creaminess. It’s one of those recipes where you can play around but somehow it always turns out just right. If you love rustic baking or a good mushroom dish, this galette stands out because it’s warm, inviting, and oh-so-satisfying without any pretense.
How do you make a rustic mushroom and herb galette?
Quick Overview
Making this galette is like a relaxing afternoon in the kitchen with a little rhythm. You start by prepping your buttery crust—nothing fancy, just cold butter cut into flour until it looks like coarse crumbs. Then, you sauté a fragrant mix of mushrooms with garlic and fresh herbs until everything’s rich and golden. After that, it’s all about assembling: rolling out the dough, piling on the mushroom goodness, folding the edges, and popping it in the oven until the crust is perfectly crispy and the filling bubbling. The method is straightforward, but the result feels like a little celebration every time. I always tell friends not to stress about getting the fold “just so”—it’s meant to look rustic, after all.
Ingredients
For the main battery (crust):
- 1 1/4 cups all-purpose flour – For the flakiest crust, make sure to sift and keep your butter cold.
- 1/4 teaspoon salt – Just enough to bring out flavor without making it salty.
- 8 tablespoons unsalted butter, cold and cut into cubes – The star of the show for that melt-in-your-mouth texture.
- 3-4 tablespoons ice water – Add slowly to bring the dough together without making it sticky.
For the Filling:
- 4 cups mixed mushrooms (cremini, shiitake, baby bella) – Clean gently, and slice evenly for even cooking.
- 2 tablespoons olive oil or butter – Use one or a mix for rich flavor.
- 3 cloves garlic, minced – Adds that warm, aromatic punch.
- 1 small shallot, finely chopped – For sweetness that balances the earthiness.
- Fresh thyme leaves, about 1 tablespoon – The classic mushroom partner.
- Fresh parsley, chopped, about 2 tablespoons – Brightens the whole dish.
- Salt and pepper to taste – Just enough seasoning to let the mushroom flavor shine.
- Optional: 1/4 cup grated Parmesan or crumbled goat cheese – For a melty, tangy twist.
For the Glaze:
- 1 egg yolk, beaten with 1 tablespoon water – For that glossy, golden-brown crust.
- Optional: A sprinkle of flaky sea salt – Adds a charming crunch and flavor punch.
Step-by-Step Instructions
Step 1: Preheat & Prep Pan
Start by preheating your oven to 400°F (200°C) so it’s nice and hot when the galette is ready to go in. Line a baking sheet with parchment paper or a silicone mat—this makes cleanup a breeze and helps the bottom crust crisp up beautifully. I always keep the baking sheet handy near the counter so I can assemble right onto it without extra transferring.
Step 2: Mix Dry Ingredients
In a large mixing bowl, whisk together the flour and salt to make sure the seasoning is evenly distributed. This little step is a game-changer for even flavor throughout the crust. When I skip this, the taste is a bit off, so I never do anymore. Take your time to ensure a nice blend before moving on.
Step 3: Mix Wet Ingredients
Add cold, cubed butter to the flour mix. Using your fingers, a pastry cutter, or even a food processor, work the butter into the flour until it looks like rough peas or coarse sand. This crumbly texture is crucial because it makes the crust flaky and tender. Then, slowly drizzle in the ice water, stirring gently with a fork until the dough barely comes together—but don’t overdo it or the crust will get tough!
Step 4: Combine
Bring the dough together with your hands, shaping it into a disk. Wrap it in plastic and pop it in the fridge for at least 30 minutes. This resting period chills the butter again and helps the gluten relax—trust me, this is key for an effortlessly flaky crust that flakes apart with every bite.
Step 5: Prepare Filling
While the dough chills, heat olive oil or butter in a large skillet over medium-high heat. Add minced garlic and shallot, sautéing until fragrant and softened. Toss in the mushrooms, stirring occasionally until they release their juices and start turning golden, about 8-10 minutes. Stir in fresh thyme, parsley, and season with salt and pepper. If using cheese, add now and stir to combine. The filling should be rich but not soggy—drain any excess moisture if needed by cooking a bit longer or placing mushrooms on paper towels.
Step 6: Layer & Swirl
Roll out chilled dough on a floured surface into a rough 12-inch circle. Transfer the dough to your prepared baking sheet. Pile the mushroom mixture into the center, leaving a good 2-inch border all around. Fold the edges over the filling, pleating as you go; don’t worry about perfect symmetry—this rustic look is part of the charm. Brush the crust edges with the egg wash for that shiny finish.
Step 7: Bake
Slide the galette into the oven and bake 35-40 minutes or until the crust is golden, crisp, and the filling is bubbling. The smell alone is enough to make you want to cut a slice right from the oven. Keep an eye toward the end—if the crust seems to be browning too fast, loosely tent with foil.
Step 8: Cool & Glaze
Let the galette cool on the baking sheet for 10-15 minutes so the filling sets a little—cutting too soon can be a mess! After it’s cooled slightly, I sometimes add a quick drizzle of a truffle oil glaze or a sprinkle of flaky salt for an extra pop—but that’s totally optional.
Step 9: Slice & Serve
Use a sharp knife to slice into wedge-shaped pieces, serve warm or at room temperature. This dish shines with a side of fresh greens or a simple soup. I love how the crust flakes apart perfectly, and the mushroom filling tastes like a little slice of cozy woodland magic.
What to Serve It With
For Breakfast: Pair warm pieces with a cup of strong, black coffee or a lightly steamed latte. Fresh fruit or a dollop of ricotta on the side makes it feel like a special weekend treat that wakes you up without weighing you down.
For Brunch: I like to serve this galette on a wooden board with a bright arugula salad tossed in lemon vinaigrette and a glass of chilled Sauvignon Blanc. The brightness in the salad balances the earthiness of the mushrooms perfectly, making it feel elegant but still relaxed.
As Dessert: This galette isn’t sweet, but it’s a fantastic grown-up savory option after a rich dinner—think alongside a light sorbet or poached pears to freshen your palate. If you’re a fan of cheese, a smear of herbed goat cheese alongside finishes beautifully.
For Cozy Snacks: Nothing beats reheated galette slices on a chilly afternoon, perhaps with a mug of herbal tea or spiced cider. My kids actually ask for seconds whenever I heat this up as a quick after-school snack.
Over the years, this galette has become a family favorite. It’s one of those dishes that fills the kitchen with the kind of smells that pull everyone home, and the hearty mushrooms make it feel like a warm hug on a plate.
Top Tips for Perfecting Your Rustic Mushroom and Herb Galette
Dough Prep: Always work with cold butter and ice water for that flaky texture. If the kitchen is warm where you live, try chilling your mixing bowl and utensils too. I learned this trick after one too many crumbly crust disasters!
Mushroom Cooking: Don’t overcrowd the pan or the mushrooms will steam instead of brown. I usually cook in batches if needed. Also, taste as you go; sometimes a splash of soy sauce or balsamic vinegar really takes the umami notes up a notch.
Mixing Advice: When combining wet and dry dough ingredients, stir gently just until combined—overmixing will make the crust tough. I once mixed so much I ended up with a dense galette crust, so gently really is key here.
Swirl and Fold: Don’t stress about making the edge perfect. The beauty of a galette is its rustic charm. Just fold with care, and if a fold breaks, patch it gently with a bit of extra dough or flour. I tend to pleat like a pro after a few tries!
Ingredient Swaps: Ready to switch things up? Try adding caramelized onions or sautéed spinach with your mushrooms. For a nutty twist, sprinkle toasted pine nuts before baking. Gluten-free lovers, you can swap the flour for a mix of almond and oat flour, but expect a slightly different texture—still delicious!
Baking Tips: Position your galette on the middle rack for even heat exposure. If your oven runs hot, turn the temperature down a tad and bake a bit longer. The crust should be a deep golden brown, and if you tap it, it should sound hollow.
Glaze Variations: If you’re skipping the egg wash, brush crust edges with melted butter before baking for rich flavor and color. After baking, a gentle drizzle of honey or a sprinkle of flaky sea salt amps it up beautifully. I learned this tip from a friend—try it, you’ll thank her!
Storing and Reheating Tips
Room Temperature: Keep your galette covered loosely with foil or a kitchen towel for up to 24 hours. It stays flaky and tasty if you’re planning to eat it all within the day.
Refrigerator Storage: Store leftover galette in an airtight container or cover with plastic wrap. It keeps well for up to 3 days. To revive the crust’s crispness, reheat in the oven at 350°F (175°C) for 10-15 minutes instead of microwaving.
Freezer Instructions: This galette freezes like a dream. Wrap tightly in plastic wrap followed by aluminum foil or place it in a freezer-safe container. It keeps beautifully for up to 2 months. Thaw overnight in the fridge, then reheat in a 350°F oven until warm.
Glaze Timing Advice: If you’re freezing, skip the egg glaze before baking, and instead brush on melted butter or egg wash before reheating to refresh the golden color and shine. If serving fresh, glaze before baking for that perfect glow.
Frequently Asked Questions
Final Thoughts
I can’t emphasize enough how this rustic mushroom and herb galette has become my go-to for feeding both my family and friends with minimal fuss and maximum heart. It’s that perfect blend of cozy and impressive—the kind of dish you want to make again and again because it just feels like home on a plate. The layers of mushroom flavor and fresh herbs wrapped in tender, buttery crust never fail to bring smiles and, honestly, a bit of happy sighing around my kitchen table. If you love earthy, comforting meals that don’t require standing over the stove all day, give this one a try. And if you do, please come back and tell me how it turned out, or share your own twists—I’m always eager to hear! Happy baking, and here’s to many delicious mushroom-filled moments ahead.
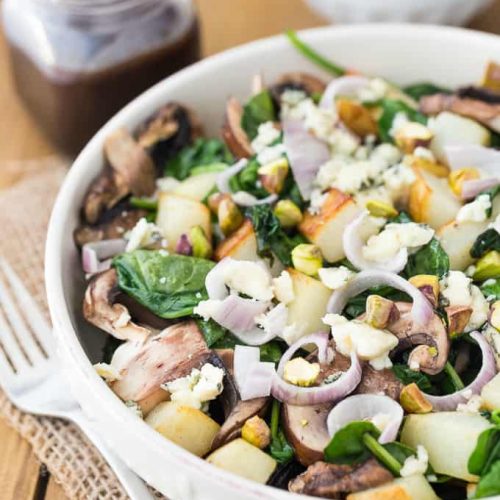
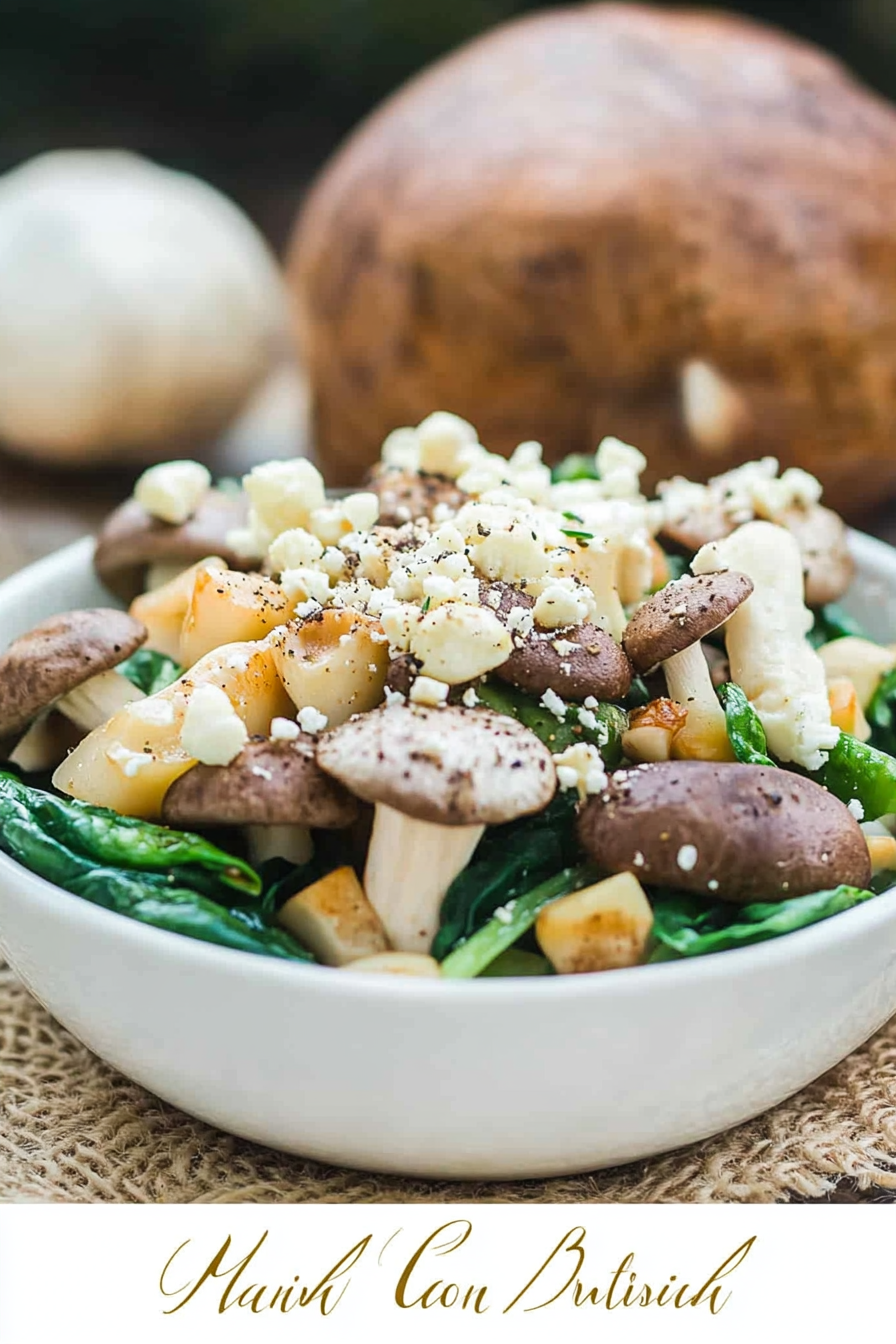
Savory Mushroom Kale Salad with Raspberry Balsamic
Ingredients
Main Ingredients
- 1 cup Russet potatoes peeled and cubed into 1-inch pieces
- 1 cup chopped kale
- 1 cup fresh crimini mushrooms sliced
- 0.5 cup red onion finely sliced
- 0.25 cup Gorgonzola cheese crumbled
- 0.33 cup balsamic vinegar
- 1 tablespoon raspberry preserves
- 3 tablespoons extra virgin olive oil
- 1 teaspoon Dijon mustard
- 1 tablespoon pistachios roasted and chopped
Instructions
Preparation Steps
- Heat 1 tablespoon olive oil in a large nonstick skillet over medium-high heat. Add the cubed potatoes and cook, stirring often, until browned, about 5 minutes. Add the kale and mushrooms and continue cooking until the potatoes are tender and kale is wilted, about 5-6 more minutes.
- While the potatoes are cooking, in a small saucepan over medium heat, bring balsamic vinegar to a gentle boil and reduce until slightly thickened, about 1 minute. Whisk in raspberry preserves, 2 tablespoons olive oil, and Dijon mustard until smooth.
- Divide the mushroom, kale, and potato mixture evenly onto salad plates. Top each with sliced red onion, crumbled Gorgonzola cheese, and chopped pistachios.
- Drizzle the raspberry balsamic dressing evenly over each salad serving.