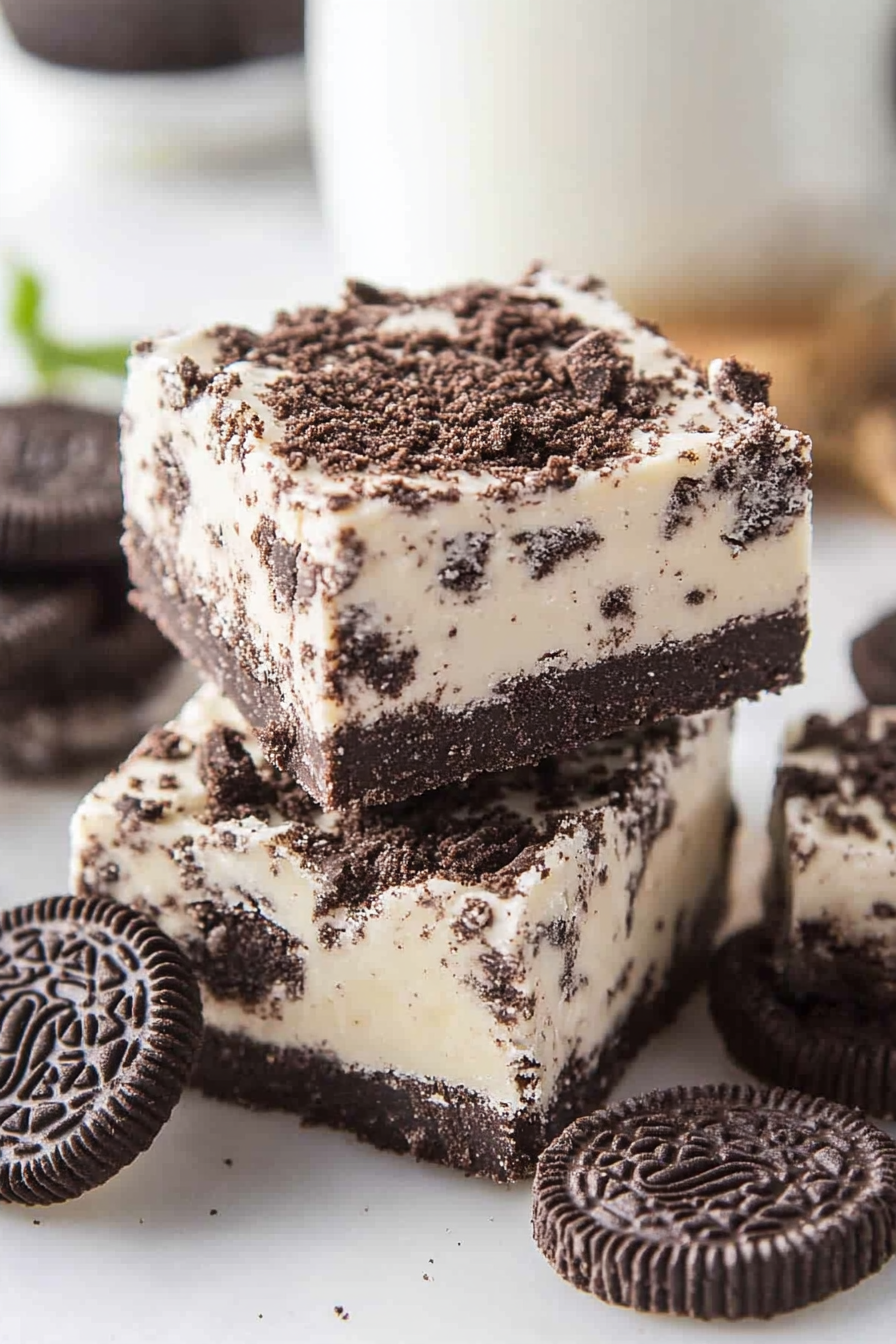
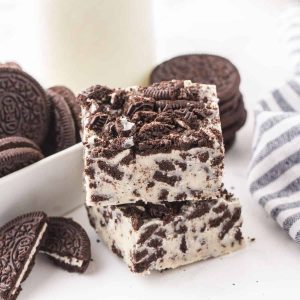
Oreo fudge
Is there anything better than biting into a piece of fudge that’s rich, creamy, and packed with crunchy bits of Oreo cookies? I swear, this Oreo fudge is one of those magic recipes that takes me right back to lazy Sunday afternoons with my grandma. She’d always have a tray of this irresistible treat ready, and no matter how full I was from dinner, I could never resist sneaking just one more piece. If you’ve ever made classic chocolate fudge before, this twist amps it up with that signature Oreo crunch that makes it feel both familiar and wonderfully indulgent. Plus, it’s surprisingly easy to whip up, which makes it my go-to when I need a quick sweet fix that will vanish faster than you can say “double-stuffed.” Trust me, this recipe is a total crowd-pleaser that’ll have everyone asking for seconds—and maybe thirds.
What is Oreo fudge?
Think of Oreo fudge as the lovechild of two all-time favorites: the creamy, melt-in-your-mouth texture of traditional fudge and the iconic crunch and flavor of Oreos. It’s essentially a rich, buttery fudge base—made with sugar, butter, and cream—laced generously with crushed Oreo cookies that add bursts of crunch and chocolatey cookie goodness in every bite. The name says it all, but what really makes it special is that combo of smooth sweetness with that unmistakable Oreo crunch. It’s like taking a classic chocolate fudge recipe and dressing it up for a fun party or comforting treat, perfect for when you want something easy yet insanely satisfying. If you’ve never played around with fudge before, Oreo fudge is a friendly place to start because it’s forgiving, quick to prepare, and feels fancy without fancy effort.
Why you’ll love this recipe?
What I love most about this Oreo fudge is how it perfectly balances flavors and textures. The fudge itself is silky smooth and sweet, but those chunks of Oreo cookies add a delightful crunch and a hint of bitterness from the dark chocolate cookie that cuts through the richness in just the right way. This isn’t your run-of-the-mill fudge—there’s a fun textural surprise in every bite.
And here’s the kicker—it’s ridiculously simple to make. I mean, if you can melt butter and sugar without burning it, you’re basically halfway there. No weird ingredients, no hours in the kitchen, just pure unadulterated yum. Plus, it’s great on a budget since you only need a handful of pantry staples, and the Oreos are super affordable to grab at any store. I usually keep a pack in my pantry for baking emergencies, and honestly, this fudge always saves the day.
Beyond just a snack, this fudge is incredibly versatile. I’ve taken it to potlucks, gifted it in cute jars around the holidays, and even chopped it up to sprinkle over ice cream for an extra special dessert topping. Compared to other chocolate treats I’ve made—like truffles or brownies—this Oreo fudge wins for sheer ease and that nostalgic childhood flavor that’s hard to beat. It’s that kind of recipe where you find yourself craving more, and lucky for me, it’s super forgiving if you need to double or triple the batch.
How do you make Oreo Fudge?
Quick Overview
Basically, you’re melting together your sugar, butter, and cream until it’s rich and glossy, then stirring in white chocolate chips so the fudge gets that irresistibly smooth texture. From there, crushed Oreos are gently folded in before letting the whole mixture set up in the fridge until firm. The best part? No complicated candy thermometer or fancy gadgets. Just a simple stovetop step, mixing, and a bit of patience while it chills. I always find myself peeking at it during the cooling phase, just because I can’t wait to taste that first creamy chunk.
Ingredients
For the Main Batter:
- 2 cups granulated sugar – I use a good quality sugar to avoid any grainy texture.
- ½ cup unsalted butter – room temperature so it melts evenly.
- ½ cup whole milk or heavy cream – heavy cream gives it a richer bite, but milk works in a pinch.
- 1 teaspoon vanilla extract – for that warm, comforting aroma.
For the Filling:
- 2 cups white chocolate chips – this is the secret to getting that creamy, buttery fudge texture.
- 15-20 Oreo cookies, coarsely crushed – double-stuffed if you like it extra indulgent!
For the Glaze (Optional but Recommended):
- ½ cup semi-sweet chocolate chips – melted smooth for that shiny finish.
- 1 tablespoon heavy cream – to thin the glaze just enough for pouring.
- Extra crushed Oreos for sprinkling on top.
Step-by-Step Instructions
Step 1: Preheat & Prep Pan
First things first, line an 8×8-inch square baking pan with parchment paper, making sure to leave an overhang on the sides. This makes lifting the fudge out a total breeze later on. No need to grease the paper—trust me, it sticks just right without it. Just set that prepared pan aside while we get the batter ready.
Step 2: Mix Dry Ingredients
In a medium saucepan, combine the sugar and milk or cream. I always keep stirring gently to dissolve as much sugar as possible before I turn on the heat. This helps prevent any graininess in the final fudge. Once the mixture is pretty smooth, we’re ready for the next step.
Step 3: Mix Wet Ingredients
Add the butter and vanilla extract directly to the saucepan with your sugar mixture. As the heat goes on, all these melt together creating that glossy, luscious liquid base. Stir continuously—this part smells SO good (like buttery sugar heaven), and a smooth texture here is key.
Step 4: Combine
Bring the mixture to a gentle boil over medium heat, stirring constantly. Once it reaches a slow boil, keep it there for about 4-5 minutes, stirring frequently to avoid burning or seizing. The mixture will thicken slightly, and your kitchen will smell like a candy shop. Remove from heat and immediately stir in the white chocolate chips until completely melted into a silky batter. Don’t rush—smoothness here makes all the difference.
Step 5: Prepare Filling
While your batter cools just a bit (about 3-5 minutes), coarsely crush your Oreos. I like to give them a light whirl in a food processor—just enough that there are still chunkier bits inside because that textural contrast is everything.
Step 6: Layer & Swirl
Pour half of the fudge batter into your prepared pan, then sprinkle half of the crushed Oreos evenly over the top. Add the remaining fudge batter and more Oreos on top. For a fun touch, use a butter knife or skewer to gently swirl the layers so you get those pretty Oreo ribbons peeking through. This step always gets me jazzed because the end result looks so inviting.
Step 7: Bake
No baking needed here! Once everything’s layered and swirled, pop the pan into the fridge and let it chill for at least 3 hours—or until firm to the touch. I usually leave mine overnight because the flavors meld beautifully, but honestly, it’s hard to wait that long.
Step 8: Cool & Glaze
Remove the chill fudge from the fridge. If you’re feeling fancy, melt your semi-sweet chocolate chips with the tablespoon of cream in short bursts in the microwave, stirring until silky. Pour evenly over the top of the fudge and quickly sprinkle some extra crushed Oreos while the glaze is still wet. Pop it back in the fridge for about 15 minutes so the glaze sets perfectly.
Step 9: Slice & Serve
Lift your fudge out using the parchment overhang, then slice into small squares with a sharp knife. I find warm water rinses between cuts prevent the knife from sticking. This fudge is best served chilled or at room temp. The texture is buttery but still holds its shape beautifully, perfect with a big mug of coffee or as a sweet bite anytime you need a little pick-me-up.
What to Serve It With
For Breakfast: Oreo fudge might sound like dessert vibes, but paired with a strong morning coffee or creamy latte, it’s an indulgent treat to brighten a slow weekend morning. I like serving a couple of small fudge squares alongside a bowl of fresh berries and my morning brew—such a cozy combo.
For Brunch: Plate your fudge squares on a pretty tray with fresh fruit, mini muffins, and a sparkling mimosa or homemade iced coffee. It’s surprisingly elegant, and guests love the twist on the usual sweet pastry offerings.
As Dessert: These fudge bites make for a delightful end to dinner. Try them alongside a scoop of vanilla ice cream or a drizzle of caramel sauce. They’re also a fun sweet surprise layered in parfaits or even chopped and folded into whipped cream for a playful topping on pies and cakes.
For Cozy Snacks: When your kids (or you!) are craving something simple but special during a movie night or after school, a couple of these fudge pieces alongside a glass of cold milk or hot chocolate hits just right. At my house, this is the go-to treat—we call it the “magical Oreo moment.”
Top Tips for Perfecting Your Oreo Fudge
Sifting Sugar: I learned this the hard way: if your sugar is a bit clumpy or coarse, try sifting it first. This little step helps everything dissolve smoother and keeps your fudge from feeling grainy.
Crushing Oreos: Don’t pulverize the Oreos into dust unless you want a very different texture. I like leaving a mix of small chunks and crumbs—gives that delightful “bite” in each square.
Swirling Flair: When you swirl the Oreo layers into the fudge, go gently. Heavy stirring blends it all too much and you lose those pretty Oreo ribbons. Just a few figure-eights with a skewer will do.
Ingredient Swaps: I’ve tried substituting white chocolate chips with cream cheese chips for a tangy twist, and it’s surprisingly good! You can also use almond milk instead of cream for a lighter texture, but the fudge becomes just a little less creamy.
Chilling Time: Patience is a virtue here. Let it firm up completely, or you’ll end up with fudge that’s too soft and hard to slice nicely. Overnight chill is my personal favorite—it makes cutting clean and the flavors even richer.
Glaze Variations: If you want to skip the glaze, dust the fudge lightly with powdered sugar or crushed cookies. I sometimes drizzle melted caramel for an extra layer of decadence. Whipped cream or marshmallow fluff dollops on top work wonders too!
Storing and Reheating Tips
Room Temperature: Keep your Oreo fudge in an airtight container, and it’ll stay fresh for 2-3 days at room temp. Just be sure it’s not too warm—otherwise, it will start to soften and lose that lovely fudge texture.
Refrigerator Storage: For longer freshness, store the fudge in an airtight container in the fridge. This preserves its texture and flavor for up to 2 weeks. I always line my containers with parchment paper so the fudge pieces don’t stick to each other.
Freezer Instructions: Oreo fudge freezes beautifully! Wrap individual pieces in wax paper or plastic wrap, then place them in a zip-top bag or airtight container. Frozen fudge keeps well for up to 3 months. When you’re ready to enjoy, just thaw in the fridge for a few hours before serving.
Glaze Timing Advice: If freezing, I recommend glazing the fudge after it’s thawed, so the glaze stays smooth and shiny. Adding glaze before freezing sometimes makes it crack or dull in appearance.
Frequently Asked Questions
Final Thoughts
Honestly, this Oreo fudge holds a special place in my heart—it’s a simple recipe that brings back memories and never fails to wow anyone who tries it. There’s something magical about how creamy fudge and crunchy Oreos come together so effortlessly. Whether you need a quick dessert for unexpected company or a sweet treat to lift your spirits after a long day, this fudge is your new best friend in the kitchen. If you end up loving this, you should definitely give my classic chocolate fudge or peanut butter swirl fudge a shot—both are equally comforting and easy.
I’d love to hear how your fudge turns out and if you’ve tried any fun twists! Drop a comment below, share a photo, or let me know your favorite Oreo mix-ins (I’ve seen peanut butter chocolate and mint Oreos work wonders). Happy baking, and enjoy every melt-in-your-mouth bite—it’s one of my all-time favorite sweet moments!
Easy Oreo Fudge
Ingredients
Main Ingredients
- 24 pieces Oreo cookies roughly chopped, divided
- 3 cups vanilla almond bark chopped (~18 ounces)
- 14 ounces sweetened condensed milk
- 2 tablespoons salted butter
- 1 teaspoon vanilla extract
- 0.5 teaspoon salt
Instructions
Preparation Steps
- Line an 8x8 baking pan with waxed or parchment paper; spray or butter to prevent sticking.
- Chop the Oreo cookies with a knife.
- Reserve 0.5 cup of chopped cookies for topping.
- In a non-stick saucepan over medium heat, combine chopped almond bark, sweetened condensed milk, and butter.
- Stir frequently until mixture is melted and smooth, about 5 minutes.
- Remove from heat and stir in vanilla extract and salt.
- Mix in the chopped Oreo cookies and spread the mixture evenly in the prepared pan.
- Sprinkle the reserved 0.5 cup cookies evenly on top and gently press down.
- Cover with plastic wrap and chill in refrigerator for 2-3 hours until firm.
- Lift the fudge out of the pan using the paper edges and cut into small, bite-sized pieces.