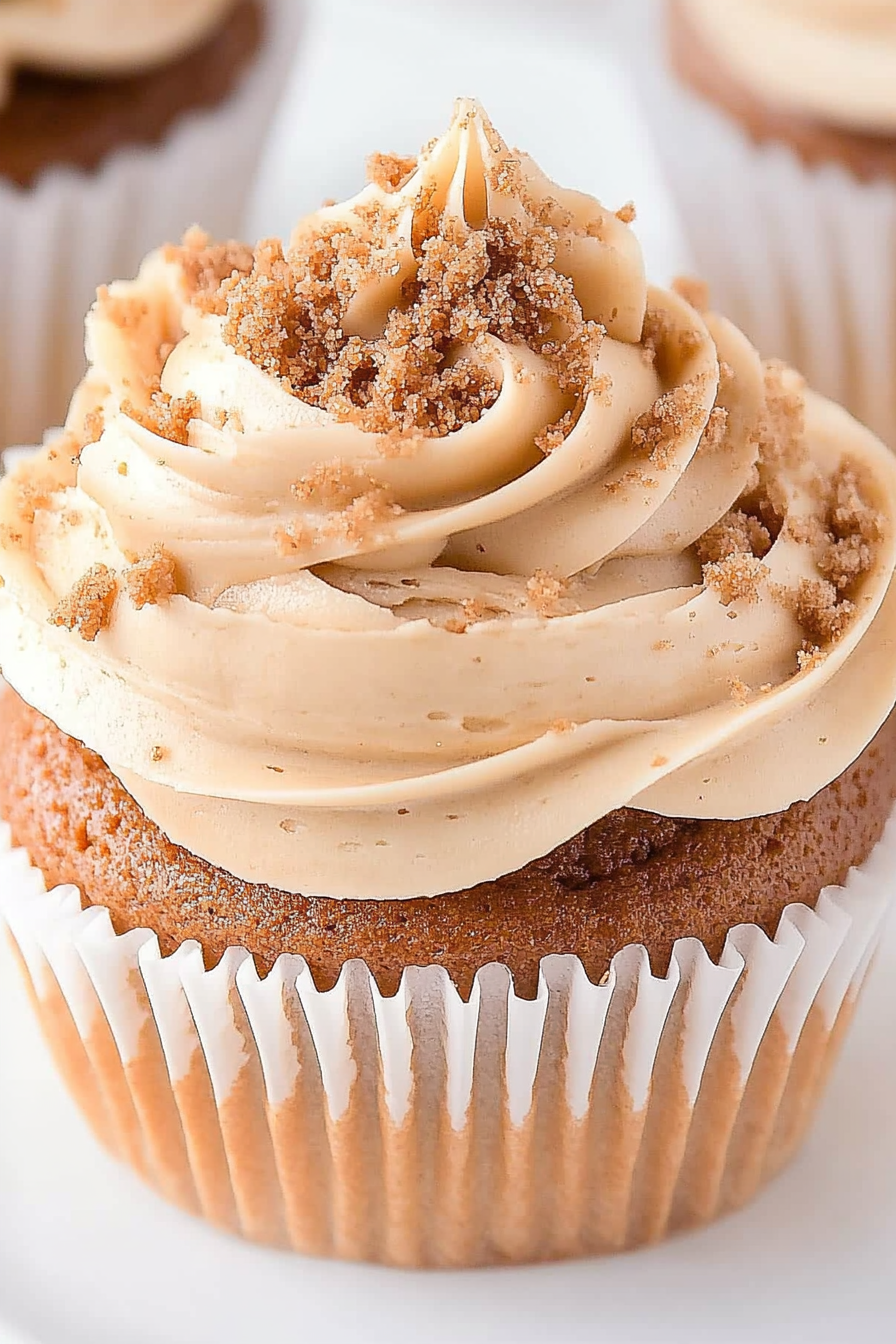
biscotti cupcakes
There’s something about the nostalgic snap of a biscotti dunked into a steaming cup of coffee that immediately takes me back to cozy mornings in my grandmother’s kitchen. But let me tell you, when I first stumbled on the idea of biscotti cupcakes, my whole perspective on this classic Italian treat changed—and for the better! Imagine the crunchy, almond-studded biscotti flavor infused into a soft, moist cupcake with a delicate swirl of glaze on top. These biscotti cupcakes are that perfect mashup of crunchy and tender that’s perfect for when you want the best of both worlds. They’re like biscotti met a cupcake, had a little chat, and decided to put their best foot forward together. If you’re a fan of biscotti but don’t want your teeth to suffer from breaking through a hard cookie every time, this recipe’s going to be your new best friend. Honestly, the smell alone will have your family gathering in the kitchen faster than you can say “more, please!”
What is Biscotti Cupcake?
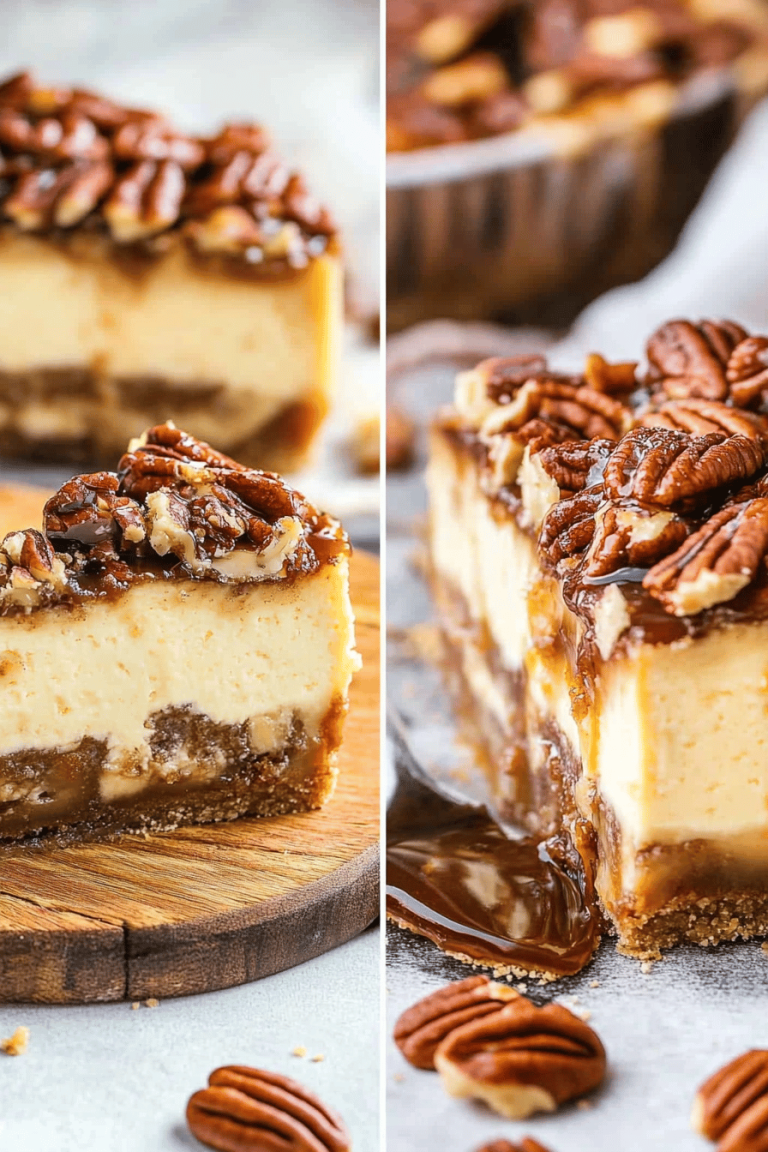
Think of biscotti cupcakes as the cozy lovechild of traditional Italian biscotti and the everyday cupcake. The name might throw you a bit—’biscotti’ means ‘twice baked’ in Italian, referring to that lovely crunch you get from those hard, dry cookies. But in this cupcake version, we capture those same almond and anise-spiked flavors and that sweet crunch in a softer, more tender bite. They’re essentially cupcakes with bits of biscotti incorporated inside or flavors that mimic the original cookie, topped off with a shiny glaze that adds just the right touch of sweetness and moisture. So it’s not about being a cookie or a cupcake but a playful mix of both, a little enough crunch to keep things interesting and a whole lot of moist goodness to satisfy any sweet tooth.
Why you’ll love this recipe?
What I love most about these biscotti cupcakes is their uncanny ability to combine comfort with surprise. You get that classic almond and vanilla hint that’s cozy and predictable, layered with an unexpected crunch that reminds you of the biscotti you grew up loving. Plus, the glaze? It’s like a whisper of sweetness, never overpowering but always inviting you back for one more bite.
And, listen, this recipe couldn’t be simpler. The batter mixes up quickly with pantry staples, and you don’t have to worry about perfect piping or fancy decorations. The glaze is lemony and fresh—one of those little touches that makes your kitchen smell like a bakery, and before you know it, your kids (or your friends) are hovering, forks in hand.
Budget-wise, these are incredibly light on the wallet. Almonds or almond extract, flour, sugar, eggs—things you probably already have or can grab without a second thought. Since this one’s great for breakfast, snack time, or a last-minute dessert, it’s a lifesaver when you want something homemade but don’t feel like fussing over a complicated sweet. It’s way more fun than a plain vanilla cupcake, and way less brittle and intimidating than a biscotti cookie. If you’re a fan of combos—like coffee cake and cookies, or muffins and biscotti—this recipe might just become a fast favorite.
How do I make Biscotti Cupcakes?
Quick Overview
Making biscotti cupcakes is all about balancing the tender crumb of a classic cupcake with those delightful crunchy bits or flavors that remind you of biscotti. You’ll start with mixing your dry ingredients separately from your wet, combining them gently to avoid overmixing, then folding in your biscotti bits or flavorings. The batter goes into cupcake tins, bakes to a perfect moist texture, and while they cool, you’ll whip up a simple glaze that adds that extra zing. The whole process feels approachable but ends with a surprisingly elegant treat that folks will ask you for again and again.
Ingredients
For the Main Batter:
- 1 ½ cups all-purpose flour (I always sift mine to keep things light and fluffy)
- 1 tsp baking powder
- ½ tsp baking soda
- ¼ tsp salt
- ¾ cup granulated sugar
- ½ cup unsalted butter, softened (room temp is key here—if it’s too cold, it won’t mix well)
- 2 large eggs
- 1 tsp almond extract (this really vamped up the biscotti vibes in my kitchen)
- ½ cup plain Greek yogurt (for moisture—trust me, it makes a difference!)
For the Filling:
- ½ cup roughly chopped biscotti (choose almond or anise-flavored ones for extra oomph)
- Optional: ¼ cup chopped toasted almonds for extra crunch
If you want to skip the chunks, you can swap the chopped biscotti for an extra teaspoon of almond extract instead, but I like the textural surprise.
For the Glaze:
- 1 cup powdered sugar
- 2-3 tbsp fresh lemon juice (adjust to your preferred glaze consistency)
- 1 tsp almond extract or vanilla extract(optional enhancement)
Thicker glaze makes a nice drizzled decoration; thinner glaze soaks into the cupcakes slightly and adds a glossy finish.
Step-by-Step Instructions
Step 1: Preheat & Prep Pan
Start by heating your oven to 350°F (175°C) and lining a standard cupcake tin with paper liners. I usually butter the liners lightly—even if they’re non-stick—to keep these delicate cupcakes from sticking. Getting the oven warm ahead of time is crucial because this batter bakes quickly, and you want that nice rise right away.
Step 2: Mix Dry Ingredients
In a large bowl, whisk together your flour, baking powder, baking soda, and salt. Mixing the dry ingredients first helps avoid patches of baking powder later on and makes sure your cupcakes rise evenly. I find this step very calming—sifting and whisking in the quiet of the morning.
Step 3: Mix Wet Ingredients
In another bowl, beat your softened butter and sugar until fluffy and pale—this usually takes a few minutes with a hand mixer. You want the sugar to dissolve slightly to avoid grainy spots. Then add eggs one at a time, beating well after each. Finally, stir in almond extract and Greek yogurt, which keeps these cupcakes so moist and tender (I’ve tested this with sour cream once, but yogurt wins for tang and texture).
Step 4: Combine
Gradually add the dry ingredients to the wet, folding gently and stopping as soon as you no longer see flour. Overmixing is the sneaky enemy here, as it can lead to tough cupcakes. The batter should be slightly thick, creamy, and look smooth. If you notice streaks of flour, a few more gentle folds can help, but don’t overdo it!
Step 5: Prepare Filling
Fold in your chopped biscotti and almonds gently. These chunks add a playful crunch inside the moist cupcake, which I swear is a game changer. If you opt to skip the chunks, you can boost the almond or anise flavor with a little extra extract.
Step 6: Layer & Swirl
Spoon about two-thirds of the batter into the cupcake liners. Then add a small spoonful of extra chopped biscotti or almond paste if you like (this is my secret lazy swirl swirl). Top with the remaining batter, lightly swirling the batter with a toothpick or skewer to create a marbled effect. This might sound fancy but is so simple and gives a gorgeous presentation—trust me, your guests will think you spent hours!
Step 7: Bake
Bake in your preheated oven for 18–22 minutes, or until a toothpick inserted in the center comes out clean or with just a few moist crumbs. Depending on your oven, check around 18 minutes because these can dry out fast past their prime bake time. If you notice the tops browning too quickly, a loose tent of foil can save the day.
Step 8: Cool & Glaze
Let the cupcakes cool completely in the pan for about 10 minutes before transferring to a wire rack. While they cool, whisk together your powdered sugar, lemon juice, and almond extract for the glaze. Pour or drizzle the glaze over the cupcakes once they’re cool to the touch. If you glaze too early, it can melt into the cupcakes too much, so patience really pays off here.
Step 9: Slice & Serve
These are perfect served whole with a beautiful drizzle of glaze to admire but if you want to show off that marbled interior, slice them open and give a peek. Serve at room temperature alongside a hot cup of espresso or tea. The texture contrast really sings when everything’s just right.
What to Serve It With
For Breakfast: These cupcakes pair wonderfully with a bold black coffee or even a creamy latte. Their almond notes come through beautifully and the glaze adds a touch of brightness that wakes up the senses. I often serve a few with fresh berries and a dollop of ricotta for something a little extra but still quick.
For Brunch: Plate them alongside a selection of sliced cheeses, fresh fruit, and maybe a glass of sparkling wine or fresh orange juice. The sweetness of biscotti cupcakes provides a lovely counterpoint to tangy cheese and helps balance the palate.
As Dessert: These cupcakes transform effortlessly with a scoop of vanilla gelato or whipped cream on the side—nothing too heavy, just enough to enhance their delicate flavor. A drizzle of honey or a sprinkle of toasted almonds takes the presentation over the top in a flash.
For Cozy Snacks: My family and I have this tradition: a rainy afternoon and these cupcakes with a warm chai tea or hot chocolate. The combination of warm spice and crunchy-soft texture feels like a hug, and believe me, these always disappear in minutes.
Top Tips for Perfecting Your Biscotti Cupcakes
Biscotti Prep: If you’re chopping your own biscotti, make sure they’re nicely dry but not crumbling into dust—bits roughly the size of small nuts work best. If they’re too fresh and soft, gently air dry them for a few hours or lightly toast in the oven to bring out that much-needed crunch.
Mixing Advice: Keep the batter light! Overmixing has been my biggest threat over the years, leading to dense cupcakes that miss out on that signature tender crumb. Fold the flour in gently, stop mixing as soon as it comes together, and remember—lumps aren’t your enemy.
Swirl Customization: Want to get fancy? Try swirling in some cinnamon or cocoa powder with the glaze for a festive touch. You can create beautiful patterns by dragging a toothpick deeper in some areas. It’s surprisingly easy and looks beautiful.
Ingredient Swaps: I’ve tried swapping regular flour for almond flour—delicious but expect a denser, nuttier cupcake. Using buttermilk instead of yogurt works too and adds a little tang. Coconut sugar instead of granulated sugar imparts that rich caramel note but the color gets darker.
Baking Tips: Place the cupcakes on the middle rack for even baking. If your oven runs hot, reduce the temperature by 10 degrees to prevent them drying out. When in doubt, poke gently with a toothpick to check doneness—resist the urge to open the oven too often though or they may deflate.
Glaze Variations: I love experimenting here. Sometimes a simple vanilla glaze, other times a fresh orange juice glaze brightens things up. Adding finely grated lemon or orange zest is a quick flavor upgrade that feels so fresh and professional.
One lesson I learned the hard way was to resist glazing too early. I once poured glaze on warm cupcakes and ended up with a soggy mess that took days to dry properly. Patience here means that glorious glossy finish that you’ll be proud to show off!
Storing and Reheating Tips
Room Temperature: Store your cupcakes in an airtight container on the countertop for 2-3 days. Keeping them covered preserves their moisture and prevents the glaze from hardening or cracking. A cake dome or a large Tupperware works wonders here.
Refrigerator Storage: These cupcakes can last up to 5 days in the fridge—just pop them in a sealed container. Because of the yogurt and glaze, refrigeration helps keep them fresh but might dry them out a bit, so I suggest warming slightly before serving.
Freezer Instructions: Wrap individual cupcakes tightly in plastic wrap and place in a freezer-safe bag or container. They’ll keep beautifully for up to 2 months. To thaw, leave them on the counter for a couple of hours or gently warm in a low oven to revive softness.
Glaze Timing Advice: If you’re freezing, it’s better to add the glaze after thawing to keep the texture just right. For short-term storage, glaze before storing and keep refrigerated.
I can’t tell you how many times I froze a batch, thawed them for a last-minute breakfast, and felt like I’d pulled off some serious kitchen magic—like fresh-baked, anytime, all the time.
Frequently Asked Questions
Final Thoughts
I really can’t say enough how much these biscotti cupcakes have warmed my kitchen and my heart. They’re cozy, comforting, and just different enough to be exciting without being complicated. Every time I bake them, friends and family crowd around with those eager, smiling faces, ready for a taste. They’re proof that combining old favorites in new ways can bring something truly special to your table. If you loved these, you might want to explore other mashups like coffee cake cookies or almond-speckled muffins—it’s kind of addictive!
So go ahead, gather your ingredients, and whip up a batch. I can’t wait to hear how yours turn out—be sure to drop a comment, share your glaze experiments, or tell me about your family’s secret twist. Happy baking, friend!
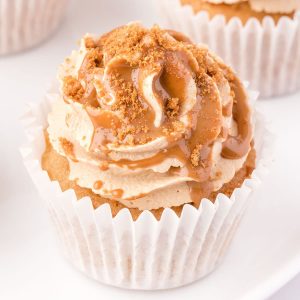
How to Bake Delightful Cookie Butter Cupcakes
Ingredients
Main Ingredients
- 0.75 cup unsalted butter softened
- 0.75 cup soft brown sugar
- 3 large eggs
- 1 cup all purpose flour
- 1.25 tsp baking powder
- 12 tsp Biscoff spread
- 0.75 cup unsalted butter for buttercream, softened
- 2 cup powdered sugar
- 1 cup Biscoff spread for buttercream
- 2 tbsp boiling water
- 4 tbsp Biscoff spread for drizzle
- 12 pieces Biscoff cookies for topping
Instructions
Preparation Steps
- Preheat the oven to 350°F. Line a 12-cup cupcake pan with cupcake liners.
- In a mixing bowl, beat the softened butter and soft brown sugar together on high speed until light and fluffy.
- Add the eggs one at a time, beating well after each addition until the mixture is light and voluminous.
- In a separate bowl, whisk together the all-purpose flour and baking powder. Gradually add to the wet mixture and beat on low speed until just combined.
- Divide the cupcake batter evenly among the prepared cupcake liners.
- Bake for 18 minutes or until cupcakes have risen and are pale golden brown. Remove from oven and let cool completely.
- Warm 12 teaspoons of Biscoff spread slightly in the microwave to soften. Core the center of each cooled cupcake and fill each hole with 1 teaspoon of the warm Biscoff spread.
- To prepare the buttercream, beat the softened butter in a mixing bowl until creamy. Gradually add powdered sugar half a cup at a time and beat until fully combined and fluffy.
- Add 1 cup of Biscoff spread to the buttercream and beat at medium-high speed for 5 minutes until light and smooth.
- Add boiling water to the buttercream and beat on low speed to achieve a smooth, pipeable consistency.
- Pipe swirls of Biscoff buttercream onto each cupcake using a star nozzle.
- Warm the remaining 4 tablespoons of Biscoff spread until pourable, then drizzle over the frosted cupcakes. Top each with one Biscoff cookie.
- Enjoy your delicious cookie butter cupcakes!