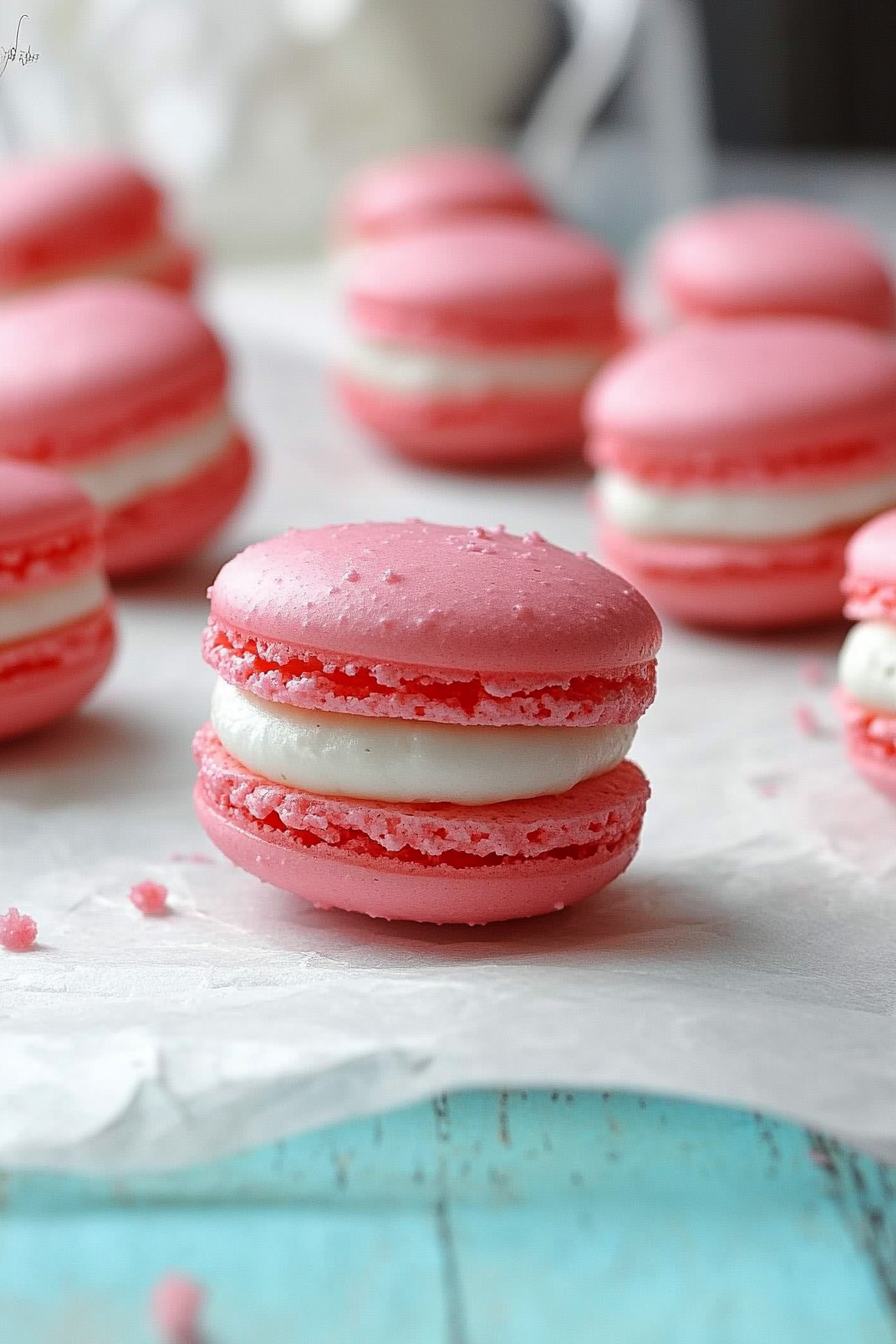
French Macarons
There’s something about the delicate crunch of a French macaron shell giving way to a soft, chewy center that just pulls me right back to my first visit to Paris. I remember strolling past tiny bakeries where rows of these pastel gems beckoned from glass cases, each one promising a bite of pure joy. Honestly, they’re the grown-up cousin of your favorite sugar cookie but oh-so-much more elegant and downright addictive. I’m not gonna lie—these little cookies can seem intimidating at first, but if you stick with me, I’ll share all my tricks and secrets to make French macarons that’ll have your friends thinking you hired a pastry chef. Plus, they’re entirely worth the love and patience they demand. If you’ve ever tried a simple sugar cookie and thought it was good, wait until you experience the refined flavors and silky textures in these French macarons—trust me, you’re in for a treat!
What is French Macarons?
Think of French macarons as tiny, colorful pillows made from almond flour, egg whites, and sugar, sandwiched together with luscious fillings like buttercream, ganache, or jam. They have a crisp outer shell with a soft inside that melts in your mouth. The name “macaron” comes from the Italian word “maccherone,” meaning fine dough, which was later embraced by the French bakers and turned into the delicate confection we adore today. It’s essentially a sweet meringue sandwich—but don’t let that fancy description scare you off. These little treats make for a charming homemade gift or party showstopper, and learning how to nail their signature texture is like unlocking a secret door in the kitchen. Once you know the basics, you’ll be whipping up batches that look and taste just like those chic patisseries!
Why you’ll love this recipe?
Let me start by saying, what I love most about this French macaron recipe is how it perfectly balances sophistication and simplicity. The flavor is absolutely dreamy—the nutty almond base paired with the smooth, sometimes tangy filling just makes your taste buds do a happy dance. I’ve tried macarons from pricey cafes, and honestly, homemade ones like these hold their own. Plus, it’s such a rewarding bake. Yes, macarons get a bit of a reputation for being finicky, but once you get the hang of folding the batter just right and letting the shells rest before baking, it’s actually much easier than it looks.
Another thing I appreciate is how cost-effective it is—almond flour and sugar might cost a bit upfront, but compared to store-bought macarons, you’re saving lots and getting a fresher, customizable result. Speaking of which, the versatility is incredible. Whether you want to fill them with lavender-infused buttercream, chocolate ganache, or a simple lemon curd, you can switch it up to suit your mood or occasion. My kids adore the classic chocolate-filled ones, but I’m partial to pistachio-flavored macarons myself.
It’s like the elevated version of those sugar cookies you loved as a kid but with endless ways to play around, taste-wise. If you’re into other fun bakes, you might also enjoy trying my chocolate chip cookies or basic meringues alongside these. What really makes this recipe stand out is the balance—it’s indulgent but approachable, and I promise once you make your first batch, you’ll understand exactly why I keep coming back for more.
How do I make French macarons?
Quick Overview
Making French macarons is a bit like doing a little chemistry experiment in your kitchen, but don’t panic—it’s super straightforward when you take it step by step. The process involves whipping egg whites to the perfect glossy peak, carefully folding in finely ground almond flour and powdered sugar to create a silky batter, then piping neat little rounds onto a baking sheet and letting them dry slightly before baking. That resting period is the secret to those signature smooth shells and “feet” (the ruffled base). Once baked, you fill them with your favorite buttercream or ganache. It’s all about patience and precision, but I’ve got your back with tips so you won’t feel lost.
Ingredients
For the Main Batter:
- 110g almond flour (super fine, sifted if needed—it makes all the difference)
- 200g powdered sugar (sifted to avoid lumps)
- 90g egg whites (aged and at room temperature for better whipping)
- 30g granulated sugar
- A pinch of cream of tartar (optional, for stabilizing the meringue)
- Food coloring (gel preferred for vibrant colors without messing with the batter’s consistency)
For the Filling:
- 150g unsalted butter (softened to room temperature)
- 120g powdered sugar
- 1 tsp vanilla extract or flavorings like cocoa powder, lemon zest, or fruit puree
- Optional: 1–2 tbsp heavy cream or milk for adjusting texture
For the Glaze (Optional):
- 1/2 cup powdered sugar
- 1–2 tsp milk or lemon juice
- Few drops of vanilla extract or rose water for a delicate aroma
Step-by-Step Instructions
Step 1: Preheat & Prep Pan
Start by preheating your oven to 300°F (150°C). Line two baking sheets with silicone baking mats or parchment paper—this prevents sticking and helps give those beautiful flat bottoms. Meanwhile, bring your egg whites out to room temp for easy whipping. This step never gets old—I always feel like the real baker when the oven warms up and the kitchen starts smelling cozy. Trust me, your effort here sets the tone for a great batch!
Step 2: Mix Dry Ingredients
In a bowl, sift together the almond flour and powdered sugar. Sifting eliminates clumps and ensures your batter is ultra smooth which is essential for those glossy shells. I’ve learned the hard way that skipping this results in lumpy shells that crack instead of smooth surfaces. So don’t rush this step!
Step 3: Mix Wet Ingredients
Beat your egg whites in a clean, dry bowl until foamy. Add the cream of tartar (if you have it) and gradually add granulated sugar, beating until stiff, glossy peaks form. This is the magical stage where your batter gains life and volume. A quick tip I picked up: make sure not to overbeat as it dries out the whites, and underbeating won’t give enough structure.
Step 4: Combine
Fold the dry ingredients gently into the meringue using a spatula. This folding step is crucial—you want a batter that flows like lava but isn’t runny. Too much mixing and the dough gets too thin; too little and your macarons crack or won’t rise properly. I always fold a handful at a time, rotating the bowl to keep everything even.
Step 5: Prepare Filling
While the shells rest, whip your butter until creamy, then gradually add powdered sugar and flavorings. For a softer, spreadable filling, add a splash of cream. My personal fave is a vanilla bean buttercream, but chocolate ganache or even jam work wonders too. This part is where you get to personalize your macarons.
Step 6: Layer & Swirl
If you want to get fancy, you can pipe two colors side-by-side or swirl them gently with a toothpick for a marbled effect. This always makes me feel like a true artist in the kitchen—even if the “art” is accidental sometimes! For classic macarons, just keep the piped circles uniform and about 1.5 inches wide.
Step 7: Bake
Let your piped batter rest at room temperature for 30-45 minutes until a skin forms on the surface—run your fingertip lightly over the top, and it shouldn’t stick. This resting is king for those flawless smooth shells and feet. Bake on the middle rack for 15-18 minutes. If your oven runs hot, keep a close eye—you want them firm but not browned. When done, they should lift right off the mat gently.
Step 8: Cool & Glaze
Cool the shells completely before filling. If you opt for the glaze, mix powdered sugar with milk or lemon juice, then drizzle carefully over assembled macarons for a shiny finishing touch. I often skip the glaze because the natural sheen of the shells is stunning, but it’s fun to add a little flair for special occasions.
Step 9: Slice & Serve
French macarons are best served at room temperature. When you bite into one, you want to feel that delightful first crunch followed by the chewy, soft interior and that burst of buttercream. Display them on a pretty plate, and prepare for the compliments. My kids can’t get enough of these at tea time, and they’ve become our go-to for celebrations big and small!
What to Serve It With
For Breakfast: Pair macarons with a robust cup of coffee or a frothy latte. I love presenting these alongside fresh fruit and a light cheese plate for a special weekend morning treat. It turns an ordinary breakfast into a mini celebration.
For Brunch: Serve macarons on a tiered stand next to sparkling wine or a citrusy mimosa. Their delicate sweetness cuts through well, making the whole table feel elegant and festive.
As Dessert: Finish dinner on a high note by plating macarons with fresh berries or a drizzle of chocolate sauce. Sometimes, I even warm a berry coulis and use it as a dip—unexpected but utterly delicious.
For Cozy Snacks: When the kids or friends pop by unexpectedly, these little delights with hot tea or cocoa are an instant crowd-pleaser. The smell alone pulls everyone into the kitchen for a sweet hug in cookie form.
Honestly, macarons have become a part of our family’s special moments, from birthdays to lazy Sunday afternoons. The way they look almost too pretty to eat makes every occasion feel just a bit more magical.
Top Tips for Perfecting Your French Macarons
Almond Flour Quality: Always use superfine almond flour that’s well sifted. Coarser flakes will ruin the smooth texture and cause cracks. I usually buy mine from a trusted supplier and store it airtight.
Mixing Advice: Folding is key—do it gently but thoroughly. Look for a batter consistency that flows slowly off your spatula like thick lava. If it droops quickly, it’s overmixed; too stiff and the macarons won’t spread.
Resting the Shells: This step saved me countless batches. Don’t rush it. The batter needs to dry until a light skin forms on the surface before baking, or your macarons will crack and lose their feet.
Ingredient Swaps: I’ve experimented with aquafaba (chickpea water) for vegan versions, and it works surprisingly well, just requires extra whipping time. Coconut sugar can also replace granulated sugar but expect a slight color change.
Baking Tips: Oven calibration is a must. I recommend an oven thermometer to avoid overheating. Bake on the center rack, and if you notice excessive browning, tent loosely with foil.
Glaze Variations: Feel free to add lemon zest, rose water, or even matcha powder for flavor twists. Just ensure the glaze is thin enough to drizzle but not so watery it runs off the macarons.
One lesson I learned the hard way: never skip sifting, and always give yourself extra time for the resting phase—rushing these steps is usually the cause behind disappointing shells. Patience and attention to detail are the secret ingredients here.
Storing and Reheating Tips
Room Temperature: Store macarons in an airtight container at room temp for up to 2 days. Keeping them sealed helps maintain their crisp shells and soft interiors. I usually cover mine with a loose towel then transfer to the container.
Refrigerator Storage: Macarons actually taste even better after a day in the fridge—the flavors meld beautifully. Use an airtight container lined with parchment paper to prevent moisture buildup. They keep well up to 5 days this way.
Freezer Instructions: For longer storage, freeze macarons in a single layer on a baking sheet, then transfer to a sealed container or freezer bag. Freeze up to a month. Thaw fully in the fridge overnight before serving.
Glaze Timing Advice: If you glaze macarons, it’s best to do so just before serving. Glaze can soften the shells over time, so for storage, keep macarons unglazed and add the drizzle fresh.
I usually prepare batches ahead for parties and store leftovers in the fridge with no problem. Just let them rest for at least 30 minutes at room temp before serving to bring out their best texture.
Frequently Asked Questions
Final Thoughts
There’s just something so satisfying about mastering French macarons that makes the whole kitchen feel a bit more magical. They aren’t just cookies—they’re little bites of joy, patience, and art all rolled into one. I adore how you can tweak the flavors and colors to suit any mood or celebration, and the sense of achievement when you pull off smooth, shiny shells with those characteristic feet never gets old. If you love the elegance of macarons, I’d also recommend trying my homemade buttercream variations or experimenting with creative fillings like salted caramel or rose petal jam. Seriously, once you get your first batch right, you’ll feel like you’ve unlocked the ultimate baking win. Don’t be shy about asking questions or sharing your own spins—I’d love to hear how your macarons turn out. Happy baking!
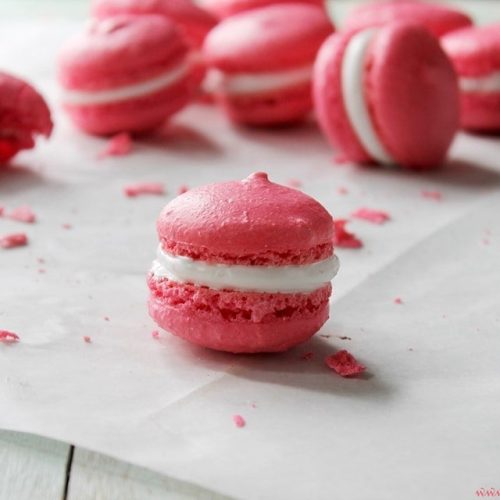
Delicate French Macarons with Marshmallow Frosting
Ingredients
Main Ingredients
- 5 large egg whites at room temperature
- 0.5 cup superfine sugar
- 1.75 cups almond flour
- 2 cups powdered sugar
- 2 large egg whites
- 0.25 teaspoon salt
- 0.25 cup sugar
- 0.75 cup light corn syrup
- 1 teaspoon pure vanilla extract
Instructions
Preparation Steps
- Line three baking sheets with parchment paper and set aside.
- Place 5 egg whites in a mixer bowl and beat until frothy; gradually add superfine sugar, continue beating until glossy stiff peaks form.
- Optional: add a few drops of food coloring and mix until combined. Set aside.
- Sift almond flour and powdered sugar into a large bowl and mix well.
- Gently fold 1/4 of the meringue into the almond mixture using a rubber spatula, then fold in the rest until fully incorporated.
- Fit a piping bag with a 3/8-inch round tip and fill with the macaron batter.
- Pipe small rounds onto the prepared baking sheets.
- Let the piped batter dry at room temperature for 1 hour.
- Preheat oven to 315°F.
- Bake macarons for 12 to 15 minutes until they no longer jiggle. Rotate trays halfway through baking.
- Remove macarons from oven and transfer to a cooling rack without removing them from the sheets.
- Allow macarons to cool completely before filling.
- For the frosting: Beat 2 egg whites with salt until foamy.
- Gradually add sugar and continue beating until soft peaks form.
- Microwave corn syrup on high for 1.5 to 2 minutes until boiling.
- Slowly pour hot corn syrup into egg whites while beating until stiff, glossy frosting forms.
- Add vanilla extract and beat until well combined.
- Pipe about 0.5 teaspoon of marshmallow frosting onto half the cooled macaron shells, then top with remaining shells to form sandwiches.
- Store assembled macarons in an airtight container in the refrigerator and let rest for 24 hours to develop flavor.