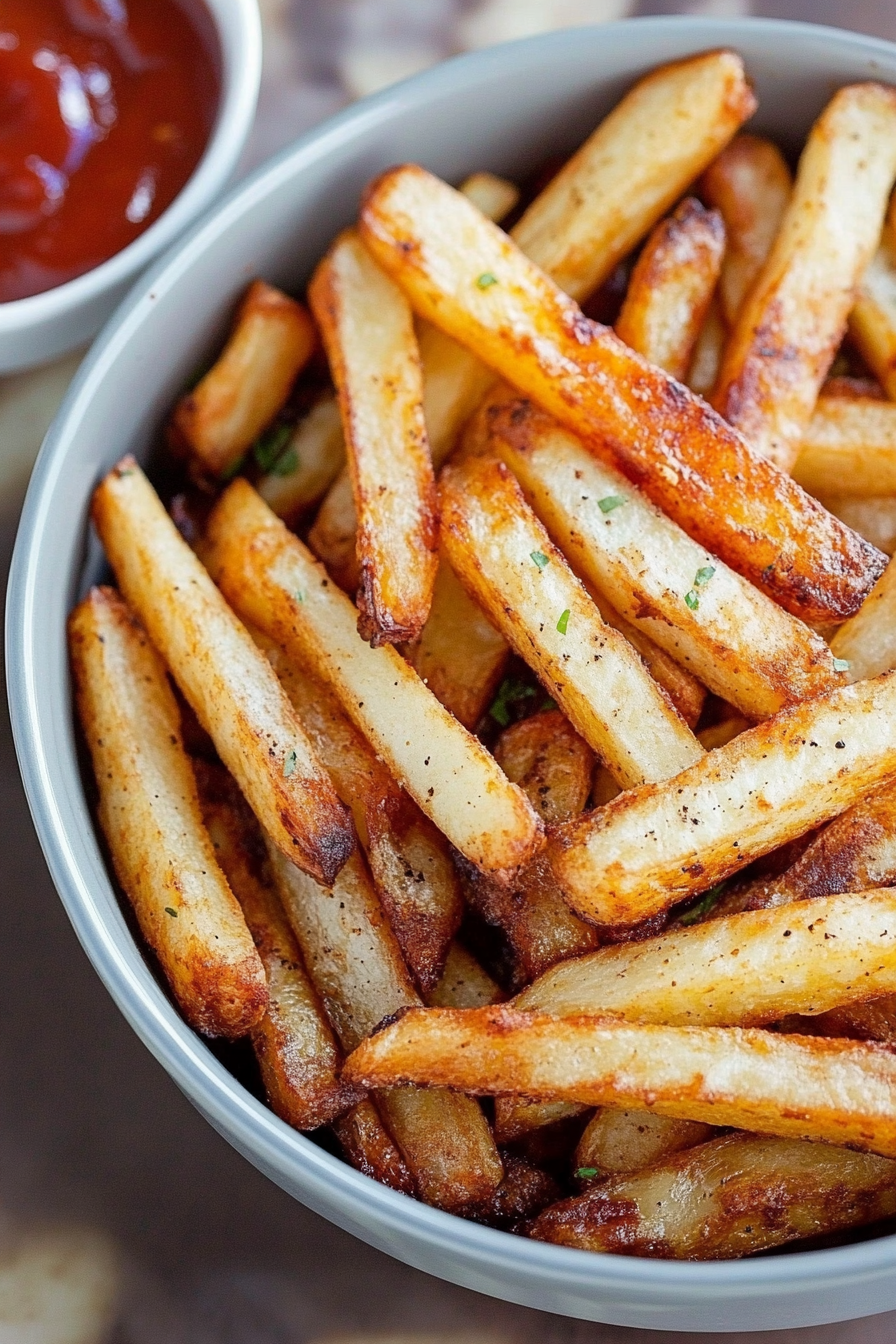
air fryer fries
There’s nothing quite like that warm, crispy feeling of biting into a perfectly cooked french fry — you know, the kind that’s golden on the outside and fluffy on the inside. I remember the first time I tried making air fryer fries at home, skeptical that they could rival the deep-fried crispy fries from our favorite local spot. But once I tasted them, I was hooked. Air fryer fries are my go-to comfort food when I want something crunchy and satisfying without the greasy mess. Plus, they come together faster and cleaner than any oven-baked attempt I’ve made before. My kids actually ask for these all the time, especially during those movie nights when we’re craving snacks but I don’t want to spend forever in the kitchen. If you’re craving fries that hit that perfect balance of crispy and tender, this recipe will become your new best friend.
What is an air fry?
Think of air fryer fries as a clever shortcut to classic French fries, but without the deep-frying. Essentially, you’re cooking sliced potatoes using rapidly circulating hot air that crisps them up with just a whisper of oil. The air fryer came into my kitchen as a lifesaver when I wanted my fries light but still delightfully crunchy. Unlike baked fries that sometimes end up more soft or limp, air fryer fries have this special texture — a crispy shell hugging a tender, fluffy inside. They’re sometimes called “healthy fries,” but honestly, they’re just smart fries that don’t skimp on taste. Plus, you can customize them with your favorite seasonings — from paprika to garlic powder — making them perfect for anything from a casual snack to a fun side for dinner.
Why you’ll love this recipe?
What I love most about these air fryer fries is how incredibly easy they are to whip up, especially when life gets busy. There’s no need for a huge pot of oil or worrying about splatters across the stove — just a quick toss in the air fryer and you’re golden. The flavor? Totally amazing if you use the right potatoes like Yukon Gold or Russet, which crisp beautifully and stay soft inside.
Budget-friendly is another big win here. Potatoes are always affordable, and you only need a touch of oil and some pantry staples for seasoning. That simplicity makes these fries an everyday winner, unlike many recipes that require fancy ingredients or hours of prep. Versatility is the cherry on top — I’ve paired them with everything from burgers to grilled chicken, and even sprinkled with Parmesan and herbs for a fancy twist. Plus, if you love roasted potato wedges or oven-baked fries, this just feels like the cooler, faster cousin who always nails the crispy texture.
This one’s a lifesaver when you want fries that taste indulgent but don’t want to spend the evening cleaning up a greasy mess. Trust me, once you get the hang of it, you’ll never look at frozen fries the same way.
How do I make air fryers?
Quick Overview
Your journey to crispy, golden air fryer fries is surprisingly simple. After slicing your potatoes evenly, the key step is soaking or rinsing them to release excess starch — this makes all the difference for that coveted crunch. Dry them thoroughly, toss gently with oil and seasoning, then air fry until that glorious golden color appears. The air fryer’s magic crisps the exterior while keeping the inside soft and fluffy. You’ll be biting into fries in under 30 minutes, way faster than waiting for the oven to heat or deep-frying.
Ingredients
For the Fries:
- I like Russets for fluffy centers and Yukon Gold for buttery flavor. I like Yukon Gold for a buttery flavor.
- 1-2 tablespoons olive oil or avocado oil – just enough to lightly coat, avoid excess for crispiness
- 1 teaspoon kosher salt – season generously after cooking too
- 1/2 teaspoon garlic powder – optional, but adds a lovely savory note
- 1/2 teaspoon smoked paprika – for that faint smoky warmth (totally optional)
Step-by-Step Instructions
Step 1: Prep Your Potatoes
First, wash and peel the potatoes if you prefer—though leaving the skin on adds texture and nutrients if you’re okay with it. Cut them into evenly thick sticks about 1/4 inch wide. If the fries are uneven, some will cook faster and become too crispy or burnt while others stay underdone.
Step 2: Soak and Dry
Here’s a trick I learned the hard way — soak the cut fries in cold water for at least 30 minutes (even up to 2 hours if you’re planning ahead). This rinses away the starch that makes fries gummy. Drain and pat each fry completely dry with kitchen towels or paper towels. If they’re still damp, the fries won’t get as crispy!
Step 3: Toss With Oil and Seasoning
Place your dry fries in a large bowl, drizzle with olive or avocado oil, and sprinkle on salt, garlic powder, and paprika if you’re using. Toss gently but thoroughly, making sure each fry has a thin, even coat. This light coating is what gives you that beautiful crunch without making the fries greasy.
Step 4: Preheat and Load the Air Fryer
Preheat your air fryer to 380°F (193°C) for about 5 minutes — I always do this so the fries start crisping immediately. Place fries in the basket in a single layer; you might need to cook in batches if your air fryer is small. Crowding the basket can trap steam and lead to soggy fries.
Step 5: Air Fry
Cook fries for 15-20 minutes, shaking or tossing the basket every 5 minutes to promote even browning. Keep an eye on them in the last 5 minutes—they should be golden and crisp but not burnt.
Step 6: Final Seasoning and Serve
Remove fries and immediately sprinkle with a little extra flaky sea salt or your favorite finishing salt. Serve piping hot!
What to Serve It With
For Breakfast: Serve these crispy air fryer fries alongside fluffy scrambled eggs and a fresh cup of coffee. The contrast of warm, golden fries with your morning brew is comfort food at its best.
For Brunch: Pair fries with avocado toast topped with a poached egg and a light mimosa. The fries add a playful crunch that makes the meal feel a bit more festive.
As a Dinner Side: These fries shine with burgers — homemade or from a box, they elevate the meal. I also love serving them with a simple grilled chicken or even alongside fish tacos for a fun, casual dinner.
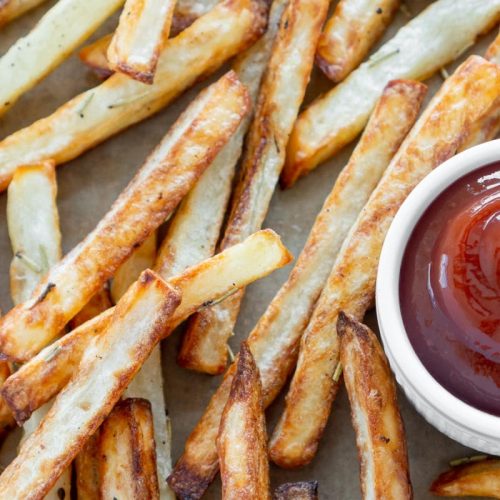
For Cozy Snacks: Sometimes, my kids and I munch on these fries with classic ketchup or a creamy garlic aioli during evening movie marathons. It’s a classic combo that always disappears in minutes.
Fun fact: we occasionally sprinkle them with Parmesan and fresh herbs like rosemary or thyme, which makes them feel a little grown-up but still approachable — perfect for Sunday dinners.
Top Tips for Perfecting Your Air Fryer Fries
Potato Selection: Russets are my favorite because their starchiness helps with that fluffy core, but Yukon Gold adds a buttery flavor and creamier texture. I tend to avoid red potatoes for this recipe since they don’t crisp as nicely.
Drying the Fries: Don’t rush the drying step. Even slight moisture on your fries before air frying can keep them from becoming crisp. I pat mine until I can no longer feel any dampness.
Avoid Crowding: This one’s a game-changer. Whether you layer fries too thickly or put too many in at once, you’ll end up with steam-softened fries rather than crispy ones. Cook in batches if needed.
Season After Cooking: While tossing with salt before cooking is fine, finishing with flaky sea salt or your favorite seasoning blend right after air frying gives you that satisfying pop of flavor. I learned this trick because too much salt upfront sometimes draws moisture out.
Shake the Basket: Every 5 minutes is my rule of thumb—I’ve accidentally forgotten this step and definitely saw uneven cooking. It also prevents burnt edges.
Glaze Variations: If you’re up for a twist, brush fries with a little garlic butter or sprinkle Parmesan cheese right when they come out—you’ll be amazed at how much flavor this adds. For a spicy kick, a dust of cayenne or chili powder works wonders.
Over the years I’ve tried different oils—like coconut oil or even bacon fat—and each time the flavor profile shifted, but olive or avocado oil remains my steady favorite for crisp, neutral taste.
Storing and Reheating Tips
Room Temperature: If you have leftovers (rare in my house), spread the fries on a plate or tray and loosely cover with foil. They’re best eaten within 1-2 hours of cooking to keep crisp.
Refrigerator Storage: Place cooled fries in an airtight container and refrigerate for up to 3 days. They’ll lose some crispness but reheating is the key.
Reheating: Skip the microwave if you want to keep some crunch. Instead, pop leftover fries back into the air fryer at 350°F for 3-5 minutes. This refreshes their crispiness almost like they’re freshly cooked.
Freezer Instructions: You can freeze cooked fries by spreading them on a parchment-lined sheet tray. Once frozen, transfer them to a freezer-safe bag or container. When ready to eat, air fry at 400°F for about 8-10 minutes, shaking once halfway through. Don’t glaze before freezing—add seasoning after reheating.
Glaze Timing Advice: If you use a glaze or butter topping, apply it right before serving for the best texture. Applying glaze before storing can make fries soggy.
Frequently Asked Questions
Final Thoughts
I honestly can’t recommend these air fryer fries enough—they’ve become that humble little go-to recipe I make when I want comfort food that’s both easy and feels a bit special. The smell as they cook pulls me right into the kitchen every single time, and the crispiness balances perfectly with their soft centers. If you’ve ever thought making fries at home was complicated or messy, give this method a shot—you might find yourself reaching for your air fryer way more often than you expect. And if you enjoy this recipe, you might want to peek at my other air fryer favorites like crispy chicken wings or roasted veggies, which share that same no-fuss magic.
Don’t be shy—drop a comment, share your tweaks, or let me know how yours turned out. Happy cooking, and here’s to the best fries you’ve ever made at home!
Crispy Oven-Baked Air Fryer Style Fries How to Make Them
Ingredients
Main Ingredients
- 4 medium russet potatoes
- 1 tablespoon avocado oil
- 1 teaspoon kosher salt
- 0.5 teaspoon fresh rosemary finely chopped
Instructions
Preparation Steps
- Wash your potatoes thoroughly under cool running water.
- Dry potatoes completely with a clean towel.
- Preheat your oven to 425°F (218°C).
- Peel the potatoes if desired.
- Cut the potatoes into fries approximately 3/8 inch thick.
- Toss the fries in a large bowl with avocado oil until evenly coated.
- Sprinkle half the salt and rosemary over the fries and toss. Add the remaining salt and rosemary and toss again to evenly season all fries.
- Arrange fries in a single layer on a baking sheet lined with parchment paper, leaving space between fries for even crisping.
- Bake in the preheated oven for 20 minutes. Halfway through, flip fries to ensure even cooking.
- Check fries for desired crispness. If needed, bake for an additional 5-10 minutes.
- Remove fries from oven, add extra salt if desired, and serve immediately with your favorite dipping sauce.