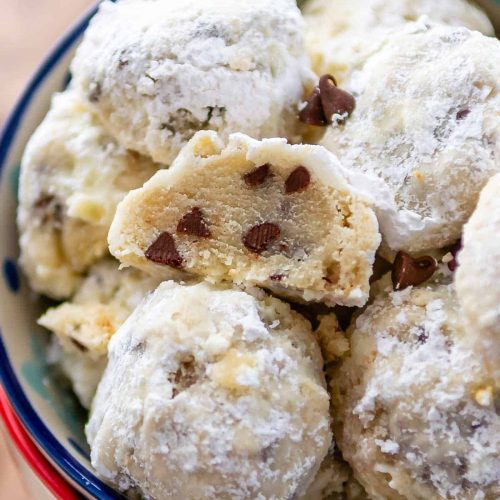
snowball cookies
There’s something about snowball cookies that instantly takes me back to sitting on the kitchen floor as a kid, waiting for my grandma to pull these delicate, powdered-sugar-dusted treats from the oven. The smell of buttery, nutty goodness melting gently into the air — it’s like a warm hug on a chilly winter afternoon. If you’re picturing those classic Russian tea cakes or Mexican wedding cookies, you’re already halfway there. But for me, snowball cookies are more than just a festive nibble; they’re those little pockets of joy that vanish in minutes at every family gathering. They’re comforting, surprisingly easy to whip up, and perfect when you want a sweet bite without the fuss of a big dessert. Trust me, once you try my version of snowball cookies, you’ll be baking them again and again — they’re that irresistible.
What is snowball cookie?
Think of snowball cookies as these bite-sized, round cookies that are coated in powdered sugar, giving them a snowy, magical appearance—hence the name! They’re essentially little buttery bites often made with finely chopped nuts, which adds a lovely texture and a subtle nuttiness that balances out the sweetness. The beauty is in their simplicity: a tender, crumbly cookie that melts on your tongue, followed by that snowy white sugar coating that’s so pretty it almost feels like a treat just to look at. Originating from various cultural traditions—sometimes called Russian tea cakes or Mexican wedding cookies—the snowball cookie has been embraced across the globe. It’s basically the cookie equivalent of a cozy winter scarf wrapped around your hands, perfect for sharing or sneaking when no one’s looking.
Why you’ll love this recipe?
What I love most about snowball cookies is how they manage to hit all the right notes with zero pretentiousness. First off: the flavor. The buttery dough is rich but not heavy, with toasted nuts woven in that add just the right crunch. When that powdered sugar coats every nook and cranny, it’s like a sweet little snow kiss with every bite. Secondly, simplicity. If you’ve ever felt intimidated by fancy cookie recipes that demand hours of chilling or precise shaping, forget that. These cookies come together with just a handful of pantry staples, no fancy tools, and bake in under 20 minutes. Seriously, this one’s a lifesaver on busy nights or last-minute get-togethers. Thirdly, they’re budget-friendly. Nuts are the only “special” ingredient, and even there, you can swap in what you have—walnuts, pecans, almonds. Versatility is another big winner here. Beyond the traditional powdered sugar finish, I sometimes toss them with cinnamon sugar or dip half into melted chocolate for a fancy twist. Compare this to other crumble cookies or shortbread, and the snowball cookie edges out with its effortless charm and melt-in-your-mouth appeal. Also, my kids ask for these more than any other cookie I’ve made — and disappearing trays don’t lie!
How do you make snowball cookies?
Quick Overview
Making snowball cookies is kind of like a warm-up act to your holiday baking but can easily stand on its own any time of year. You basically mix together a buttery dough loaded with finely chopped nuts, shape it into little balls, bake until just golden, then roll them in heavenly powdered sugar while still warm. The whole process is quick and hands-on, no chilling necessary, so you get those fresh-from-the-oven cookies in no time. Plus, because they’re naturally crumbly, you get to enjoy that satisfying texture every single bite.
Ingredients
For the Main Batter:
- 1 cup unsalted butter, softened (make sure it’s good quality, it makes a difference!)
- 1/2 cup powdered sugar, plus more for rolling (don’t skip the rolling part — that sugar coating is the star)
- 2 cups all-purpose flour (sift it for lightness)
- 1 cup finely chopped nuts (I love walnuts, but pecans or almonds work great too; toast them lightly for extra flavor)
- 1/4 teaspoon salt (balances sweetness beautifully)
- 1 teaspoon vanilla extract (trust me, it lifts the whole cookie)
For the Filling:
Actually, classic snowball cookies don’t have a filling, but if you’re feeling adventurous, you can stuff a little dollop of your favorite jam or Nutella inside before baking. It turns the humble snowball into a delightful surprise.
For the Glaze:
- About 1 cup powdered sugar (extra for rolling when warm)
- Optional: a pinch of cinnamon or a splash of lemon zest mixed into the sugar for a twist on the classic
Step-by-Step Instructions
Step 1: Preheat & Prep Pan
Start by preheating your oven to 350°F (175°C). Line a baking sheet with parchment paper or a silicone baking mat to make cleanup a breeze and prevent sticking. I usually get this ready while I’m mixing — multitasking for the win!
Step 2: Mix Dry Ingredients
In a bowl, whisk together the flour, salt, and the chopped nuts that you’ve toasted lightly beforehand. The nuts add such a lovely, toasty aroma; you’ll notice that rich fragrance right away. This mix is dry and gritty at first, but don’t worry—we’ll add the magic next.
Step 3: Mix Wet Ingredients
In a separate large bowl, beat the softened butter until smooth and creamy. Add the powdered sugar and vanilla extract, then keep beating until the mixture looks light and fluffy. The smell of vanilla combined with fresh butter? Pure comfort on a spoon.
Step 4: Combine
Slowly add your dry nut and flour mixture to the wet bowl, folding gently with a spatula until just combined. It’s tempting to overmix here, but resist! You want to keep that tender texture — overworking the dough makes the cookies tough, and that’s the last thing we need.
Step 5: Prepare Filling
Like I said earlier, these classic cookies don’t normally have fillings, but if you’re going the stuffed route, prepare about a teaspoon of your filling (jam, chocolate, or even peanut butter). Scoop a little dough, place the filling inside, and seal carefully before shaping.
Step 6: Layer & Swirl
Skip this for snowball cookies — this step is more relevant for layered or marble cookies, but feel free to sprinkle some cinnamon into your powdered sugar coating for extra flair if you want a little swirl in flavor.
Step 7: Bake
Roll your dough into walnut-sized balls and place them evenly spaced on your prepared baking sheet. Bake for about 15–18 minutes or until the edges just begin to turn golden. Keep a close eye — you want them tender and lightly golden, not browned. The smell alone will have you counting down the minutes!
Step 8: Cool & Glaze
While the cookies are still warm but not hot, gently roll them in powdered sugar until fully coated. This step is THE key to that signature snowball look and melt-in-your-mouth sweetness. Let them cool completely on a wire rack, then roll them painlessly for a second time in powdered sugar once they’ve hardened a bit. This double coating keeps them snowy and prevents sticky fingers.
Step 9: Slice & Serve
Snowball cookies are best served whole, but if you want to get fancy, try a delicate bite-sized break to release that buttery, nutty aroma. They’re perfect at room temperature, with a cup of tea or coffee (or even a glass of cold milk if you want to channel childhood memories). Share them in a festive tin or wrap in parchment for little edible gifts — they always steal the show.
What to Serve It With
For Breakfast: Snowball cookies are oddly perfect with your morning coffee or latte. The buttery sweetness complements your first caffeine hit so well. Try a dollop of whipped cream or a side of fresh berries for a simple but elegant touch.
For Brunch: Serve these on a pretty plate next to fresh fruit and a light citrus salad. A mild green tea or a sparkling grapefruit cocktail (if you’re fancy) makes a playful pairing.
As Dessert: After dinner, dust them with a tiny bit of extra cinnamon or cocoa powder for a little grown-up twist. They also work beautifully with a scoop of vanilla ice cream or alongside a rich hot chocolate—decadence meets comfort.
For Cozy Snacks: I love to have a plate of snowball cookies out during movie nights or afternoon downtime. They’re just the right size to nibble slowly, and the powdered sugar often ends up adorably all over my kids’ faces, which only adds to the fun!
Our family has a tradition of pairing these cookies with a slow-simmering pot of mulled cider during holiday gatherings. It’s my favorite way to enjoy their nutty sweetness while staying warm and connected.
Top Tips for Perfecting Your Snowball Cookies
Nuts Prep: Always toast your nuts lightly before chopping. It brings out the oils and deepens flavor. I learned this after a few batches tasted a bit flat. Also, make sure to chop them fine enough so they meld nicely in the dough but still give a pleasant crunch.
Mixing Advice: Be gentle when combining wet and dry ingredients. Overmixing is the classic cookie killer for snowballs; it makes them tough instead of crumbly. I usually fold with a spatula and stop as soon as everything’s incorporated.
Swirl Customization: If you want to experiment with swirls or different sugar coatings, mix cinnamon or lemon zest into your powdered sugar before rolling. It adds an unexpected burst of flavor and a pretty finish without extra work.
Ingredient Swaps: I’ve swapped half the butter for coconut oil once, and though it changed the texture slightly, the flavor was surprisingly good—just a bit more tropical. Almond flour can be used instead of some all-purpose flour for a delicate nuttier bite but keep an eye on the dough—it may be softer.
Baking Tips: Oven temps do vary, so start checking your cookies around 15 minutes. Ideally, edges turn light golden but don’t brown fully. If you bake longer, they lose their delicate texture. I usually place the baking sheet in the middle rack for even heat.
Glaze Variations: Powdered sugar is classic, but you can swap in a dusting of cocoa powder or chopped freeze-dried berries mixed with sugar for something vibrant. I occasionally spread a thin drizzle of melted white chocolate on top after rolling and let it harden — a total crowd-pleaser.
One crucial lesson? Don’t skip the double roll in powdered sugar. The first dusting absorbs into the warm cookie, and the second keeps that snowy charm and prevents stickiness. Makes a huge difference in the final presentation and taste.
Storing and Reheating Tips
Room Temperature: Snowball cookies keep fresh for about 3 days when stored in an airtight container at room temp. I always use a sealed tin or a glass jar—keeps the sugar coating crisp and prevents drying out.
Refrigerator Storage: If you want to keep them longer, stashing them in the fridge (tightly wrapped or in an airtight container) extends life up to a week. Just bring to room temp before serving so they soften back into that melt-in-your-mouth texture.
Freezer Instructions: Snowball cookies freeze beautifully. Lay them flat on a tray until frozen, then transfer to a freezer bag or container wrapped tightly to avoid freezer burn. They’ll stay great up to 3 months. Thaw overnight in the fridge or pop out on the counter for an hour before enjoying.
Glaze Timing Advice: Always roll or dust your cookies in powdered sugar when they’re still warm to get that beautiful coating. If freezing, I like to freeze plain cookies and do the powdered sugar roll just before serving. That way, they always look freshly baked and snow-dusted.
Frequently Asked Questions
Final Thoughts
Snowball cookies hold a special place in my heart because they’re one of those super simple recipes that never fail to bring a smile. They’re buttery, tender, and melt sweetly in your mouth—a little bite of nostalgia and homemade love. Whether you’re baking them for a holiday, a casual afternoon treat, or a last-minute gift, these cookies always steal the spotlight. If you enjoy this recipe, you might also want to try my buttery shortbread or those classic snickerdoodles I can’t stop baking. I’d love to hear how your snowball cookies turn out — feel free to share your tweaks, questions, or stories in the comments. Happy baking and may your kitchen be filled with sweet memories!
Melting Snowball Cookies A Simple Treat
Ingredients
Main Ingredients
- 1 cup unsalted butter softened
- 0.5 cup powdered sugar
- 1 teaspoon vanilla extract
- 2.25 cups all-purpose flour
- 0.5 teaspoon salt
- 1 cup mini chocolate chips
- 1 cup powdered sugar for rolling cookies
Instructions
Preparation Steps
- Preheat oven to 375°F. Line two baking sheets with parchment paper.
- Cream the butter, 0.5 cup powdered sugar, and vanilla extract with an electric mixer until fluffy. Gradually add flour and salt, mixing until dough forms. Stir in the mini chocolate chips. If dough is soft, chill until easy to handle.
- Scoop tablespoon-sized balls of dough onto prepared baking sheets, spacing them evenly.
- Bake for 7 to 10 minutes until the bottoms are lightly browned. Remove and let cool for a minute.
- Roll each warm cookie gently in powdered sugar to coat. Allow cookies to cool completely on a wire rack and re-roll in powdered sugar if desired.