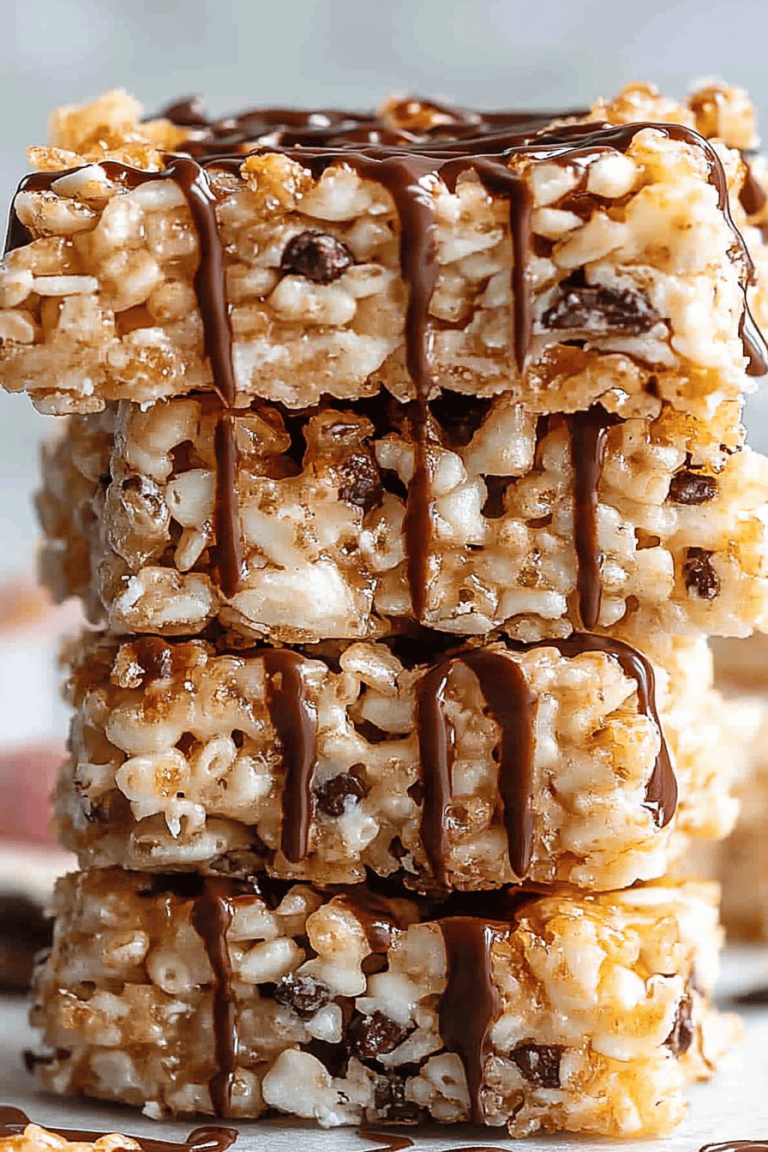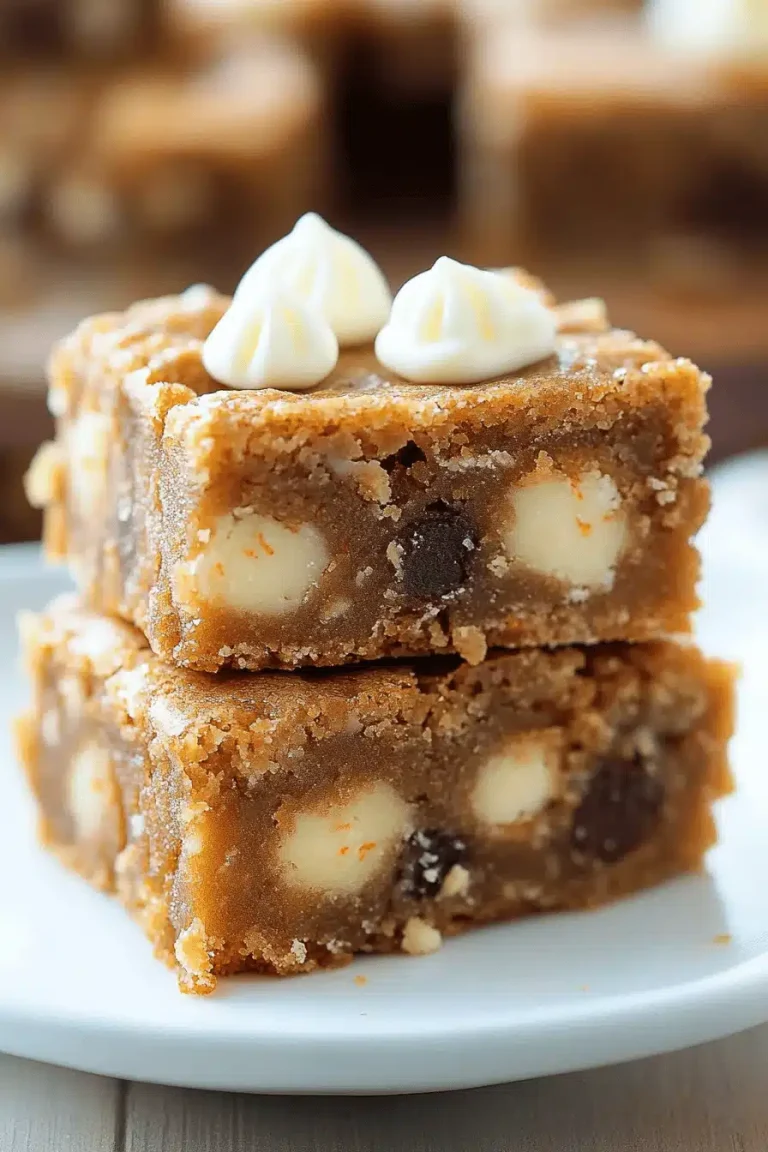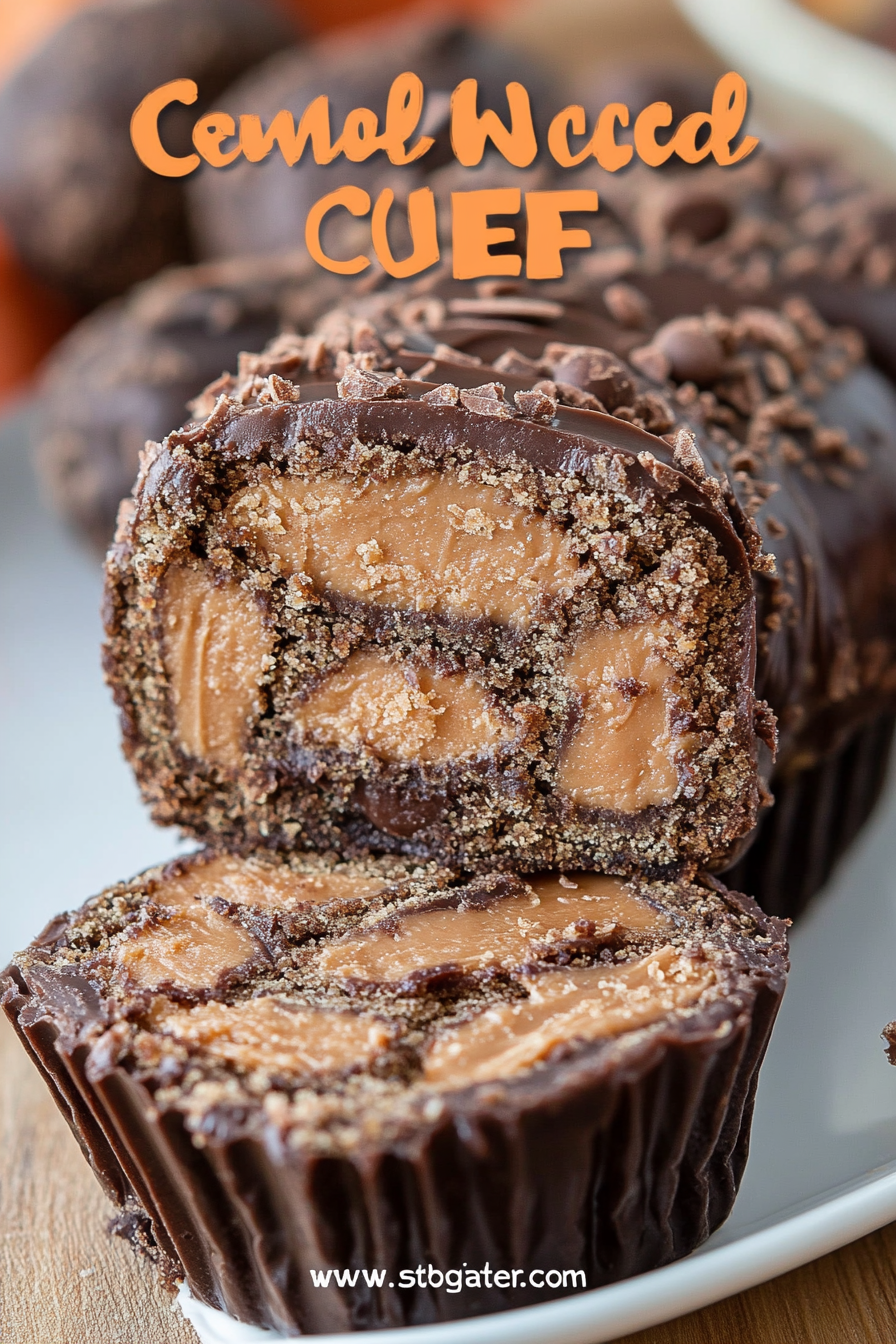
Peanut Butter Cup
There’s something magical about the smell of peanut butter warming up in the oven—the way it wraps around your kitchen like a cozy blanket on a chilly afternoon. I still remember my mom pulling these peanut butter cup bars out of the oven when I was a kid; the chocolate and peanut butter mingling together just fired up my sweet tooth in the best possible way. This recipe hits that perfect sweet-and-salty balance, but with a little homemade love that you just can’t get from store-bought candy bars. If you’ve ever wished Reese’s peanut butter cups were a bit softer, gooier, and easier to share, this one’s for you. It’s my go-to when I need something comforting but don’t want to wrestle with a fancy cake. Honestly, my kids beg me to make these all the time, and the entire batch disappears faster than I can pour a second cup of coffee.
What is peanut butter cup?
So, let me break down what exactly a peanut butter cup is, in case you’re new to this wonderland of flavor. At its core, it’s a simple combo: creamy peanut butter embraced by a shell of rich chocolate. Think of it as candy’s version of the ultimate power couple—kind of like chocolate and caramel but with that salty peanut butter punch. The “cup” part? That’s just how it’s traditionally served, typically molded into little rounds or bars that fit perfectly in your hand. The idea originated with the famous Reese’s peanut butter cups, but homemade versions like this one bring a more tender, fresh, melt-in-your-mouth experience that’s a little softer, a lot less sweet, and so much more personal. It’s essentially a mini dessert that feels luxurious without being complicated.
Why you’ll love this recipe?
Here’s the thing: what I love most about this peanut butter cup recipe is how it never fails to feel like a small celebration with every bite. The flavor is nothing short of hypnotic—the creamy peanut butter keeps things luscious, while the chocolate glaze adds just the right touch of sweetness that’s not overwhelming. Plus, this recipe is surprisingly simple! I’m all about no-fuss desserts that don’t make me turn my kitchen upside-down, and these bars fit the bill perfectly. I usually whip this up when I’m juggling a million things because the ingredients are pretty straightforward and easy to swap out if you’re running low on something. Speaking of which, it’s also crazy budget-friendly. A few common pantry staples—peanut butter, chocolate, sugar, eggs—and you’re good to go.
Versatility? Totally there. You can enjoy this as a grab-and-go snack, a midday pick-me-up, or even dress it up with a scoop of vanilla ice cream for an after-dinner treat. If you dig other peanut butter-chocolate combos (like brownies or peanut butter swirl cookies), this one will fit right into your rotation. Plus, I adore how it’s soft enough for littles to bite into without crumbling everywhere, but also rich enough to satisfy the biggest sweet tooth in the family. Honestly, this recipe has proven itself over and over again with guests, family dinners, and those late-night cravings only a peanut butter cup can satisfy.
How do I make peanut butter cups?
Quick Overview
Alright, here’s the scoop: making these peanut butter cup bars is a breeze, but that doesn’t mean you lose any of the magic. Basically, you mix up a tender, moist peanut butter batter, whip up a luscious peanut butter filling, and finish it off with a smooth chocolate glaze that sets up just right. The layering and swirling technique is where the fun begins—plus it makes these look like a tiny masterpiece without needing fancy skills. The whole process flows quickly, so you won’t be stuck at the stove all day, and the end result feels indulgent with minimal effort. Plus, the smell while it bakes? Absolute heaven.
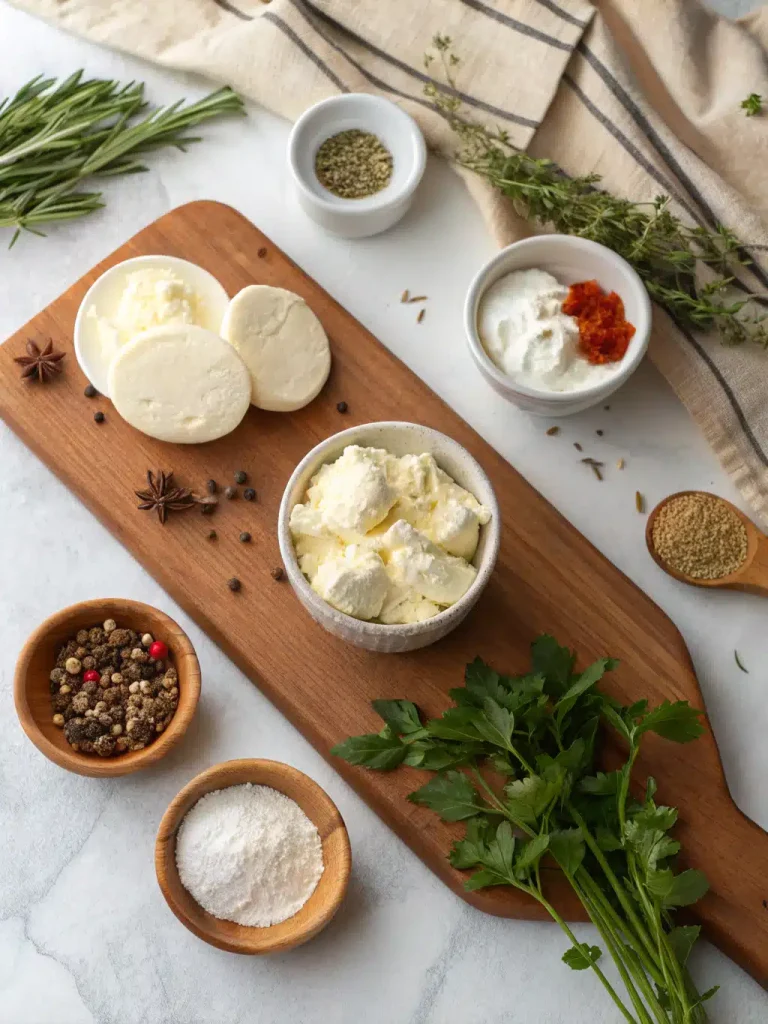
Ingredients
For the Main Batter:
- 1 cup creamy peanut butter (I always grab natural or no-stir versions for that fresh flavor)
- 3/4 cup granulated sugar (fine sugar helps with texture)
- 2 large eggs (room temperature helps everything mix better)
- 1 teaspoon vanilla extract (just a splash to deepen flavors)
- 1/2 teaspoon baking powder (a little lift goes a long way)
- 1/4 teaspoon salt (balances all that sweetness)
For the Filling:
- 1/2 cup peanut butter (feel free to use chunky if you like a bit of crunch!)
- 1 cup powdered sugar (sifted for smoothness)
- 1 tablespoon butter, softened (makes the filling extra creamy)
- 1-2 tablespoons milk or cream (to adjust consistency)
For the Glaze:
- 1 cup semisweet chocolate chips (or mix half dark for a richer taste)
- 2 tablespoons butter (helps the glaze shine and spread easily)
- 1 teaspoon vanilla extract (optional, but I always add it!)
Step-by-Step Instructions
Step 1: Preheat & Prep Pan
Preheat your oven to 350°F (175°C). Grab an 8×8-inch square baking pan and coat it lightly with non-stick spray or line it with parchment paper—trust me, parchment is a lifesaver for easier removal without any breakage. I like to let the parchment hang a bit over the sides so I can just lift the whole batch out at once afterward.
Step 2: Mix Dry Ingredients
In a medium bowl, whisk together the sugar, baking powder, and salt. This dry mix ensures your peanut butter batter rises gently and holds texture but doesn’t get cakey. I always double-check the baking powder; old stuff can make your batter flat, and nobody wants that!
Step 3: Mix Wet Ingredients
In a larger bowl, beat the peanut butter, eggs, and vanilla until smooth and glossy. The eggs should be room temperature here to blend in effortlessly—cold eggs can cause a lumpy batter, and that texture is no fun. This part should smell incredible—almost nutty and rich already.
Step 4: Combine
Slowly add your dry ingredients into the wet mixture, folding gently to combine. You want to stop once it’s just mixed through—overmixing will make the bars tough, and I’ve had batches turn dense that way. The batter should be thick but smooth, no flour streaks or lumps.
Step 5: Prepare Filling
In a small bowl, beat together the peanut butter, powdered sugar, butter, and just enough milk to get a thick but spreadable consistency. If it feels too stiff, add a bit more milk; too runny? Add a touch more sugar. This filling is the creamy surprise in the middle, and its richness perfectly balances the crumbly peanut butter batter.
Step 6: Layer & Swirl
Pour half the peanut butter batter into your pan, smoothing it evenly with a spatula. Dollop spoonfuls of the peanut butter filling on top, spreading lightly but leaving some patches thicker here and there. Finish with the remaining batter, dropping it over the filling in chunks. Now comes the fun part: use a butter knife or skewer to swirl the layers together lightly, creating little pools of filling nestled inside the batter. It looks rustic but so beautiful when done right.
Step 7: Bake
Bake for 25 to 30 minutes, or until the edges are golden, and a toothpick inserted near the center comes out with just a few moist crumbs. Ovens vary, so keep an eye after 20 minutes—you want these to stay a bit soft in the middle without being raw. The smell filling your kitchen at this point? Pure nostalgia and peanut butter dreams.
Step 8: Cool & Glaze
Let the bars cool completely in the pan on a wire rack—that’s key for the glaze to stay shiny and set properly. While you wait, gently melt your chocolate chips and butter together in a microwave-safe bowl (30-second bursts, stirring between), stirring in that optional vanilla for a tiny flavor twist. Pour the glossy glaze over the cooled bars and spread evenly. Pop it in the fridge for about 15 minutes to set the glaze fully.
Step 9: Slice & Serve
Once the glaze’s firm but not too hard, lift the block out using the parchment edges and set it on a cutting board. Use a sharp knife (warm it slightly under hot water and wipe dry before each cut for clean lines). Slice into squares or rectangles, and you’ve got yourself a batch of homemade peanut butter cups that look just as good as they taste. Serve at room temp for that perfect gooey bite or straight from the fridge if you want a firmer texture. Either way, they’re irresistible.
What to Serve It With
For Breakfast: Pair these bars with your morning coffee—preferably something smooth like a latte or a mild roast. The combination of caffeine and peanut butter makes waking up feel like a warm hug. I like slicing a bar into smaller pieces on weekends when the kids want a sweet wake-up treat alongside fresh fruit.
For Brunch: Add a drizzle of honey or a dollop of whipped cream alongside these bars and serve with iced chai or a sparkling fruit mocktail. It’s casual but a little fancy—great for a laid-back weekend gathering when you want to impress without stress.
As Dessert: Serve alongside vanilla ice cream or dollop of fresh whipped cream sprinkled with chopped roasted peanuts for contrasting textures. Cinnamon or a pinch of sea salt on top elevates the flavors—a little sprinkle I learned from my sister, and it’s endlessly addictive after dinner.
For Cozy Snacks: These bars are perfect with a mug of hot chocolate or even a cold glass of milk on quiet afternoons. I’ve lost count of how many times this combo rescued me from the 3 PM slump or restless evenings with the kids begging for “just one more.”
Top Tips for Perfecting Your Peanut Butter Cup
Peanut Butter Quality: Use fresh, good-quality peanut butter without too much oil separation—natural is great but give it a good stir every time. If your peanut butter is too runny, your batter can get watery, so sometimes I add a tiny extra splash of flour to balance.
Mixing Advice: Be gentle when combining dry and wet ingredients—overmixing makes the crumb tight and dry, while undermixing leaves flour pockets. You’re aiming for a thick, even batter that falls off your spoon smoothly.
Swirl Customization: Don’t be shy with swirling! The more uneven your layers, the prettier the marbling looks when baked. Using a small skewer or even a chopstick works well. I usually swirl in a figure-eight motion to get the best pattern.
Ingredient Swaps: I’ve tried swapping butter for coconut oil in the filling, and it worked surprisingly well, giving a subtle coconut note that’s lovely. You can also use dark chocolate instead of semisweet for a deeper flavor. Just watch your sugar levels accordingly.
Baking Tips: Keep your bars on the middle rack; ovens can vary widely, so if you only have a convection setting, decrease the time by a few minutes and check early. The smell will guide you—your nose knows.
Glaze Variations: For a twist, add a teaspoon of espresso powder or cinnamon into your chocolate glaze. I sometimes sprinkle flaky sea salt over the glaze before it sets—trust me, it turns these bars from “yum” to “oh wow.”
One lesson I learned the hard way? Don’t glaze while the bars are still warm. I once rushed and ended up with a dull, cracked finish—so cooling is your best friend here if you want that glossy shine.
Storing and Reheating Tips
Room Temperature: These bars keep well for about 2 days covered loosely with foil or in an airtight container. Keeping them wrapped in parchment paper inside the container prevents the glaze from sticking to the lid. This is perfect if you want to grab a bar or two without any fridge chill.
Refrigerator Storage: If you want them to last longer, store airtight in the fridge for up to a week. The firmer texture straight from the fridge is actually nice if you’re craving a firmer bite, but bring them back to room temperature before serving for that melty peanut butter feel.
Freezer Instructions: For long-term storage, wrap individual bars tightly with plastic wrap and pop them in a freezer-safe bag or container. You can freeze them for up to 2 months. Thaw overnight in the fridge and then bring to room temperature for best texture. I keep extras in the freezer for surprise sweet cravings.
Glaze Timing Advice: If you plan to freeze or refrigerate these long-term, consider glazing after thawing to avoid cracking or dullness from moisture condensation. Or, if you glaze beforehand, be sure the bars are fully cooled and cover tightly to avoid fridge odors affecting the chocolate.
Frequently Asked Questions
Final Thoughts
These peanut butter cup bars are more than just a dessert; they’re a little moment of joy in every square. The cozy, nostalgic flavors paired with a straightforward recipe make this one of my absolute favorites to return to whenever life demands a sweet escape. What’s wonderful is how easy it is to make these your own—tweak the swirl, swap your favor chocolate, adjust sweetness, or turn them into muffins for busy mornings. I’d love to hear how yours turns out, especially if you add your own spin on the filling or glaze! Don’t forget to leave a comment or rating if you give it a try—it always makes my day to know these bars are bringing smiles from kitchen to table. Happy baking, and here’s to many peanut butter-filled moments ahead!
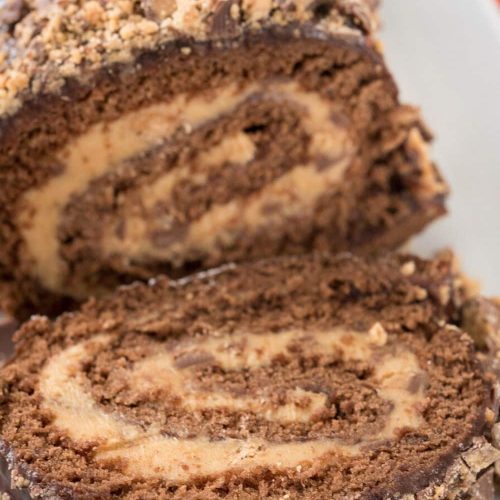
Sweet Peanut Butter Dessert Roll Recipe
Ingredients
Main Ingredients
- 3 large eggs eggs
- 0.75 cup granulated sugar
- 2 teaspoons brewed coffee or water
- 1 teaspoon vanilla extract
- 0.25 cup unsweetened cocoa powder
- 0.25 teaspoon salt
- 1 teaspoon baking powder
- 0.75 cup all-purpose flour
- to taste powdered sugar to aid in rolling
- 2 ounces cream cheese softened
- 0.33 cup peanut butter
- 1 cup powdered sugar
- 1 teaspoon vanilla extract
- 0.67 cup heavy whipping cream divided (4 tablespoons + 2/3 cup)
- 7 pieces Reese’s peanut butter cups chopped (about 1 cup chopped)
- 1 cup semi-sweet chocolate chips
Instructions
Preparation Steps
- Preheat oven to 350°F. Line a 10x15 inch jelly roll pan with foil and spray with cooking spray with flour.
- Beat eggs at high speed for 3 minutes until frothy and dark yellow. Add sugar, brewed coffee or water, and vanilla. Mix in cocoa powder, salt, baking powder, and flour until just blended.
- Spread batter in the prepared pan in a very thin layer, using a spatula to cover all corners. Bake 10 to 15 minutes until it springs back when lightly touched.
- Immediately after baking, invert cake onto a powdered sugar-dusted kitchen towel. Carefully peel off foil.
- Fold the towel short edge over the cake and roll tightly with the towel. Let cool completely while rolled, at least 1 hour or overnight refrigerated.
- Beat cream cheese and peanut butter until smooth. Add powdered sugar and beat until crumbly. Add vanilla and 2 tablespoons heavy cream, blending to a smooth, spreadable consistency. Stir in half of the chopped peanut butter cups.
- Unroll the cooled cake and spread filling evenly, leaving 1 inch clear on ends. Reroll cake carefully and chill wrapped in plastic for at least 1 hour.
- For the topping, microwave chocolate chips and remaining 2/3 cup heavy cream until warm, about 30-60 seconds, then whisk until smooth. Chill until thickened but pourable.
- Place cake roll on a wire rack over a baking sheet. Pour ganache evenly over the cake and sprinkle with remaining chopped peanut butter cups. Chill until set. Slice and serve.
- Cake may be wrapped and refrigerated for up to 24 hours before serving for best flavor and texture.