fried chicken
There’s just something about fried chicken that takes me right back to Sunday dinners at my grandma’s house. The smell always hit you first—a mouthwatering mix of sizzling oil, garlic, and spices that filled the whole kitchen, making everyone’s mouths water before the first bite. I remember how my cousins and I would hover around the table, barely able to wait our turn, fingers sticky and golden crispy from the best fried chicken around. This recipe has that same unbeatable balance of crispy crunch and juicy tenderness that keeps me coming back again and again. I promise, it’s easier than you think and beats any takeout—you won’t even miss that drive-thru. Whether you’re cooking for family or just craving some comfort food, this fried chicken hits all the right spots like no other.
What is fried chicken?
Think of fried chicken as the quintessential comfort food that’s all about crispy, golden breading wrapped around tender, juicy meat. The name is pretty straightforward—the chicken pieces are coated and then pan-fried or deep-fried until they reach that perfect crunch. Origins of this beloved dish trace back to Southern United States cooking traditions, but it’s enjoyed worldwide in countless variations. I like to say it’s essentially a love letter to simple, satisfying flavors with a crunch that just won’t quit. When you make fried chicken at home, it feels approachable too—not just fast food or restaurant fare. It’s something you can tweak with your favorite spices and get exactly how you like it. Plus, nothing beats the joy of sharing fresh, hot fried chicken with friends and family just out of the fryer.
Why you’ll love this recipe?
What I love most about this fried chicken recipe is the way it nails every craving: crunch, juicy meat, flavor that stays with you—and all without turning your kitchen into an oil disaster zone. First off, the flavor is a knockout—there’s just the right blend of herbs and spices in the seasoned flour that gives it a bit of a kick but stays classic. I always get asked for seconds when I serve this up. Secondly, it’s surprisingly simple to make, especially if you follow a few tricks I’ve picked up over years of frying chicken. You don’t need a deep fryer; a heavy pan and a good thermometer do the trick. Those crispy edges are achieved with simple ingredients you probably already have in your pantry—like buttermilk for tenderizing and a splash of hot sauce for depth.
Money-wise, fried chicken is a total win. Chicken thighs or drumsticks are affordable cuts, but this recipe makes every bite feel special—like you’ve spent twice the cash. This versatility also means it’s great for a casual dinner, picnics, or even meal prep. Reheat it carefully, and it’s almost as good the next day. I often pair it with mashed potatoes, a crisp veggie side, or even a tangy slaw to keep things fresh. I’ve experimented plenty—sometimes swapping out seasonings or adding a bit of cornstarch to the batter for extra crackle—and honestly, this specific combo always steals the show at my table.
How do I make fried chicken?
Quick Overview
At its core, this fried chicken method is about seasoning the chicken well, soaking it in buttermilk to tenderize, dredging it in a seasoned flour mixture, and frying it just right to get that beautiful golden crust. The magic happens when the oil is hot enough to crisp but gentle enough to cook through without burning. The steps are straightforward but give you delicious, golden, crunchy fried chicken every time. I always tell friends, trust me on the oil temperature and soaking steps—they’re absolute game changers.
Ingredients
For the Marinade:
- 4 cups buttermilk (or plain yogurt diluted with milk) — makes the chicken tender and juicy
- 2 teaspoons hot sauce — adds a subtle tang and depth
- Salt and pepper — to taste
For the Flour Dredge:
- 2 cups all-purpose flour — use fresh and sifted if you can for lighter coating
- 1 tablespoon paprika — smoky sweetness
- 1 teaspoon garlic powder — for savory notes
- 1 teaspoon onion powder — subtle warmth
- 1 teaspoon cayenne pepper — adjust based on heat preference
- 1 teaspoon salt
- 1/2 teaspoon freshly ground black pepper
- Optional: 1 tablespoon cornstarch — for extra crispness
For Frying:
- Vegetable oil or peanut oil — enough for frying but don’t fill pan more than half full
Step-by-Step Instructions
Step 1: Preheat & Prep Pan
Set a heavy-bottomed skillet or cast iron pan over medium heat and pour in about two inches of oil. Use a thermometer to bring the temperature to around 350°F (175°C). This temp is perfect for crisping without burning or undercooking. While the oil heats, pat your chicken pieces dry and prepare the dredging station. Don’t rush—hot oil is key to that unbeatable crust!
Step 2: Mix Dry Ingredients
In a wide bowl, combine flour, paprika, garlic powder, onion powder, cayenne, salt, pepper, and cornstarch if using. Mix thoroughly so the spices are evenly distributed. This mixture is your flavor base and crust signature, so take a moment to smell how those spices come alive together.
Step 3: Mix Wet Ingredients
In another large bowl, whisk together buttermilk, hot sauce, salt, and pepper. This marinade is your secret weapon for juicy, tender chicken with a touch of zing. The acidity of the buttermilk works wonders breaking down proteins gently.
Step 4: Combine
Place raw chicken pieces into the buttermilk mixture, making sure they’re fully submerged. Cover and let it marinate in the fridge for at least 2 hours, but overnight is best if you can plan ahead. This soaking step really amps up the flavor and tenderness—don’t skip it! When ready, remove pieces one by one and dredge in the flour mixture, pressing gently to adhere a good crust.
Step 5: Fry Chicken
Carefully lay each coated piece into the hot oil, making sure not to overcrowd the pan. Fry in batches if needed. Cook each side for about 7-8 minutes, flipping gently once when the underside is golden brown. Use a thermometer to check for doneness; the internal temp should hit 165°F (74°C). The crust should be deeply golden, crunchy, and the chicken perfectly cooked inside.
Step 6: Drain & Rest
Once cooked, transfer chicken to a wire rack set over a sheet pan to drain excess oil and keep the crust crispy. Avoid paper towels if you want to preserve crunch—trust me, this little step makes a world of difference.
Step 7: Serve Warm
Let the chicken rest just a few minutes before serving—it’s tempting to dig in right away, but this pause lets juices settle for maximum juicy bites. Then dive in and enjoy!
What to Serve It With
For Breakfast: Nothing beats pairing warm fried chicken with fluffy buttermilk biscuits and a drizzle of honey or hot sauce on the side. Pair this with your morning coffee and maybe a fresh grapefruit for a balanced start.
For Brunch: Serve alongside creamy mac and cheese or collard greens, with a mimosa or iced tea to keep things light and celebratory. This brings a little Southern charm to your weekend table.
As Dinner: A classic with mashed potatoes, gravy, and roasted veggies. Or get playful with a spicy slaw and cornbread. My family loves it with pickled jalapeños for that tangy contrast.
For Cozy Snacks: I love shredding leftover fried chicken into sliders or topping a fresh green salad for a crunchy surprise. It’s also an unbeatable game-day finger food—dunk ‘em in ranch or honey mustard for extra yum.
One of my favorite memories is serving this crispy fried chicken at backyard picnics where everyone’s reaching for seconds before the first plate is even empty. It’s just plain joyful to share.
Top Tips for Perfecting Your Fried Chicken
Chicken Prep: Pat your chicken dry before marinating—if it’s wet on the outside, the flour won’t stick well. Also, trimming excess fat helps avoid burning spots.
Marinating Magic: Don’t rush this step! The buttermilk bath tenderizes without turning the meat mushy. If you’re short on time, even 1 hour helps, but overnight is where the flavor truly blossoms.
Flour Mixture: Sift your dry ingredients if possible to avoid clumps. Adding cornstarch or a little baking powder can up the crunch factor. Experiment with smoked paprika for a subtle twist.
Frying Temperature: Keep an eye on your oil temp—it can drop quickly when adding chicken. Adjust your heat as needed to keep that steady 350°F. Too hot and your crust burns; too low and it gets soggy and greasy.
Batch Cooking: Don’t overcrowd the pan. I learned the hard way that crowding causes oil temp to plunge and makes for oily, limp chicken. Patience here pays off with crispiness.
Resting After Cooking: Use a wire rack instead of paper towels to drain. Paper towels trap steam, making crust soggy.
Flavor Variations: Adding a touch of garlic powder in the marinade or tossing some fresh herbs in the flour mix can brighten your chicken. I sometimes swap cayenne for smoked chipotle powder for a smoky heat that my husband swoons over.
Over the years, I’ve also learned to trust visual cues—golden-brown crust, firm but not hard texture—to know when it’s ready. Don’t forget safety first; a meat thermometer is worth the investment.
Storing and Reheating Tips
Room Temperature: Fried chicken is best eaten fresh but can stay covered out for about 2 hours. Beyond that, you risk losing that crispness and freshness.
Refrigerator Storage: Wrap leftover chicken loosely in foil or place in an airtight container. It keeps well for up to 3 days. When reheating, warming in the oven at 375°F on a wire rack helps retain that crunch.
Freezer Instructions: For longer storage, flash freeze on a sheet pan first, then transfer to a freezer bag. Chicken stays tasty up to 3 months frozen. Thaw overnight in the fridge and reheat gently to avoid drying out.
Glaze Timing Advice: I usually avoid glaze on fried chicken, but if you like a honey or hot sauce glaze, apply it fresh right before serving to keep the crust crisp rather than soggy.
Trust me, those crisp edges make all the difference, so how you store and reheat really affects your leftovers. I’ve found that reheating in the air fryer also does a fantastic job restoring crunch if you have one on hand.
Frequently Asked Questions
Final Thoughts
This fried chicken recipe has been a kitchen staple in my house for years—tried, tested, and loved by everyone from picky kids to fancy dinner guests. The crispy crust paired with juicy, flavorful chicken really hits that comfort food spot like nothing else. It’s flexible too, so you can tweak spices, sides, and dipping sauces to suit your mood or occasion. If you’re looking to bring a little Southern magic into your home cooking, give this one a shot. And hey, don’t be shy—drop a comment below with how yours turns out or any fun twists you try. I’m always excited to hear your stories and share this delicious joy. Happy frying!
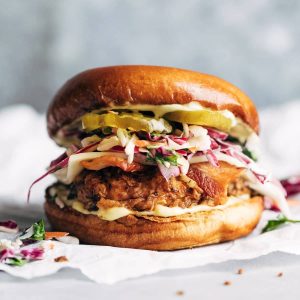
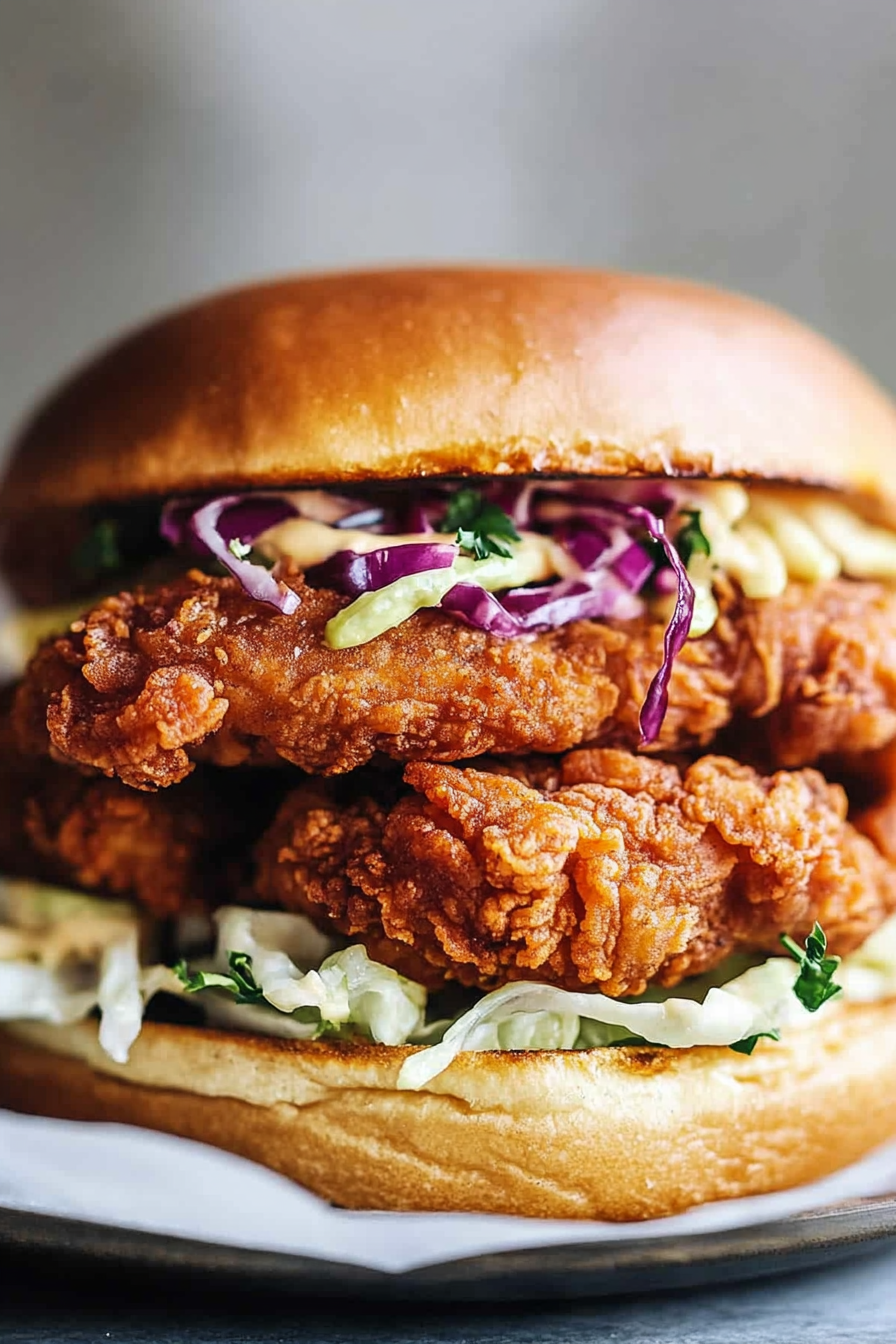
Crispy Chicken Sandwiches How to Make Them
Ingredients
Main Ingredients
- 4 pieces boneless skinless chicken breasts
- 1 tbsp seasoning mix see notes
- 1 cup buttermilk or 1 cup milk + 1 tsp vinegar
- 1 large egg
- 1.5 cups flour
- 0.5 cup cornstarch
- 1 tsp baking powder
- 2 tsp salt
- 4 cups peanut oil for frying
- 3 cups shredded cabbage
- 0.5 cup shredded carrots
- 0.5 cup mayonnaise Greek yogurt as sub
- 2 tbsp white vinegar
- 0.5 tbsp sugar
- 0.25 tsp salt
- 4 pieces Brioche buns
- 4 slices Swiss cheese
- to taste Pickles, pickled jalapenos, etc.
- 8 slices Bacon
- to taste Honey dijonnaise easy – see notes
Instructions
Preparation Steps
- Combine chicken, buttermilk, egg, and 1 tablespoon seasoning mix in a plastic bag or bowl. Marinate in the fridge for 4 to 6 hours.
- In a shallow bowl, mix flour, cornstarch, baking powder, salt, and the remaining seasoning mix to create the batter.
- Mix shredded cabbage, carrots, mayonnaise, white vinegar, sugar, and salt to make the tangy slaw.
- Heat peanut oil in a deep pan until a drop of water sizzles. Remove excess marinade from chicken, coat pieces evenly in the dry flour mix, and fry for 5 minutes on one side, then 2-3 minutes on the other side until golden and crispy. Drain on paper towels and sprinkle with salt.
- Assemble sandwiches with brioche buns, fried chicken, Swiss cheese, bacon, pickles, honey dijonnaise, and tangy slaw.