Taco Bowls
You know, sometimes I get this craving. It’s a very specific craving, the kind that makes you want all those bright, zesty, savory flavors of your favorite taco night, but you just can’t face the idea of rolling tortillas or dealing with them falling apart. That’s exactly when I whip up these taco bowls. They’re my absolute go-to, my secret weapon for getting that incredible taste without any fuss. Honestly, they’re like a flavor explosion in a bowl, and they’ve become such a lifesaver on those busy weeknights when getting dinner on the table feels like a marathon. My kids, who can be notoriously picky, devour these. They love picking out their favorite toppings and making it their own. It reminds me a little of the old days, grabbing a quick bite from a food truck, but with all the comfort and heart of a home-cooked meal. If you’ve ever found yourself dreaming of a taco but wishing for something a bit simpler, you are going to fall head over heels for this.
What is a Taco Bowl?
So, what exactly are taco bowls? Well, think of them as the most delicious, deconstructed taco you could ever imagine. Instead of being wrapped in a tortilla, all those fantastic taco fillings are layered over a base, usually rice or greens, and then topped with all the usual suspects – cheese, salsa, Sour Cream, you name it. It’s like a fiesta in a bowl! The beauty of it is that you get all the beloved flavors and textures of a traditional taco, but it’s so much easier to assemble and eat. There’s no right or wrong way to make them, which is precisely why I love them. It’s essentially a blank canvas for your taco cravings. This isn’t just a lazy substitute for tacos; it’s a whole delicious meal in its own right, designed for maximum flavor with minimum fuss. It’s the kind of meal that makes everyone happy, from the person making it to the people eating it.
Why you’ll love this recipe?
There are so many reasons why this taco bowl recipe has earned a permanent spot in my rotation, and I’m so excited to share them with you! First off, the flavor. Oh my goodness, the flavor! It’s everything you love about tacos – that savory, spiced ground meat, the fresh, zesty toppings, the creamy goodness of avocado and sour cream – all mingling together. It’s just pure comfort food with a kick. And the simplicity? It’s honestly what sold me. Most of the ingredients are things you probably already have in your pantry or fridge. Plus, the assembly is so straightforward; you can get dinner on the table in under 30 minutes, which is a lifesaver on those rushed evenings. It’s also incredibly budget-friendly. Using GROUND BEEF or turkey and common pantry staples makes this a meal that won’t break the bank, even when you’re feeding a crowd. What I love most, though, is the versatility. You can customize these taco bowls to your heart’s content. Have leftover roasted chicken? Shred it and use it! Prefer black beans over meat? Go for it! This recipe is a fantastic base, and you can adapt it based on what you have and what your family loves. It’s honestly the perfect way to use up odds and ends in the fridge too. I’ve made this countless times and it never fails to satisfy that craving for something hearty, flavorful, and fun to eat. It’s a winner in my book, and I have a feeling it will be a winner at your house too.
How do I make Taco Bowls?
Quick Overview
The whole process is wonderfully straightforward. You’ll brown some seasoned ground meat, cook up some fluffy rice, and then chop up a bunch of your favorite fresh toppings. Layer it all together in a bowl, and voilà! Dinner is served. It’s the kind of meal where everyone can customize their own bowl, which I find makes dinnertime so much more enjoyable. The best part is you’re getting all those vibrant taco flavors without any of the tortilla fuss. It’s really that easy, and the results are always spectacular.
Ingredients
For Taco Meat:
1 pound ground beef or turkey (I usually opt for 85% lean ground beef for the best flavor, but turkey is great too if you want something a little lighter)
1 tablespoon Olive Oil (just enough to get the pan going)
1 medium onion, finely chopped (adds a nice sweetness and depth)
2 cloves garlic, minced (because garlic makes everything better, right?)
1 packet (about 1 ounce) taco seasoning (I often make my own blend with chili powder, cumin, paprika, oregano, salt, and pepper, but a store-bought packet is a lifesaver!)
2/3 cup water (to help the seasonings meld into the meat)
For the Base:
2 cups cooked rice (white, brown, or even a blend – whatever you have on hand! I love using leftover rice to save time)
1 tablespoon butter or oil (for sautéing the rice if you want to give it a little extra flavor, but not strictly necessary)
For the Toppings (Be Generous!):
Shredded lettuce (iceberg for crunch, romaine for a bit more substance)
Diced tomatoes (ripe and juicy, of course!)
Diced red onion (or green onions, if you prefer a milder bite)
Shredded cheddar cheese (or a Mexican blend – whatever your cheese-loving heart desires!)
Black beans, rinsed and drained (canned is perfectly fine)
Corn kernels (fresh, frozen, or canned – I often use frozen and just toss them in with the rice)
Optional but Highly Recommended:
Salsa (your favorite kind – mild, medium, or hot!)
Sour Cream or Greek yogurt (for that creamy coolness)
Guacamole or diced avocado
Cilantro, chopped (if you’re a cilantro fan, it’s a must!)
Jalapeños, sliced (for an extra kick)
Step-by-Step Instructions
Step 1: Cook the Rice (If You Haven’t Already!)
If you don’t have pre-cooked rice, get this going first according to package directions. For a little extra flavor, once it’s cooked, you can stir in a tablespoon of butter or oil and a pinch of salt. Set aside. If you’re using leftover rice, you can just warm it up gently in a pan or the microwave. My trick is to warm it up with the taco meat towards the end to absorb some of those delicious juices!
Step 2: Brown the Meat and Onions
Heat the olive oil in a large skillet or Dutch oven over medium-high heat. Add the chopped onion and cook until it’s softened and translucent, about 5-7 minutes. Then, add the ground beef or turkey to the skillet. Break it up with a spoon and cook, stirring occasionally, until it’s browned through. Drain off any excess grease – I usually tilt the pan and use a spoon to scoop it out. This is a step I never skip; it makes a big difference in the final texture.
Step 3: Add Garlic and Seasonings
Stir in the minced garlic and cook for about 1 minute until fragrant, being careful not to burn it. Now comes the magic: add the taco seasoning packet and the water. Stir everything together really well, making sure the seasoning coats all the meat. Bring it to a simmer, then reduce the heat to low, cover, and let it cook for about 10-15 minutes. This allows all those flavors to meld beautifully. You want it to be saucy but not soupy.
Step 4: Prepare Your Toppings
While the meat is simmering, chop all your vegetables and get your toppings ready. This is the fun part! Wash and shred the lettuce, dice the tomatoes and onions, rinse and drain the black beans, and have your cheese and corn ready. If you’re making guacamole, now’s the time to mash your avocados with a little lime juice, salt, and pepper. Having everything prepped makes assembly a breeze.
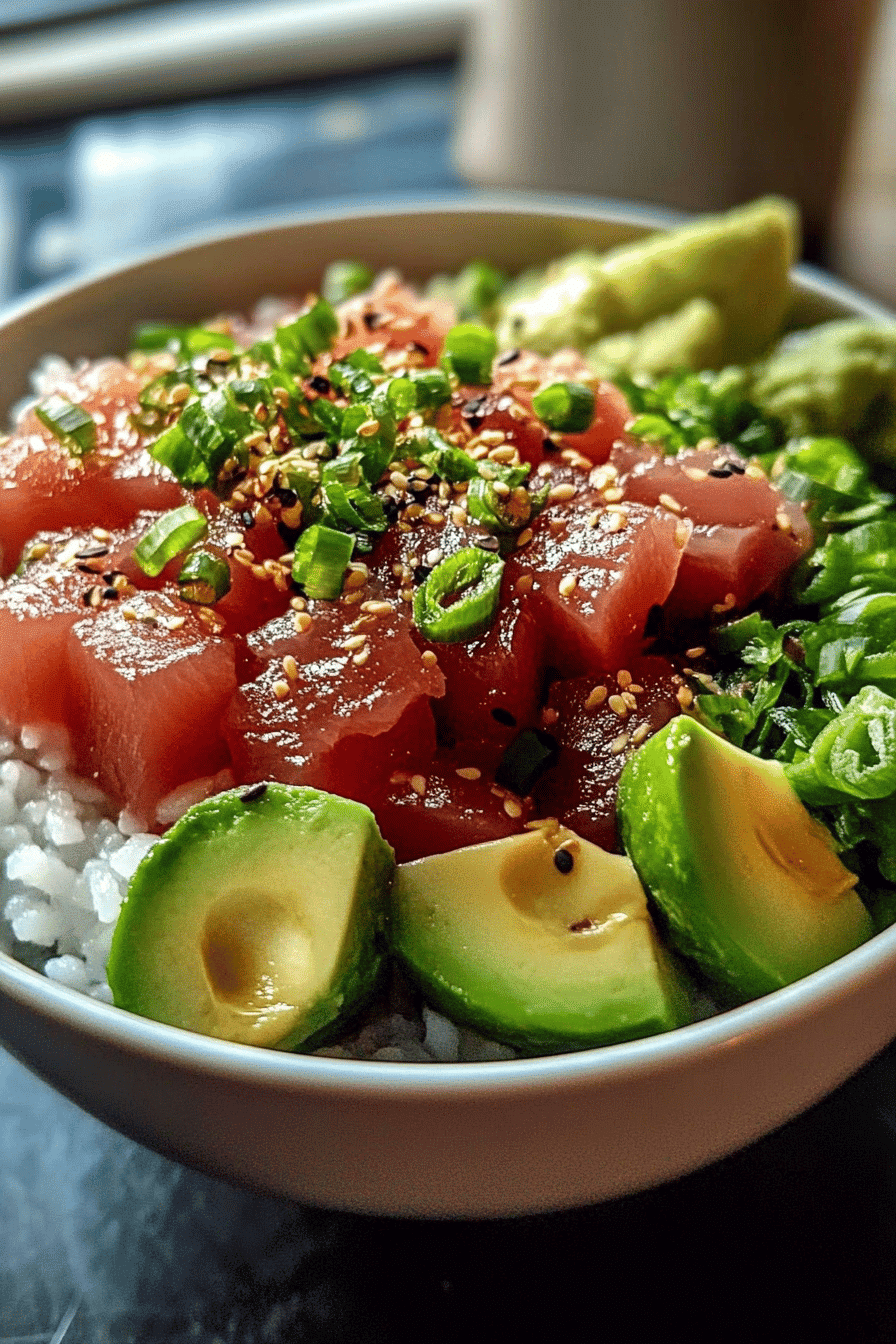
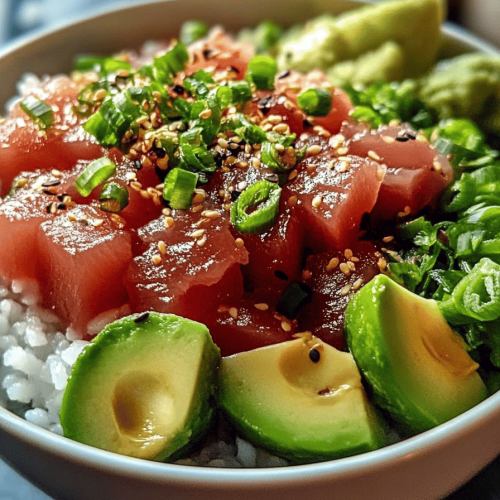
Step 5: Assemble Your Bowls
This is where the real fun begins! Grab your favorite bowls. Start with a generous scoop of warm rice at the bottom. Then, pile on that delicious, seasoned taco meat. Now, get creative with your toppings! Sprinkle on the shredded lettuce, diced tomatoes, onions, black beans, corn, and of course, plenty of cheese. Don’t forget dollops of salsa, sour cream, and that creamy guacamole.
Step 6: Add the Finishing Touches
This is where you really make it your own. Drizzle on extra salsa, add a dollop of sour cream (or Greek yogurt if you’re feeling healthy!), and nestle in some guacamole. A sprinkle of fresh cilantro and a few jalapeño slices if you like it spicy just finishes it off perfectly. The combination of textures and flavors is just divine.
Step 7: Enjoy Immediately!
Serve your incredible taco bowls right away while everything is warm and fresh. Dig in and enjoy the explosion of flavor! Trust me, you’ll wonder why you ever bothered with fussy tacos before.
What to Serve It With
These taco bowls are practically a meal in themselves, but they also pair beautifully with a few other things to make your meal even more complete. For breakfast, if you’re feeling adventurous and have leftovers (which rarely happens at my house!), a small portion of the taco meat and rice can be surprisingly good with a fried egg on top. For a more relaxed brunch, I love serving these with a side of chips and extra salsa or queso dip. It feels festive and everyone can graze. When we have these as a main course for dinner, we often keep it simple with a side of tortilla chips and maybe some pico de gallo for extra freshness. For a lighter meal, a simple side salad with a lime vinaigrette is fantastic. And if you’re craving something sweet after, I often make a simple lime sorbet or have some fresh fruit on hand. My kids love having them with a glass of milk, while I usually opt for a refreshing agua fresca or even a cold beer. The key is to keep it casual and fun, just like the bowls themselves!
Top Tips for Perfecting Your Taco Bowls
I’ve made these taco bowls more times than I can count, and over the years, I’ve picked up a few tricks that make them even better. For the taco meat, I always make sure not to overcrowd the pan when browning the meat. If the pan is too full, the meat will steam instead of brown, and you won’t get that lovely depth of flavor. Browning is key! Also, don’t skip draining the grease; it can make the bowls a bit too heavy otherwise. For the rice base, I’ve found that using slightly day-old rice actually works better; it’s a bit firmer and less likely to get mushy under the toppings. If you’re cooking rice fresh, make sure it’s fluffy and not clumpy. When it comes to the toppings, the fresher, the better! I’m a big advocate for dicing your own tomatoes and onions rather than using pre-cut, as they just taste so much brighter. For the cheese, I always recommend shredding your own block of cheddar rather than using pre-shredded. It melts so much better and doesn’t have that powdery anti-caking agent. If you’re a fan of spicy food, consider sautéing some sliced jalapeños with the onions or adding a pinch of cayenne pepper to the taco meat for an extra kick. And for the avocado, to prevent browning if you’re prepping ahead, toss it with a squeeze of lime juice. Honestly, the biggest tip I can give is to just have fun with it. Don’t be afraid to experiment with different toppings or even different bases like quinoa or a bed of greens if you’re looking for a lighter option. I once tried it with leftover roasted sweet potatoes and it was surprisingly delicious! It’s all about what makes you happy.
Storing and Reheating Tips
Now, let’s talk about what happens when you inevitably have leftovers (though, let’s be real, this rarely happens in my house!). If you’ve managed to save some taco bowls, storing them is pretty simple. The best way to store components separately to keep everything fresh. So, if possible, keep the meat, rice, and toppings in their own airtight containers in the refrigerator. The cooked taco meat and rice will stay good for about 3-4 days. Chopped veggies are best used within 2-3 days, as they tend to soften. For reheating, I usually scoop out the desired amount of rice and meat into a microwave-safe dish and heat it until warmed through, stirring halfway. Then, I’ll add fresh toppings like lettuce, tomato, avocado, and a dollop of sour cream. If the meat seems a little dry after reheating, I sometimes stir in a tablespoon of water or salsa to rehydrate it. For the cheese, it’s always best to add it fresh after reheating. If you plan to freeze components, the taco meat freezes exceptionally well for up to 2-3 months. Just thaw it overnight in the fridge and reheat as usual. Rice also freezes well, though it can sometimes get a bit drier. I don’t usually recommend freezing assembled bowls, as the toppings will get soggy upon thawing. It’s always best to assemble fresh when you’re ready to eat!
Frequently Asked Questions
Final Thoughts
Honestly, these taco bowls are just one of those recipes that make life a little easier and a lot more delicious. They’re perfect for when you’re craving something seriously satisfying but don’t have a ton of time or energy. The best part is seeing everyone happily digging into their own personalized bowls, building their perfect bite. It’s casual, it’s flavorful, and it’s incredibly forgiving. If you’re looking for more quick and easy weeknight dinners, you might also love my Sheet Pan Fajitas or my One-Pot Lemon Herb Chicken and Rice. They’re all designed to bring maximum flavor with minimum fuss. I truly hope you give these taco bowls a try; I have a feeling they’ll become a family favorite at your house too. I can’t wait to hear how yours turn out and what delicious topping combinations you come up with! Please leave a comment below and share your taco bowl triumphs!
Taco Bowls
Ingredients
Main Ingredients
- 1 pound ground beef
- 1 packet taco seasoning
- 0.5 cup water
- 4 cups shredded lettuce
- 1 cup diced tomatoes
- 1 cup shredded cheddar cheese
- 0.5 cup black beans, rinsed and drained
- 0.5 cup corn kernels
Instructions
Preparation Steps
- In a large skillet, cook the ground beef over medium heat until browned. Drain off any excess grease.
- Stir in the taco seasoning and water. Bring to a simmer and cook for 5-7 minutes, or until the sauce has thickened.
- To assemble the taco bowls, divide the shredded lettuce among four bowls.
- Top the lettuce with the seasoned ground beef mixture, diced tomatoes, shredded cheddar cheese, black beans, and corn.
- Serve immediately with your favorite taco toppings like salsa, sour cream, or guacamole.