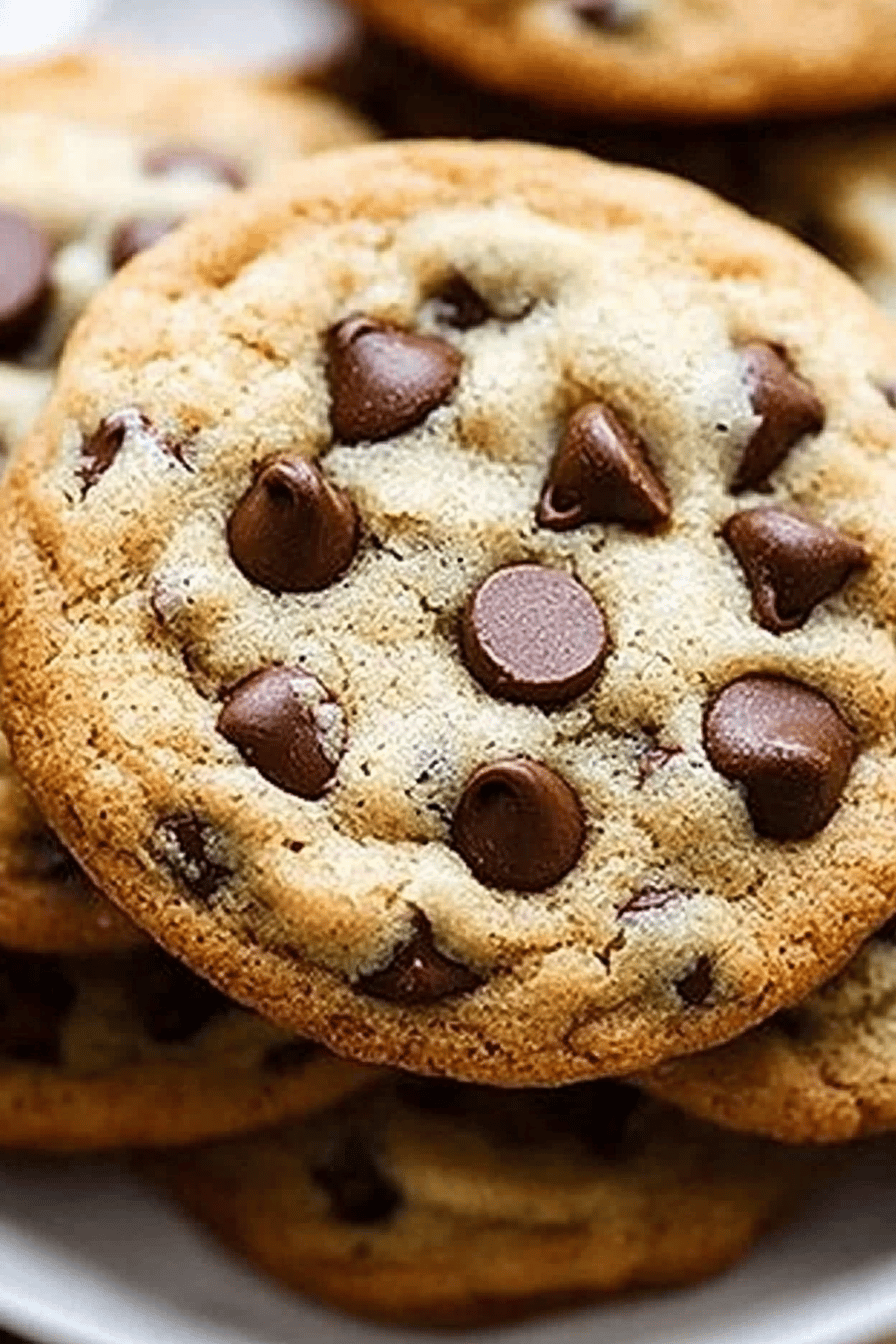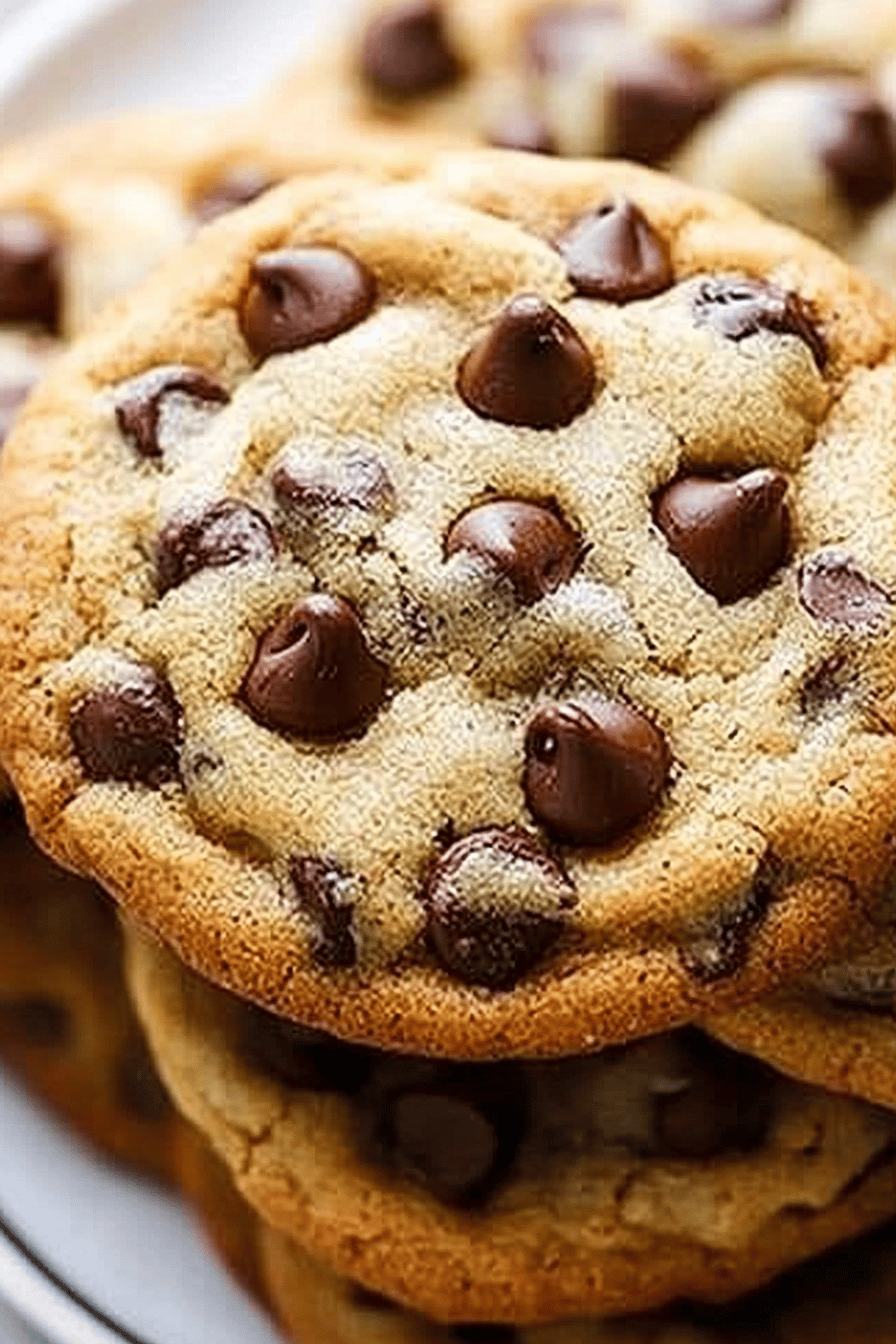


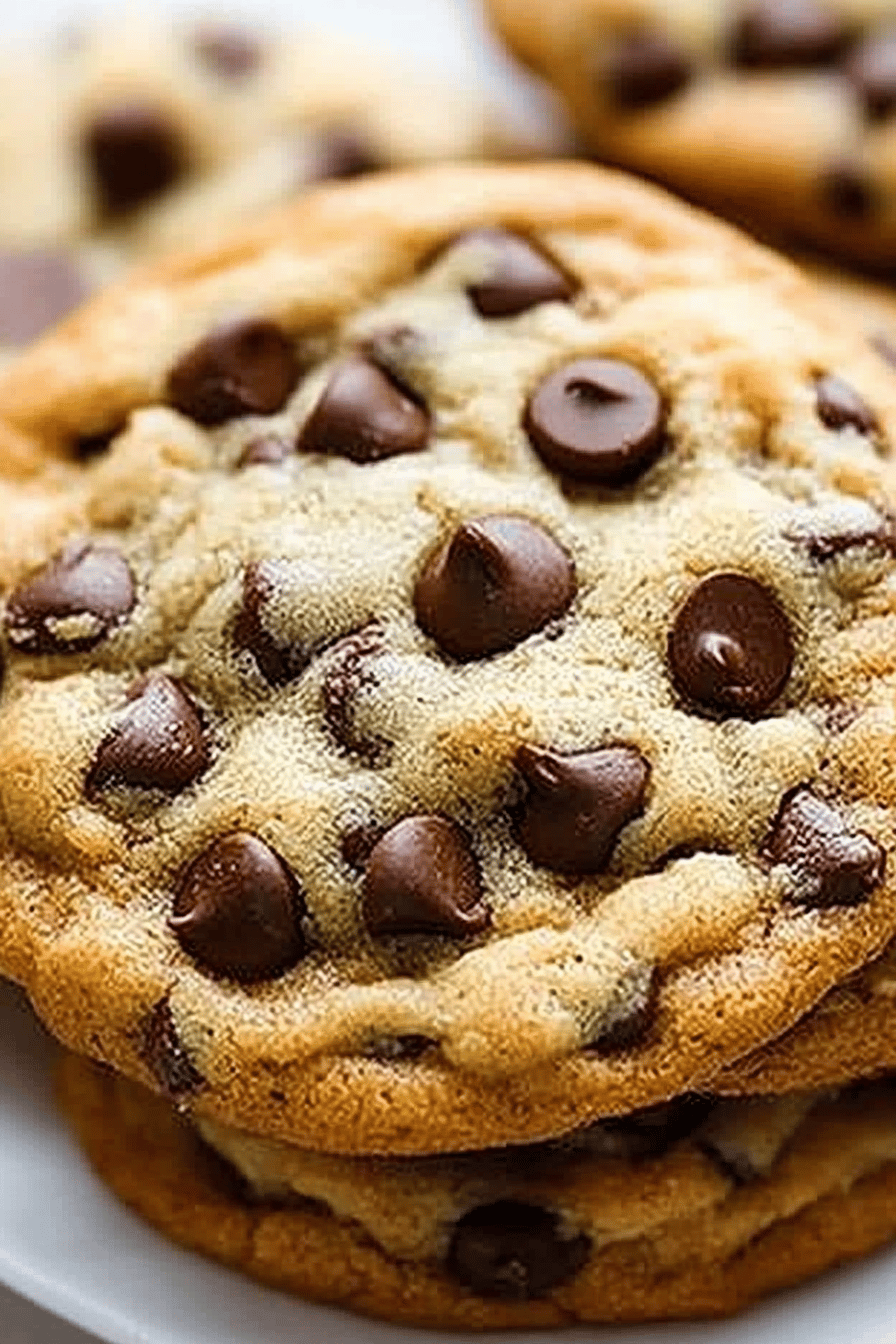
Oh, where do I even begin with this chocolate chip cookies recipe? It feels like yesterday I was a kid, perched on the kitchen counter, watching my grandma pull a fresh batch from the oven. The aroma alone was enough to make your knees go weak – that perfect blend of warm butter, sugar, and melting chocolate. This isn’t just any cookie; it’s the kind of cookie that evokes memories, brings smiles, and makes even the most stressful day feel a little bit brighter. If you’ve ever tried those fancy-pants bakery cookies, you know the ones that cost a fortune and are *almost* perfect, well, this recipe is your secret weapon. It’s simpler, arguably tastier, and you can whip them up whenever that craving strikes. We’re talking about the quintessential, melt-in-your-mouth, slightly chewy on the inside, perfectly crisp on the edges chocolate chip cookie. Get ready to bookmark this one, because once you try it, there’s no going back. This is my go-to, my crowd-pleaser, my absolute favorite chocolate chip cookies recipe.
What is the best chocolate chip cookie recipe?
So, what exactly makes this the “ultimate” chocolate chip cookies recipe? Honestly, it’s all about balance and a few little tricks I’ve picked up over the years. Think of it as the perfect harmony between sweet, salty, rich, and comforting. It’s essentially a classic chocolate chip cookie elevated, with a focus on textures that sing – that delightful slight crisp at the edges that gives way to a wonderfully soft, chewy center. No cakey imposters here! The flavor profile is deep and satisfying, with a subtle hint of vanilla that just rounds everything out. It’s the kind of cookie that doesn’t need a fancy frosting or a complicated topping; the star is the quality of the ingredients and the way they come together. It’s your favorite cookie, but dialed up to eleven, in the best way possible.
Why you’ll love this recipe?
Let me tell you, there are a million chocolate chip cookie recipes out there, but this one? This is the one that will have your friends and family begging for more. What I love most about this recipe is how it hits all the right notes. First, the FLAVOR is just out of this world. It’s deeply chocolatey, perfectly sweet with just the right hint of salt to make all those flavors pop. It’s not overly sweet, which I appreciate, so you can really taste the richness of the butter and the quality of the chocolate. Then there’s the SIMPLICITY. Seriously, if you can stir things together, you can make these cookies. There are no fancy techniques, no weird ingredients you can’t find at your local grocery store. I’ve made this on a frantic Tuesday evening when everyone suddenly declared they were starving, and it was a lifesaver. And let’s talk COST-EFFICIENCY. You probably have most of the ingredients already in your pantry! It’s so much more budget-friendly than buying those gourmet cookies, and you get way more bang for your buck. Plus, the VERSATILITY is amazing. Want to add nuts? Go for it. Different kinds of chocolate chips? Absolutely. Mini chips for more even distribution? My kids love that! They are perfect for an afternoon pick-me-up with a glass of milk, a delightful addition to a dessert table, or even just a sweet treat to enjoy with your morning coffee. It’s that reliable friend in your recipe binder that you can always count on.
How do you make chocolate chip cookies?
Quick Overview
Making these ultimate chocolate chip cookies is surprisingly straightforward. The process involves creaming butter and sugar, then incorporating eggs and vanilla, followed by the dry ingredients. We’ll then fold in those glorious chocolate chips before scooping and baking. The magic happens in the ratios and the chilling step, which I’ll get to, but the actual mixing part is wonderfully quick. It’s designed to deliver maximum flavor and that coveted texture with minimal fuss, making it perfect for beginners and seasoned bakers alike.
Ingredients
For the Main Batter:
Butter: 1 cup (2 sticks) unsalted butter, softened. Make sure it’s truly softened, not melted! This is key for that lovely texture. I always take mine out about an hour before I start. If you forget, you can cut it into smaller cubes to speed it up. Using good quality butter makes a noticeable difference here.
Sugars: 3/4 cup granulated sugar and 3/4 cup packed light brown sugar. The combination is what gives us that perfect chewy texture and rich flavor. Don’t skimp on the brown sugar – it’s crucial!
Eggs: 2 large eggs. Room temperature is best here too, as it helps them incorporate more smoothly into the batter.
Vanilla Extract: 2 teaspoons pure vanilla extract. Please, please use pure vanilla extract. It’s a game-changer for the flavor depth.
Flour: 2 1/4 cups all-purpose flour. Spooned and leveled, not scooped directly from the bag. This ensures you don’t end up with too much flour, which leads to dry cookies.
Baking Soda: 1 teaspoon. This is what gives them that perfect lift and spread.
Salt: 1 teaspoon fine sea salt. Don’t skip this! It balances the sweetness and enhances all the other flavors.
Chocolate Chips: 2 cups semi-sweet chocolate chips. I love a mix of semi-sweet and dark chocolate chips for a richer flavor, but feel free to use your favorite! You can also use chocolate chunks for bigger pockets of chocolate.
For the Filling:
This isn’t a filling in the traditional sense, but more of a technique to get those glorious pockets of gooey chocolate!
For the Glaze:
This is optional, but it adds an extra touch of indulgence!
Powdered Sugar: 1 cup, sifted. Make sure it’s sifted to avoid lumps.
Milk or Cream: 2-3 tablespoons. Start with 2 and add more until you reach your desired drizzling consistency.
Vanilla Extract: 1/2 teaspoon.
Step-by-Step Instructions
Step 1: Preheat & Prep Pan
First things first, let’s get that oven ready. Preheat your oven to 375 degrees Fahrenheit (190 degrees Celsius). While the oven is heating up, line your baking sheets with parchment paper. This is non-negotiable in my kitchen! It prevents sticking and makes cleanup a breeze. If you don’t have parchment, you can lightly grease your baking sheets, but parchment paper is truly the best for even baking and easy removal.
Step 2: Mix Dry Ingredients
In a medium bowl, whisk together the 2 1/4 cups of all-purpose flour, 1 teaspoon of baking soda, and 1 teaspoon of salt. Whisking these together before adding them to the wet ingredients ensures the leavening agent and salt are evenly distributed. This prevents pockets of salty or flat cookies. You want a nice, uniform mixture here. Give it a good whisk until everything looks well combined and there are no visible clumps of baking soda or salt.
Step 3: Mix Wet Ingredients
In a large bowl (or the bowl of your stand mixer if you’re using one), cream together 1 cup (2 sticks) of softened unsalted butter with 3/4 cup granulated sugar and 3/4 cup packed light brown sugar. Beat until the mixture is light and fluffy, which usually takes about 2-3 minutes. Then, beat in 2 large eggs, one at a time, making sure to scrape down the sides of the bowl as needed. Finally, stir in 2 teaspoons of pure vanilla extract. This step is where a lot of the flavor and structure starts to build, so make sure you get it nice and creamy!
Step 4: Combine
Gradually add the dry ingredients to the wet ingredients, mixing on low speed (or stirring by hand) until just combined. Be careful not to overmix here! Overmixing develops the gluten in the flour too much, which can lead to tough cookies. You want to mix until you no longer see streaks of flour. It’s okay if there are a few little bits of flour still visible; they’ll disappear when you add the chocolate chips. If the dough seems a bit too soft or sticky, don’t worry, we’ll chill it next!
Step 5: Prepare Filling
This is where we add the star of the show – the chocolate chips! Stir in your 2 cups of chocolate chips. I like to use a sturdy spoon or a spatula for this. Gently fold them into the dough until they are evenly distributed. If you’re feeling fancy, you can reserve about 1/4 cup of chocolate chips to press onto the tops of the cookies *after* they’re scooped onto the baking sheet. This gives them that perfectly studded look.
Step 6: Layer & Swirl
Now for the crucial chilling step! Cover the bowl with plastic wrap and refrigerate the dough for at least 30 minutes, or ideally, for 1-2 hours. This chilling step is a game-changer. It solidifies the butter, which prevents the cookies from spreading too much in the oven, giving you that lovely thick, chewy cookie. It also allows the flavors to meld together. Once chilled, use a cookie scoop (about 1.5 to 2 tablespoons) to portion out the dough. Roll each portion into a ball and place them on your prepared baking sheets, leaving about 2 inches between each cookie.
Step 7: Bake
Bake the cookies in your preheated oven for 9-12 minutes, or until the edges are golden brown and the centers are still slightly soft. They’ll continue to cook a bit on the hot baking sheet after you take them out. For that perfect chewy texture, you want to underbake them slightly rather than overbake. Watch them closely towards the end of the baking time. Oven temperatures can vary, so your first batch is your test batch!
Step 8: Cool & Glaze
Let the cookies cool on the baking sheets for about 5-10 minutes before transferring them to a wire rack to cool completely. This allows them to set up properly. If you’re adding the glaze, whisk together 1 cup of sifted powdered sugar, 2 tablespoons of milk or cream, and 1/2 teaspoon of vanilla extract. Add more milk, a teaspoon at a time, until you reach a drizzling consistency. Drizzle over the cooled cookies. Let the glaze set before serving.
Step 9: Slice & Serve
Once cooled (or still slightly warm if you can’t resist!), these chocolate chip cookies are ready to be devoured! They are best served fresh, but they hold up beautifully for a few days. Enjoy them with a glass of cold milk, a cup of coffee, or simply on their own. They’re perfect for sharing, but I won’t tell if you keep them all to yourself!
What to Serve It With
These chocolate chip cookies are so versatile, they fit into almost any occasion! For a simple Breakfast treat, I love pairing them with a strong cup of black coffee or a creamy latte. They’re a little sweet indulgence to start the day, especially on weekends. For a more elegant Brunch spread, they add a touch of homemade charm. Arrange them on a tiered stand with some fresh fruit and other pastries. They also make a fantastic, crowd-pleasing Dessert. Serve them warm with a scoop of vanilla bean ice cream for the ultimate chocolate chip cookie sundae – it’s pure bliss! And for those quiet moments, those Cozy Snacks when you just need something comforting, they are absolute perfection. I often have one or two with a glass of cold milk while I’m catching up on emails or reading a book. My kids always beg for them after school, and honestly, they disappear so fast, I rarely have leftovers!
Top Tips for Perfecting Your Chocolate Chip Cookies
Over the years, I’ve learned a few tricks that have really elevated my chocolate chip cookies. First, the Zucchini Prep isn’t really relevant here, but for the cookies, PAY ATTENTION TO YOUR BUTTER TEMPERATURE. It needs to be softened, not melted. Melted butter leads to flat, greasy cookies. Softened butter allows you to cream it properly with the sugars, creating air pockets that give the cookies structure and chewiness. My Mixing Advice is to always, always, always mix the dry ingredients separately before adding them to the wet. This ensures the baking soda and salt are evenly distributed, leading to a uniform rise and flavor. And for goodness sake, DON’T OVERMIX the dough once you’ve added the flour. Mix until *just* combined. A few streaks of flour are fine. Overmixing develops gluten, which makes your cookies tough instead of tender and chewy.
The Swirl Customization comes into play with how you arrange your chocolate chips. I sometimes like to reserve some chips and press them into the tops of the dough balls *after* scooping. This gives you those beautiful, melty-looking chocolate pockets on top. For Ingredient Swaps, if you don’t have light brown sugar, dark brown sugar will work, but it will give a slightly more molasses-y flavor. You can also experiment with different types of chocolate: milk chocolate, dark chocolate, white chocolate, or even a mix! For Baking Tips, the chilling step is non-negotiable for me. It’s the secret to that perfect thickness and chew. If you’re short on time, even 30 minutes in the freezer will help. Also, use parchment paper on your baking sheets. It prevents sticking and promotes even baking. For Glaze Variations, if you don’t want a sweet glaze, you can simply dust the cooled cookies with a little powdered sugar or leave them plain. The glaze adds an extra layer of indulgence, but the cookies are fantastic without it.
I’ve learned through trial and error that using good quality vanilla extract makes a huge difference in the final flavor. Also, don’t be afraid to slightly underbake them. They will continue to cook on the hot baking sheet, and pulling them out when the centers still look a little soft is the key to that perfect chewy texture. If you want crispier edges, bake them a minute or two longer, but be careful not to dry them out. These are my tried-and-true methods, and they’ve never failed me!
Storing and Reheating Tips
Storing these amazing chocolate chip cookies is pretty simple, and thankfully, they stay delicious for a good few days. At Room Temperature, they’re best stored in an airtight container. They’ll stay wonderfully soft and chewy for about 3-4 days. Make sure they are completely cooled before sealing them up, otherwise, you might get condensation which can make them gummy. If you notice they’re getting a little too soft, you can place a slice of bread in the container with them; it helps absorb excess moisture and keep them from becoming too soft too quickly.
For Refrigerator Storage, I don’t usually refrigerate my cookies unless it’s extremely hot and humid. If you do, place them in an airtight container, and they should last for about a week. However, refrigeration can sometimes slightly alter the texture, making them a bit firmer. If you find they’ve become too firm from the fridge, you can gently warm them in a low oven (around 250°F or 120°C) for a few minutes, or even a few seconds in the microwave.
Freezer Instructions are fantastic if you want to make a big batch and save some for later. You can freeze the baked and cooled cookies in a single layer on a baking sheet until firm, then transfer them to a freezer-safe bag or container. They’ll keep well for up to 2-3 months. To thaw, just leave them at room temperature for an hour or so. You can also freeze the dough balls *before* baking! Portion them out onto a baking sheet, freeze until solid, then transfer to a freezer bag. When you’re ready for a cookie fix, bake them straight from the freezer, adding a minute or two to the baking time. The Glaze Timing Advice is to always add the glaze *after* the cookies have completely cooled. If you try to glaze warm cookies, the glaze will just melt off. If you’re storing glazed cookies, make sure the glaze has fully set before stacking or boxing them up.
Frequently Asked Questions
Final Thoughts
So there you have it – my absolute favorite, no-fuss, utterly delicious chocolate chip cookies recipe. I truly believe this recipe strikes that perfect balance of flavor, texture, and ease that makes it a winner every single time. It’s the kind of recipe that brings comfort, joy, and a little bit of magic to your kitchen. Whether you’re a seasoned baker or just starting out, I encourage you to give this one a try. It’s more than just a recipe; it’s a way to create lasting memories and share a little bit of sweetness with the people you love. If you try this chocolate chip cookies recipe, please let me know how it turns out in the comments below! I’d love to hear about your experiences, any fun variations you tried, or just how quickly they disappeared. And if you enjoyed this, be sure to check out my other favorite cookie recipes for more baking inspiration. Happy baking!

Chocolate Chip Cookies Recipe
Ingredients
Main Ingredients
- 2.25 cups all-purpose flour
- 1 teaspoon baking soda
- 0.5 teaspoon salt
- 1 cup unsalted butter, softened
- 0.75 cup granulated sugar
- 0.75 cup packed brown sugar
- 2 large eggs
- 2 teaspoons vanilla extract
- 2 cups semisweet chocolate chips
Instructions
Preparation Steps
- Preheat oven to 375 degrees F (190 degrees C). Line baking sheets with parchment paper.
- In a medium bowl, whisk together flour, baking soda, and salt. Set aside.2.25 cups all-purpose flour
- In a large bowl, cream together the softened butter, granulated sugar, and brown sugar until light and fluffy.2.25 cups all-purpose flour
- Beat in the eggs one at a time, then stir in the vanilla extract.2.25 cups all-purpose flour
- Gradually add the dry ingredients to the wet ingredients, mixing until just combined. Do not overmix.2.25 cups all-purpose flour
- Stir in the chocolate chips.2.25 cups all-purpose flour
- Drop rounded tablespoons of dough onto the prepared baking sheets.2.25 cups all-purpose flour
- Bake for 9 to 12 minutes, or until the edges are golden brown and the centers are still slightly soft.
- Let the cookies cool on the baking sheets for a few minutes before transferring them to a wire rack to cool completely.2.25 cups all-purpose flour