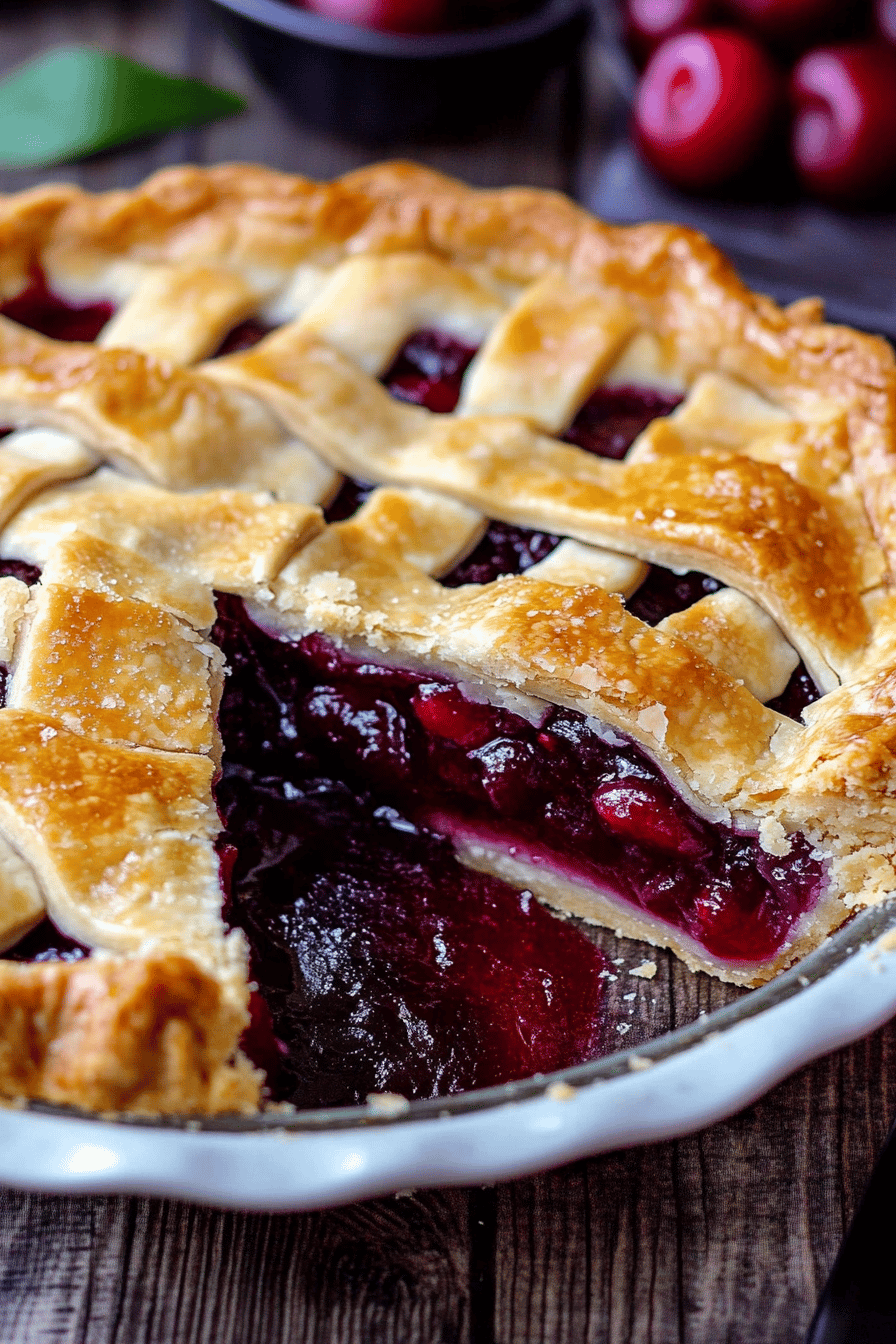
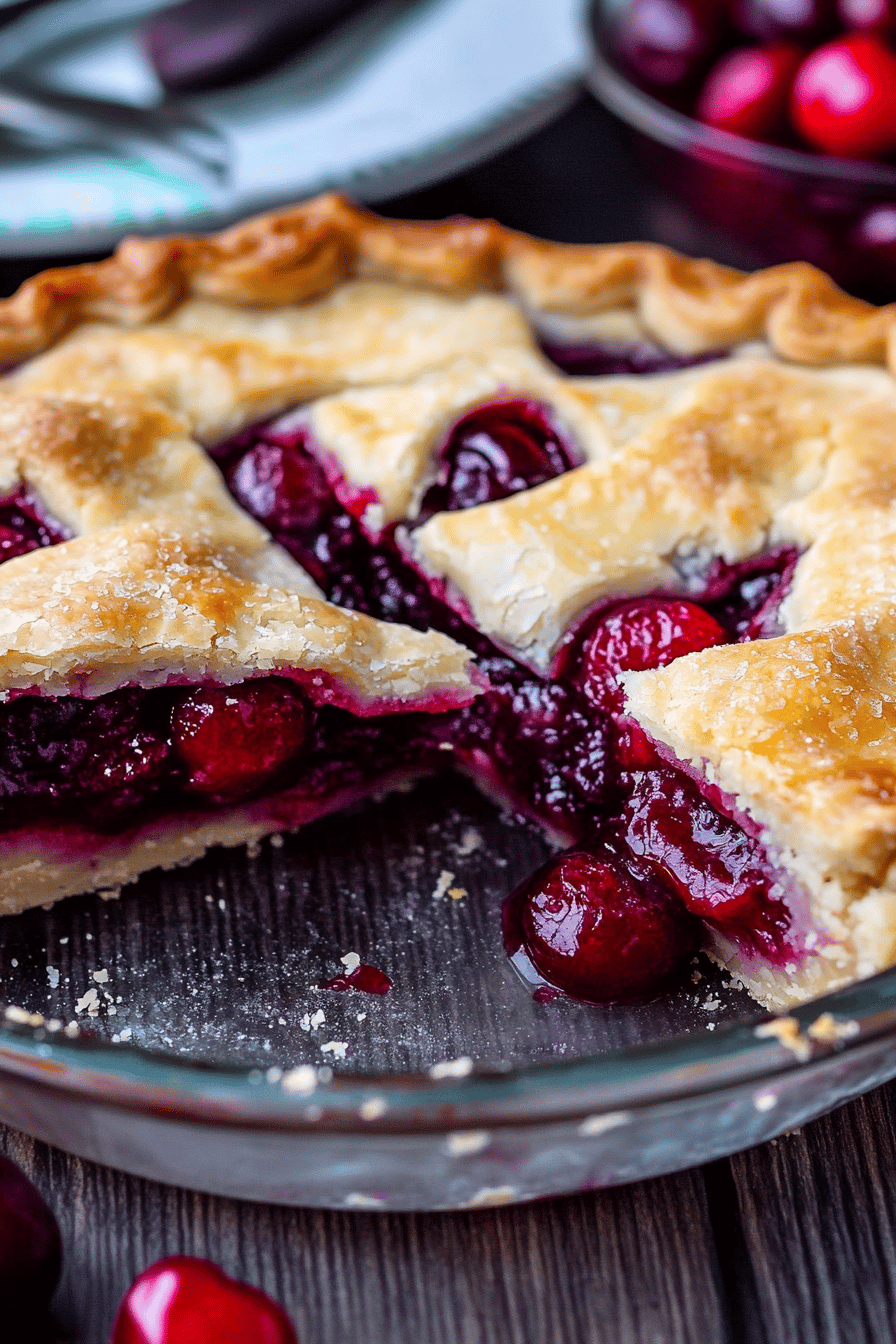
Cherry Pie Recipe
The art of crafting a perfect homemade Cherry Pie is a journey worth embarking upon for any kitchen enthusiast. This delectable recipe, celebrated for its rich and tangy flavors wrapped in a flaky crust, is sure to become a family favorite. Whether you’re a seasoned baker or a novice, mastering this cherry pie will make your culinary repertoire shine.
My love affair with cherry pie began in my grandmother’s kitchen. Every summer, she would take me to the farmers market to pick the juiciest cherries. The process of pitting cherries by hand always seemed like a tedious task to my younger self, but the reward at the end—a warm slice of pie straight from the oven—made it all worthwhile. The aroma of the baking pie would fill the house, drawing everyone to the kitchen, just as it does in my home now.
Why You’ll Love This Recipe
This cherry Pie Recipe stands out not only for its perfect balance of sweet and tart but also for its simple preparation, making it accessible to all kinds of bakers. With a buttery, flaky crust that cradles a juicy cherry filling, each bite is a delight. This pie is a show-stopper for holidays, potlucks, or any gathering where you wish to impress without the stress.
Ingredients Notes
Choosing the right ingredients is key to the success of your cherry pie. Opt for fresh, ripe cherries whenever possible, but frozen cherries work well in a pinch and offer convenience. For the crust, high-quality unsalted butter plays a crucial role in creating that flaky texture. If gluten is a concern, substitute the all-purpose flour with a gluten-free alternative. Don’t forget to adjust the sweetness of the filling to your taste if using sour cherries.
Recipe Steps
Step 1
Begin by preparing your pie crust. Combine flour, sugar, and salt in a bowl. Cut in cold butter until the mixture resembles coarse crumbs. Gradually add ice water, mixing until dough forms. Divide and shape into discs. Chill for at least 30 minutes.
Step 2
While the dough chills, pit and halve your cherries. Toss them with sugar, cornstarch, lemon juice, and vanilla extract. Allow the mixture to sit and macerate, drawing out the natural juices.
Step 3
Preheat your oven to 425°F (220°C). Roll out one dough disc on a floured surface to fit your pie pan. Carefully transfer the crust, trimming the edges, and save the excess for lattice topping.
Step 4
Pour the cherry filling into the prepared crust. Dot the surface with small pieces of butter. Roll out the second dough disc, cut into strips, and create a lattice pattern over the filling. Brush with egg wash for a glossy finish.
Step 5
Bake for 20 minutes at 425°F (220°C), then reduce the heat to 350°F (175°C) and continue baking for another 25-30 minutes. Protect the crust edges with foil if they brown too quickly. Cool slightly before serving.
Storage Options
To store leftovers, wrap the pie tightly in plastic wrap or aluminum foil and refrigerate for up to four days. For longer storage, slice the pie and freeze individual portions in airtight containers. Reheat in the oven at a low temperature to maintain the crust’s flakiness.
Variations & Substitutions
For a sugar-free version, replace sugar with your favorite sugar alternative. Experiment with adding a handful of raspberries or a spoonful of almond extract to the filling for a unique twist. Consider a crumble topping with oats and nuts for added texture and flavor.
Serving Suggestions
This pie shines on its own, but a scoop of vanilla Ice Cream or a dollop of whipped cream can elevate it to another level. Ideal for summer picnics or festive winter gatherings, make it the centerpiece of your dessert table.
Frequently Asked Questions
Can I use canned cherries for this pie?
Yes, canned cherries can be a time-saving substitution. Ensure they are packed in water or juice, not syrup, to control the pie’s sweetness. Drain and rinse the cherries before using them in the recipe.
How do I prevent a soggy bottom crust?
Blind baking the crust can help avoid sogginess. After rolling out the bottom crust, line it with parchment paper, fill with pie weights, and bake for 10-15 minutes before adding the filling. Ensure your filling isn’t too watery by properly draining and thickening.
What’s the best way to pit cherries quickly?
If you frequently bake with cherries, investing in a cherry pitter is worthwhile. In a pinch, you can use a metal straw or a chopstick to push the pits out gently. Be sure to wear an apron as cherry juice can be splattery.
Cherry Pie Recipe
Ingredients
Main Ingredients
- 4.5 cups cherries pitted and halved
- 1 cup granulated sugar
- 0.25 cup all-purpose flour for thickening
- 1.5 tablespoons lemon juice freshly squeezed
- 1 teaspoon vanilla extract
- 1 tablespoon butter unsalted, cut into small pieces
- 1 package pie crust two crusts for 9-inch pie
Instructions
Preparation Steps
- Preheat your oven to 425°F (220°C).
- In a large bowl, combine cherries, sugar, flour, lemon juice, and vanilla extract. Stir until cherries are evenly coated.
- Place one pie crust in the bottom of a 9-inch pie plate. Fill with cherry mixture. Dot with butter.
- Cover with second pie crust, cut slits in the crust to allow steam to escape.
- Bake for 50 minutes, or until the crust is golden brown and the filling is bubbly. Cool before serving.