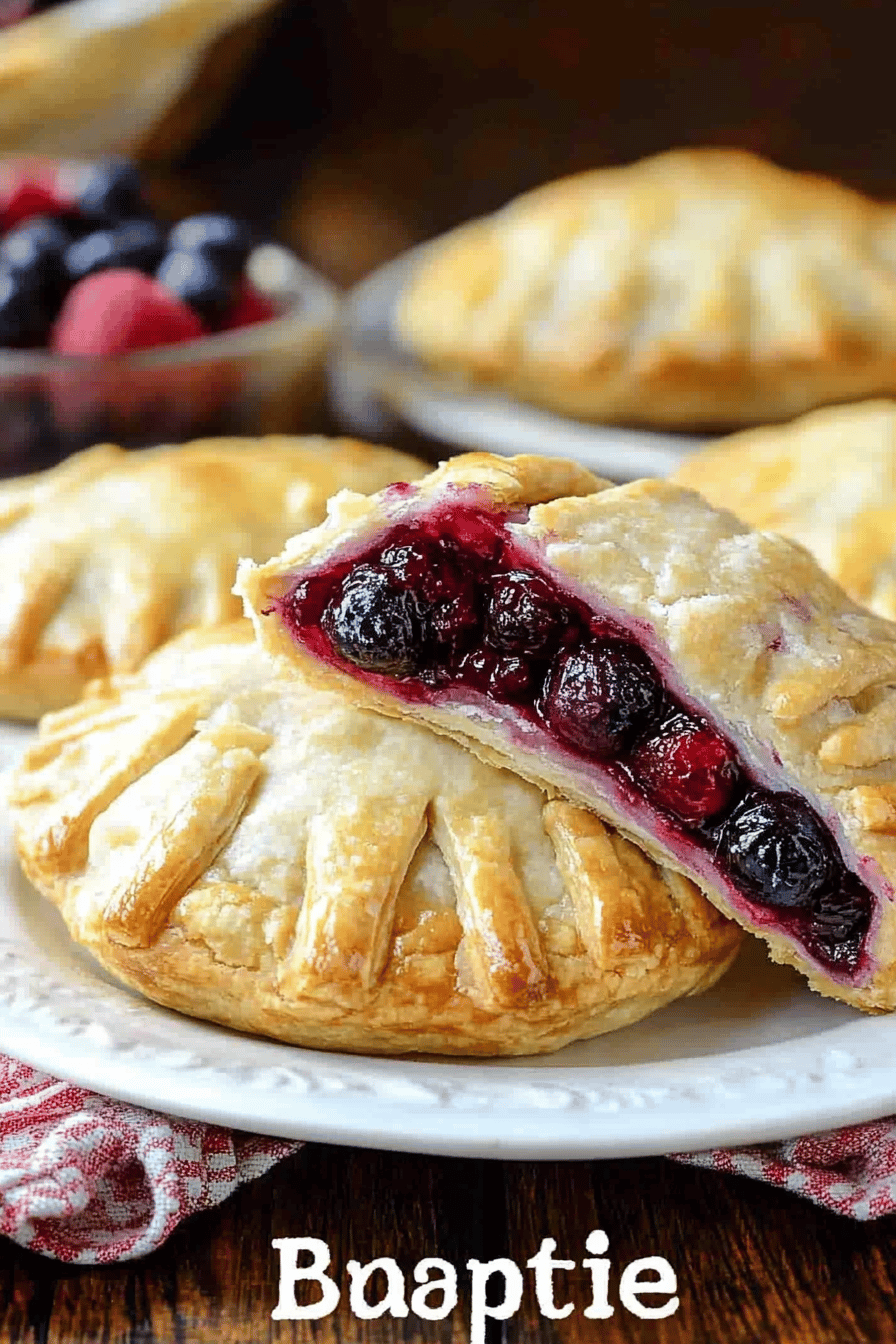
Berry Hand Pies
If you’re seeking the perfect blend of flaky pastry and luscious berry filling, these berry Hand Pies are an absolute must-try. This simple yet indulgent recipe not only satisfies dessert cravings but also makes for an impressive treat at any gathering. With a focus on fresh ingredients and easy preparation, these hand pies will quickly become your go-to dessert.
Growing up, these Hand Pies were a staple at our family picnics, evoking memories of sunlit days and shared laughter. My grandmother, the original culinary artist of our family, would often whip up a batch, filling the kitchen with the irresistible scent of baked berries. Every bite felt like a little piece of summer, no matter what the season. My mom continued this tradition, adding her own creative twist, and now I have the delight of sharing it with you all, adding a touch of nostalgia to every pie.
Why You’ll Love This Recipe
These Berry Hand Pies bring together the perfect balance of sweet, tart, and buttery flavors that make them irresistible. The recipe is straightforward, making it accessible even for beginner bakers. They are perfect for on-the-go snacking, casual get-togethers, and even elegant dessert tables. Each hand pie is individually portioned, adding a personal touch to your dessert presentation. Plus, you have full control over the fillings, allowing you to tailor each pie to your taste.
Ingredients Notes
Choosing the right berries is key. Fresh, in-season berries offer the best flavor, but you can also use frozen ones if needed. Consider a mix of strawberries, blueberries, and raspberries for a depth of flavor. For the pastry, using a high-quality unsalted butter will yield a flakier crust. If you’re short on time, store-bought pastry dough can be a convenient alternative.

Recipe Steps
Step 1
Prepare the Berries: Rinse the berries and remove stems, if necessary. Pat them dry. In a mixing bowl, combine the berries with sugar, a splash of lemon juice, and cornstarch. This mixture will thickly coat the berries and create a cohesive filling.
Step 2
Roll Out the Dough: On a floured surface, roll out the pastry dough to about 1/8-inch thick. Use a round cutter to cut out circles. Be sure to gather the scraps, re-roll, and cut again to maximize your dough.
Step 3
Add Filling: Place a spoonful of the berry mixture on one half of each circle, leaving room at the edge for sealing. Be cautious not to overfill, as this can cause the pies to burst open during baking.
Step 4
Seal the Pies: Fold the dough over the filling to make a semi-circle. Press firmly around the edges and seal with a fork. Poking small holes on top of each pie allows steam to escape as they bake.
Step 5
Bake: Preheat your oven to 375°F (190°C). Place the pies on a baking sheet lined with parchment paper. Brush the top of each pie with a beaten egg for a golden finish. Bake for 20-25 minutes or until golden brown.
Storage Options
Once cooled, store leftover pies in an airtight container at room temperature for up to two days. For longer storage, freeze them on a baking tray first until firm, then transfer to a freezer-safe bag. When ready to enjoy, simply reheat in the oven at 350°F (175°C) for 10-15 minutes or until warm.
Variations & Substitutions
If you’re looking to switch things up, try using different fruit combinations like apples and cinnamon or peaches and cream. For dietary adjustments, consider a gluten-free pastry option or use coconut sugar in place of granulated sugar for a different flavor profile. Vegan-friendly pie crusts prepared with plant-based butter are also an excellent substitution.
Serving Suggestions
These hand pies are best served warm, either on their own or with a scoop of vanilla Ice Cream. They make a delightful end to a casual lunch or an elegant addition to a tea party spread. Take them with you as a portable dessert for picnics or potlucks.
Frequently Asked Questions
Can I make the dough in advance? Certainly! The dough can be prepared up to two days in advance. Wrap it tightly in plastic and store it in the refrigerator. When you’re ready to assemble the pies, let the dough sit at room temperature until it becomes pliable.
What if my pies are leaking during baking? Leakage can often happen if the filling is too watery or if they are overfilled. Ensure that the berry mixture is well-coated with cornstarch, which helps absorb excess moisture. Also, check that the edges are properly sealed and consider additional sealing using beaten egg if needed.
Can I add spices to the filling? Absolutely! Adding spices like cinnamon or nutmeg can enhance the natural sweetness of the berries and add a warming element to your pies. A teaspoon mixed into the berry filling can provide a delightful kick.

Berry Hand Pies
Ingredients
Main Ingredients
- 2 cups mixed berries fresh or frozen
- 0.5 cup granulated sugar
- 1 tablespoon cornstarch for thickening
- 1 package premade pie crust thawed
- 1 egg egg wash for brushing
Instructions
Preparation Steps
- Preheat oven to 400°F (200°C) and line a baking sheet with parchment paper.
- In a bowl, mix berries, sugar, and cornstarch until well combined.
- Roll out the pie crust and cut into 4-inch circles.
- Place a spoonful of berry mixture on one half of each circle, fold over, and seal the edges.
- Brush tops with egg wash and make a small slit for steam.
- Bake for 18-20 minutes or until golden brown.