
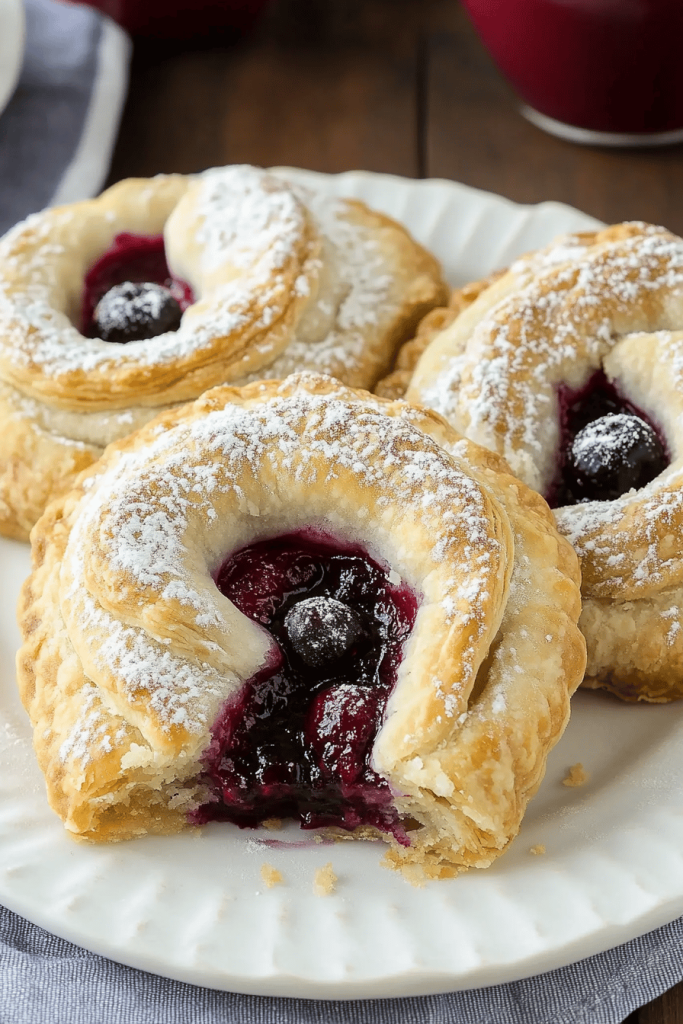
Homemade Berry Hand Pies: A Nostalgic Delight
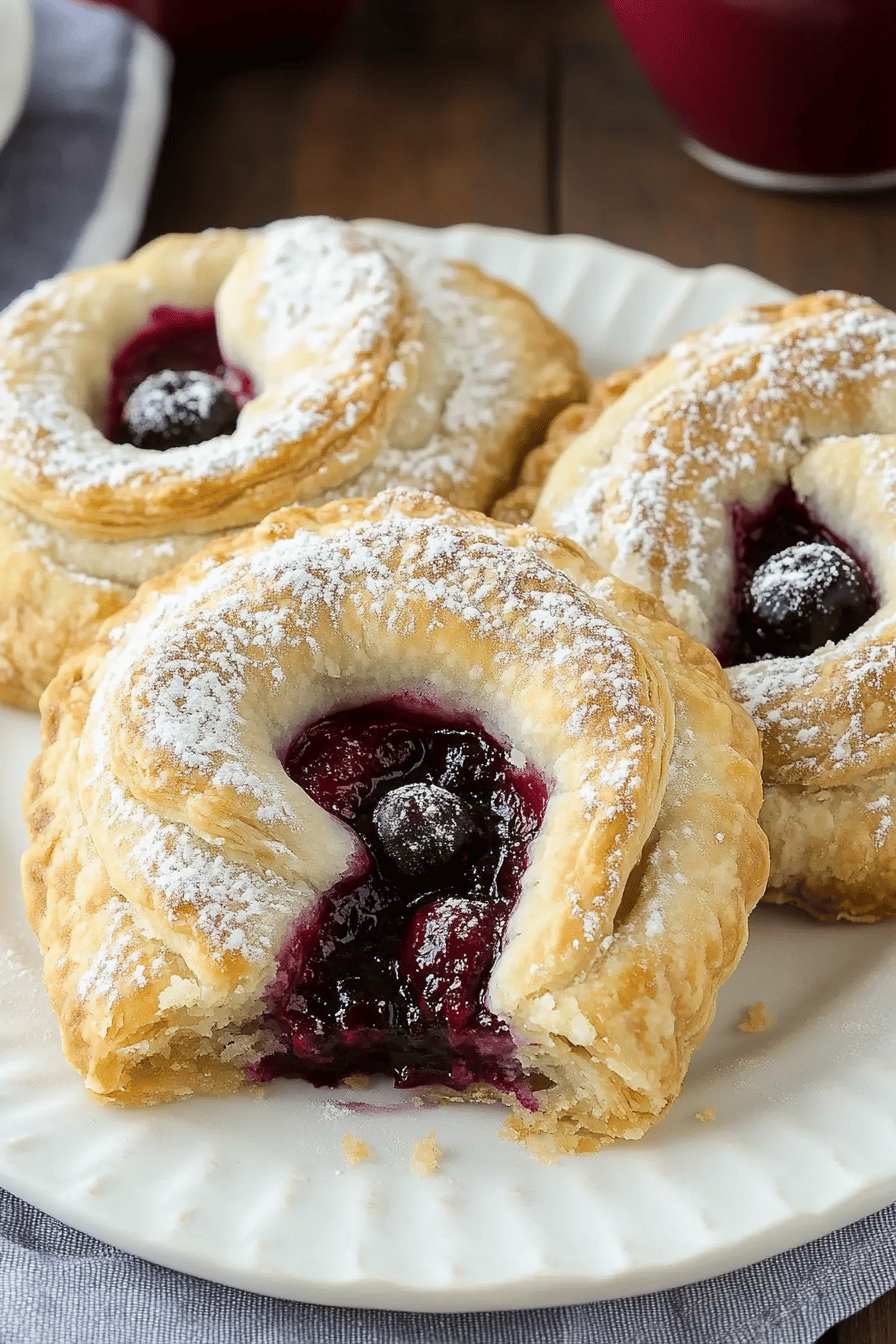
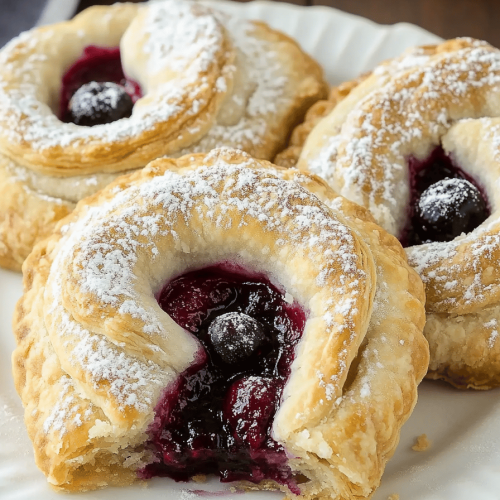
These golden, flaky Berry Hand Pies, bursting with sweet and tart summer fruits, are a perfect, portable slice of pure happiness. Think grandma’s kitchen, warm sun, and the irresistible scent of freshly baked goodness – all wrapped up in a single, delightful bite. Perfect for picnics, potlucks, or just a sweet treat on a summer afternoon.
I remember making these with my own grandmother every summer. We’d pick fresh berries from her garden, our fingers stained purple and red, and then spend the afternoon rolling out dough, filling it with the juicy berries, and crimping the edges. The kitchen would be filled with laughter and the warm, comforting aroma of baking pies. These weren’t just desserts; they were memories in the making, little edible vessels brimming with love and shared moments. Now, I carry on that tradition, making these Hand Pies with my own children, passing down a legacy of sweetness and connection.
Why You’ll Love This Recipe
Okay, let’s get real – life’s busy! Who has time to spend all day baking? That’s why this recipe is an absolute winner. It’s surprisingly quick and easy, perfect for when you crave something homemade but don’t want to commit to a full-blown baking marathon. We’re talking from start to finish in about an hour, with most of that time being inactive while the pies bake. Think about it: you could whip these up while the kids are doing their homework, or as a fun activity to do together on a lazy weekend afternoon. Plus, they’re so much more satisfying than store-bought pastries! The taste of real fruit, encased in a perfectly flaky crust, is simply unmatched.
Beyond the convenience, these Hand Pies are also incredibly budget-friendly. Forget expensive bakery treats; you can use frozen berries (especially in the off-season) or take advantage of seasonal sales at your local farmers market. And let’s not forget the health benefits! While still a treat, using fresh or frozen berries means you’re getting a dose of antioxidants and vitamins with every bite. It’s a win-win! Finally, there’s that nostalgic factor. One bite of these hand pies, and you’ll be transported back to childhood memories of simpler times. They’re comfort food at its finest, a little pocket of happiness that’s sure to bring a smile to your face.
Essential Ingredients & Quality Tips
Let’s talk ingredients, because quality really matters here! First up, the berries. You can use a mix of your favorites – blueberries, raspberries, strawberries, blackberries – whatever you’ve got on hand or find looking gorgeous at the store. Frozen berries work wonderfully too, especially if you’re making these in the off-season. Just make sure to thaw them slightly and drain off any excess juice to prevent soggy pies. Speaking of soggy, a little cornstarch helps to thicken the berry mixture and keep it from becoming too runny while baking. Don’t skip it!
Now, for the crust. You can absolutely use store-bought pie crust, especially if you’re short on time. But if you’re feeling ambitious, homemade crust is really worth the effort. The secret to a flaky crust is cold butter – and I mean *really* cold. Cut the butter into small cubes and keep it in the freezer for about 15 minutes before you start. When you mix it with the flour, use a pastry blender or your fingers to break the butter into pea-sized pieces. This creates pockets of butter that melt in the oven, creating those delicious flaky layers. Finally, a little lemon juice brightens up the berry flavor and adds a touch of acidity to balance the sweetness. Trust me, it makes a difference! And don’t forget a simple egg wash before baking – it’s what gives those pies that beautiful golden-brown sheen.
Step-by-Step Cooking Instructions
Ready to get baking? Don’t be intimidated! This recipe is straightforward and fun. We’re aiming for a flaky, golden crust and a juicy, flavorful filling. Total time is about an hour, with a difficulty level of easy-to-medium, depending on whether you make your own crust.
Step 1: Preparation Phase
First, preheat your oven to 375°F (190°C). While the oven warms up, prepare your berry filling. In a large bowl, combine your chosen berries (about 4 cups), sugar (1/2 cup), cornstarch (2 tablespoons), and lemon juice (1 tablespoon). Gently toss everything together until the berries are evenly coated. This step takes about 5 minutes, and it’s crucial to ensure the cornstarch is well distributed to prevent lumps. Pro tip: if using frozen berries, let them sit for about 10 minutes after thawing to release some of their juices, then drain off the excess before mixing with the other ingredients. This will help prevent your pies from getting soggy.
Step 2: Building Flavors
Now, let’s get that crust ready. Whether you’re using store-bought or homemade, gently roll it out on a lightly floured surface to about 1/8 inch thickness. Using a round cookie cutter (about 4 inches in diameter) or a knife, cut out circles of dough. Re-roll any scraps to get as many circles as possible. This part takes about 15-20 minutes. The key here is to work quickly and keep the dough cold. If it starts to get too soft, pop it back in the fridge for a few minutes. This will ensure a flaky, tender crust. For extra flavor, you can brush the dough circles with a little melted butter before adding the filling – it’s a game changer!
Step 3: Main Cooking Process
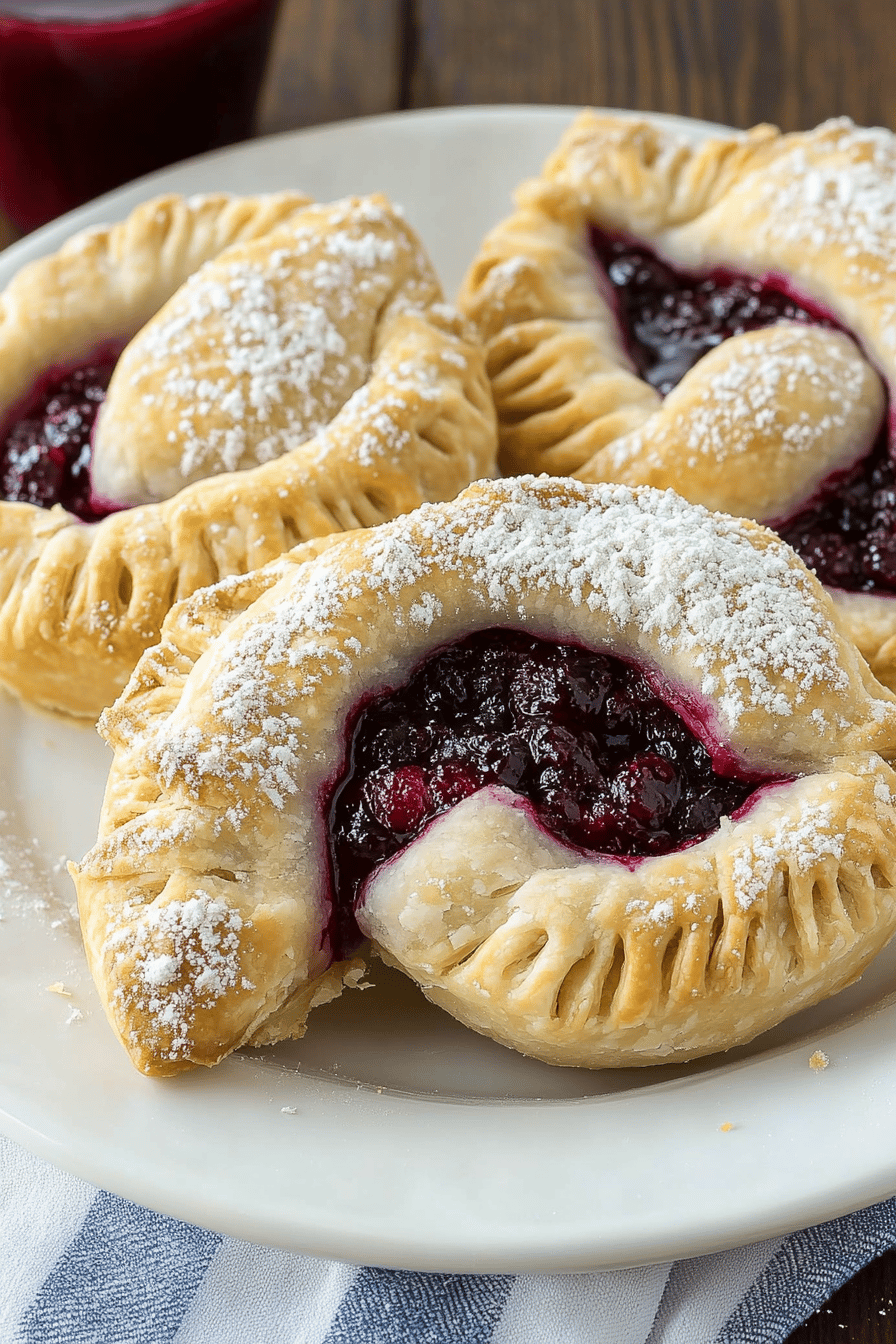
Time to assemble the pies! Place a spoonful (about 2-3 tablespoons) of the berry filling in the center of each dough circle. Don’t overfill them, or they might burst open while baking. Fold the dough over to form a half-moon shape, and crimp the edges with a fork to seal. This is where you can get creative! You can use a simple fork crimp, or try a more elaborate braided edge. Just make sure the edges are sealed tightly to prevent the filling from leaking out. This step takes about 10 minutes. Pro tip: before baking, brush the tops of the pies with an egg wash (1 egg beaten with 1 tablespoon of water) for a beautiful golden-brown color. You can also sprinkle them with a little coarse sugar for extra sparkle and crunch.
Step 4: Final Assembly
Carefully transfer the assembled Hand Pies to a baking sheet lined with parchment paper. This will prevent them from sticking and make cleanup a breeze. If you’re feeling fancy, you can cut a few slits in the top of each pie to allow steam to escape while baking. This will help prevent the crust from puffing up too much. Pop the baking sheet into the preheated oven and bake for 20-25 minutes, or until the crust is golden brown and the filling is bubbling. Keep a close eye on them, as baking times may vary depending on your oven.
Step 5: Finishing Touches
Once the hand pies are golden brown and bubbly, remove them from the oven and let them cool on a wire rack for at least 10 minutes before serving. This will allow the filling to thicken slightly and prevent you from burning your tongue. While they’re cooling, you can whip up a simple glaze by whisking together powdered sugar (1 cup) and milk (2-3 tablespoons) until smooth. Drizzle the glaze over the cooled pies for an extra touch of sweetness and elegance. Serve warm or at room temperature, with a scoop of vanilla Ice Cream or a dollop of whipped cream for the ultimate indulgence.
Expert Storage & Leftover Tips
If you happen to have any leftovers (which is unlikely!), these Hand Pies can be stored at room temperature for up to 2 days. For longer storage, keep them in an airtight container in the refrigerator for up to 5 days. To reheat, simply pop them in a preheated oven at 350°F (175°C) for about 10 minutes, or until warmed through. You can also microwave them for a few seconds, but be careful not to overheat them, or the crust will become soggy.
For freezing, let the baked Hand Pies cool completely, then wrap them individually in plastic wrap and place them in a freezer-safe bag or container. They can be frozen for up to 3 months. To thaw, simply transfer them to the refrigerator overnight, or let them sit at room temperature for a few hours. Reheat as directed above. Pro tip: for the best texture, reheat frozen hand pies in the oven rather than the microwave.
Creative Variations & Dietary Adaptations
Want to mix things up? These hand pies are incredibly versatile! For a vegetarian version, simply use your favorite vegetarian pie crust recipe. To make them gluten-free, use a gluten-free pie crust blend. There are many great options available at most grocery stores.
For a vegan version, use a vegan pie crust recipe and replace the egg wash with a plant-based milk (like almond or soy milk) or a mixture of maple syrup and water. You can also get creative with the filling! Try adding a pinch of cinnamon or nutmeg for a warm, spicy flavor. Or, swap out the berries for other fruits, like apples, peaches, or cherries. For a savory twist, try filling them with spinach and feta cheese or mushrooms and onions. The possibilities are endless!
If you’re watching your sugar intake, you can reduce the amount of sugar in the filling or use a sugar substitute like stevia or erythritol. Just be sure to adjust the amount according to the package directions. Finally, for a more decadent treat, try adding a layer of chocolate chips or a dollop of Nutella to the filling before baking. Trust me, it’s heavenly!
Perfect Serving Suggestions & Pairings
These berry hand pies are perfect for so many occasions! They’re ideal for picnics, potlucks, barbecues, and summer parties. They also make a wonderful dessert after a casual weeknight dinner. Serve them warm with a scoop of vanilla Ice Cream or a dollop of whipped cream for an extra-special treat.
As for beverage pairings, a glass of cold milk, a cup of hot coffee, or a refreshing iced tea are all great choices. For a more sophisticated pairing, try a crisp white wine like Sauvignon Blanc or Pinot Grigio. Portion sizes will vary depending on the occasion, but generally, one hand pie per person is a good starting point. If you’re serving them as part of a larger dessert spread, you can cut them into smaller pieces. Ultimately, these hand pies are about bringing people together and sharing a moment of sweetness. So, serve them with love and enjoy!
Final Thoughts & Recipe Success Tips
So, there you have it – my foolproof recipe for homemade berry hand pies! Remember, the key to success is to keep your ingredients cold, don’t overfill the pies, and seal the edges tightly. And most importantly, have fun! Baking should be a joyful experience, so don’t be afraid to experiment and put your own spin on this recipe. I truly believe that anyone can make these hand pies, regardless of their baking experience.
Now, I’d love to hear from you! What are your favorite berry combinations? Do you have any secret tips for making the perfect pie crust? Let me know in the comments below! And if you try this recipe, be sure to share your photos and tag me on social media. Happy baking!
Frequently Asked Questions
Berry Hand Pies
Ingredients
Main Ingredients
- 2.5 cups mixed berries (strawberries, blueberries, raspberries) fresh or frozen
- 1 tablespoon lemon juice
- 1 teaspoon ground cinnamon
- 1 teaspoon granulated sugar
- 1 package refrigerated pie crusts (2)
Instructions
Preparation Steps
- Preheat oven to 375°F (190°C).
- In a bowl, gently toss the berries with lemon juice, cinnamon, and sugar.
- Unroll pie crusts. Cut each crust into 6 equal squares.
- Place a spoonful of berry filling in the center of each square.
- Fold the corners of the square over the filling to form a triangle, pressing the edges to seal.
- Bake for 20-25 minutes, or until the crust is golden brown and the filling is bubbly.
- Let cool slightly before serving.