Sunday Pork Roast
There are certain meals that just wrap you up like a warm hug, aren’t there? For me, that’s a perfectly roasted pork. It’s more than just dinner; it’s the centerpiece of our Sunday gatherings, the aroma that signals relaxation, and the dish my kids have been asking for since they were tiny. Forget those complicated, time-consuming roasts you see in magazines. This is the real deal – straightforward, ridiculously flavorful, and utterly foolproof. It’s the kind of Sunday pork roast that makes you feel like a culinary rockstar without all the stress. I’ve tried many a pork dish over the years, but this one, this specific Sunday pork roast, always, always comes out a winner. It reminds me of my grandmother’s kitchen, bustling with happy chatter and the promise of something delicious. It’s a simple pleasure, really, but a profoundly satisfying one.
What is Sunday Pork Roast?
So, what exactly *is* this magical Sunday pork roast? Think of it as your go-to, no-fuss, incredibly delicious roasted pork shoulder that practically cooks itself. It’s that classic, comforting dish that graces tables on lazy Sundays, but with a few personal touches that elevate it from good to absolutely unforgettable. The name itself, “Sunday Pork Roast,” evokes a sense of tradition and warmth, doesn’t it? It’s not about fancy techniques or obscure ingredients; it’s about taking a beautiful cut of pork and coaxing out its Absolute Best flavors through simple, smart cooking. It’s essentially a love letter to slow cooking and savory goodness, designed to be shared with the people you care about. It’s the kind of meal that makes you want to linger at the table, savoring every bite and every moment.
Why you’ll love this recipe?
Why is this Sunday pork roast a must-make recipe?flavor is just out of this world. We’re talking tender, fall-apart pork with a slightly crispy, caramelized exterior that’s seasoned to perfection. It’s savory, a little sweet, and deeply aromatic. Then there’s the simplicity. I’ve learned over the years that the best recipes are often the ones that don’t require a culinary degree. This one involves minimal prep and mostly hands-off cooking time, which is a lifesaver, especially on busy weekends. You can throw it in the oven and focus on spending time with family or just enjoying a quiet moment. And let’s talk about Cost-efficiency: What is the best way to measure cost-efficiency?. Pork shoulder is generally a more budget-friendly cut, making this a fantastic option for feeding a crowd without breaking the bank. It’s incredible value for the taste and satisfaction you get. Finally, its versatility is a huge plus. I’ll often use leftovers in sandwiches, tacos, or even a hearty stew. It’s a recipe that truly keeps on giving! What I love most about this Sunday pork roast is that it feels both special enough for a celebration and comforting enough for an ordinary Sunday. It’s that perfect sweet spot.
How to Make Sunday Pork Roast
Quick Overview
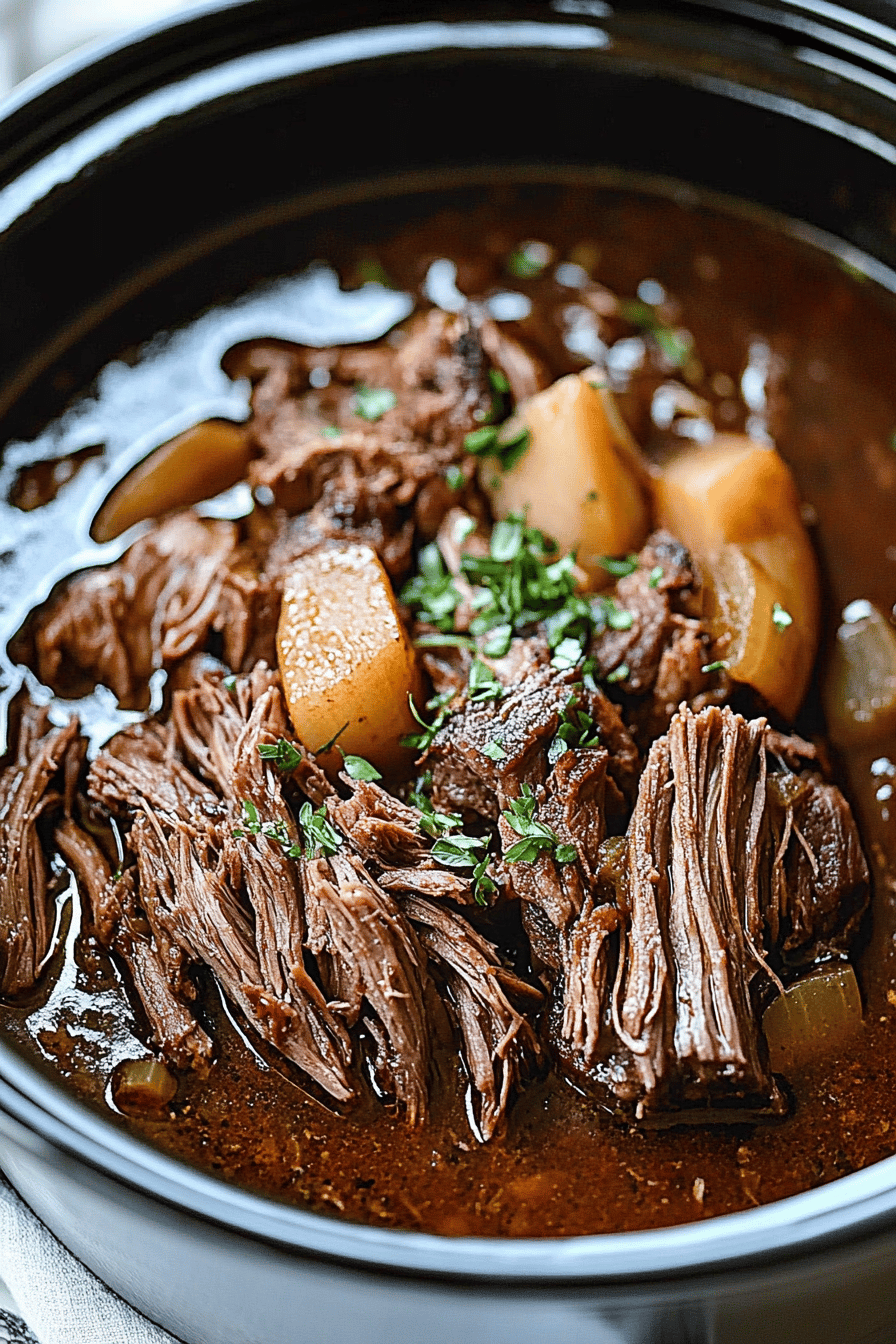
This Sunday pork roast is all about building layers of flavor and letting time do its magic. You’ll start by prepping your pork shoulder with a delicious rub, giving it a good sear for extra depth, and then letting it slowly roast in the oven until it’s incredibly tender. The key is low and slow heat, allowing the connective tissues to break down and create that melt-in-your-mouth texture. It’s a straightforward process that guarantees a spectacular result, making it ideal even for beginner cooks looking to impress.
Ingredients
For the Main Roast:
You’ll want a beautiful, bone-in pork shoulder (also known as a Boston butt or pork butt). Aim for about 3-4 pounds. The bone adds extra flavor and moisture, so don’t skip it! You can usually find good quality ones at your local butcher or even the regular grocery store. Just look for good marbling – those little flecks of fat are crucial for tenderness and flavor. For the rub, we’ll need: 2 tablespoons of smoked paprika (this is key for that smoky depth!), 1 tablespoon of brown sugar (just a touch to help with caramelization), 1 tablespoon of garlic powder, 1 tablespoon of onion powder, 2 teaspoons of kosher salt, and 1 teaspoon of Black Pepper. This rub is simple but packs a punch.
For the Aromatics & Liquid:
To help infuse flavor and keep things moist, we’ll add a few things to the roasting pan. I like to use 2 large yellow onions, roughly chopped, and 4-5 cloves of garlic, smashed. About 1 cup of chicken or vegetable broth is perfect for the bottom of the pan, providing moisture and a base for a fantastic pan sauce later. You can also use water in a pinch, but broth really adds that extra something.
For the Optional Glaze (highly recommended!):
About an hour before it’s done, I love to brush on a simple glaze. This is totally optional, but it adds a beautiful sticky, slightly sweet finish. You’ll need 1/2 cup of your favorite BBQ sauce (I love a good smoky, slightly tangy one) and 2 tablespoons of APPLE CIDER vinegar to cut through the richness. Whisk them together, and you’re golden.
Step-by-Step Instructions
Step 1: Preheat & Prep Pan
First things first, get your oven preheating to a nice and cozy 325 degrees Fahrenheit (160 degrees Celsius). While that’s warming up, grab a sturdy roasting pan. I prefer one with a rack, but it’s not strictly necessary. If you don’t have one, you can skip the rack. Scatter your chopped onions and smashed garlic cloves on the bottom of the pan. This creates a flavorful bed for the pork. Now, take your pork shoulder and pat it thoroughly dry with paper towels. This step is crucial for getting a good sear. Season it generously all over with your rub mixture, making sure to get into all the nooks and crannies. Don’t be shy with the rub; it’s what gives our Sunday pork roast its fantastic flavor.
Step 2: Sear the Pork
Now for a step that makes all the difference: searing! Get a large, heavy-bottomed skillet (cast iron is my favorite) screaming hot over medium-high heat with a tablespoon of your preferred cooking oil. Carefully place the seasoned pork shoulder into the hot skillet, fat cap side down first if it has one. Sear it for about 3-4 minutes per side, until you get a beautiful, deep golden-brown crust. This caramelization adds incredible depth of flavor. Once seared, carefully transfer the pork shoulder to your prepared roasting pan, placing it on top of the onions and garlic.
Step 3: Add Liquid & Cover
Pour the chicken broth (or water) into the bottom of the roasting pan, being careful not to wash off the rub from the pork. You want the liquid to stay at the bottom. Now, cover the roasting pan tightly with aluminum foil. You want to create a sealed environment so the pork braises in its own juices and the aromatics. If your foil feels a bit flimsy, use a double layer. Make sure it’s sealed well around the edges to trap all that delicious steam.
Step 4: Slow Roast to Perfection
Pop that foil-covered pan into your preheated oven. Now comes the patience part – let it roast for about 3 to 4 hours. The exact time will depend on the size of your pork shoulder, but you’re looking for it to be fork-tender. You can test this by carefully removing the foil (watch out for steam!) and inserting a fork into the thickest part of the meat. If it goes in with little to no resistance and the meat easily pulls apart, it’s ready.
Step 5: Apply the Glaze (Optional but Recommended!)
If you’re going for that extra layer of deliciousness, about 45 minutes to an hour before your pork is done, remove the foil. Brush your prepared BBQ sauce and Apple Cider vinegar glaze all over the top of the pork. Return the uncovered pan to the oven and continue roasting. This allows the glaze to caramelize and create a beautiful, sticky crust on the outside. Keep an eye on it to make sure it doesn’t burn; if it starts to get too dark too quickly, you can loosely tent it with foil again.
Step 6: Rest the Roast
This is a step that’s often overlooked, but it’s SO important for juicy meat. Once your Sunday pork roast is perfectly tender and beautifully glazed, carefully remove it from the oven. Transfer the pork to a clean cutting board or platter. Tent it loosely with foil and let it rest for at least 15-20 minutes. This allows the juices to redistribute throughout the meat, ensuring every bite is moist and flavorful. Don’t rush this!
Step 7: Make Pan Sauce (Optional)
While the pork is resting, you can make a quick pan sauce. Carefully pour the juices and softened onions and garlic from the roasting pan into a small saucepan. Skim off any excess fat from the top. Simmer the liquid over medium heat until it reduces slightly and thickens into a delicious sauce. You can strain it if you prefer a smoother sauce, or leave the bits of onion and garlic in for extra texture and flavor. Taste and adjust seasoning if needed. A pinch of salt and pepper usually does the trick.
Step 8: Slice & Serve
After resting, you can either shred the pork using two forks (it will likely fall apart easily!) or slice it against the grain into thick, juicy pieces. Serve it piled high on platters, drizzled with that glorious pan sauce. The aroma alone will have everyone gathering around the table!
What to Serve It With
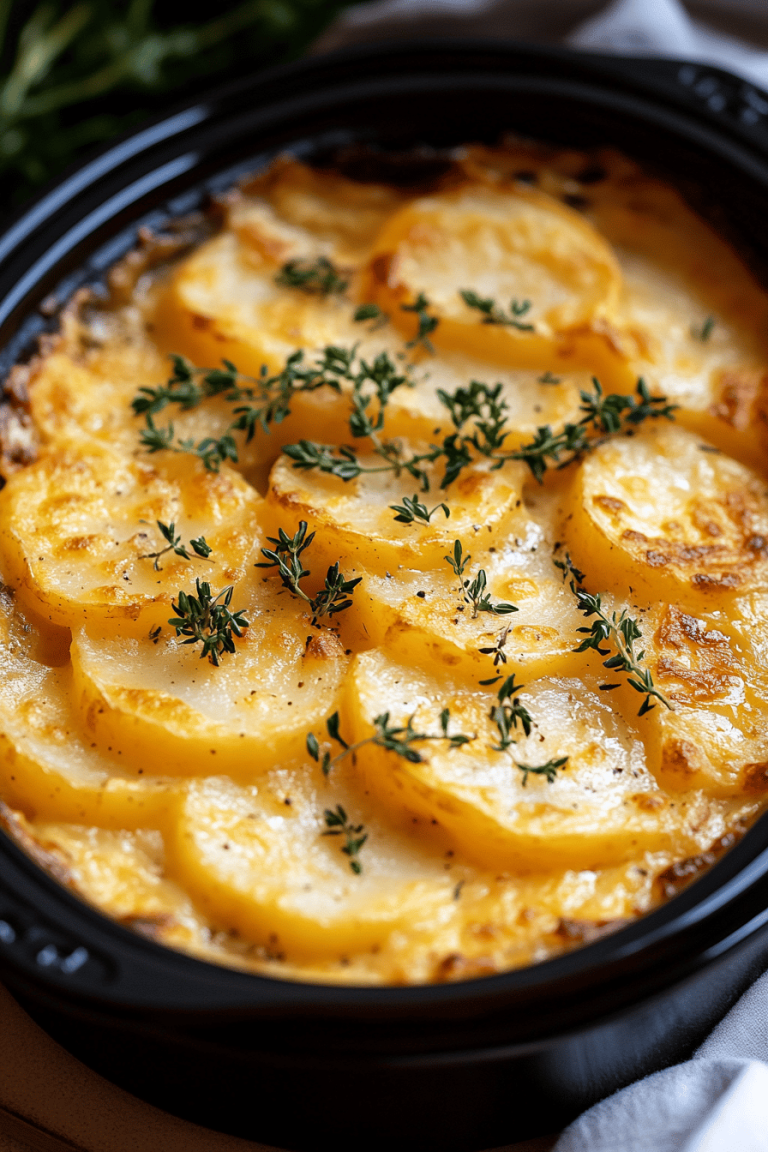
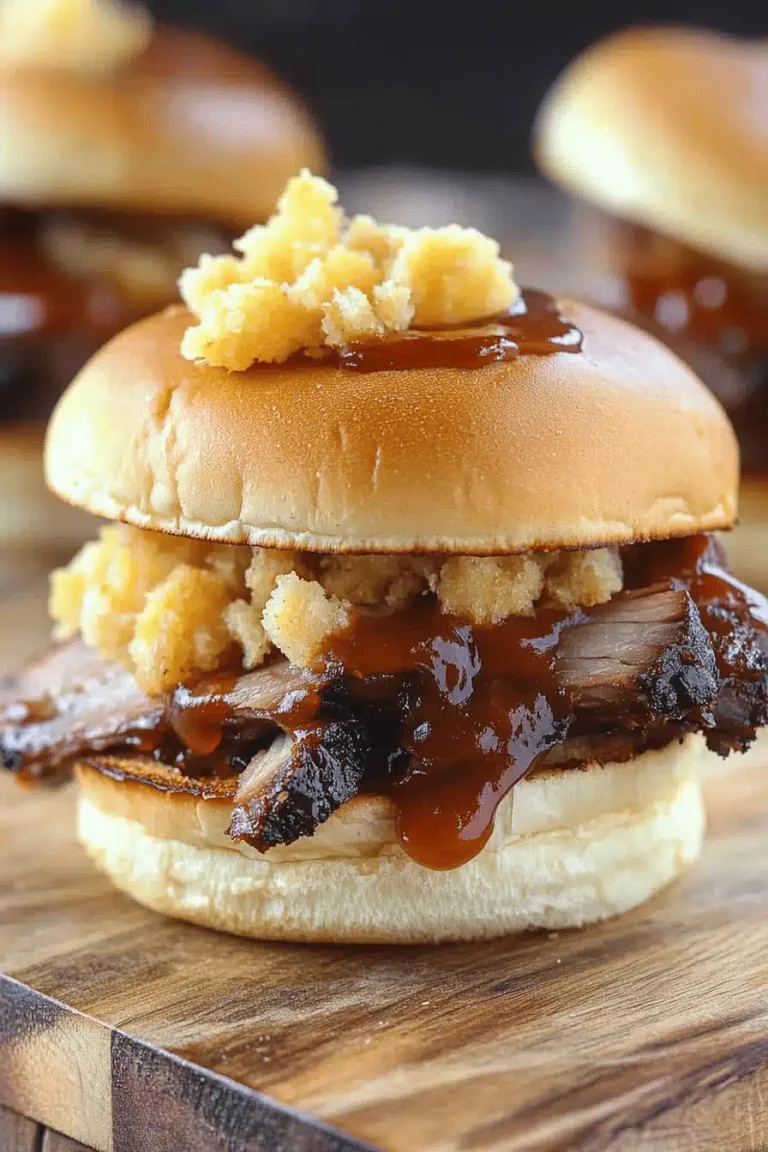
This Sunday pork roast is incredibly versatile, making it a perfect fit for so many occasions! For a classic Sunday Brunch, I love pairing it with fluffy scrambled eggs, crispy home fries, and a fresh fruit salad. It’s elegant enough for guests but still feels wonderfully relaxed. If you’re serving it as a hearty main course for dinner, classic sides are always a hit. Think creamy mashed potatoes, roasted root vegetables (carrots, parsnips, and Brussels sprouts are divine!), or a crisp green salad to balance the richness. For cozy, casual meals, we often shred the leftovers and pile it high on toasted brioche buns with a tangy coleslaw for the most amazing Pulled Pork sandwiches. My kids also adore it served over rice with some steamed broccoli – a simple yet satisfying meal that’s always a hit. And don’t even get me started on what it does for tacos! Just shred it, warm it up, and serve with your favorite taco fixings. It’s a fantastic way to repurpose leftovers for quick weeknight meals.
Top Tips for Perfecting Your Sunday Pork Roast
Over the years, I’ve picked up a few tricks that I think really elevate this Sunday pork roast from good to absolutely phenomenal. For starters, don’t skip the sear. I know it adds an extra step, but that golden-brown crust is where so much flavor develops. It’s the difference between a decent roast and a truly spectacular one. Second, patting the pork shoulder completely dry before seasoning and searing is non-negotiable. Moisture is the enemy of a good crust! My “rub it in like you mean it” philosophy comes from learning that a generous, even coating of the spice blend is key for flavor distribution. For the slow roasting, trust the process. Low and slow is the name of the game here. Resist the urge to crank up the heat; it’s the gentle, prolonged cooking that breaks down the tough connective tissues in the pork shoulder, making it incredibly tender and juicy. I’ve also learned that testing for doneness with a fork, rather than just relying on time, is super important because pork shoulders can vary in size and density. If your pork seems a little tough after the initial cooking time, just give it another 30-60 minutes – it’s always better to overcook slightly than undercook when it comes to pork shoulder. And that resting period? It’s not just a suggestion, it’s a rule! I used to cut into it too soon and wonder why it wasn’t as juicy as I expected. Letting it rest allows those precious juices to settle back into the meat, ensuring every slice is moist and tender. Finally, when it comes to the pan sauce, don’t be afraid to simmer it down a bit longer if you want a thicker, more concentrated flavor. It’s like liquid gold!
Storing and Reheating Tips
One of the best things about this Sunday pork roast is how well it keeps and how easily it can be enjoyed again. For room temperature storage, I usually don’t leave cooked pork out for more than two hours, especially if it’s been glazed. If you need to keep it warm for a serving buffet, a low oven (around 200°F or 95°C) can work for a short while, but I prefer to slice and serve shortly after resting. For refrigerator storage, once the pork has cooled down completely, store it in an airtight container. I usually cut it into manageable portions or shred it. It will stay delicious in the fridge for about 3-4 days. The flavor often gets even better the next day! When it comes to freezer instructions, this is where it truly shines for future meals. Wrap cooled pork tightly in plastic wrap, then in aluminum foil, or place it in heavy-duty freezer bags, squeezing out as much air as possible. It can last in the freezer for up to 2-3 months. Thawing is best done overnight in the refrigerator. For reheating, I often find that gently reheating shredded or sliced pork in a covered dish in a low oven (around 300°F or 150°C) with a splash of broth or water works wonders to bring back moisture. You can also reheat it on the stovetop over low heat, stirring occasionally. The key is gentle heat to avoid drying it out. If you’ve glazed your roast, the glaze might be a bit sticky and caramelized; you can reapply a little more BBQ sauce or a fresh glaze after reheating if you like.
Frequently Asked Questions
Final Thoughts
So there you have it – my tried-and-true recipe for the ultimate Sunday Pork Roast. It’s a dish that brings so much comfort and joy to our table, and I truly hope it does the same for yours. It’s proof that incredible flavor doesn’t have to come with complicated steps. Whether you’re a seasoned cook or just starting out, this recipe is designed to deliver delicious results every single time. It’s the kind of meal that makes you feel good about what you’re serving, and it’s perfect for those relaxed Sunday afternoons. If you loved this Sunday pork roast, you might also enjoy my Slow Cooker Pulled Pork or my Crispy Pork Belly recipes for more porky goodness! I can’t wait to hear how your roast turns out, so please leave a comment below and let me know your favorite way to enjoy this delicious dish. And if you have any variations or tips of your own, I’d love to learn them!
Sunday Pork Roast
Ingredients
Pork and Marinade
- 2.5 pounds Pork loin roast bone-in
- 2 tablespoons Olive oil
- 1 tablespoon Salt
- 0.5 teaspoon Black pepper
- 1 teaspoon Garlic powder
- 0.5 teaspoon Onion powder
- 0.25 teaspoon Rosemary dried
- 0.25 teaspoon Thyme dried
Optional Sides
- 1 kilograms Potatoes quartered
- 2 cups Carrots chopped
Instructions
Preparation Steps
- Preheat your oven to 400°F (200°C).
- Pat the pork loin dry with paper towels. This helps to achieve a crispy crackling.
- In a small bowl, mix together olive oil, salt, black pepper, garlic powder, onion powder, rosemary, and thyme.
- Rub the spice mixture all over the pork loin, ensuring it's evenly coated.
- If using, toss the potatoes and carrots with a little olive oil, salt, and pepper and place them in the bottom of a roasting pan.
- Place the pork loin, fat-side up, on top of the vegetables (or directly in the roasting pan if not using vegetables).
- Roast for 20 minutes at 400°F (200°C).
- Reduce the oven temperature to 350°F (175°C) and continue roasting for approximately 25-30 minutes per pound, or until an internal thermometer registers 145°F (63°C) in the thickest part of the roast.
- For the last 15-20 minutes of cooking, you can increase the oven temperature back to 400°F (200°C) to help crisp up the crackling, watching carefully to prevent burning.
- Once cooked, remove the pork roast from the oven and let it rest for at least 15-20 minutes before carving. This allows the juices to redistribute, resulting in a more tender and moist roast.
- Serve the pork roast with the roasted vegetables (if used) and your favorite gravy.