Royal Icing Recipe
Oh, where do I even begin with this Royal Icing Recipe? It feels like I’ve known it forever, though in reality, it’s probably been about ten years since I first stumbled upon a version of it and started tweaking it to perfection. It’s the kind of thing that makes cookies look like they’ve been professionally decorated, but trust me, even if your piping skills are… let’s say, ‘developing’… you can absolutely nail this. I remember my first attempts at decorating cookies for my nephew’s birthday; I was so stressed! But then I found this method, and suddenly, those intricate floral designs and sharp edges weren’t so intimidating anymore. This royal icing is my absolute go-to for any special occasion, from elaborate holiday cookies to little treats for a bake sale. It dries hard and glossy, giving everything that polished, professional finish without requiring a degree in pastry arts. If you’ve ever looked at those magazine-perfect decorated cookies and thought, “There’s no way *I* could do that,” then stick around, because this recipe is about to change your mind!
What is royal icing?
So, what exactly *is* this magical concoction we call Royal Icing? At its heart, it’s a simple mixture of egg whites (or meringue powder, which is my preferred route these days for food safety and consistency!), powdered sugar, and a touch of liquid like lemon juice or vanilla extract for flavor and pliability. Think of it as the edible glue and decorator’s dream all rolled into one. Unlike a buttercream, which stays soft and creamy, royal icing hardens to a firm, glossy finish once it dries. This is what makes it perfect for detailed piping, creating those sharp outlines, filling in areas smoothly, and even for building edible structures like gingerbread houses. The name itself just sounds so elegant, doesn’t it? It conjures images of fancy cakes and elaborate sugar work. While it *can* be used for that, it’s also wonderfully approachable for everyday baking, making even a simple Sugar Cookie look like a work of art.
Why you’ll love this recipe?
Why do I love Royal Icing?flavor! While some royal icings can taste overwhelmingly sweet or a bit chalky, this one has a subtle tang from the lemon juice (or almond extract, which is another favorite of mine!) that balances the sweetness beautifully. It’s not just sweet; it’s delicious! Then there’s the simplicity. Seriously, once you’ve got your ingredients measured out, it’s just a matter of mixing them together. No fancy techniques or hard-to-find items required. It’s truly a lifesaver when you’re short on time but want to make baked goods look extra special. And let’s talk Cost-efficiency: What is the best way to measure cost-efficiency?. Powdered sugar and egg whites (or meringue powder) are incredibly budget-friendly ingredients, especially when you consider how far this icing goes. You can decorate dozens of cookies with just one batch. Finally, its versatility is just astounding. It’s perfect for flooding large areas of cookies, creating delicate lace patterns, writing messages, or even making little edible flowers. I’ve even used it to stick together gingerbread house pieces – it’s like edible cement! Compared to other frostings, its ability to dry hard is what really sets it apart, allowing for layering and intricate designs that just aren’t possible with buttercream. What I love most about this recipe is that it’s consistently reliable. It behaves exactly as I expect it to, every single time, which is a huge confidence booster when you’re decorating.
How to Make Royal Icing
Quick Overview
This recipe is surprisingly straightforward! You’ll whip together your base ingredients until you have a thick, smooth consistency. Then, you’ll adjust it with a little liquid to get it just right for piping or flooding. The key is achieving the perfect texture for whatever decorating you have in mind. It’s the kind of recipe that makes you feel like a decorating pro, even if you’re just starting out. The entire process usually takes less than 15 minutes from start to finish, which is fantastic for those last-minute party preparations!
Ingredients
For the Main Icing Base:
4 cups (about 500g) confectioners’ sugar (also known as powdered sugar), sifted
3 tablespoons meringue powder
1/4 cup warm water
1 teaspoon vanilla extract or 1/2 teaspoon lemon juice (or almond extract for a different flavor profile)
For Adjusting Consistency (if needed):
Additional water, a teaspoon at a time
For Coloring (optional):
Gel food coloring
Step-by-Step Instructions
Step 1: Sift the Sugar
This is a step I *never* skip, and it makes all the difference. Grab your finest sieve and sift your powdered sugar into a large mixing bowl. This removes any lumps and ensures your royal icing will be super smooth and easy to work with. If you don’t sift, you risk little pockets of unincorporated sugar, and nobody wants that in their beautifully decorated cookie!
Step 2: Mix Dry Ingredients
Add the meringue powder to the sifted confectioners’ sugar in the mixing bowl. Give it a quick whisk with a fork or a small whisk to combine them evenly. Meringue powder is the secret to that firm, glossy finish, and it’s also safer than using raw egg whites, especially if your cookies might be eaten by little ones. It really helps create a stable icing that won’t crack or crumble.
Step 3: Add Wet Ingredients
Pour the warm water, vanilla extract (or lemon juice/almond extract) into the bowl with the dry ingredients. Using warm water helps the meringue powder dissolve properly and creates a smoother base from the get-go. Make sure your water isn’t too hot, just pleasantly warm to the touch.
Step 4: Combine and Beat
Now, it’s time to bring it all together! Using an electric mixer (a stand mixer with a whisk attachment is ideal, but a hand mixer works great too), start mixing on low speed to prevent a sugar cloud from exploding everywhere. Once the ingredients are just starting to combine, increase the speed to medium-high and beat for about 5-7 minutes. You’re looking for a thick, glossy, and smooth consistency. It should hold stiff peaks when you lift the whisk – meaning when you pull the whisk out, the icing that sticks to it forms a pointy peak that doesn’t flop over.
Step 5: Adjust Consistency for Piping/Flooding
This is where you customize it for your decorating needs! For general piping (outlines, details), the thick consistency from Step 4 is usually perfect. If you want to ‘flood’ larger areas of cookies, you’ll need a thinner icing. Add water, just *one teaspoon at a time*, mixing well after each addition, until the icing flows smoothly off the whisk in a ribbon that slowly melts back into the bowl within about 10-15 seconds. For writing or very fine details, you might want it slightly thicker than flooding consistency, but thinner than piping consistency. It takes a little practice, but you’ll get the hang of it!
Step 6: Color Your Icing (Optional)
If you want to add color, divide your icing into smaller bowls based on how many colors you want. Add gel food coloring a tiny bit at a time and mix gently until you achieve your desired shade. Gel colors are best because they don’t add extra liquid to the icing, which could alter the consistency. Start with a small amount; you can always add more!
Step 7: Prepare for Decorating
Transfer your icing to piping bags fitted with your desired tips. If you’re flooding, squeeze the icing into small squeeze bottles. Work relatively quickly, or cover your bowls of icing with a damp cloth or plastic wrap pressed directly onto the surface to prevent a skin from forming. This is crucial!
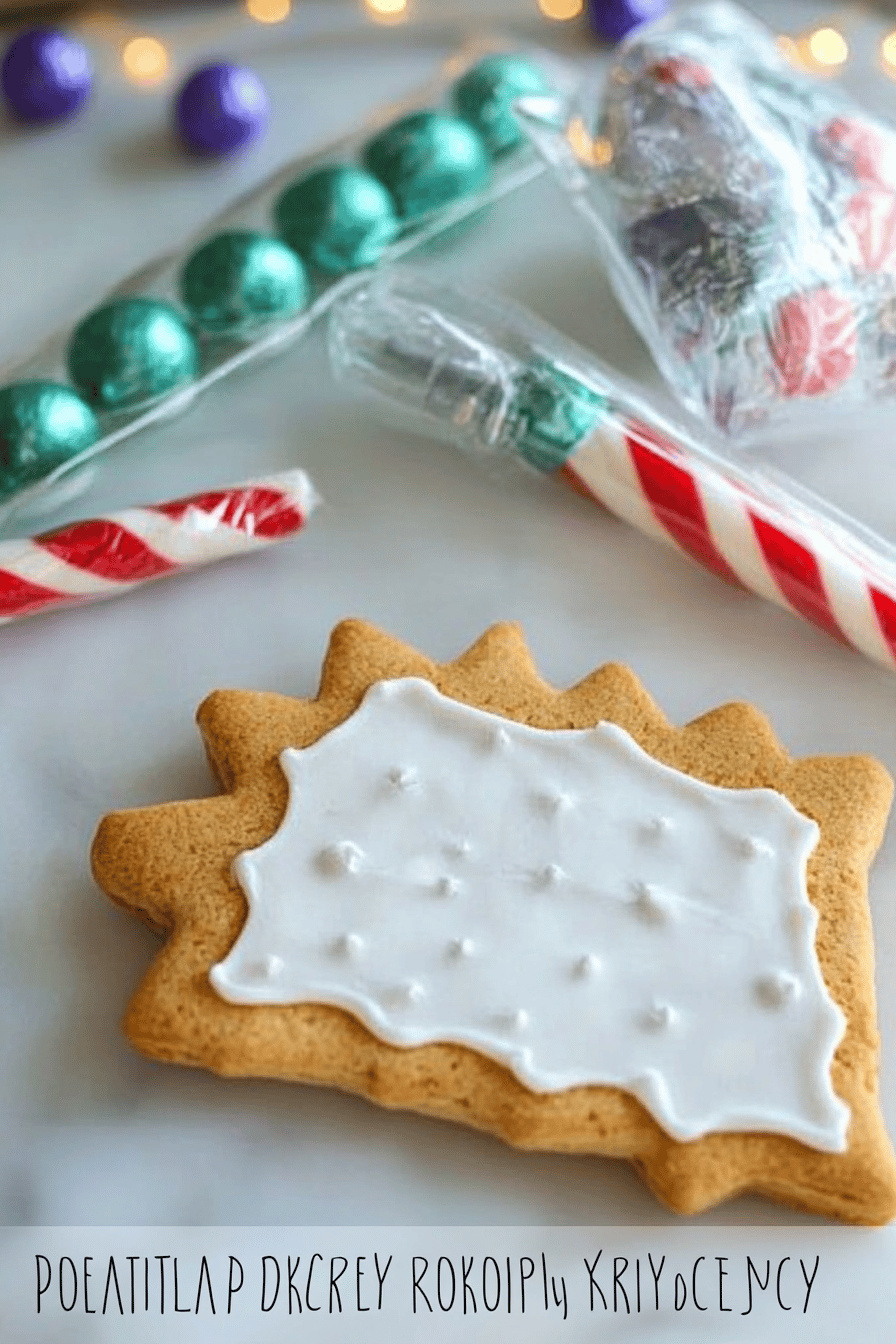
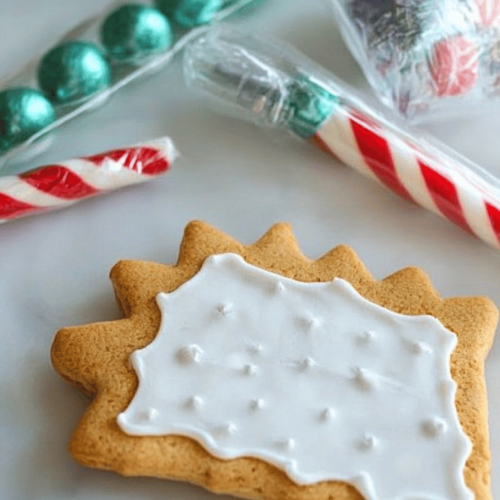
Step 8: Decorate Your Creations!
Now for the fun part! Pipe outlines around your cookies, fill them in with flooding icing, create intricate patterns, write messages, or whatever your heart desires. Let your imagination run wild! The royal icing will start to set as it sits.
Step 9: Let it Dry Completely
This is probably the hardest part – the waiting! Allow your decorated cookies to dry completely. This can take anywhere from a few hours to overnight, depending on the humidity in your kitchen and how thick your icing layers are. They are ready when the surface is hard to the touch and doesn’t dent when gently pressed. Once dry, they’re ready to be enjoyed or packaged!
What to Serve It With
This Royal Icing isn’t just for cookies, though that’s where it truly shines! I love pairing it with all sorts of baked goods. For Breakfast: Imagine a beautifully decorated Sugar Cookie shaped like a sun with your morning coffee. It’s a little burst of joy to start the day. Or perhaps some intricately piped Danish pastries? The clean, sweet finish is lovely with a rich pastry. For Brunch: This is where it really gets elegant. Think about a platter of beautifully decorated mini tarts or éclairs. The smooth, hard icing adds a touch of sophistication that’s perfect for a gathering. You can even use it to “glue” together delicate meringue cookies for a stunning dessert centerpiece. As Dessert: Beyond cookies, consider decorating shortbread rounds or even using it as a base for edible embellishments on cakes. A simple swirl on a cupcake can elevate it instantly. For Cozy Snacks: My kids love it when I make decorated graham crackers or simple sugar cookies with fun shapes. It’s a great way to make a simple treat feel extra special. My personal family tradition is to always decorate a batch of snowflake cookies for the first snow of winter, and we enjoy them with a warm mug of hot chocolate. It’s those little moments, made a bit brighter with a touch of beautifully decorated icing, that I cherish.
Top Tips for Perfecting Your Royal Icing
Over the years, I’ve picked up a few tricks that have made my royal icing journey so much smoother, and I’m eager to share them with you! Sifting the Sugar, as I mentioned, is non-negotiable. It’s the first line of defense against lumpy icing. For Mixing Advice, be patient! That 5-7 minutes of beating is essential for creating a stable, glossy icing. Don’t be tempted to stop early, or you might end up with icing that’s too soft. Overmixing isn’t really a thing here, as long as you’re not beating it for an hour straight; the goal is to incorporate air and create that stiff peak consistency. For Consistency Customization, always add water a *tiny* bit at a time. It’s much easier to thin icing than to thicken it. Remember, you’re aiming for specific flow rates for different decorating techniques. For piping, you want it to hold its shape. For flooding, you want it to spread evenly and smoothly. Experimenting with Swirl Customization is where the real artistry comes in! Different piping tips create different effects – star tips for borders, round tips for writing, and petal tips for flowers. For marbling, swirl two colors together gently with a toothpick before they set. For Ingredient Swaps, while I adore vanilla extract for its classic flavor, almond extract or a touch of lemon juice can add a lovely subtle complexity. Be cautious with other extracts, as some can affect the icing’s ability to set. When it comes to baking tips, ensure your cookies are baked through and completely cool before decorating. Warm cookies can melt the icing! Also, humidity is your enemy when drying royal icing. If it’s a very humid day, you might need to leave your decorated cookies in an air-conditioned room or even pop them in a very, very low oven (like 150°F or 70°C) for a few minutes, watching them *very* carefully, to help them dry. For Glaze Variations, besides water, you can use milk for a slightly richer flavor, though it might affect the drying time slightly. A tiny bit of corn syrup can also add extra shine to your glaze if that’s your goal.
Storing and Reheating Tips
Knowing how to store your beautifully decorated cookies is just as important as making the icing itself! Room Temperature Storage is usually best for decorated cookies. Once the royal icing is completely dry, you can store them in an airtight container. They’ll stay fresh and the icing will remain perfectly intact for at least 1-2 weeks. I usually place parchment paper between layers to prevent sticking, especially if they have intricate details. Refrigerator Storage isn’t typically recommended for plain royal iced cookies, as condensation can form and make the icing soft or sticky. However, if you’ve decorated something that *needs* refrigeration (like a cake with buttercream that also has royal icing elements), ensure it’s well-sealed. For Freezer Instructions, this is a bit trickier. It’s best to freeze undecorated cookies and then decorate them after thawing. If you must freeze decorated cookies, make sure they are *completely* dry and then wrap them very, very well in plastic wrap, then place them in a freezer-safe container. Thaw them slowly at room temperature overnight to minimize condensation. When it comes to Glaze Timing Advice, it’s crucial to let the icing dry completely before storing. If you try to store them too soon, the icing can stick to the container, smudge, or get damaged. For most cookies, 12-24 hours of drying time is sufficient, but always test a small area to be sure.
Frequently Asked Questions
Final Thoughts
There you have it – my tried-and-true Royal Icing recipe! I genuinely believe this is one of the most accessible and beautiful ways to elevate your baked goods. It’s that perfect blend of simplicity and elegance that makes you feel like you’ve accomplished something truly special. Whether you’re decorating for a birthday, a holiday, or just because, this icing will give you stunning results without all the fuss. I hope you give it a try and discover how much fun decorating can be! If you love this recipe, you might also enjoy my tutorials on creating delicate sugar flowers or my guide to perfect meringue cookies. They use similar principles and will open up even more creative possibilities for you. I can’t wait to hear how your creations turn out! Don’t forget to share your decorated masterpieces and tag me! Happy baking, and happy decorating!
Royal Icing Recipe
Ingredients
Main Ingredients
- 3 cups powdered sugar
- 3 tablespoons meringue powder
- 0.375 cup warm water
- 0.5 teaspoon vanilla extract optional
Instructions
Preparation Steps
- In a large bowl, whisk together the powdered sugar and meringue powder.
- Add the warm water and vanilla extract (if using) to the dry ingredients.
- Using an electric mixer on low speed, beat the ingredients until just combined. Scrape down the sides of the bowl.
- Increase the mixer speed to medium-high and beat for 5-7 minutes, until the icing is thick, smooth, and has stiff peaks.
- If the icing is too thick, add more warm water, 1 teaspoon at a time, until desired consistency is reached. If it's too thin, add more powdered sugar, 1 tablespoon at a time.
- Transfer the icing to a piping bag fitted with your desired tip or use it for flooding cookies.
- Decorate your cookies or baked goods and let them dry completely in a well-ventilated area. Drying time will vary depending on humidity and thickness of the icing.