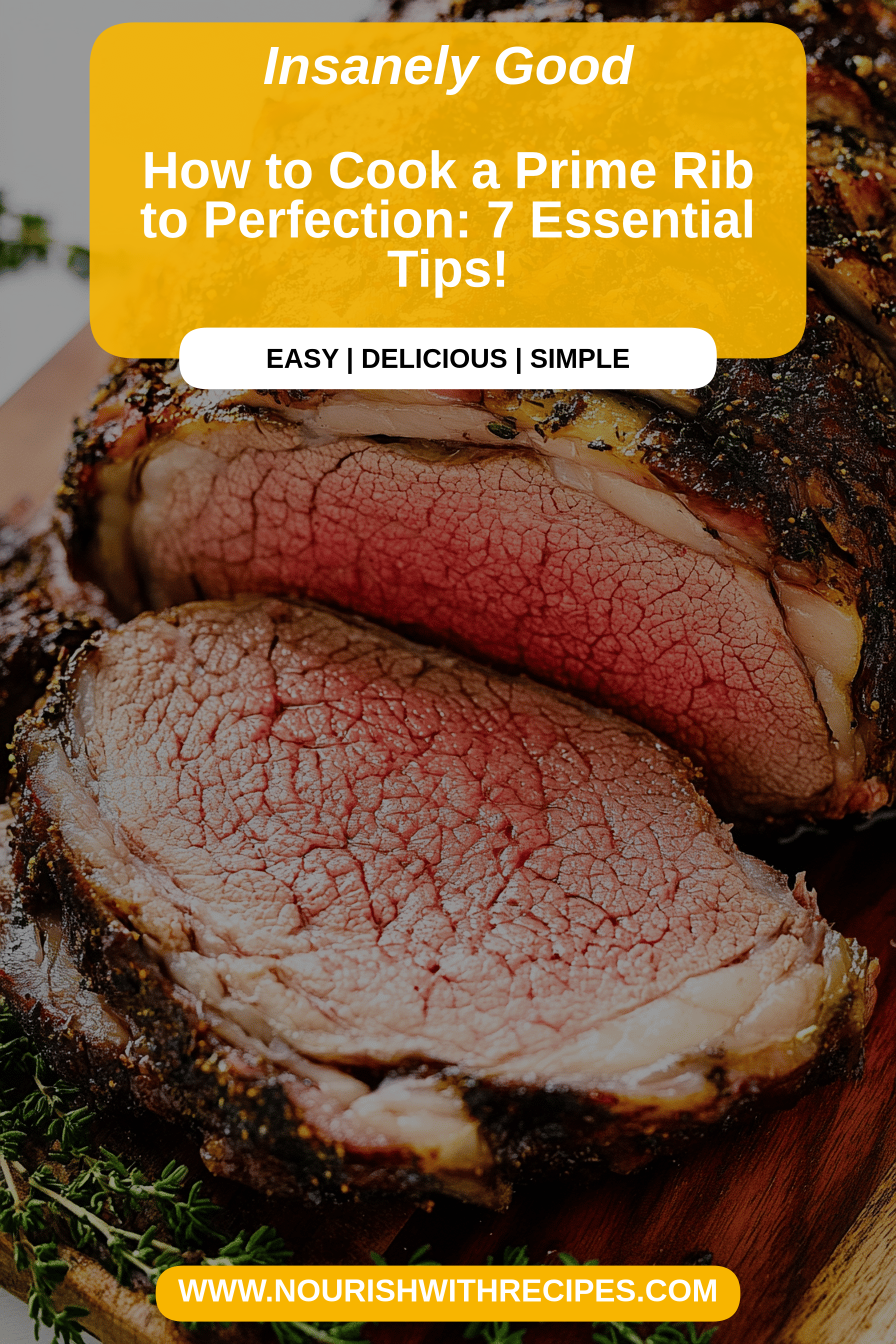
Prime Rib Cooking Tips
Oh, prime rib. Just saying the words brings back a flood of memories. For me, it’s always been synonymous with holidays, with the cozy hum of family chatter, and that incredible, mouthwatering aroma that filled our house on special occasions. I remember my grandmother, her hands dusted with flour and a twinkle in her eye, meticulously preparing her prime rib. It felt like magic. Now, I get to share that same magic with my own family, and honestly, it’s one of those dishes that makes everyone feel a little extra special. If you’ve ever felt intimidated by cooking a prime rib, thinking it’s only for fancy restaurants or professional chefs, I’m here to tell you that’s just not true. With a few key prime rib cooking tips, you can achieve a restaurant-quality roast right in your own kitchen. It’s simpler than you think, and the payoff? Absolutely incredible. Forget those complicated recipes you might have seen; we’re going to focus on what truly matters to get that perfect, juicy, flavorful roast every single time. This is the method I’ve honed over years, the one that consistently brings smiles to faces and earns requests for seconds.
What is prime rib?
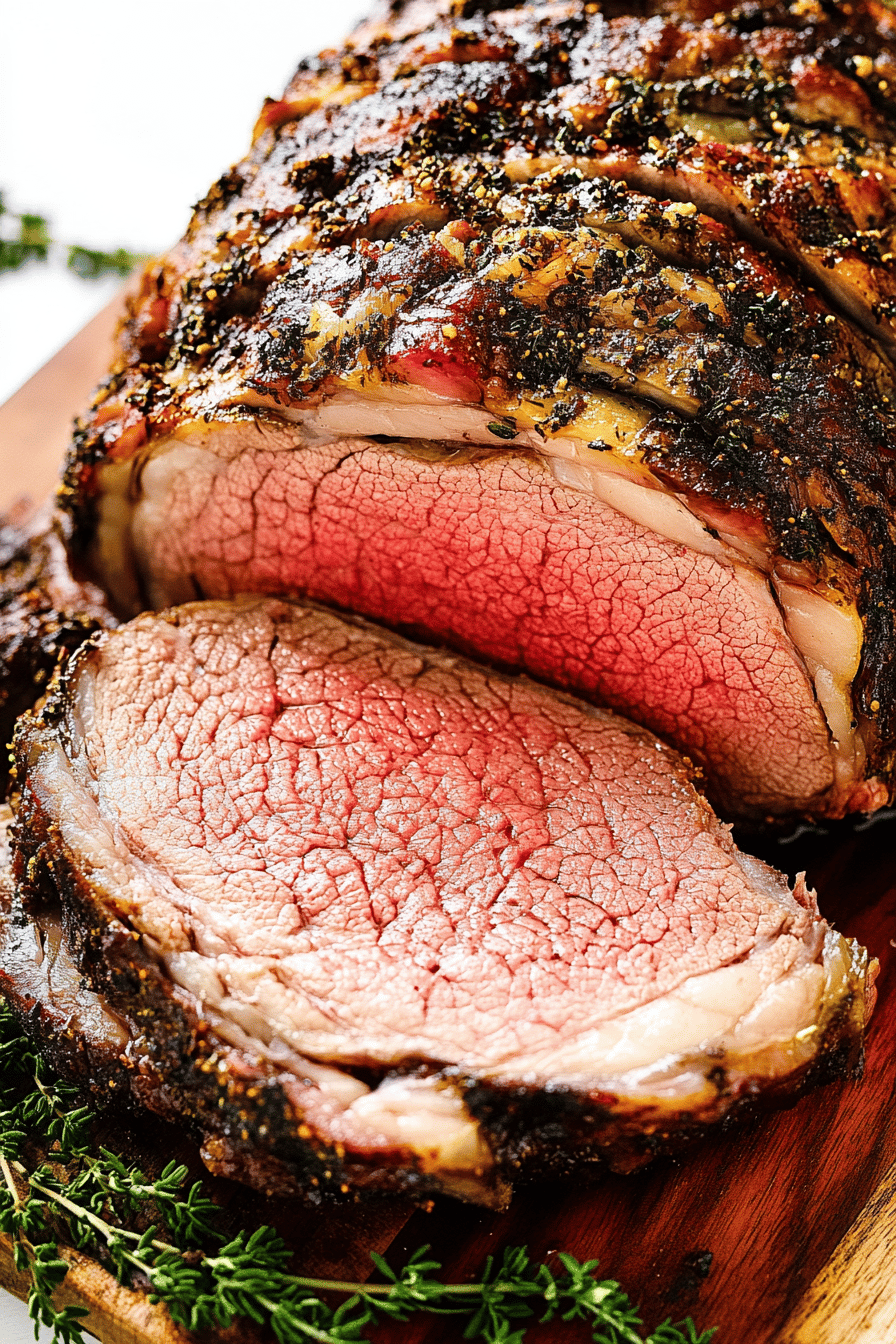
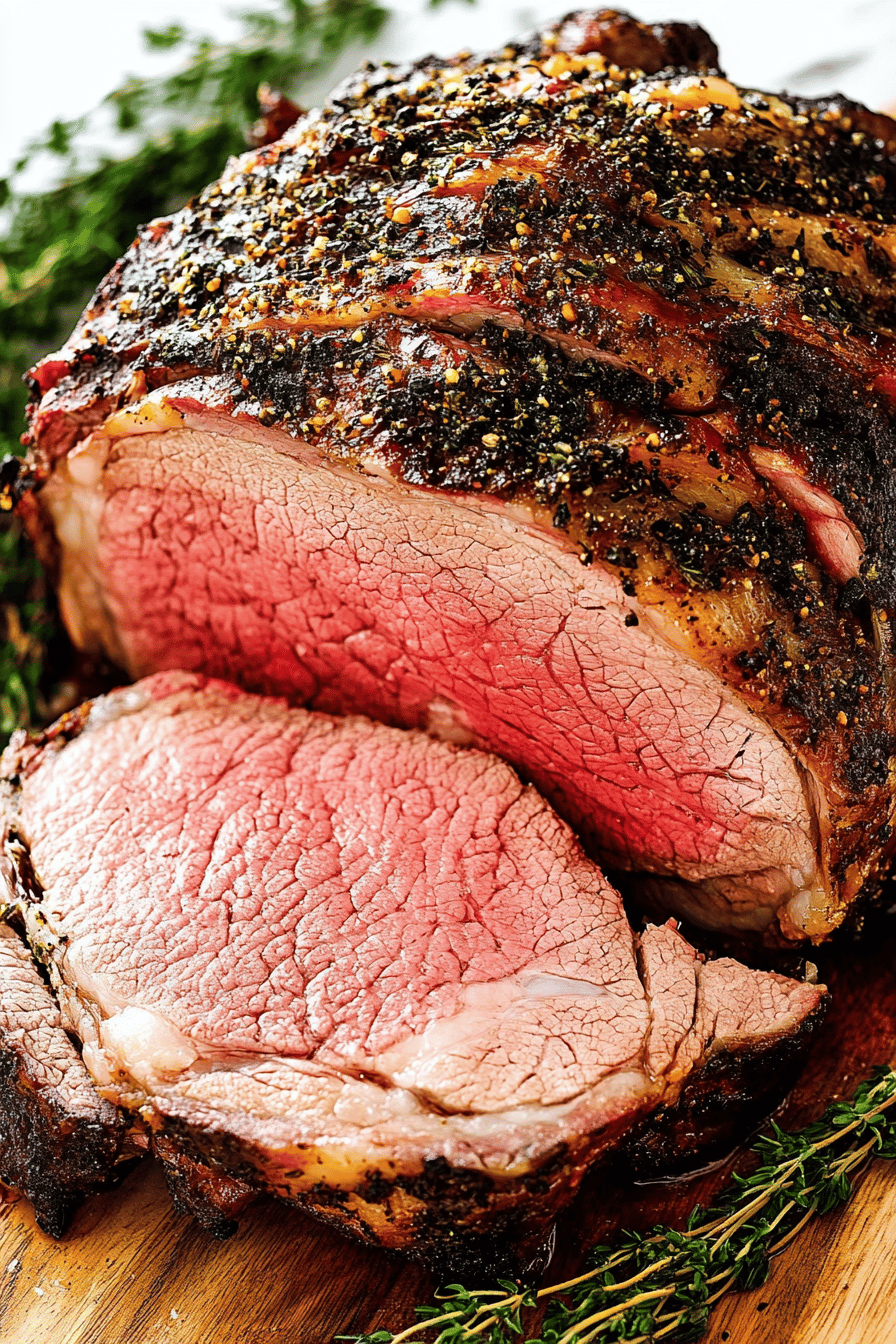
So, what exactly is this magnificent cut of meat we call prime rib? At its heart, it’s a large, bone-in beef roast taken from the rib section of the cow. Think of it as the star of the show, the undisputed champion of celebratory meals. It’s traditionally made from a larger roast called a standing rib roast, which can have anywhere from two to seven ribs. The “prime” in prime rib actually refers to the quality grade of the beef – USDA Prime, the highest grade, known for its abundant marbling, which translates to incredible tenderness and flavor. However, you can absolutely make a spectacular prime rib with a USDA Choice grade roast too; the key is in how you cook it. This isn’t just any roast; it’s a cut that, when treated with a little love and the right prime rib cooking tips, delivers a deeply savory, melt-in-your-mouth experience with a beautiful, golden-brown crust. It’s the kind of dish that commands attention at the table and makes any meal feel like a grand occasion.
Why you’ll love this recipe?
Honestly, there are so many reasons I keep coming back to this prime rib. First and foremost, the FLAVOR. It’s just unparalleled. The slow roasting allows the natural beefy taste to intensify, while the exterior develops this incredible, savory crust that’s just divine. Imagine that rich, beefy aroma wafting through your home – it’s enough to make your stomach rumble! Then there’s the SIMPLICITY. I know, I know, a prime rib can sound intimidating, but this method breaks it down into really manageable steps. There’s no fancy equipment needed, just a good oven, a roasting pan, and a little patience. What I love most is how forgiving it is. Even if you’re not a seasoned chef, these prime rib cooking tips will guide you to success. It’s also surprisingly COST-EFFECTIVE when you consider the restaurant prices you’d pay for something comparable. Buying a whole roast and preparing it yourself is far more economical, especially when feeding a crowd. And let’s talk about VERSATILITY. While it’s a showstopper for holiday dinners, it’s also fantastic for a Sunday supper or even as impressive leftovers. Think prime rib sandwiches or hash! It’s the kind of meal that feels luxurious without being overly complicated or breaking the bank. It truly stands out because it focuses on bringing out the natural goodness of the beef, making it the perfect centerpiece for any gathering or a special treat just because.
How do I make Prime Rib?
Quick Overview
Making a perfect prime rib is all about patience and temperature control. We’ll start by seasoning the roast generously, then slow-roast it at a lower temperature to cook it evenly through, finishing with a blast of high heat to develop that irresistible crust. The key is to let the meat rest properly afterward, which is crucial for juiciness. This method ensures a tender, flavorful roast with a beautiful pink center and a wonderfully caramelized exterior. Trust me, these prime rib cooking tips will make it feel incredibly manageable, even if it’s your first time.
Ingredients
For the Prime Rib Roast:
You’ll want a good quality bone-in prime rib roast, typically 3-5 pounds. Look for one with nice marbling – that’s the little flecks of fat within the meat, which are key for flavor and moisture. Bone-in is generally preferred as it helps protect the meat from drying out and adds flavor. I always opt for a roast that’s at least three ribs, as it tends to cook more evenly. Make sure to ask your butcher to “French” the bones if you want that classic look; it just means trimming away the excess meat from the rib bones. For seasoning, you’ll need kosher salt – it’s coarse and adheres beautifully to the meat, allowing for better flavor penetration. Freshly ground Black Pepper is non-negotiable; it adds a wonderful bite. A few cloves of fresh garlic, minced finely, will add a fantastic aromatic layer. Some people like to add rosemary or thyme, which are wonderful additions, but I often keep it simple to really let the beef flavor shine. I also like to have a tablespoon or two of olive oil or melted butter for rubbing.
For the Au Jus (Optional but Recommended):
This is where the magic happens for dipping! You’ll need the drippings from your roasting pan – don’t discard them! I usually set aside about 2 cups of the rendered fat. Then, you’ll want about 2 cups of beef broth or stock. Good quality stock makes a difference here. A splash of dry Red Wine (like Cabernet Sauvignon or Merlot) adds depth, but it’s optional. A bay leaf and a sprig of fresh thyme will infuse subtle herbaceous notes. If you have any of the rib bones removed, you can even roast those alongside some chopped onions and carrots to add to the broth for extra flavor. A pinch of salt and pepper to taste, of course.
Step-by-Step Instructions
Step 1: Preheat & Prep Pan
This is where we set the stage for success. First things first, take your prime rib roast out of the refrigerator at least 1 to 2 hours before you plan to cook it. Allowing it to come closer to room temperature helps it cook more evenly. While the roast is tempering, preheat your oven. We’re going to start with a high temperature, around 450°F (230°C). Grab a sturdy roasting pan, preferably one with a rack. If you don’t have a rack, don’t worry, you can place the roast directly in the pan, bone-side down. If you are using a rack, it allows air to circulate all around the roast, promoting even cooking and a better crust. You can even place some roughly chopped onions, carrots, and celery at the bottom of the pan under the rack to add some extra flavor to the drippings for your au jus later on. Make sure your pan is large enough to comfortably hold the roast without it touching the sides.
Step 2: Mix Dry Ingredients
This step is all about building that foundational layer of flavor. In a small bowl, combine your kosher salt and freshly ground Black Pepper. I usually go for about 1 tablespoon of salt and 1 to 2 teaspoons of pepper for a 3-pound roast, but you can adjust this to your preference. If you’re using any dried herbs like thyme or rosemary, you’d mix them in here too. My personal rule of thumb is to be generous with the salt; it really draws out the beef’s natural flavor. The coarse texture of kosher salt gives you little bursts of savory goodness throughout the roast. Ensure your pepper is freshly ground for the most pungent and aromatic flavor – it makes a world of difference, trust me!
Step 3: Mix Wet Ingredients
For the wet components, it’s super simple. If you’re using Olive Oil, have it ready. If you prefer melted butter, melt about 2 tablespoons. Some people also like to mix in a minced clove or two of garlic with the oil or butter. I find that rubbing a thin layer of olive oil all over the roast first helps the salt and pepper mixture adhere better and also aids in creating that gorgeous, crispy exterior. If you’re adding garlic directly to the roast, you can mince a couple of cloves and then rub them all over the meat, or even make small slits in the roast with a sharp knife and tuck in the garlic pieces. I find a simple rub of oil or butter followed by the salt and pepper mixture is all you really need for amazing flavor.
Step 4: Combine
Now it’s time to bring it all together! Pat your prime rib roast completely dry with paper towels. This is a crucial step for getting a good sear and crust. Then, rub the roast all over with your Olive Oil or melted butter. Sprinkle the salt and pepper mixture (and any dried herbs, if using) all over the roast, making sure to coat every surface, including the ends. Don’t be shy! Really press it in so it sticks. If you’re tucking in garlic cloves, do it now. The goal here is to create a flavorful “crust” that will develop beautifully as it cooks. This seasoning step is one of the most important prime rib cooking tips I can give you. It might seem like a lot of salt and pepper, but a good portion will fall off during cooking, and the rest infuses the meat perfectly.
Step 5: Prepare Filling
(This step is more relevant for recipes with a distinct filling component. For a classic prime rib, this section would be adapted or removed. Assuming a classic roast, we’ll focus on prepping the roasting pan.)
If you chose to add vegetables to the bottom of your roasting pan for flavor (like onions, carrots, celery), make sure they are roughly chopped. These vegetables will not only add a lovely aroma to your kitchen as they roast but will also contribute a wonderful depth of flavor to any drippings you collect for an au jus or gravy. Don’t overcrowd the pan; you want them to caramelize, not steam. If you are using a rack, ensure the vegetables are placed beneath it.
Step 6: Layer & Swirl
(This step is more relevant for recipes with a distinct layering or swirling technique, like a marbled cake or a swirled cookie. For a classic prime rib, this section would be adapted or removed.)
For our prime rib, this step is about carefully placing the roast in the prepared pan. Ensure it’s bone-side down if you aren’t using a rack, or place it on the rack, bone-side down. This orientation helps protect the more delicate meat on top from overcooking. Make sure there’s a little space around the roast for even heat circulation. If you are adding any herbs like fresh sprigs of rosemary or thyme on top of the roast at this stage, do so now. They will gently infuse their aroma as the roast cooks.
Step 7: Bake
Now for the main event! Place your roasting pan with the seasoned prime rib into the preheated 450°F (230°C) oven. Let it roast at this high temperature for 15 minutes. This initial blast of heat is crucial for searing the exterior and beginning to develop that beautiful crust. After 15 minutes, reduce the oven temperature to 325°F (160°C). Continue to roast, allowing the meat to cook gently. The cooking time will vary depending on the size of your roast and how well-done you prefer it. A general guideline is about 15 minutes per pound for rare, 18-20 minutes per pound for medium-rare, and 22-25 minutes per pound for medium. The most reliable way to check for doneness is to use an instant-read meat thermometer. Insert it into the thickest part of the roast, avoiding the bone. For rare, aim for 115-120°F (46-49°C). For medium-rare, 120-125°F (49-52°C) is perfect. Medium will be around 130-135°F (54-57°C). Remember, the temperature will rise a few degrees as it rests, so pull it out slightly before your target temperature.
Step 8: Cool & Glaze
(For a classic prime rib, there’s no glaze. This step would be adapted for resting the meat.)
This is arguably the MOST important step for a juicy roast! Once your prime rib reaches its target internal temperature, carefully remove the roasting pan from the oven. Tent the roast loosely with aluminum foil. DO NOT skip this step! Let the prime rib rest for at least 15-20 minutes, and up to 30 minutes for larger roasts. This resting period allows the juices to redistribute throughout the meat, ensuring every slice is tender and moist. If you try to slice it too soon, all those precious juices will run out onto the cutting board, leaving you with a dry roast. While it’s resting, you can easily make your au jus. Strain the drippings from the pan into a saucepan. Skim off most of the fat (leaving a tablespoon or so), add the beef broth and wine (if using), bay leaf, and thyme. Simmer gently until slightly reduced and flavorful. Season with salt and pepper to taste. Strain out the solids before serving.
Step 9: Slice & Serve
After the prime rib has had its well-deserved rest, it’s time to carve! Place the roast on a sturdy cutting board. Using a sharp carving knife, slice the roast into desired thickness. The bones can be a bit tricky, so it’s often easiest to cut between the ribs first, then slice the meat away from the bones. The meat should be a beautiful pinkish-red in the center (for medium-rare), graduating to a lovely brown on the outside. Arrange the slices on a warm platter. Serve immediately with that rich, flavorful au jus on the side for dipping. Garnish with some fresh parsley if you’re feeling fancy. The aroma, the visual appeal, the taste – it’s pure culinary bliss!
What to Serve It With
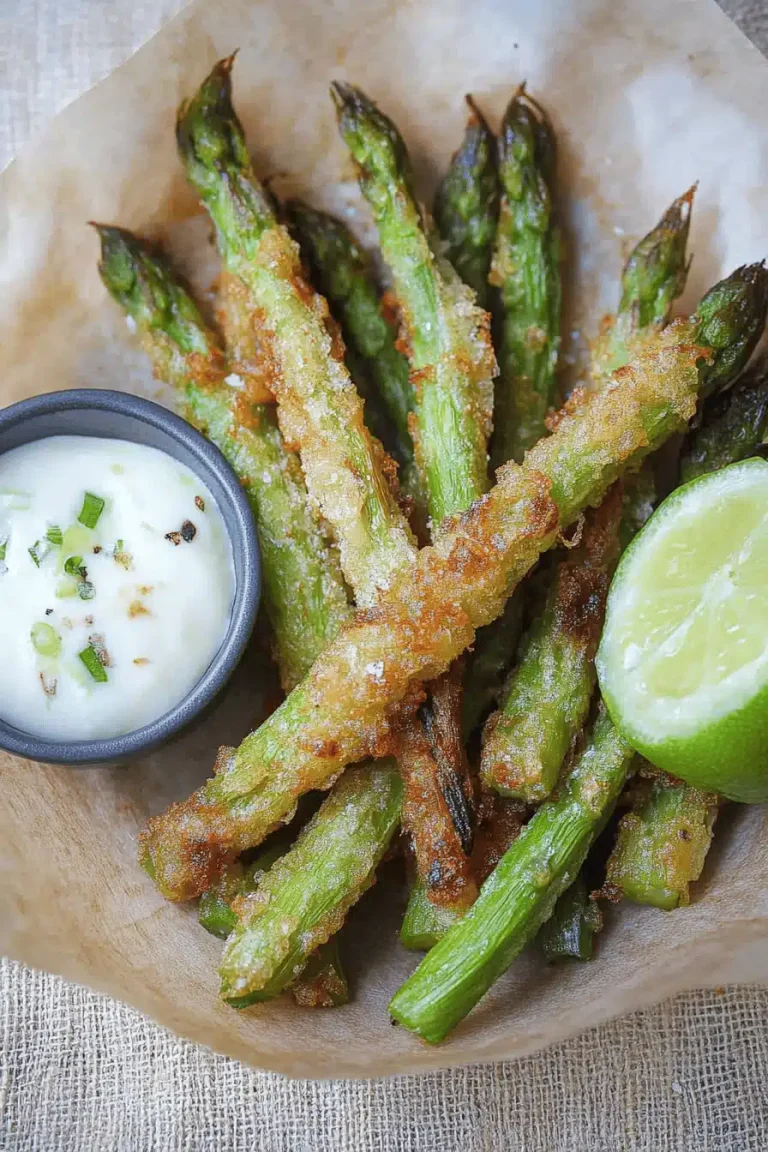
Prime rib is such a decadent dish, it practically sings with a variety of accompaniments! For a truly classic experience, you can’t go wrong with creamy mashed potatoes. They’re the perfect canvas to soak up all those delicious juices and the au jus. Roasted root vegetables like carrots, parsnips, and Brussels sprouts are also fantastic; they get beautifully caramelized and bring a lovely sweetness and earthiness to the plate. A crisp, fresh green salad with a light vinaigrette can offer a refreshing contrast to the richness of the beef. Don’t forget a good horseradish sauce or a dollop of creamy Dijon mustard for an extra kick! For a more elegant affair, consider a rich béarnaise sauce or a mushroom risotto. My family also loves it with some simple roasted asparagus or green beans almondine. It’s all about balancing the richness of the prime rib with flavors and textures that complement it beautifully. And of course, a robust red wine, like a Cabernet Sauvignon or a Merlot, is the perfect beverage to pair with this magnificent meal. It truly elevates the whole dining experience.
Top Tips for Perfecting Your Prime Rib
Over the years, I’ve picked up a few tricks that have made my prime rib cooking consistently excellent. First, when it comes to the roast itself, don’t be afraid to ask your butcher questions! They can guide you to the best cut and even prepare it for you. One of my go-to prime rib cooking tips is the importance of the resting period. Seriously, I can’t stress this enough. Tent it loosely and let those juices work their magic – it’s the secret to that unbelievably tender bite. When it comes to seasoning, using a good quality kosher salt and freshly ground black pepper is paramount. Don’t skimp! The initial high heat sear is also crucial. It helps to lock in moisture and starts building that glorious crust. Then, lowering the temperature allows the inside to cook gently and evenly. Don’t be afraid of the thermometer; it’s your best friend for hitting that perfect doneness every time. For the au jus, if you don’t have time to make it from scratch, a good quality store-bought beef broth with a splash of Worcestershire sauce can be a decent shortcut, but the homemade version truly can’t be beat. I also learned early on that the quality of your roasting pan matters. A heavy-duty pan distributes heat more evenly, preventing hot spots and ensuring your roast cooks uniformly. Lastly, always aim to pull your roast out of the oven 5-10 degrees Fahrenheit below your target temperature, as it will continue to cook while resting (this is called carryover cooking). These little details, honed through trial and error, make all the difference in achieving that perfect, restaurant-worthy prime rib.
Storing and Reheating Tips
Leftover prime rib is like gold! If you happen to have any (which is rare in my house!), storing it properly is key to enjoying it later. Once the roast has cooled down to room temperature, I like to slice any remaining portions and store them in an airtight container in the refrigerator. It usually stays good for about 3-4 days. For reheating, the goal is to warm it through without drying it out. My favorite method is to gently heat slices in a little bit of beef broth or au jus in a skillet over low heat. You can also wrap individual slices in foil with a splash of broth and warm them in a low oven (around 250°F or 120°C) until heated through. Avoid microwaving if you can, as it tends to make the meat a bit tough. If you’re planning to make prime rib sandwiches or something where the meat will be chopped, you can also shred or thinly slice it and then warm it gently in a pan with some sauce. If you’re freezing portions, wrap them tightly in plastic wrap followed by a layer of aluminum foil or a freezer bag to prevent freezer burn. It should keep well in the freezer for up to 2-3 months. Thaw frozen portions in the refrigerator overnight before reheating.
Frequently Asked Questions
Final Thoughts
There you have it – my tried-and-true method for creating a truly spectacular prime rib. It’s a recipe that has brought so much joy to my family table, and I sincerely hope it does the same for yours. Remember, the key is in the quality of your ingredients, a good understanding of temperature, and allowing that all-important resting time. Don’t be afraid to experiment with your favorite herbs or spices in the rub, but always let the incredible flavor of the beef be the star. This prime rib is more than just a meal; it’s an experience, a reason to gather, and a delicious way to make any day feel special. If you give these prime rib cooking tips a try, please let me know how it turns out in the comments below! I love hearing about your culinary adventures and seeing your beautiful creations. Happy roasting!
Prime Rib Cooking Tips
Ingredients
Main Ingredients
- 1 rib roast Beef Rib Roast Standing, bone-in
- 2 tablespoons Olive Oil
- 2 tablespoons Kosher Salt
- 1 tablespoon Black Pepper Freshly ground
- 2 cloves Garlic Minced
- 1 sprig Fresh Rosemary Chopped
Instructions
Preparation Steps
- Preheat your oven to 450°F (230°C).
- Pat the prime rib dry with paper towels. This helps create a better sear.
- Rub the entire roast with olive oil, then season generously with kosher salt, black pepper, minced garlic, and chopped rosemary.
- Place the prime rib, bone-side down, on a rack in a roasting pan.
- Roast at 450°F (230°C) for 15 minutes to sear the outside.
- Reduce the oven temperature to 325°F (160°C) and continue roasting until the internal temperature reaches your desired doneness (120-125°F for rare, 130-135°F for medium-rare, 140-145°F for medium). A good rule of thumb is about 13 minutes per pound for medium-rare.
- Remove the prime rib from the oven and let it rest, loosely tented with foil, for at least 20-30 minutes before carving. This allows the juices to redistribute, ensuring a tender and juicy roast.