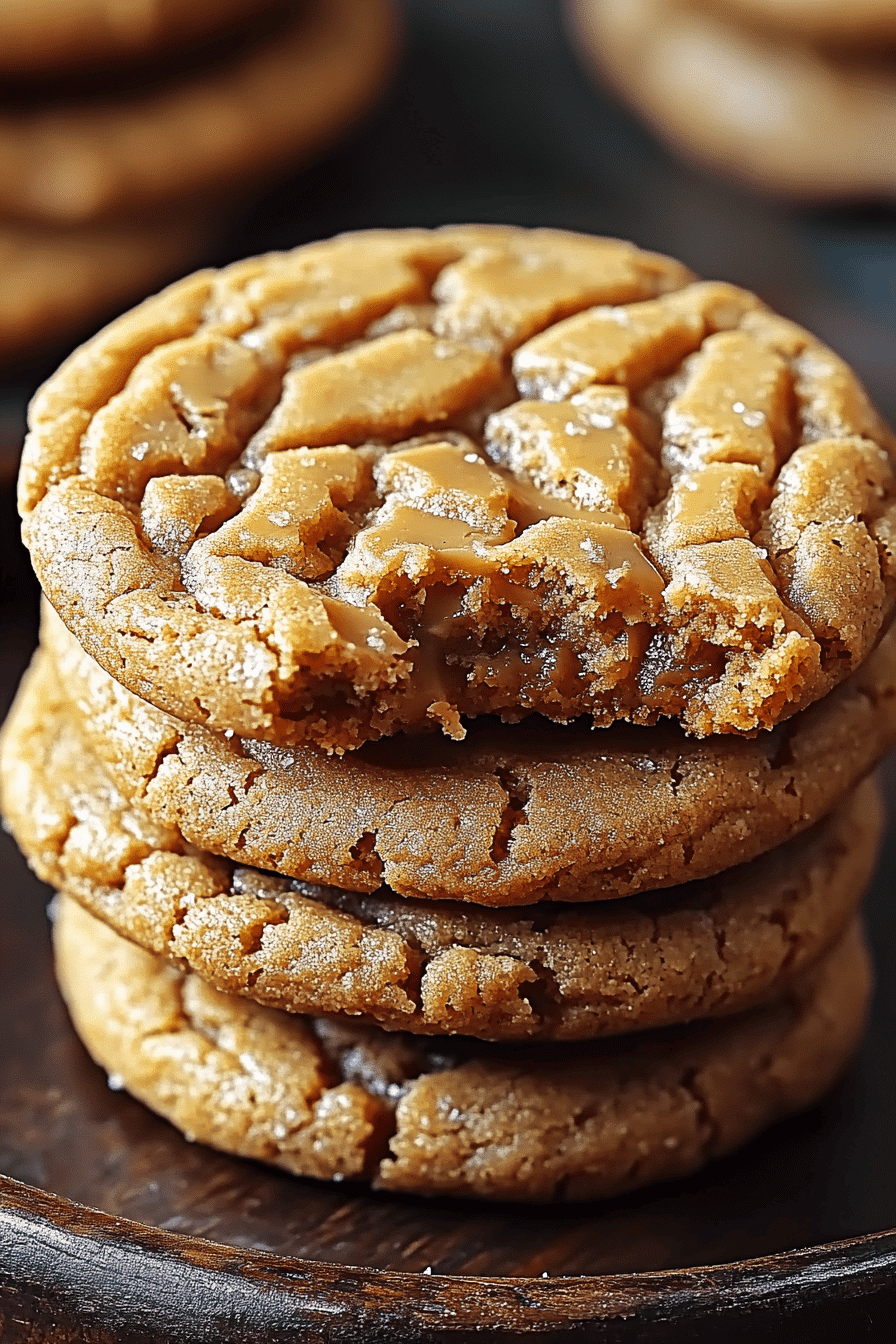
Peanut Butter Cookies
I still remember the way the kitchen smelled the day my grandmother taught me to bake Peanut Butter Cookies. The sugar fogging the air, the soft click of the mixer, and the way the dough stuck just enough to my fingers to remind me it was real, not a dream. This recipe became a favorite because it’s forgiving, cozy, and somehow always comes out with a sunlit, crumbly edge and a wink of peanut butter richness in every bite. It’s the kind of treat that pairs perfectly with a mug of coffee or a cold glass of milk, and it’s a lifesaver on busy nights when you need something comforting fast. If you’ve ever compared these to classic Chocolate Chip Cookies, you’ll notice these little Peanut Butter Cookies have a nutty, caramelized flair that feels like a warm hug from the inside out. Let me take you through my favorite version, the one that never fails me or my family.
What is peanut butter cookies?
Think of Peanut Butter Cookies as the compromise between a chewy shortbread and a bold, peanut-forward bite. It’s essentially a straightforward dough, enriched with Creamy Peanut Butter, a touch of vanilla, and a splash of brown sugar for depth. The name itself is simple and honest—these cookies are all about that peanut butter personality, with a texture that stays tender but holds its shape. I love that the dough comes together quickly, so you’re not hanging around the kitchen all afternoon. The concept is as approachable as it gets: you mix, scoop, bake, and you’ve got happy, crumbly cookies that pair with just about any mood—coffee on a chilly morning, a glass of milk after school, or a midafternoon pick-me-up when you need a little happiness in a bite.
Why you’ll love this recipe?
What I love most about this Peanut Butter Cookies Recipe is that it feels like a tiny ritual. It’s quick enough for a weeknight, but special enough to make the house smell like a bakery around the holidays. Here’s what keeps me coming back:
- Flavor:The peanut butter runs bold and mellow at the same time, with vanilla and a kiss of brown sugar rounding out the
- Simplicity:How do I get these from bowl to plate in under an hour?
- Cost-efficiency: Pantry staples do the heavy lifting here. A jar of peanut butter, a bit of sugar, and flour—nothing fancy, but everything you want for a crowd-pleasing bake.
- Versatility: These cookies stand up to mix-ins and toppings. Dip them in chocolate, press a chocolate kiss into the center, or sandwich with jam for a playful twist.
What I love most is how the dough behaves: it’s forgiving if you chill it a bit, and you can tailor the sweetness or the saltiness to your liking. I’ve tested this with almond milk in a pinch, and you know what? It made the dough a touch creamier without changing the result at all. My kids actually ask for these all the time, and friends who aren’t “cookie people” suddenly become converts after a bite. This recipe is a little beacon of sweetness that always delivers.
How to Make Peanut Butter Cookies
Quick Overview
Here’s the fast-tracked version: you’ll whisk dry ingredients, cream the wet ones until supple, bring them together into a dough, and chill just long enough to make scooping easy. Scoop rounds, flatten them with a quick fork press for that classic ridged look, bake until the edges are just tinged with brown, and finish with a simple glaze or a chocolate dip if you’re feeling fancy. The beauty is that this method is reliably dependable—the cookies bake to a tender center with a faint crisp at the rim, and the Peanut Butter aroma becomes your kitchen’s unofficial welcome mat.
Ingredients
For the Main Batter:
– 1 cup creamy Peanut Butter (or a mixture of peanut butter and peanut butter with a touch of olive oil for extra silkiness)
– 1/2 cup unsalted butter, softened
– 3/4 cup packed light brown sugar
– 1/4 cup granulated sugar
– 1 large egg
– 1 teaspoon vanilla extract
– 1 1/4 cups all-purpose flour
– 1/2 teaspoon baking soda
– 1/4 teaspoon fine sea salt
For the Filling:
– Optional: 1/2 cup creamy peanut butter + 2 tablespoons powdered sugar (for a quick peanut butter center)
– Or use your favorite jam for a playful sandwich style
For the Glaze:
– 1/2 cup powdered sugar
– 1-2 tablespoons milk or cream
– 1/4 teaspoon vanilla extract
– Optional: 2 tablespoons cocoa powder for a chocolate drizzle
Step-by-Step Instructions
Step 1: Preheat & Prep Pan
Heat the oven to 350°F (175°C). Line two baking sheets with parchment paper. I always give the sheets a quick spray of nonstick if I’m using a lighter cookie dough—it helps these Peanut Butter Cookies release without any sticking, especially if your butter was extra soft. Set a wire rack nearby for cooling and make sure you have a shallow bowl for rolling the dough if you prefer to shape by hand rather than scooping.
Step 2: Mix Dry Ingredients
In a small bowl, whisk together the flour, baking soda, and salt. I like to whisk until the flour looks evenly distributed, then I fold it into the dry mix a little at a time to avoid flour clouds. This is where I’ll sometimes add a pinch more salt if I’m craving a little more contrast—the cookies will forgive you either way.
Step 3: Mix Wet Ingredients
In a separate large bowl, beat the butter and sugars until light and fluffy—this takes about 2 minutes on medium speed with a hand mixer. Add the egg and vanilla and mix until glossy. The mixture should look a bit pale and feel airy when you lift the beaters. If your kitchen is warm, you’ll notice the dough starts to look ideal for scooping sooner, which is a nice surprise when you’re in a rush.
Step 4: Combine
Slowly add the dry ingredients to the wet mixture, mixing just until incorporated. You want a dough that is soft but scoopable. If it feels too sticky, a tablespoon or two of flour can help, but don’t go overboard—these cookies should stay fudgy inside, not crumbly. The moment you see the dough pulling away from the sides, you’re good to go.
Step 5: Prepare Filling
If you’re making filled cookies, scoop a small amount of the peanut butter filling (or jam) and shape it into little discs. The trick is to keep them slightly smaller than the dough rounds so you get a nice peanut butter contrast inside without overflowing. For a simpler approach, you can skip the filling entirely and still love the result—these cookies are delicious with or without a center. If you’re using a glaze, you’ll whisk it up later and drizzle when the cookies are slightly cooled.
Step 6: Layer & Swirl
Roll the dough into 1-inch balls and place them on the prepared sheets. If you’re making sandwich cookies, place a small amount of filling on half the dough balls and top with the remaining dough, pressing gently to seal. For a classic single-layer cookie, flatten the dough balls with a fork to create the characteristic crisscross imprint. The fork trick is my go-to; it flattens evenly and helps the cookie bake uniformly.
Step 7: Bake
Bake for 9-11 minutes, depending on your oven and the size of your dough portions. You want the edges to be just set and the centers a touch soft. They’ll continue to firm up as they cool, so err on the side of a little underbaking if you’re unsure. If you like a more robust, fudgy center, pull a minute earlier. If you prefer more spread and a crisper edge, give them an extra minute, but watch closely—these cookies can go from perfect to overdone in a blink.
Step 8: Cool & Glaze
Let the cookies rest on the baking sheet for 5 minutes before transferring to a rack to finish cooling. If you’re glazing, whisk together the glaze ingredients until smooth. A spoon or a small spatula works well for drizzling; you can also dip the cookies halfway and let the glaze run down for a glossy finish. If you want a chocolatey touch, add a quick cocoa drizzle. The glaze should be thick enough to hold a little shape but runny enough to slick across the cookie surface.
Step 9: Slice & Serve
Once cooled, you’re ready to slice into a dozen perfect halves of Peanut Butter Cookie bliss—or pop the filled versions together and present them as little sandwich bites. For a playful presentation, dust with a pinch of flaky salt or sprinkle with chopped peanuts for texture. The best part is that they store beautifully and still taste like they were baked this afternoon, even a couple of days later.
What to Serve It With
These Peanut Butter Cookies are versatile enough to pair with many moments. Here are a few ideas that have made their way into my family’s routine:
For Breakfast: A quick dunk in coffee or a glass of cold milk, and you’ve got a mood lifter before the daily grind. I like to pair them with a cinnamon-spiced latte for a cozy weekend start.
For Brunch: Plate a few with berries and a dollop of yogurt for a simple, elegant spread. The nutty aroma makes the whole table smile.
As Dessert: Layer two cookies with a spoonful of vanilla custard or whipped cream for a quick peanut butter sandwich dessert. A drizzle of melted chocolate makes it feel special, without much extra effort.
For Cozy Snacks: After a long day, I’ll warm one cookie for a few seconds in the microwave and it becomes like a tiny, warm peanut butter hug. My kids call this a “mom-time” treat, and it’s become our little ritual.
In our house, Peanut Butter Cookies aren’t just a snack—they’re a way to gather, laugh, and slow down for a moment. The flavor is nostalgic enough to trigger memories, yet flexible enough to stay modern with a handful of variations. I’ve watched friends swap in mini chocolate chips or crushed pretzels for crunch, and every time it works beautifully. These cookies tell a story with every bite: simple ingredients, big feelings, and a little sweetness that sticks around long after the plate is empty.
Top Tips for Perfecting Your Peanut Butter Cookies
Here are a few seasoned tricks that have helped me consistently nail the texture and flavor of these cookies. I’ve learned these from mistakes, late-night test bakes, and a lot of happy taste-test sessions with family.
Flour & Dry Ingredients: If your cookies spread too much, try chilling the dough for 15–20 minutes before baking. A touch more flour can help, but add it sparingly—overdoing it makes the cookies feel dry. I often start with the recipe’s measured amount and adjust by a tablespoon or two depending on the humidity in the kitchen.
Mixing Advice: Cream the butter and sugars until the mixture is light and airy. You’re aiming for a pale, fluffy texture; it makes the cookies tender. If you beat too long after adding the egg, you risk introducing too much air, which can cause cracking as they bake. It’s a balance, and you’ll spot it with your first batch.
Shape & Swirl Customization: The classic fork pattern is adorable and reliable. If you want a cleaner surface, press the dough balls with the flat of a glass for a uniform look. For a marbled glaze effect, you can swirl a peanut butter ribbon into the dough before scooping, or alternate with a chocolate ribbon after baking for a pretty, two-tone surface.
Ingredient Swaps: Want to lighten the cookie a bit? Use a blend of peanut butter and peanut butter with a touch of Greek yogurt to retain moisture. For a gluten-free version, swap in a 1:1 gluten-free flour blend and add a teaspoon of xanthan gum to help with elasticity. If you’ve got almond butter on hand, you can substitute half of the peanut butter for almond butter to change the aroma while keeping the texture.
Baking Tips: Oven behavior varies. If your oven tends to run hot, consider dropping the temperature to 340°F (170°C) and baking a minute or two longer. Conversely, if you’re oven is a touch cool, you may need an extra minute. Your first batch is the test batch—note how the edges look and adjust accordingly next round.
Glaze Variations: For a glossy finish, whisk in a pinch of corn syrup or a drop of lemon juice to stabilize the glaze. If you want a savory note, a tiny pinch of sea salt in the glaze is magical. You can also add a teaspoon of espresso powder to the glaze for a mocha twist that pairs beautifully with peanut butter.
Over the years I’ve learned that a little patience pays off: letting the dough rest a bit before scooping helps the flavors meld and the cookies bake more evenly. I’ve also found that keeping the glaze a touch thick makes for a more dramatic finish without dripping off the sides. Most importantly, trust your senses—if the dough smells nutty and inviting, you’re on the right track. These tips have helped me turn a simple Peanut Butter Cookies recipe into a reliable, comforting staple that I reach for again and again.
Storing and Reheating Tips
Cookie storage is where the real magic happens. You want to preserve that soft center and the slight crisp at the edges without losing flavor.
Room Temperature: Store in an airtight container for up to 4 days. If you live in a humid area, add a small piece of bread to the container to absorb excess moisture and keep the cookies from turning soft.
Refrigerator Storage: You can refrigerate the dough, tightly wrapped, for up to 3 days before baking. I love doing this when I want to bake a small batch midweek without committing to a full afternoon in the kitchen.
Freezer Instructions: Freeze baked cookies in a single layer on a sheet pan, then transfer to a freezer bag for up to 3 months. Thaw at room temperature and re-crisp in a 300°F (150°C) oven for 5–7 minutes if you want that just-baked texture again.
Glaze Timing Advice: If you’re freezing the cookies, add the glaze after they’ve thawed to maintain a smooth finish. For store-bought or homemade glazes, you can chill the glaze first to keep it from running off during handling. The texture—glossy, slightly tacky, and perfectly edible—will be your guide to when it’s ready to plate.
These methods have helped me keep Peanut Butter Cookies tasting fresh and full of personality, whether I’m serving them warm right out of the oven or sharing them a week later at a gathering.
Frequently Asked Questions
Final Thoughts
These Peanut Butter Cookies have earned a front-and-center spot in my recipe rotation. They’re not flashy, but they’re incredibly reliable, deeply comforting, and endlessly adaptable. The first bite brings back memories of the kitchen table and warm conversations, while the second bite invites you to experiment—double the peanut butter for a bolder bite, fold in chocolate chips for a surprise, or sandwich with a little jam to recreate a childhood favorite. If you try one variation, I hope you’ll tell me what you discovered—the way you tweak flavors and textures is part of what makes this little recipe so special. Happy baking, my friend, and may your kitchen fill with the scent of toasted nuts, vanilla, and sweet, homey memories. I’d love to hear how your Peanut Butter Cookies turn out in the comments, and don’t forget to rate the recipe if it becomes a staple in your home. Enjoy every bite!

Peanut Butter Cookies
Ingredients
Main Ingredients
- 0.5 cup unsalted butter softened
- 1 cup peanut butter creamy or crunchy
- 0.75 cup granulated sugar
- 0.75 cup packed brown sugar
- 1 large egg
- 1 teaspoon vanilla extract
- 1.5 cup all-purpose flour
- 0.5 teaspoon baking soda
- 0.25 teaspoon salt
Instructions
Preparation Steps
- Preheat oven to 350°F (175°C). Line baking sheets with parchment paper.
- In a large bowl, cream together the softened butter, peanut butter, granulated sugar, and brown sugar until smooth.
- Beat in the egg and vanilla extract until well combined.
- In a separate medium bowl, whisk together the flour, baking soda, and salt.
- Gradually add the dry ingredients to the wet ingredients, mixing until just combined. Do not overmix.
- Roll the dough into 1-inch balls and place them on the prepared baking sheets, about 2 inches apart.
- Using a fork, press down on each cookie in a crisscross pattern to flatten them slightly.
- Bake for 10-12 minutes, or until the edges are lightly golden brown and the centers are still slightly soft.
- Let the cookies cool on the baking sheets for a few minutes before transferring them to a wire rack to cool completely.