Key Lime Cake
Oh, where do I even begin with this Key Lime Cake? It feels like a sunshine-filled hug in cake form. I remember the first time I tried a truly authentic Key Lime Pie years ago – that bright, zesty punch, the creamy filling, the crumbly crust… pure magic. But honestly, sometimes pie just feels like too much work, you know? Especially when that craving hits hard and you want something sweet *now*. That’s where this Key Lime Cake swoops in like a superhero. It’s got all the dazzling, tropical flavor you adore from Key Lime pie, but in a perfectly tender, moist cake that’s surprisingly easy to whip up. It’s become my go-to for potlucks, a little pick-me-up on a Tuesday, and honestly, it’s the only way I can convince my kids to eat *any* fruit disguised as dessert. This isn’t just a cake; it’s a little slice of paradise, and I can’t wait to share it with you.
What is a Key Lime Cake?
So, what exactly *is* Key Lime Cake? Think of it as the best of both worlds. It’s a delightful dessert that captures the irresistible tart-sweetness of a classic Key Lime Pie but baked into a wonderfully moist and tender cake. Instead of a traditional pie crust, we’re creating a cake batter that’s infused with that signature Key Lime zing. The “key lime” part comes from using actual Key Limes, which are smaller and more intensely flavored than Persian limes. They have this unique floral aroma and a more concentrated tartness that’s just divine. It’s essentially a fluffy, citrusy sponge that’s then often topped with a luscious lime-infused glaze or a creamy frosting, mimicking the experience of biting into a slice of pie without all the fuss of rolling out dough. It’s a celebration of that vibrant, tropical flavor in an approachable, comforting cake format.
Why you’ll love this
Honestly, there are so many reasons why this Key Lime Cake has earned a permanent spot in my recipe binder, and I’m betting it’ll do the same for you. Firstly, the flavor is just out of this world. That bright, tangy burst of Key Lime hits you first, followed by a gentle sweetness that’s perfectly balanced. It’s like sunshine on your taste buds, without being overwhelmingly sour. It’s the kind of flavor that makes you close your eyes and smile.
Then there’s the simplicity. I know baking can sometimes feel daunting, but I promise, this Key Lime Cake is genuinely straightforward. It uses basic pantry staples and comes together pretty quickly. No fancy techniques, no hours spent in the kitchen. It’s a lifesaver when you need a showstopper dessert without the stress.
And speaking of stress, let’s talk about cost! The ingredients are incredibly budget-friendly. You don’t need exotic or expensive items. Plus, it makes a generous amount, so you get a lot of deliciousness for your money.
Versatility is another big win here. While it’s fantastic on its own, you can dress it up or down. Serve it as is for a simple treat, or get fancy with some whipped cream and extra lime zest for a more elegant dessert. It’s perfect for a casual afternoon tea, a backyard barbecue, or even a birthday celebration. It’s truly a crowd-pleaser that appeals to everyone, from picky eaters to seasoned foodies. What I love most about this Key Lime Cake is that it delivers that wow factor with minimal effort, making it perfect for those nights you’re craving something special but don’t want to spend all evening in the kitchen.
How do you make a Key Lime
Quick Overview
This Key Lime Cake is all about creating a tender, moist crumb infused with bright citrus flavor, then dressing it up with a zesty glaze. We’ll mix our dry and wet ingredients separately before combining them gently. A special swirl of lime filling adds an extra punch of tartness and visual appeal. It bakes up beautifully golden and is then finished with a simple, tangy glaze that just melts into the warm cake. The whole process is designed to be fuss-free, ensuring you get that incredible Key Lime taste with minimal effort.
Ingredients
For the Main Batter:
You’ll need all-purpose flour – about 2 ½ cups. Make sure it’s spooned and leveled, not scooped, for accuracy! I always use unbleached; it seems to give a better texture. For leavening, we’ll use 1 ½ teaspoons of baking powder and ½ teaspoon of baking soda. A pinch of salt, around ½ teaspoon, really makes the flavors pop. Now for the fat: 1 cup of unsalted butter, softened to room temperature. This is key for creaming and a tender crumb. For sweetness, 1 ¾ cups of granulated sugar. And the eggs – 3 large ones, at room temperature makes them incorporate better. For that moistness and creaminess, I use 1 cup of buttermilk. If you don’t have buttermilk, just add 1 tablespoon of lemon juice or white vinegar to 1 cup of regular milk and let it sit for 5-10 minutes. Trust me, it works like a charm! And of course, the star: the zest and juice of about ½ cup of fresh Key Limes. You can find Key Limes at most well-stocked grocery stores or specialty produce markets. If you absolutely can’t find them, you can substitute with Persian limes, but you might need a little extra zest and juice to get that intense flavor.
For the Filling:
This is where we amp up the lime goodness! You’ll need ½ cup of Key Lime juice (again, fresh is best!) and about 2 tablespoons of granulated sugar. I also like to add a touch of green food coloring, just a drop or two, for that classic Key Lime color, but it’s totally optional. Some people even like to add a bit of lime zest here too for extra aroma.
For the Glaze:
This is super simple and adds that perfect final touch. You’ll need about 1 ½ cups of powdered sugar, sifted to avoid lumps. Then, we’ll add 2 to 3 tablespoons of Key Lime juice. Start with 2 tablespoons and add more, a teaspoon at a time, until you reach your desired drizzling consistency. A little bit of lime zest can also be stirred in here for extra fragrance.
Step-by-Step Instructions
Step 1: Preheat & Prep Pan
First things first, let’s get our oven fired up to 350°F (175°C). This is a pretty standard baking temperature, and it ensures the cake bakes evenly. Now, grab a 9×13 inch Baking Pan. I like to grease it generously with butter or cooking spray, and then lightly dust it with flour. This is your insurance policy against sticking! You can also line the bottom with parchment paper for extra peace of mind, especially if you’re serving it directly from the pan. Make sure to get into all the corners.
Step 2: Mix Dry Ingredients
In a medium-sized bowl, whisk together your flour, baking powder, baking soda, and salt. Whisking them together ensures everything is evenly distributed, which means your cake will rise evenly and have a consistent texture. No one wants a bite that’s just baking soda! Give it a good whisk until it looks uniform. Set this aside for now; we’ll bring it into play soon.
Step 3: Mix Wet Ingredients
In a large bowl, cream together the softened butter and granulated sugar until the mixture is light and fluffy. This usually takes about 3-5 minutes with an electric mixer. You’re looking for a pale yellow, almost creamy consistency. Then, beat in the eggs one at a time, making sure each one is fully incorporated before adding the next. Don’t rush this part; it adds air and tenderness to the cake. Next, stir in the Key Lime zest and juice. Give it a good mix until everything is well combined. Make sure to scrape down the sides of the bowl so all the butter and sugar get mixed in properly.
Step 4: Combine
Now, we’ll add the dry ingredients to the wet ingredients alternately with the buttermilk. Start by adding about a third of the dry mixture and mix on low speed until just combined. Then, add half of the buttermilk and mix again. Repeat this process: another third of the dry, the rest of the buttermilk, and finally the remaining dry ingredients. It’s super important *not* to overmix here! Mix on low speed until just barely combined. Overmixing develops the gluten in the flour, which can lead to a tough cake. A few streaks of flour are okay; they’ll disappear as we proceed. We want a tender crumb, after all!
Step 5: Prepare Filling
While the cake batter is resting, let’s get our intense Key Lime filling ready. In a small bowl, whisk together the Key Lime juice, sugar, and optional food coloring and zest. You just want to combine them until the sugar is dissolved. This filling is meant to be zingy, so don’t be afraid of the tartness! We’ll be swirling this into the batter, so it should be a pourable consistency, not too thick.
Step 6: Layer & Swirl
Pour about half of the cake batter into your prepared 9×13 inch pan and spread it evenly. Now, drizzle about half of the Key Lime filling mixture over the batter. Don’t worry about making it perfect; we’re going for a marbled effect. Then, carefully pour the remaining cake batter over the filling. Drizzle the rest of the Key Lime filling on top. To create those beautiful swirls, take a knife or a skewer and gently swirl it through the batter. Don’t overdo it; just a few passes will create lovely patterns without blending everything together. You want distinct ribbons of lime filling!
Step 7: Bake
Pop the pan into your preheated oven. Bake for about 30-40 minutes. The exact time will depend on your oven, so keep an eye on it. You’ll know it’s done when a wooden skewer or toothpick inserted into the center comes out clean or with just a few moist crumbs attached. The cake should be golden brown around the edges and slightly springy to the touch. If the top starts to brown too quickly, you can loosely tent it with aluminum foil.
Step 8: Cool & Glaze
Once baked, take the cake out of the oven and let it cool in the pan on a wire rack for about 15-20 minutes. This allows the cake to set up properly. While it’s cooling, prepare your glaze. In a small bowl, whisk together the sifted powdered sugar and the Key Lime juice. Start with 2 tablespoons of juice and add more a little at a time until it’s a smooth, drizzly consistency. You want it thick enough to coat the cake but thin enough to drip down the sides. Once the cake has cooled for a bit, you can generously drizzle the glaze over the top. Let the glaze set for another 10-15 minutes before slicing. This is the hardest part, waiting for that yummy glaze to set!
Step 9: Slice & Serve
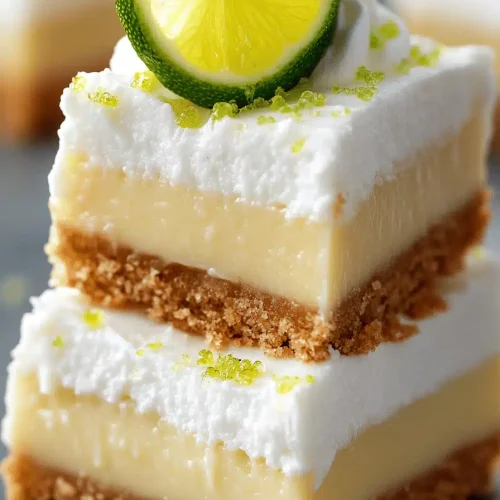
Once the glaze has set, it’s time to slice and serve! Use a sharp knife to cut neat squares. This cake is delicious served warm or at room temperature. For an extra special touch, you can top each slice with a dollop of whipped cream and a sliver of lime. It’s pure bliss!
What to Serve It With
This Key Lime Cake is so wonderfully versatile, it’s a star on its own but also plays beautifully with other flavors. For a delightful breakfast treat, I love serving a warm slice with a strong cup of coffee. The tartness of the lime cuts through the richness of the coffee perfectly, and it’s a much lighter start to the day than a super heavy pastry. Sometimes, I’ll just dust it with a little powdered sugar for a simple morning treat.
At brunch, it really shines. Imagine this vibrant cake on a table laden with fruit salad, quiches, and maybe some crispy bacon. I love to serve it slightly chilled, maybe with a small bowl of fresh berries on the side, like raspberries or blueberries, which add a lovely color contrast and a different kind of fruity sweetness. A glass of sparkling water with lime or a mimosa pairs wonderfully too.
As a dessert, it’s an absolute showstopper. After a big meal, a slice of this Key Lime Cake is refreshing and satisfying without being overly heavy. I often serve it with a dollop of homemade whipped cream, or even a scoop of vanilla bean ice cream. Sometimes, I’ll make a quick lime curd to put alongside it for an extra layer of tanginess. It’s also fantastic alongside a more decadent dessert, like a rich chocolate mousse, to offer a contrasting bright flavor.
And for those cozy snack times? It’s just perfect. Grab a slice with a glass of cold milk, or maybe some iced tea on a warm afternoon. It’s that easy, comforting treat that feels like a little indulgence without requiring a lot of fanfare. My family loves it with a glass of iced milk; it’s a simple tradition that always makes them happy.
Top Tips for Perfecting Your Key Lime Cake
I’ve made this Key Lime Cake more times than I can count, and over the years, I’ve picked up a few tricks that make it even better. For the Key Limes themselves, make sure they’re fresh and plump. Give them a good roll on the counter before juicing; it helps release more juice. If you can’t find Key Limes, don’t despair, but be prepared to use more zest and juice from Persian limes to get that authentic punch. And for goodness sake, use fresh juice! Bottled lime juice just doesn’t have the same vibrant flavor.
When it comes to mixing the batter, remember my mantra: don’t overmix! Seriously, this is crucial for a tender cake. Once you add the flour, mix *just* until you don’t see any dry streaks. A few tiny lumps are fine; they’ll disappear in the oven. Overmixing is the fastest way to a tough cake, and no one wants that. And always, always use room temperature ingredients – butter, eggs, and buttermilk. They emulsify much better, leading to a smoother batter and a finer crumb. I learned this the hard way after a few dense cakes!
For the swirl, don’t go crazy with the knife. Just a few gentle passes will create a beautiful marbled effect. If you swirl too much, you’ll just end up with a uniformly lime-colored batter, and we want those lovely ribbons! You can experiment with different swirl patterns; sometimes a zigzag works beautifully, other times gentle loops are best. It’s all about adding that visual appeal.
Ingredient swaps are where you can get creative! If you want to make this slightly less sweet, you can reduce the sugar in the batter by ¼ cup. The lime will still provide plenty of tang. For a dairy-free version, I’ve had success using a good quality vegan butter and unsweetened almond or oat milk with a splash of lemon juice for the “buttermilk.” The texture might be slightly different, but the flavor still holds up beautifully. Some people even add a touch of coconut extract for a tropical twist!
Baking is always a bit of an art. Know your oven! If your oven tends to run hot, you might need to reduce the temperature slightly or shorten the baking time. Use the toothpick test – it’s your best friend. And if the top is browning too quickly before the center is cooked, don’t hesitate to loosely tent the cake with aluminum foil. It works wonders. For the glaze, the consistency is key. Too thin, and it’ll just run off. Too thick, and it’s hard to spread. Aim for a pourable, but not watery, consistency. You can always adjust it with more powdered sugar or more lime juice.
Storing and Reheating Tips
Storing this delicious Key Lime Cake is pretty straightforward, and thankfully, it keeps well, which is great if you don’t plan on devouring it all in one sitting (though I wouldn’t blame you if you did!). For room temperature storage, once the cake has completely cooled and the glaze has set, you can cover it tightly with plastic wrap or place it in an airtight container. It should stay fresh at room temperature for about 2-3 days. Just keep it out of direct sunlight and away from heat sources. It’s perfect for leaving on the counter for easy grabbing.
If you need to store it for longer, the refrigerator is your best bet. Place the cooled cake in an airtight container or wrap it well with plastic wrap, and then perhaps a layer of foil. It will keep nicely in the refrigerator for up to 5 days. When you’re ready to serve, you can enjoy it chilled or let it sit out at room temperature for about 20-30 minutes to take the chill off and bring out its flavors. I find it tastes best at that slightly cooler, but not fridge-cold, temperature.
Freezing this Key Lime Cake is also an option, especially if you want to make it ahead for a future event. Once completely cooled and glazed, wrap the entire cake or individual slices very tightly in a layer of plastic wrap, followed by a layer of aluminum foil to prevent freezer burn. It can be stored in the freezer for up to 2-3 months. To thaw, remove the wrapping and let it defrost slowly in the refrigerator overnight. If you’re thawing individual slices, they’ll thaw much faster at room temperature. The glaze might soften a bit upon thawing, but it usually firms up again as it cools.
Regarding the glaze, it’s best applied when the cake is fully cooled. If you plan on storing it in the fridge or freezer, adding the glaze *after* thawing and bringing to room temperature is ideal. This prevents the glaze from becoming sticky or overly firm in the cold. If you’re serving it room temperature for a day or two, glazing right after cooling is perfectly fine.
Frequently Asked Questions
Final Thoughts
So there you have it – my absolute favorite Key Lime Cake! It’s a recipe that brings me so much joy, from the moment I start zesting the limes to the last crumb disappearing from the plate. It truly captures that bright, refreshing essence of Key Lime pie in a form that’s incredibly approachable and satisfying. It’s proof that you don’t need to be a professional baker to create something truly special and delicious.
If you love this recipe, I think you might also enjoy my Lemon Blueberry Bundt Cake for another burst of citrusy goodness, or perhaps my No-Bake Raspberry Cheesecake if you’re looking for another simple yet impressive dessert. They both have that effortless charm that I adore.
I really hope you give this Key Lime Cake a try. It’s perfect for any occasion, or no occasion at all! Let me know in the comments below how yours turns out, and if you’ve found any fun twists or variations. Happy baking!
Key Lime Cake
Ingredients
Cake Ingredients
- 2.5 cups all-purpose flour
- 1.5 cups granulated sugar
- 1 teaspoon baking powder
- 0.5 teaspoon salt
- 0.5 cup unsalted butter softened
- 3 large eggs
- 1 cup buttermilk
- 0.25 cup key lime juice
- 1 teaspoon key lime zest
Key Lime Frosting
- 1 cup unsalted butter softened
- 4 cups powdered sugar sifted
- 0.25 cup key lime juice
- 0.5 teaspoon key lime extract optional
- 2 tablespoons milk or more, as needed
Instructions
Preparation Steps
- Preheat oven to 350°F (175°C). Grease and flour two 9-inch round cake pans.
- In a large bowl, whisk together the flour, sugar, baking powder, and salt.
- Add the softened butter to the dry ingredients and mix until the mixture resembles coarse crumbs.
- In a separate bowl, whisk together the eggs, buttermilk, key lime juice, and key lime zest.
- Gradually add the wet ingredients to the dry ingredients, mixing until just combined. Do not overmix.
- Divide the batter evenly between the prepared cake pans.
- Bake for 30-35 minutes, or until a wooden skewer inserted into the center comes out clean.
- Let the cakes cool in the pans for 10 minutes before inverting them onto a wire rack to cool completely.
- While the cakes are cooling, prepare the frosting. In a large bowl, beat the softened butter until creamy.
- Gradually add the sifted powdered sugar, alternating with the key lime juice and key lime extract (if using), beating until smooth and creamy. Add milk, one tablespoon at a time, if needed to reach desired consistency.
- Once the cakes are completely cool, frost them using an offset spatula.