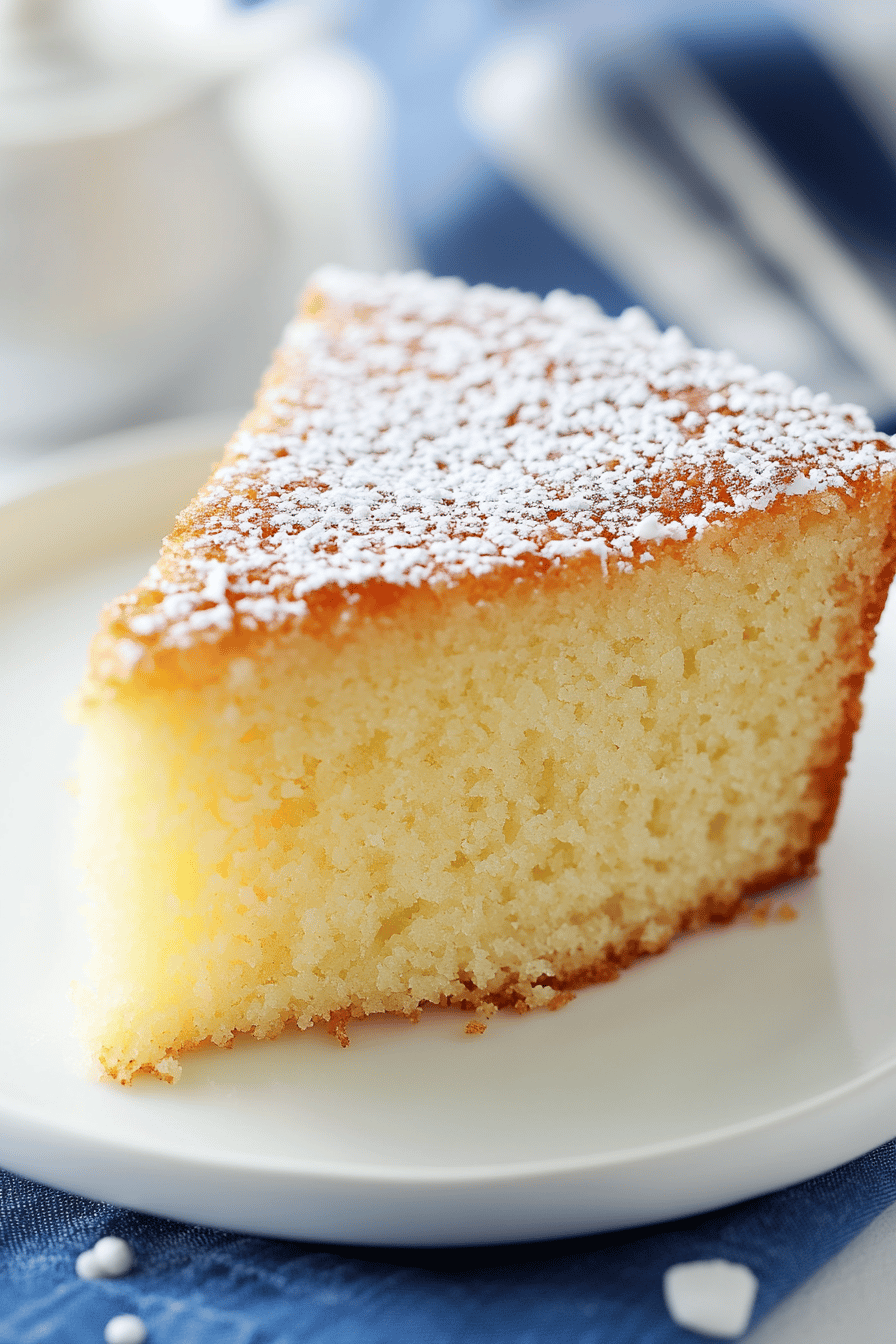
Italian Olive Oil Cake Recipe
Okay, friends, let me tell you about this cake. It’s not just any cake; it’s the kind of cake that makes you close your eyes and savor every single bite. Remember those simple, perfect lemon cakes Grandma used to bake? Well, this Italian Olive Oil Cake Recipe is similar, but with a twist that’ll make you wonder why you haven’t been baking with olive oil all along. It’s light, it’s moist (yes, I said moist!), and it has a subtle, fruity flavor that’s completely addictive. Plus, it’s ridiculously easy to make, which is always a win in my book. I swear, the aroma alone is enough to transport me back to sun-drenched afternoons in Italy. I made this for my book club last week and it vanished quicker than you can say “tiramisu!”
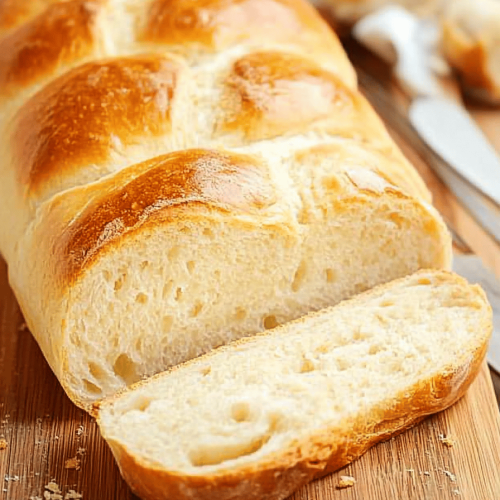
What is Italian Olive Oil Cake?
Italian Olive Oil Cake is essentially sunshine in cake form. Seriously, it’s that good! Unlike traditional cakes that rely on butter for richness, this one uses olive oil, which gives it a unique texture and flavor. Think of it as a rustic, unfussy cake, perfect for enjoying with a cup of coffee or as a light dessert. The origin of this cake lies in the heart of Italy, where olive oil is a staple ingredient. It’s a testament to how simple ingredients can come together to create something truly extraordinary. Don’t be fooled by its humble appearance – this cake packs a serious flavor punch!
Why you’ll love this recipe?
Oh, where do I even begin? What I love most about this Italian Olive Oil Cake Recipe is how incredibly forgiving it is. You don’t need to be a master baker to pull this off – trust me, I’ve had my fair share of baking fails! The flavor is out of this world – the olive oil adds a subtle fruitiness and richness that you just can’t get with butter. It’s not overly sweet, which I appreciate, and it has a beautiful, moist crumb that stays fresh for days (if it lasts that long!).
And talk about simplicity! You probably already have most of the ingredients in your pantry. It’s a one-bowl wonder, which means minimal cleanup – hooray! Plus, it’s surprisingly cost-effective. Olive oil is generally cheaper than butter, and the other ingredients are pantry staples. We recently hosted a large family gathering, and this cake was a total lifesaver, it was so easy to whip up a few of them!
Versatility is another reason I adore this recipe. You can enjoy it plain, dust it with powdered sugar, or top it with fresh berries and whipped cream. It’s also fantastic with a scoop of vanilla ice cream or a drizzle of balsamic glaze. Honestly, the possibilities are endless. It is similar to the simple pleasure of an Angel Food Cake, but this is bursting with so much more flavor. This recipe quickly became a staple in my home, I know it will be for you too.
How do I make Italian Olive Oil Cake?
Quick Overview
How do I make Italian Olive Oil Cake? How do you mix dry ingredients and wet ingredients together and bake? What is the secret ingredient of olive oil? How do I create a super moist crumb? What are some foolproof baking recipes? What’s the best part about it all? Is it true that olive oil is in a cake?
Ingredients
For the main battery:
* 2 cups all-purpose flour (I prefer unbleached, but either works fine)
* 1 ½ cups granulated sugar
* 2 ½ teaspoons baking powder
* ½ teaspoon salt
* 1 cup whole milk (almond milk works great too!)
* 12 cup extra virgin olive oil (use a good quality one – it makes & difference! )
* 2 large eggs
* 1 teaspoon vanilla extract
* Zest of one lemon (optional, but highly recommended)
For the Glaze:
* ½ cup powdered sugar
* 2-3 tablespoons lemon juice (freshly squeezed is best) * 2 teaspoons almond milk (1-2 teaspoon)

Step-by-Step Instructions
Step 1: Preheat & Prep Pan
Preheat your oven to 350°F (175°C). Grease and flour a 9-inch round cake pan (or a loaf pan – either works!). I always line the bottom with parchment paper, too. It makes removing the cake so much easier and prevents sticking. Trust me, this little trick is a game-changer!
Step 2: Mix Dry Ingredients
In a large bowl, whisk together the flour, sugar, baking powder, and salt. Set aside. Make sure everything is well combined. What is the best way to make baking powder evenly distributed? I always do this step first to avoid overmixing later on.
Step 3: Mix Wet Ingredients
In a separate bowl, whisk together the milk, olive oil, eggs, vanilla extract, and lemon zest (if using). I usually warm the milk slightly, as I feel like it helps the ingredients combine better. Make sure the eggs are at room temperature, too. It really does make a difference!
Step 4: Combine
Gradually add the wet ingredients to the dry ingredients, whisking until just combined. How do you avoid overmixing a cake? I like to stop mixing when there are still a few streaks of flour visible, then gently fold them in. How do you use a spatul I’ve made this mistake before, and the cake was not nearly as tender.
Step 5: Bake
If a toothpick comes out clean, pour the batter into the prepared pan and bake for 30-35 minutes. The center comes out clean. I always start checking the cake around 30 minutes, as baking times can vary depending on your oven. If the top starts to brown too quickly, you can tent it with foil.
Step 6: Cool & Glaze
Let the cake cool in the pan for 10 minutes before inverting it onto a wire rack to cool completely. While the cake is cooling, prepare the glaze by whisking together the powdered sugar and lemon juice until smooth. Once the cake is completely cool, drizzle the glaze over the top. I like to use a spoon to get an even coating, but you can also use a piping bag for a more decorative look.
Step 7: Slice & Serve
Slice the cake and serve. It’s delicious on its own, but it’s also fantastic with fresh berries, whipped cream, or a scoop of vanilla Ice Cream. I’ve even served it with a drizzle of balsamic glaze – it’s surprisingly good! My kids love it with a side of strawberries, and I usually enjoy it with a strong cup of coffee.
What can I serve it with?
This Italian Olive Oil Cake Recipe is incredibly versatile, so you can serve it in so many ways! It’s fantastic for breakfast, brunch, dessert, or even just a cozy snack. This one’s a lifesaver for those impromptu visits or when you just need a comforting treat.
For Breakfast: Enjoy a slice with a cup of strong Italian coffee. I love pairing it with a cappuccino – the creamy coffee complements the cake perfectly. For a more substantial breakfast, add a side of fresh fruit or yogurt.
For Brunch:Dress it up with a dollop of mascarpone cream and Fresh Berries. Arrange the slices on a pretty platter and serve with tea and mimosas. Is this a crowd pleaser?
As Dessert:Serve warm with vanilla Ice Cream or a drizzle of chocolate sauce. For a more sophisticated dessert, try pairing it with tamari of Vin Santo, roasted almonds, or toasted walnuts.
For Cozy Snacks: Simply enjoy a slice with a cup of tea or hot chocolate. It’s the perfect comfort food for a chilly evening. I often sneak a slice with my afternoon tea – it’s my little indulgence!
My family loves this cake, so I’ve tried serving it in countless ways. But honestly, it’s delicious no matter what you pair it with. It’s a blank canvas for your culinary creativity!
How do I make an Italian Olive Oil Cake?
How do I make Italian Olive Oil Cake? Is it true that everything turns out perfect every single time? I’ve learned these the hard way after many cake experiments!
Olive oil: What is the best olive Choosing a good quality olive oil is crucial. Use extra virgin olive oil for the best flavor. But don’t go overboard with a super expensive one! A moderately priced, fruity olive oil will work perfectly.
Mixing Advice: Don’t overmix the batter! Overmixing can develop the gluten in the flour, resulting in a tough cake. Mix until just combined, and then gently fold in any remaining streaks of flour.
Zest It Up:Lemon zest really brightens up the flavor of the cake. Don’t skip this step! I often add a little extra zest for an even more pronounced citrus flavor. I find that the citrus cuts through the richness of the olive oil perfectly.
Oven Temperature:Make sure your oven is properly preheated before baking the cake. How do you bake at an even temperature? I always use an oven thermometer to check the temperature of my oven.
Doneness Test: Use a toothpick to check for doneness. Insert the toothpick into the center of the cake. If it comes out clean, the cake is done. If it comes out with wet batter, bake for a few more minutes and check again.
Glaze Variations: Feel free to experiment with different glazes. I’ve made this cake with a simple LEMON GLAZE, an orange glaze, and even a balsamic glaze. They’re all delicious! Sometimes, I add a little bit of vanilla extract to the glaze for extra flavor.
I’ve also tried substituting some of the flour with almond flour for a slightly nutty flavor. It’s a great way to add a little extra texture to the cake. And if you’re feeling adventurous, try adding a handful of chocolate chips to the batter. Trust me, it’s amazing!
Storing and Reheating Tips
This Italian Olive Oil Cake Recipe stays surprisingly fresh, thanks to the olive oil. But here are some tips for storing and reheating it to keep it at its best.
Room Temperature: You can store the cake at room temperature for up to 3 days. Just make sure to cover it tightly with plastic wrap or store it in an airtight container to prevent it from drying out. I usually keep mine in a cake stand with a lid.
Refrigerator Storage: For longer storage, you can refrigerate the cake for up to a week. Wrap it tightly in plastic wrap or store it in an airtight container. The cake might become a little denser in the refrigerator, but it will still be delicious.
Freezer Instructions: You can also freeze the cake for up to 2 months. Wrap it tightly in plastic wrap, then wrap it again in aluminum foil. To thaw, simply let it sit at room temperature for a few hours.
Glaze Timing Advice: If you’re planning to freeze the cake, I recommend waiting to glaze it until after it’s thawed. The glaze can sometimes become sticky when frozen.
I’ve found that the cake tastes best when it’s served at room temperature. If you’ve refrigerated it, let it sit at room temperature for about 30 minutes before serving. And if you’ve frozen it, make sure it’s completely thawed before serving.
Frequently Asked Questions
Final Thoughts
So there you have it – my favorite Italian Olive Oil Cake Recipe! I truly believe this is a cake that everyone should try at least once. It’s simple, delicious, and surprisingly versatile. The olive oil adds a unique flavor and texture that you just can’t get with butter. It’s perfect for any occasion, from a casual breakfast to a fancy dinner party. Plus, it’s incredibly easy to make, even for beginner bakers.
If you enjoyed this recipe, be sure to check out my other Italian-inspired desserts, like my classic tiramisu and my creamy panna cotta. And if you try this cake, please let me know how it turns out! I’d love to hear your feedback and see your creations. Share your photos and tag me so I can see what you’ve baked!
Happy baking! I can’t wait to hear how yours turns out. And don’t be afraid to experiment with different flavors and toppings. The possibilities are endless!
Italian Olive Oil Cake Recipe
Ingredients
Main Ingredients
- 1.5 cups all-purpose flour
- 1 cup granulated sugar
- 0.75 cup extra virgin olive oil
- 4 large eggs
- 1 teaspoon baking powder
- 0.5 teaspoon baking soda
- 0.5 teaspoon salt
- 1 teaspoon vanilla extract
- 0.5 cup lemon juice
Instructions
Preparation Steps
- Preheat oven to 350°F (175°C). Grease and flour a 9x13 inch baking pan.
- In a large bowl, whisk together flour, sugar, baking powder, baking soda, and salt.
- In a separate bowl, whisk together olive oil, eggs, vanilla extract, and lemon juice.
- Gradually add the wet ingredients to the dry ingredients, mixing until just combined. Do not overmix.
- Pour batter into the prepared pan and bake for 45-50 minutes, or until a wooden skewer inserted into the center comes out clean.
- Let the cake cool in the pan for 10 minutes before transferring it to a wire rack to cool completely.