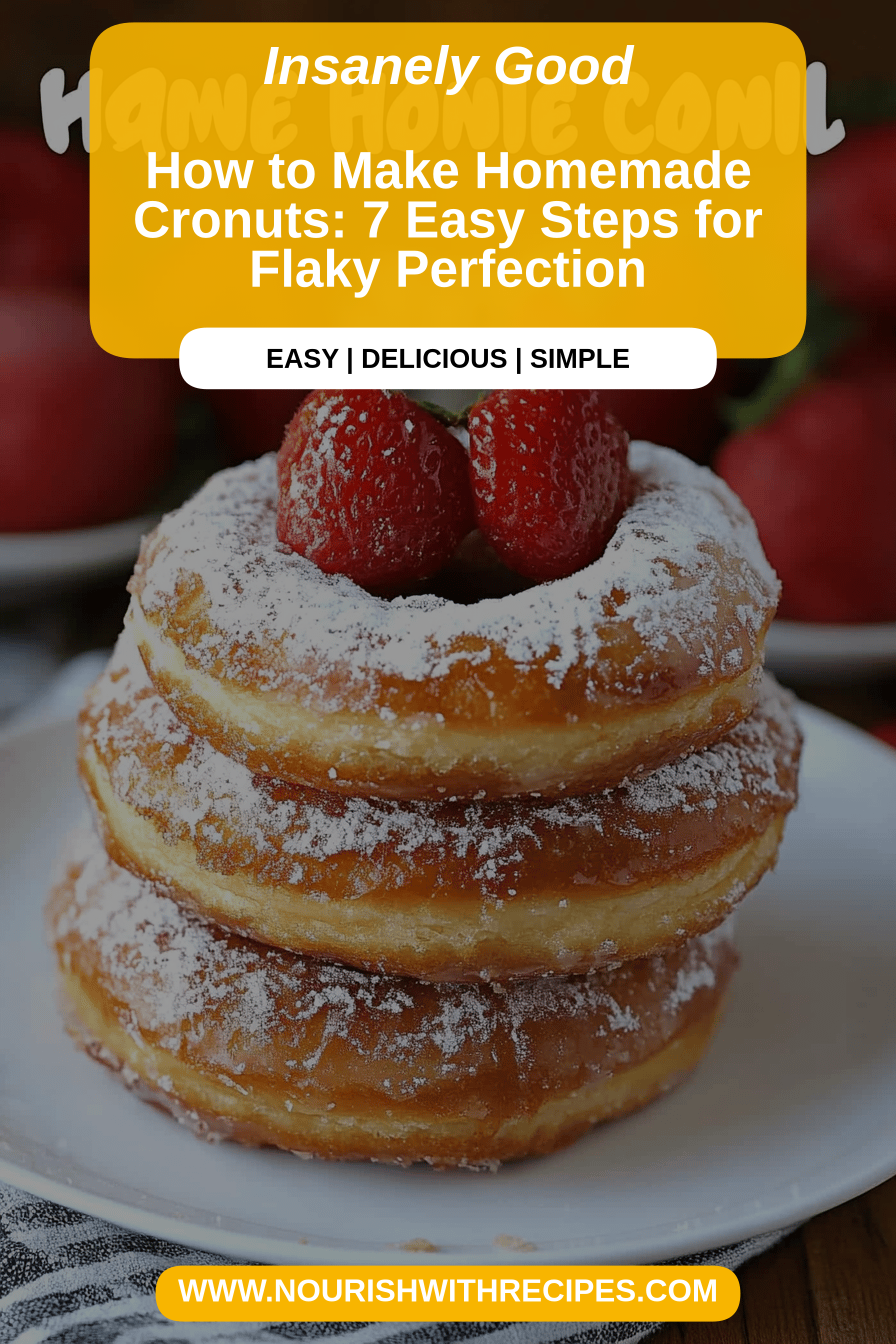
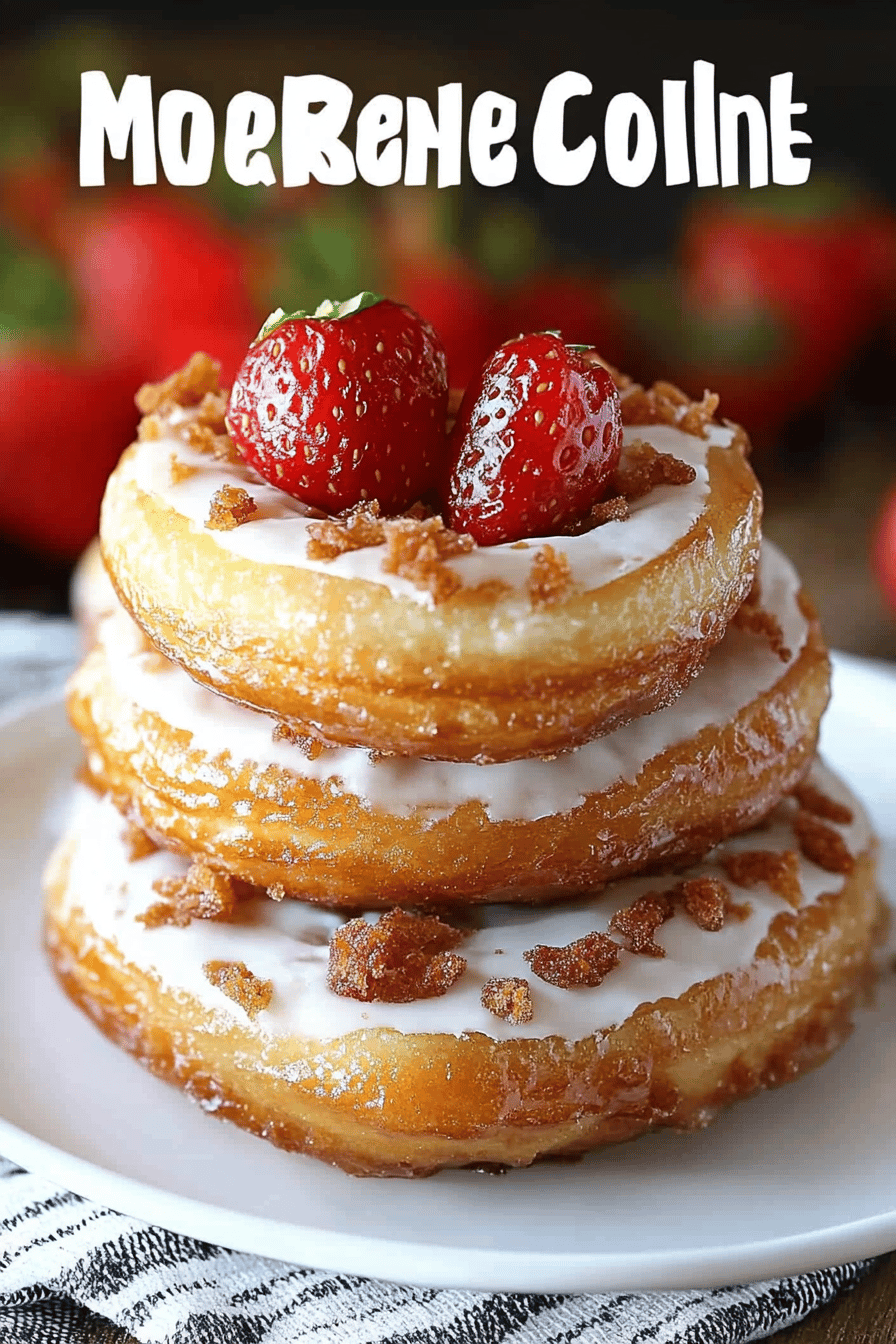
homemade cronuts
You know, sometimes you just get that craving. That deep, undeniable yearning for something utterly decadent, something that feels like a special occasion even on a Tuesday. For me, that craving almost always leads me to thinking about cronuts. Oh, those glorious, flaky, croissant-doughnut hybrids! For the longest time, I thought they were strictly the domain of fancy bakeries and urban cafes. But let me tell you, after a *lot* of trial and error (and let’s just say a few kitchen mishaps I’d rather not dwell on!), I’ve cracked the code. I’ve figured out how to make truly amazing homemade cronuts right in my own kitchen, and I’m practically bursting to share this with you. Imagine biting into that crisp, caramelized exterior, then hitting that impossibly tender, layered interior that practically melts in your mouth. It’s pure magic, and honestly, so much more achievable than you might think. Forget store-bought; we’re going to make something even better, something made with love and a sprinkle of kitchen bravery!
What are home made cronuts?
So, what exactly *is* a cronut? It’s a brilliant mashup, really. Picture a croissant – that buttery, flaky, laminated dough that’s folded and rolled countless times – and then imagine it being shaped and fried like a classic doughnut. The result? A pastry that’s both airy and rich, crispy and tender, with that signature honeycomb interior you get from proper lamination. The name itself, a portmanteau of “croissant” and “doughnut,” tells you pretty much everything you need to know. It’s that perfect marriage of two beloved pastries, taking the best qualities of each and creating something entirely new and utterly irresistible. It’s not just a doughnut, and it’s not just a croissant; it’s a culinary invention that’s captured hearts (and taste buds!) worldwide, and now, it’s coming to your home kitchen.
Why you’ll love this recipe?
Why do you make cronuts from scratch?flavor. Oh my goodness, the flavor! That rich, buttery dough, the slight sweetness from the glaze, and if you add a filling? Pure bliss. It’s a symphony of textures and tastes that will seriously blow you away. You get that satisfying crunch on the outside, that delightful chew from the layers within, and it’s just… heavenly. Then there’s the simplicity, which might sound crazy for something this fancy, but I promise, once you get the hang of the lamination process, it’s really not that intimidating. I’ve streamlined it here to make it as approachable as possible. And let’s talk about Cost-efficiency: What is the best way to measure cost-efficiency?. Buying artisanal cronuts can get pricey pretty quickly. Making them at home means you can indulge as often as you like without breaking the bank. Plus, the versatility is a huge win! You can play with glazes, fillings, and even add-ins. Feeling chocolatey? Add some chocolate chips to the dough. Craving something fruity? A berry jam filling is divine. This recipe is the perfect canvas for your pastry creativity. Honestly, what I love most about this recipe is the sheer joy on people’s faces when they take that first bite. It’s a showstopper, a conversation starter, and a guaranteed crowd-pleaser, all from your own oven (and stovetop!). It’s like bringing a piece of a gourmet bakery experience home, and that’s just incredibly rewarding.
How to Make Homemade Cronuts
Quick Overview
The secret to these incredible homemade cronuts lies in a simple, yet magical, lamination process – similar to how you’d make croissants. We’ll create a rich dough, encase a block of butter, and then fold and roll it multiple times to create dozens of impossibly thin layers. After chilling, we’ll cut and shape them, then fry them to golden perfection. A quick glaze finishes them off, but you can get creative with fillings too! It might sound involved, but trust me, each step builds on the last, and the payoff is absolutely worth it. It’s about patience and a little bit of love, but it’s totally achievable for any home baker.
Ingredients
For the Main Dough:
You’ll need good quality all-purpose flour – about 3 cups, plus a bit more for dusting. Unsalted butter is a non-negotiable here, at least 1 cup (2 sticks), softened just slightly so it’s pliable but not melty. Granulated sugar, about 1/4 cup, for a hint of sweetness. A teaspoon of salt is crucial for flavor balance. And for leavening, we’ve got active dry yeast, 2 and 1/4 teaspoons, and warm milk (around 105-115°F), about 3/4 cup. This combination creates that signature tender crumb.
For the Butter Block:
This is where the magic happens! You’ll need another 1 cup (2 sticks) of *cold*, unsalted butter. We want it firm so it creates distinct layers when we roll it into the dough. Make sure it’s sliced into manageable pieces, then pulsed in a food processor until it forms a rough, spreadable paste. Don’t over-process it into a liquid!
For the Filling (Optional, but highly recommended!):
A simple pastry cream is divine. You’ll need egg yolks, sugar, cornstarch, milk, and a touch of vanilla extract. Or, for something quicker, a good quality jam or a chocolate ganache works wonders. For this batch, I’m thinking a luscious vanilla bean pastry cream!
For the Glaze:
A classic powdered sugar glaze is perfect. About 2 cups of powdered sugar, mixed with a few tablespoons of milk or cream, and a dash of vanilla extract until it reaches a pourable but not watery consistency. You can also add a pinch of salt to enhance the sweetness.
Step-by-Step Instructions
Step 1: Preheat & Prep Pan
First things first, get your workspace ready. Lightly flour a clean surface. You’ll also want a large baking sheet lined with parchment paper. We’re not preheating the oven yet, but having everything prepped makes the process so much smoother. Grab a rolling pin and make sure your butter is ready to go. Oh, and make sure you have plenty of room in your refrigerator – chilling is key!
Step 2: Mix Dry Ingredients
In a large bowl, whisk together the 3 cups of all-purpose flour, 1/4 cup granulated sugar, 1 teaspoon salt, and the 2 and 1/4 teaspoons active dry yeast. Give it a good stir so everything is well combined. This ensures the yeast is evenly distributed throughout the flour.
Step 3: Mix Wet Ingredients
In a separate, smaller bowl or a large measuring cup, gently warm your milk. You want it to be lukewarm, not hot – around 105-115°F. Too hot and you’ll kill the yeast, too cold and it won’t activate. Once it’s the right temperature, stir in the softened 1 cup of butter. Just stir until it’s mostly melted and incorporated into the milk. It will look a little oily, and that’s perfectly fine.
Step 4: Combine
Now, pour the wet ingredients into the dry ingredients. Mix everything with a wooden spoon or a spatula until a shaggy dough forms. It won’t look smooth yet, and that’s okay! Turn the dough out onto your lightly floured surface and knead it gently for about 5-7 minutes. You’re not looking for a super elastic dough like bread; just knead until it comes together and is somewhat smooth. Don’t overwork it! Then, form it into a rough rectangle, wrap it tightly in plastic wrap, and pop it in the refrigerator for about 30 minutes to an hour. This lets the gluten relax and makes it easier to handle.
Step 5: Prepare Filling
While the dough is chilling, let’s whip up a quick pastry cream if you’re going that route. In a saucepan, whisk together 2 egg yolks, 1/4 cup sugar, and 2 tablespoons cornstarch until smooth. Gradually whisk in 1.5 cups of whole milk. Cook over medium heat, stirring constantly, until the mixture thickens and just begins to bubble. Remove from heat and stir in 1 teaspoon of vanilla extract. Pour it into a bowl, cover the surface directly with plastic wrap to prevent a skin from forming, and let it cool completely. If you’re using jam, just have it ready! For ganache, melt equal parts chocolate and heavy cream.
Step 6: Layer & Swirl
This is the critical lamination step! Take your chilled dough and on a lightly floured surface, roll it into a rectangle about 10×15 inches. Now, take your cold butter block (which should also be roughly the same size, or you can slightly reshape it). Place the butter block onto one half of the dough rectangle, leaving a little border. Fold the other half of the dough over the butter, like you’re closing a book. Pinch the edges to seal the butter inside. Now, gently roll this package out again to about 10×20 inches. Fold it into thirds, like a letter. This is your first “turn.” Wrap it tightly in plastic wrap and refrigerate for at least 30 minutes. Repeat this process two more times: roll, fold into thirds, chill. So, three turns in total. This creates those beautiful layers!
Step 7: Bake
Once your dough has had its final chill, roll it out one last time to about 1/2 inch thickness. Use a round cutter (about 3-4 inches in diameter) to cut out your cronuts. You can then use a smaller cutter (about 1 inch) to cut out the center hole, just like a doughnut. Arrange the cut cronuts on your parchment-lined baking sheet. Cover them loosely with plastic wrap and let them rise in a warm spot for about 1-2 hours, or until they’re puffy and look like they’ve gained some volume. While they’re rising, heat about 3-4 inches of vegetable oil in a deep pot or Dutch oven to 350°F (175°C). Carefully fry 2-3 cronuts at a time, for about 2-3 minutes per side, until they’re golden brown and puffed. They cook quickly, so keep an eye on them!
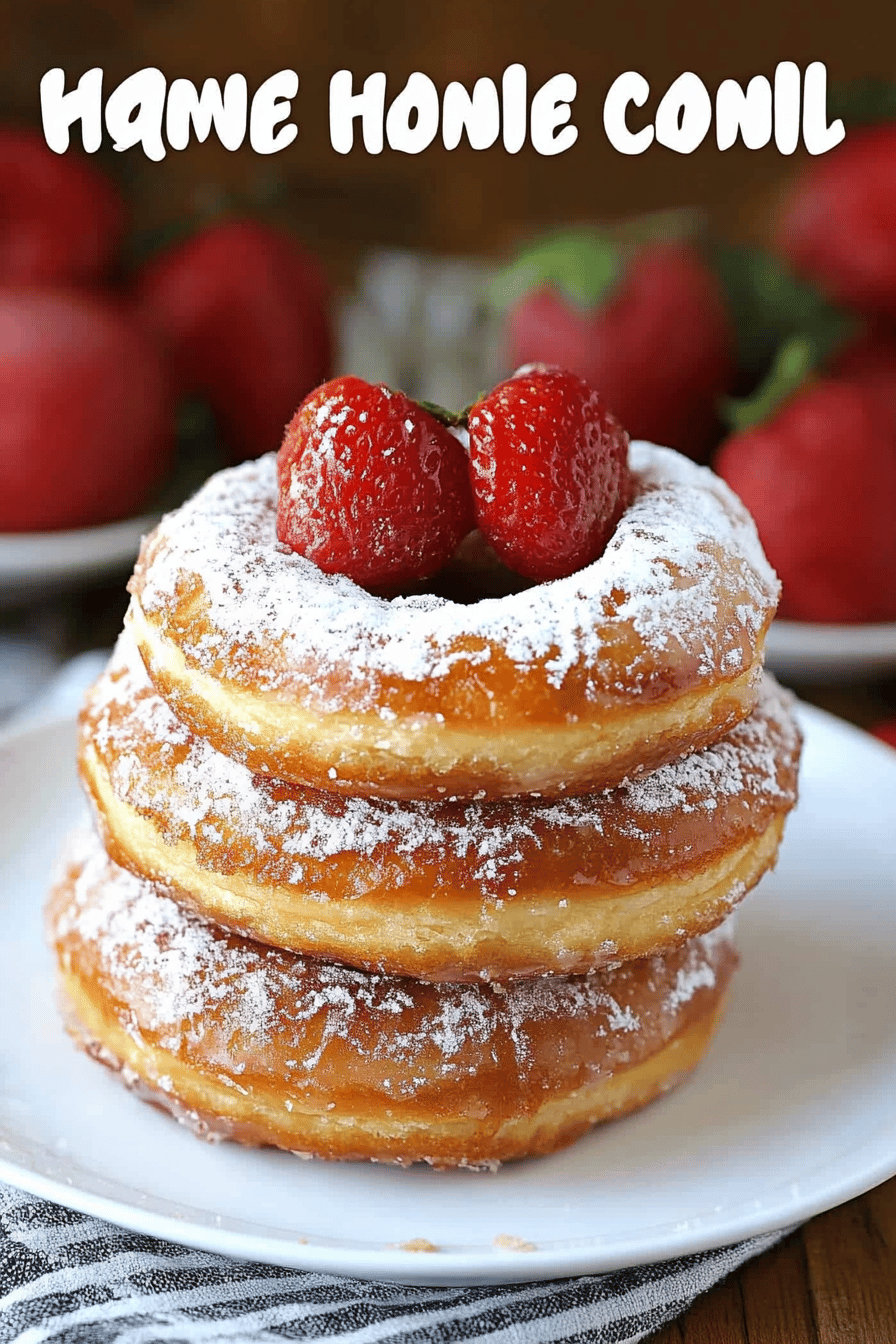
Step 8: Cool & Glaze
As each batch of cronuts finishes frying, transfer them to a wire rack set over a baking sheet to catch any drips. Let them cool for about 10-15 minutes. While they’re cooling, prepare your glaze. Whisk together the powdered sugar and milk until you have a smooth, pourable consistency. Once the cronuts are slightly cooled but still warm, dip the tops into the glaze or drizzle it over. If you’re adding a filling, poke a small hole in the side with a skewer or knife and pipe in your cooled pastry cream or filling.
Step 9: Slice & Serve
The hardest part is waiting! Let the glaze set for a few minutes. For the best experience, serve them warm. Slice one in half horizontally to reveal those gorgeous layers and admire your handiwork. These are best enjoyed the day they are made, but they’ll keep for a day or two. The aroma alone will draw everyone to the kitchen!
What to Serve It With
These homemade cronuts are stars all on their own, but pairing them can elevate the experience even further! For breakfast, they’re simply divine with a strong, hot cup of coffee. The richness of the cronut cuts through the bitterness of the coffee beautifully. Imagine a leisurely Saturday morning, a perfectly brewed latte, and a warm, glazed cronut. Pure heaven! For brunch, these can be the centerpiece. Present them on a beautiful platter, maybe with a few Fresh Berries on the side for a pop of color and freshness. A mimosa or a sparkling rosé would be a delightful beverage companion. They add that touch of elegance without being fussy. As dessert, they are an absolute triumph. Serve them slightly warm with a scoop of vanilla ice cream or a drizzle of chocolate sauce. The contrast of warm pastry and cold ice cream is irresistible. You can also dust them lightly with powdered sugar and serve them alongside a rich espresso. For cozy snacks, they’re perfect for an afternoon treat. Pair them with a glass of cold milk, or even a spiced chai tea. My kids absolutely love these with a tall glass of chocolate milk after school – it feels like such a special treat! My personal favorite is to have one with a good book and a quiet moment in the afternoon. It’s my little slice of homemade happiness.
Top Tips for Perfecting Your Homemade Cronuts
I’ve learned a few tricks over the years of making these that I really want to pass on to you. First, Zucchini Prep isn’t really applicable here since we aren’t using zucchini, but for the butter, make sure it’s *cold* when you start for the lamination process. If it gets too warm, it will meld into the dough instead of creating those distinct layers, and you won’t get that flaky texture. When you’re doing your Mixing Advice, remember that this dough isn’t meant to be overworked like bread dough. You want just enough kneading to bring it together. Overmixing will make your cronuts tough instead of tender. For Swirl Customization, don’t stress too much about perfect patterns. The beauty of these is their rustic charm. Even if your folds aren’t perfectly uniform, the layers will still develop beautifully during baking and frying. Play around with different glazes and fillings to make them your own! For Ingredient Swaps, while I highly recommend using full-fat dairy for the richest flavor, you can experiment with milk alternatives in the dough, but be aware it might slightly affect the texture. Ensure your yeast is fresh! An expired yeast will result in a flat, dense pastry. When it comes to baking tips, pay close attention to your oil temperature. If it’s too hot, the outside will burn before the inside is cooked. If it’s too cool, they’ll absorb too much oil and become greasy. A good instant-read thermometer is your best friend here! For the Glaze Variations, don’t be afraid to get creative! You can add a touch of espresso powder for a coffee glaze, some citrus zest for a bright flavor, or even a sprinkle of cinnamon for a spiced kick. Make sure your glaze isn’t too thick, or it will be difficult to apply smoothly.
Storing and Reheating Tips
These homemade cronuts are truly at their Absolute Best when they’re fresh, ideally enjoyed the same day they’re made. However, life happens, and sometimes you’ll have leftovers! For Room Temperature storage, if you have any left (which is rare in my house!), I usually keep them in an airtight container for no more than a day. They might lose a little bit of their crispness, but they’ll still be delicious. Refrigerator Storage is generally not recommended for fried pastries as it can make them tough and soggy. If you absolutely must, place them in an airtight container, and they should be okay for 1-2 days. I’d opt for reheating them. For Freezer Instructions, if you want to make a batch ahead of time, your best bet is to freeze the *unfried* cronut dough. Wrap individual portions of the laminated dough tightly in plastic wrap, then place them in a freezer-safe bag or container for up to 1 month. Thaw overnight in the refrigerator, then proceed with rolling, cutting, proofing, and frying as usual. If you have leftover *fried* cronuts, you can freeze them too, but be aware the texture might change slightly upon thawing. Wrap them well in plastic wrap, then in foil, and freeze for up to 2 weeks. Reheat them in a single layer on a baking sheet in a moderate oven (around 300°F/150°C) for about 5-10 minutes until warmed through and slightly crisped. Always add the Glaze Timing Advice *after* they are cooled from frying or reheating. If you glaze them before freezing, the glaze can become sticky and unappealing. It’s always best to glaze them just before serving!
Frequently Asked Questions
Final Thoughts
There you have it – the magic of homemade cronuts! I know it might seem like a bit of an undertaking at first glance, but I promise you, the process is so rewarding, and the end result is truly spectacular. That first bite into a perfectly layered, crisp, and tender cronut that you made yourself? It’s a feeling of accomplishment that’s almost as sweet as the pastry itself. It’s the perfect treat for a special occasion, a weekend indulgence, or just because you deserve it. If you love this recipe, you might also enjoy my recipes for classic croissants or my simple APPLE CIDER doughnuts – they share that same comforting, homemade charm. Don’t be afraid to experiment with your own glaze and filling creations; that’s part of the fun! I can’t wait to hear how your homemade cronuts turn out, so please leave a comment below and share your experience. Happy baking, and enjoy every single flaky, delicious bite!
Homemade Cronuts
Ingredients
Dough
- 3.5 cups all-purpose flour
- 0.25 cup granulated sugar
- 0.02 cup instant yeast
- 0.01 cup salt
- 0.75 cup whole milk lukewarm
- 0.25 cup unsalted butter melted
Butter Block
- 1 cup unsalted butter softened
Glaze
- 1 cup powdered sugar
- 0.03 cup milk
- 0.5 teaspoon vanilla extract
Instructions
Dough Preparation
- In a large bowl, whisk together the flour, sugar, yeast, and salt.
- Add the lukewarm milk and melted butter. Mix until a shaggy dough forms.
- Turn the dough out onto a lightly floured surface and knead for about 8-10 minutes, until smooth and elastic.
- Place the dough in a greased bowl, cover, and let it rise in a warm place for about 1 hour, or until doubled in size.
Lamination
- While the dough is rising, prepare the butter block. Place the softened butter between two sheets of parchment paper and pound it with a rolling pin until it forms a roughly 6x8 inch rectangle.
- Once the dough has risen, punch it down. Roll it out into a rectangle roughly twice the size of the butter block (about 12x8 inches).
- Place the butter block on one half of the dough rectangle. Fold the other half of the dough over the butter, like closing a book. Pinch the edges to seal.
- Gently roll the dough into a long rectangle, about 6 inches wide. Fold it into thirds, like folding a letter. This is the first fold.
- Rotate the dough 90 degrees and repeat the rolling and folding process two more times, for a total of three folds. Chill the dough for at least 30 minutes between folds.
Shaping and Frying
- After the final fold and chilling, roll out the dough to about 0.25 inch thickness.
- Cut the dough into 3 inch circles, and then cut each circle in half. Twist each half into a spiral to create the cronut shape.
- Place the cronuts on a parchment-lined baking sheet. Cover loosely and let them rise for another 30-45 minutes.
- Heat about 2 inches of vegetable oil in a deep pot or Dutch oven to 350°F (175°C).
- Carefully fry the cronuts in batches for about 2-3 minutes per side, until golden brown. Drain on paper towels.
Glazing and Serving
- While the cronuts are cooling, whisk together the powdered sugar, milk, and vanilla extract in a small bowl until smooth to make the glaze.
- Dip the cooled cronuts into the glaze, letting any excess drip off. Let the glaze set before serving.