British Scones Recipe
Oh, where do I even begin with these scones? For me, the aroma of freshly baked scones is pure comfort. It instantly transports me back to my grandmother’s kitchen, a place filled with warmth, laughter, and the most incredible baking. She had this knack for making everything taste like magic, and her scones? They were legendary. This British scones recipe is my tribute to her, a collection of all the little tips and tricks I’ve gathered over the years to recreate that perfect crumbly, buttery goodness. Honestly, if you’ve ever felt intimidated by baking, or even if you’re a seasoned pro looking for *that* perfect scone recipe, you’ve found it. Forget those dry, tough pucks you might have encountered elsewhere; these are light as a feather, melt-in-your-mouth delicious, and surprisingly simple to whip up. They’re like the ultimate hug in baked form, perfect for a lazy Sunday morning or a delightful afternoon tea. They even give my foolproof Chocolate Chip Cookie recipe a run for its money in the “disappears-in-minutes” department!

What are British Scones?
So, what exactly is a British scone? Think of it as a small, usually round, quick bread that’s leavened with baking powder. It’s a cornerstone of British afternoon tea, served alongside clotted cream and jam. Unlike American biscuits, which can sometimes be flaky and layered (thanks to lots of butter cutting), British scones tend to have a finer, more cake-like crumb. They’re meant to be sturdy enough to hold their toppings but tender enough to crumble beautifully when you bite into them. The name itself is a bit of a debate – some say it rhymes with “gone,” others with “cone,” but no matter how you say it, the taste is universally delightful! They’re not overly sweet on their own, which is precisely why they pair so wonderfully with sweet accompaniments. It’s a blank canvas for deliciousness, really, and that’s part of their charm.
Why you’ll love this recipe?
What are some of the reasons why I love this British Scones Recipe?flavor and texture are just spot on. They come out golden brown with a slightly crisp exterior and an incredibly tender, fluffy interior. They have that perfect buttery richness without being greasy, and just a hint of sweetness that makes them utterly irresistible. What I love most is the sheer simplicity. I’ve tried so many scone recipes that require a million steps or fussy techniques, but this one is genuinely straightforward. Even if you’re a beginner baker, you’ll nail these. I’ve made them on busy weeknights when I needed a quick treat, and they’ve always turned out perfectly. Plus, they are incredibly cost-efficient. The ingredients are pantry staples that most of us have on hand, making it anversatility? Oh my goodness! They’re not just for afternoon tea. I’ve served them warm with breakfast fruit, as a simple dessert with chocolate sauce, or even just plain with a cup of tea. They’re my secret weapon for unexpected guests or when that sweet craving hits hard. They truly stand out because they achieve that perfect balance – impressive enough for a special occasion but easy enough for any day.
How to Make British Scones
Quick Overview
The process is beautifully simple: we’ll mix our dry ingredients, then our wet ingredients, gently bring them together to form a soft dough, pat it out, cut out our scones, and bake them until golden and puffed. The key is minimal handling of the dough to keep them light and tender. It’s a quick bake, too, so you’ll be enjoying warm scones in under 30 minutes from start to finish. This method is foolproof, ensuring you get that delightful fluffy texture every single time, without any fuss.
Ingredients
For the Main Batter:
2 cups (250g) all-purpose flour, plus extra for dusting. I always use a good quality plain flour; it makes a difference!
1 tablespoon baking powder. Make sure it’s fresh! Old baking powder is a scone’s worst enemy.
1/2 teaspoon salt. Just a pinch to enhance the flavors.
1/2 cup (113g) cold unsalted butter, cut into small cubes. Seriously, keep it cold! This is crucial for texture.
1/2 cup (120ml) cold milk, plus a little extra for brushing. Whole milk gives the best richness, but 2% works too. I’ve even tried a non-dairy milk in a pinch and it was surprisingly good, though not quite as decadent.
1 tablespoon granulated sugar (optional, for a touch more sweetness). My grandma always added this, and I do too!
For the Glaze:
1 egg, beaten with 1 tablespoon milk or water. This gives that lovely golden sheen.

Step-by-Step Instructions
Step 1: Preheat & Prep Pan
First things first, let’s get that oven preheated to 400°F (200°C). Line a baking sheet with parchment paper. This is a simple step, but it stops any sticking and makes cleanup a breeze. Having your pan ready means you can pop the scones in as soon as they’re formed.
Step 2: Mix Dry Ingredients
In a large bowl, whisk together your flour, baking powder, salt, and sugar (if using). Give it a good whisk to make sure everything is evenly distributed. This ensures your scones rise uniformly. The texture should be light and airy.
Step 3: Mix Wet Ingredients
In a separate jug or bowl, gently whisk together the cold milk and the tablespoon of sugar (if you decided to skip it in the dry mix). Keep it cold! I usually pop my milk in the fridge for a bit before I start.
Step 4: Combine
Now, add your cold, cubed butter to the dry ingredients. Using your fingertips or a pastry blender, rub the butter into the flour until the mixture resembles coarse breadcrumbs. You want some pea-sized pieces of butter left – these will melt and create those lovely pockets of flakiness. Don’t overwork it! Then, pour in about ¾ of the milk mixture. Gently stir with a knife or spatula until it just starts to come together. Add more milk, a tablespoon at a time, only if needed, until the dough forms a soft, slightly sticky ball. Be careful not to overmix; it’s the most important rule for tender scones!
Step 5: Prepare Filling
This step isn’t applicable for this particular recipe as we’re focusing on classic plain scones for afternoon tea. However, if you wanted to add things like currants or cheese, you’d gently fold them in *now*, after the dough has just come together, before shaping.
Step 6: Layer & Swirl
Turn the dough out onto a lightly floured surface. Gently pat it down with your hands until it’s about ¾ to 1 inch thick. Don’t roll it with a pin, as this can make them tough! I like to fold the dough over on itself a couple of times – this gives a slightly better texture, almost like a rough puff. Then, using a floured 2-inch round cutter (or even a glass rim), cut out your scones. Press straight down without twisting. Gather the scraps gently, pat them down again, and cut out more scones until all the dough is used. My grandma always said the scraps made the best scones because they were handled the least!
Step 7: Bake
Place the scones onto your prepared baking sheet, leaving a little space between them. Brush the tops generously with the beaten egg and milk mixture. This gives them that beautiful golden glaze. Pop them into the preheated oven and bake for 12-15 minutes, or until they’re puffed up and golden brown. They should sound hollow when tapped on the bottom. Keep an eye on them; oven temperatures can vary!
Step 8: Cool & Glaze
Once baked, transfer the scones to a wire rack to cool slightly. They are best served warm, ideally within a few hours of baking. If you’re serving them immediately, the egg wash glaze is perfect. If you prefer a different finish, you could dust them with a little powdered sugar once cooled.
Step 9: Slice & Serve
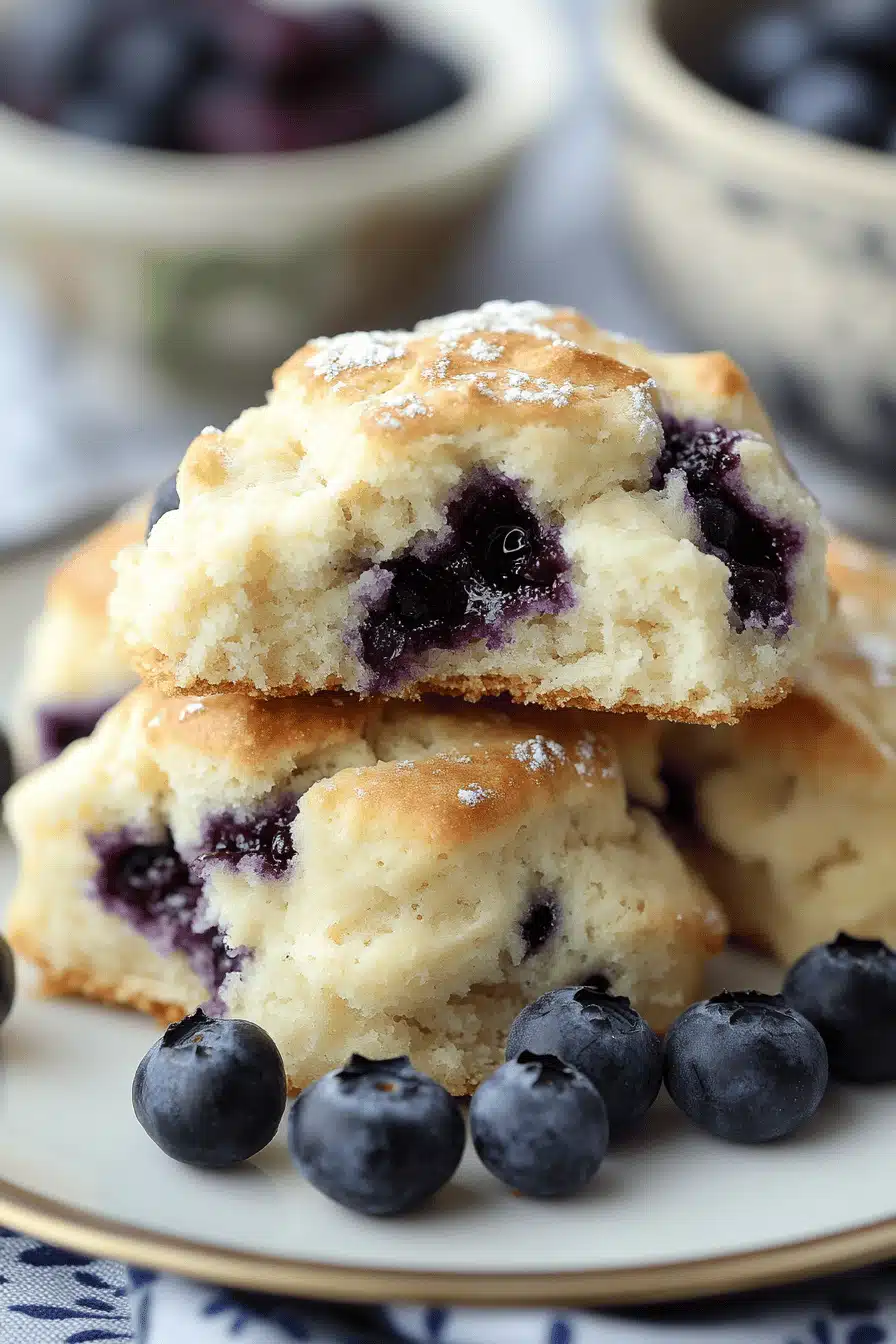
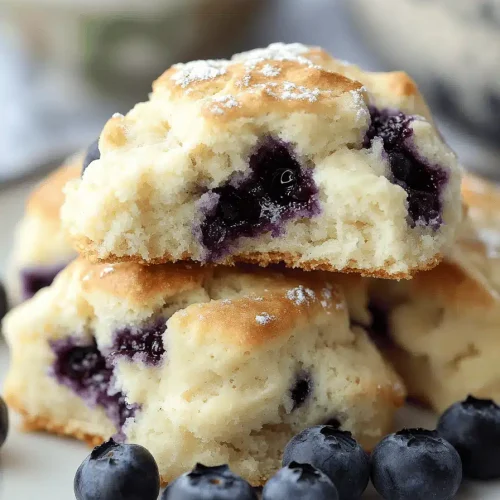
The moment of truth! Carefully slice your warm scones in half horizontally using a serrated knife. Spread generously with your favorite jam (strawberry is classic!) and a dollop of clotted cream (if you can get it – otherwise, thick double cream works wonders). The combination is pure heaven.
What to Serve It With
Oh, the possibilities! These British scones recipe gems are so versatile, they fit into almost any occasion. For breakfast, I love them warm with a dollop of Greek yogurt and a drizzle of honey, alongside a strong cup of coffee. They’re a much more elegant start to the day than toast, if I’m being honest! For a leisurely brunch, I’ll serve them alongside some fresh fruit salad and perhaps a light quiche. The contrast between the savory quiche and the sweet scone is just delightful. They really shine as the star of an afternoon tea spread, though, accompanied by finger sandwiches, mini cakes, and of course, plenty of jam and cream. My family also loves them as a simple dessert after dinner. Sometimes, I’ll even warm them up and serve with a scoop of vanilla Ice Cream and a berry compote. And for those just-because cozy snacks? A warm scone with a smear of butter and a pot of tea is my ultimate comfort food. My kids also go crazy for them with just jam, so they’re a perfect after-school treat too!
Top Tips for Perfecting Your British Scones
I’ve learned a few things over the years making scones, and I’m happy to share them with you! First, about the flour. I always sift my flour, even though it adds an extra step. It makes such a difference to the lightness of the final bake. It aerates the flour and removes any lumps, leading to a finer crumb. Secondly, and I can’t stress this enough: don’t overwork the dough. As soon as the ingredients come together to form a soft dough, stop mixing. Overworking develops the gluten too much, which results in tough, chewy scones, and nobody wants that! For the butter, make sure it’s properly cold. I even pop my flour and butter mixture in the freezer for 10 minutes before adding the liquid if I’m worried about it warming up too much. My trick for getting those lovely tall scones is to pat the dough to about ¾-inch thickness and cut straight down with the cutter. No twisting! Twisting seals the edges and prevents them from rising evenly. If you find your scones aren’t rising as much as you’d like, check your baking powder. It loses its potency over time, so make sure yours is fresh. I always do a little test by putting a teaspoon of baking powder in a little hot water; it should bubble vigorously. If you’re looking for ingredient swaps, I’ve found that using buttermilk instead of milk adds a lovely tang and extra tenderness. You can also substitute half of the all-purpose flour with cake flour for an even lighter, more delicate crumb, though be aware you might need slightly less liquid. For the glaze, while the egg wash is classic, a simple milk wash will also give a nice golden color, just not quite as deep. And if you don’t have a round cutter, a heart-shaped cookie cutter makes for a really cute, whimsical scone!
Storing and Reheating Tips
These scones are absolutely best enjoyed fresh, within a few hours of baking. However, life happens, and sometimes you have leftovers! At room temperature, store them in an airtight container or a scone bag (if you have one) for up to 2 days. They will gradually lose some of their crispness, but they’re still lovely. If you live in a warm climate or plan to keep them for longer, refrigeration is a good option for up to 3-4 days. Keep them in an airtight container, and they should retain their moisture well. For longer storage, freezing is the way to go! Once completely cooled, wrap each scone individually in plastic wrap, then place them in a freezer-safe bag or container. They’ll keep well for up to 2 months. To reheat, you can pop them in a moderate oven (around 300°F/150°C) for about 5-10 minutes to bring back some of that lovely crispness. If they’re defrosted from frozen, you might need slightly longer. I usually reheat them just before serving, so the glaze is still fresh and appealing. If you’ve made them with a glaze, they’re best served immediately after baking. If you’re planning to store them, you might want to skip the glaze and just dust with powdered sugar later, as the glaze can sometimes become a bit sticky in storage.
Frequently Asked Questions
Final Thoughts

So there you have it – my beloved British Scones Recipe! I truly hope you give these a try. They’re more than just a baked good; they represent warmth, tradition, and the simple joy of sharing something delicious with loved ones. The light, fluffy texture and buttery flavor are just unmatched, and the fact that they’re so easy to make means you can enjoy them anytime the craving strikes. If you’re already a fan of British baking, this recipe will become a staple in your kitchen. And if you’re new to it, consider this your perfect starting point! I’d be absolutely thrilled if you tried them and let me know how yours turned out. What’s your favorite jam and cream combination? Do you have any secret scone-making tips? Share them in the comments below – I love hearing from you all! Happy baking, and enjoy every crumb!
British Scones Recipe
Ingredients
Main Ingredients
- 2.5 cups all-purpose flour
- 0.5 tablespoon baking powder
- 0.25 teaspoon salt
- 0.5 cup unsalted butter, cold and cubed
- 0.33 cup granulated sugar
- 0.5 cup heavy cream
- 1 large egg egg lightly beaten
Instructions
Preparation Steps
- Preheat your oven to 400°F (200°C) and line a baking sheet with parchment paper.
- In a large bowl, whisk together the flour, baking powder, and salt.
- Cut in the cold butter using a pastry blender or your fingertips until the mixture resembles coarse crumbs.
- Stir in the sugar.
- In a separate small bowl, whisk together the heavy cream and the beaten egg.
- Pour the wet ingredients into the dry ingredients and mix until just combined. Do not overmix.
- Turn the dough out onto a lightly floured surface and gently pat it into a 0.75-inch thick disc.
- Use a 2-inch round cutter to cut out scones. Place them on the prepared baking sheet.
- Bake for 10-12 minutes, or until golden brown and risen.
- Let cool slightly on a wire rack before serving. Serve with jam and clotted cream.