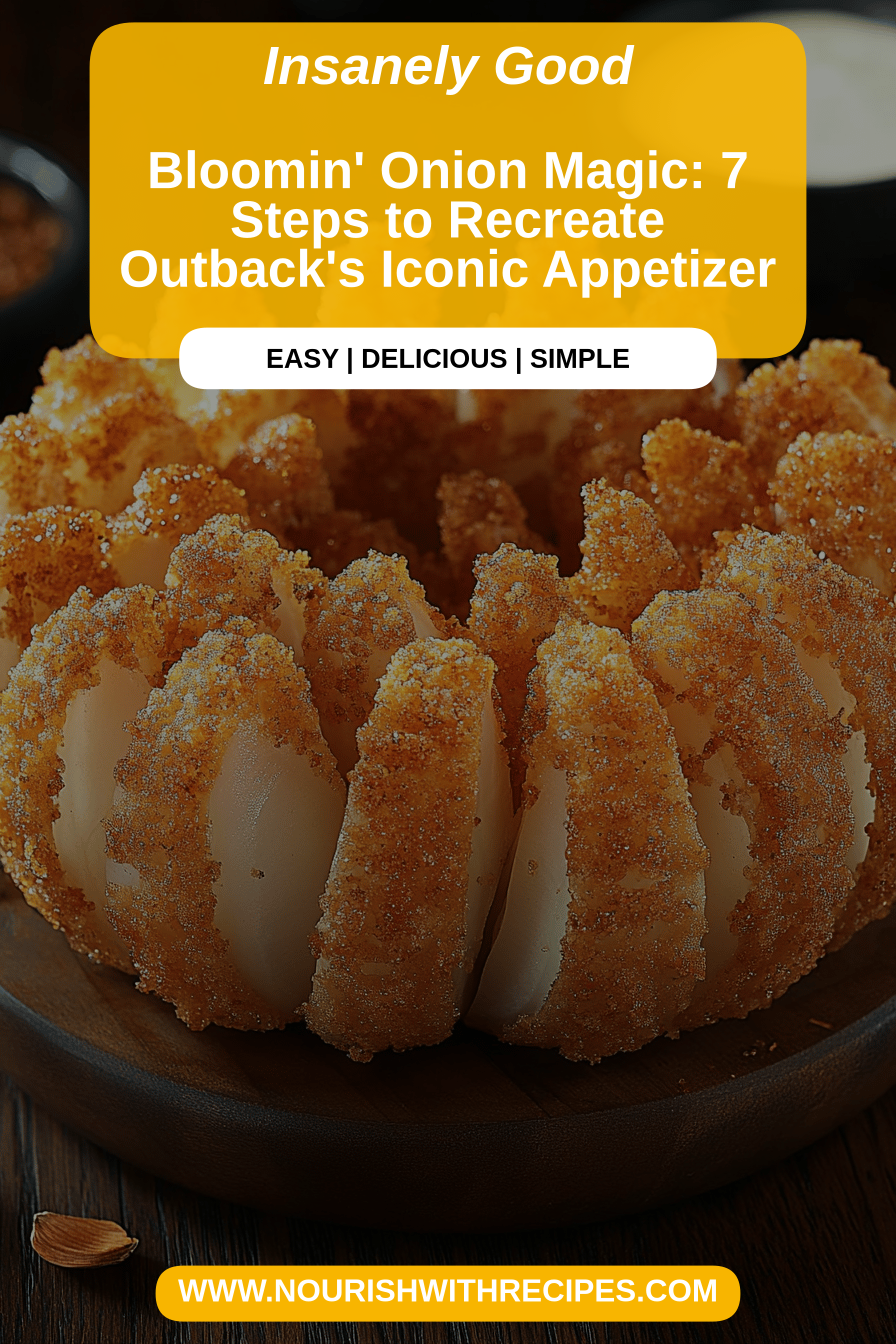
Bloomin’ Onion Recipe
Oh, where do I even begin with this Bloomin’ Onion recipe? It’s one of those dishes that just screams “special occasion” but, honestly, I’ve found myself whipping it up on a random Tuesday when we all just need a little culinary comfort. You know, the kind of comfort that comes from a perfectly crisp, deeply flavorful, and utterly delicious appetizer? It’s like the fancy restaurant version that you *think* is impossible to replicate at home, but trust me, it’s not! I remember the first time I really tried to nail this down. I’d seen them in restaurants forever and always assumed there was some secret technique involved. Turns out, it’s all about a little patience and a few key steps. It’s not quite as involved as making a whole roast chicken from scratch, but the payoff? Absolutely massive. This Bloomin’ Onion recipe is a game-changer, and I’m so excited to share it with you!
What Is a Bloomin’ Onion?
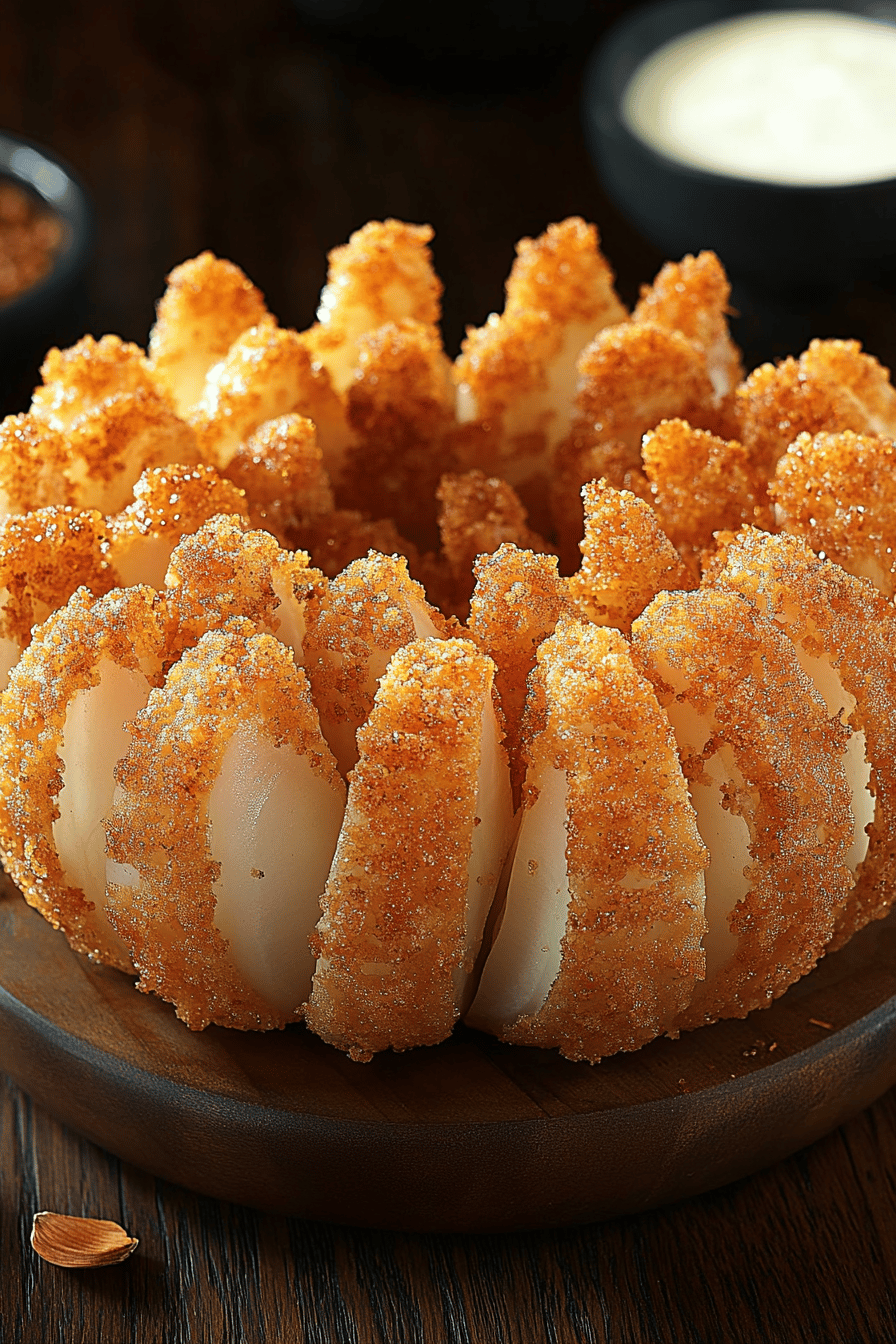
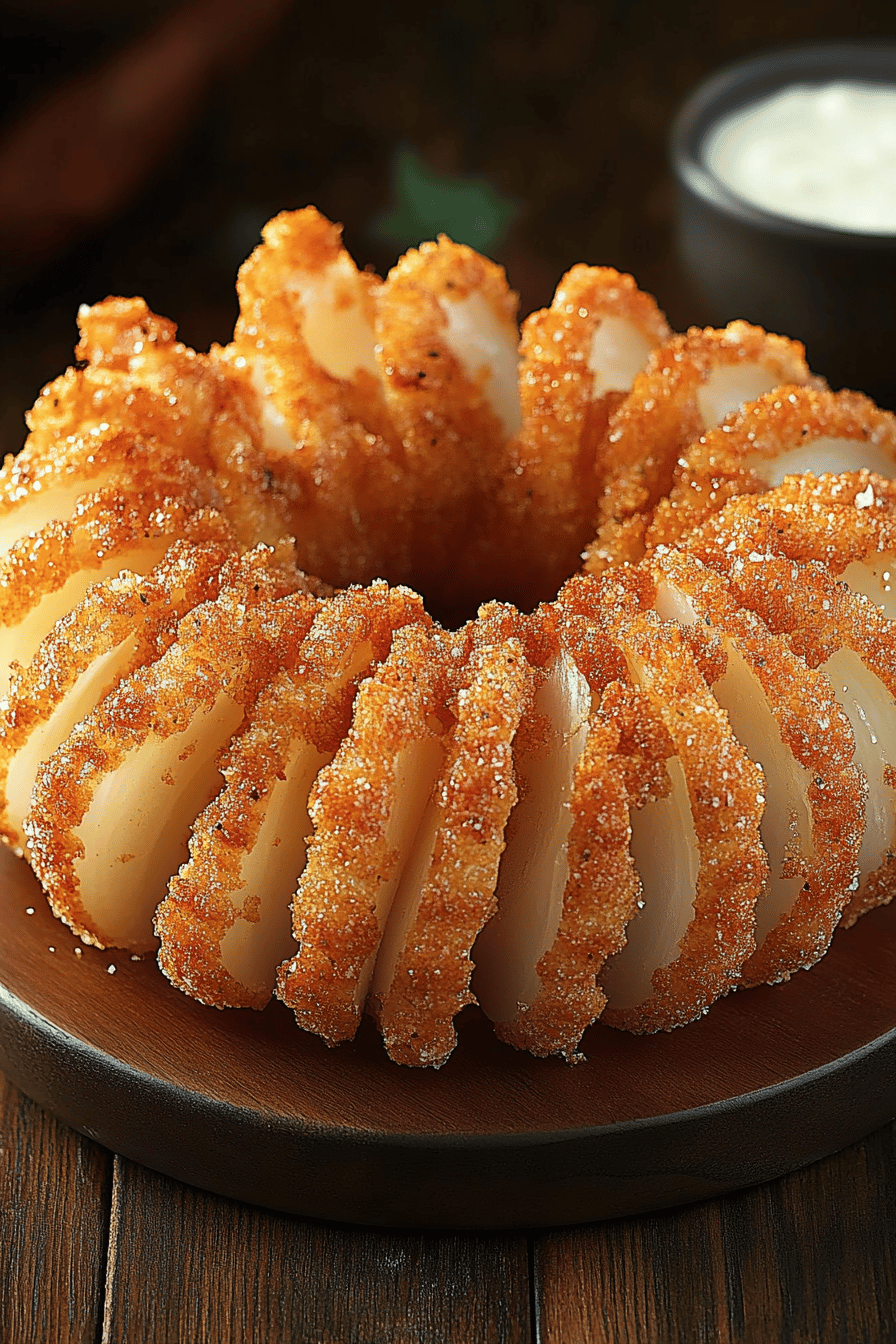
So, what exactly is this glorious creation we call a Bloomin’ Onion? Think of it as a whole onion, carefully cut into a flower shape, then battered and deep-fried to golden, crispy perfection. It’s served with a tangy dipping sauce that perfectly cuts through the richness. The name comes from its beautiful presentation – when you cut it correctly, the layers spread out like the petals of a blooming flower. It’s essentially a showstopper appetizer that’s surprisingly simple to pull off once you get the hang of the cutting technique. It’s one of those things that looks super fancy, but at its heart, it’s just a humble onion transformed into something truly magical. It’s way more exciting than just a plate of onion rings, don’t you think?
Why you’ll love this recipe?
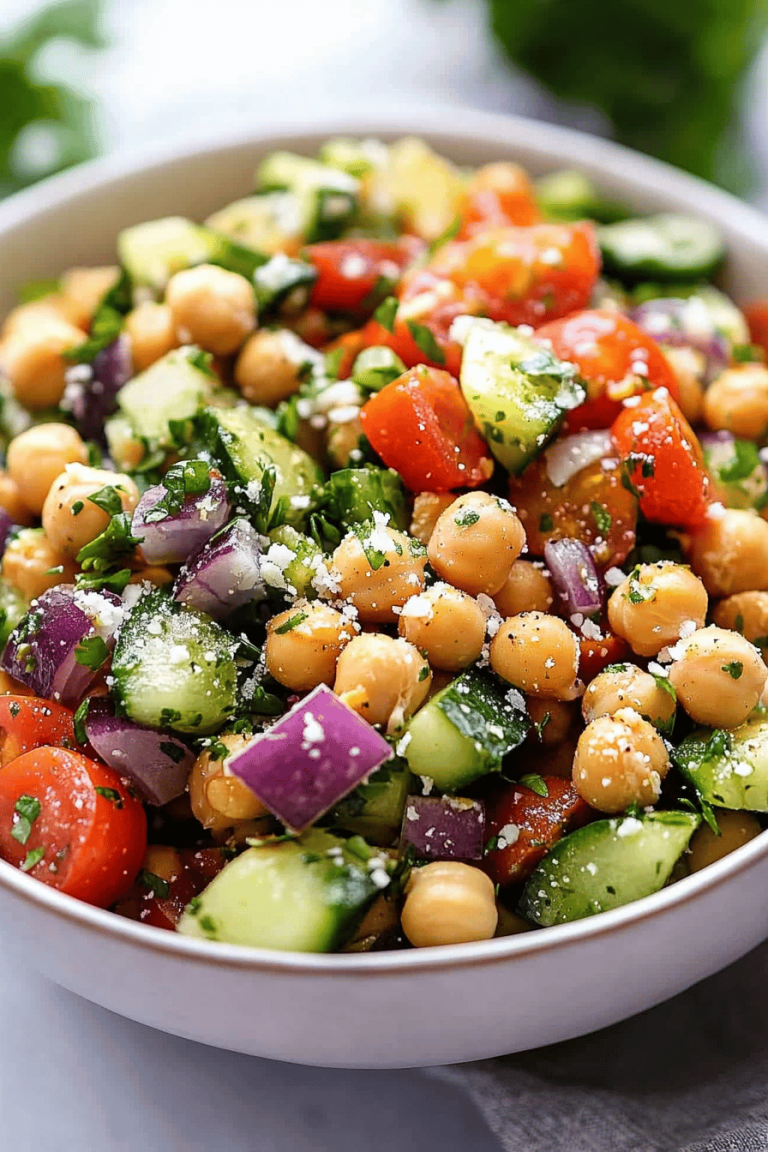
There are so many reasons why I keep coming back to this particular Bloomin’ Onion recipe, and I have a feeling you’ll fall in love with it too. First off, the flavor! Oh my goodness, the flavor. It’s this incredible balance of savory, slightly sweet onion with a perfectly seasoned, ultra-crispy coating. The outside is just shatteringly crunchy, and the inside stays wonderfully tender. What I love most is that it’s not as complicated as you might think. I’ve got it down to a system now, and it’s honestly pretty straightforward once you get past the initial cutting. And let’s talk about cost-efficiency! Buying one of these at a restaurant can really add up, but making it at home is so much more budget-friendly, especially if you’re feeding a crowd. It’s incredibly versatile too. While it’s a classic appetizer, I’ve also served smaller ones as a fun side dish for burgers or steak. It’s always a hit, and honestly, the smiles I get when I bring this out make all the effort completely worth it. If you enjoy something like my Crispy Baked Zucchini Fries, you’ll appreciate the textural contrast here, but with that unmistakable oniony goodness.
How to Make Bloomin’ Onion
Quick Overview
Making this Bloomin’ Onion recipe is all about a few key stages: preparing the onion so it blooms beautifully, coating it in a seasoned batter that crisps up perfectly, and then frying it until it’s golden brown. We’ll then whip up a quick, zesty dipping sauce. The whole process takes a bit of focused attention, especially during the cutting and frying, but the steps themselves are simple. It’s not a one-bowl wonder, but it’s definitely manageable and the result is so worth the little bit of extra effort. You get that amazing, crispy exterior and tender onion inside that’s just irresistible.
Ingredients
For the Main Batter:
You’ll need one large sweet onion, something like a Vidalia or Walla Walla is perfect because they’re naturally sweeter and hold their shape well. Make sure it’s firm and has a good weight to it. For the flour, I like to use all-purpose flour for that classic crispy texture. About two cups should do it. Then comes the seasoning magic: smoked paprika for a little smokiness and gorgeous color, garlic powder for that essential savory punch, onion powder to double down on the onion flavor (never too much onion, right?), a good pinch of cayenne pepper for just a hint of heat – you can add more if you like it spicier, salt, and freshly ground Black Pepper. I also add a tablespoon of cornstarch; this is my little secret for extra crispiness. Seriously, don’t skip this!
For the Filling:
This is where things get interesting for the batter itself! We’ll need about a cup and a half of cold milk. Using cold milk is crucial for creating that perfectly crispy coating. I’ve also experimented with using buttermilk, and it adds a wonderful tanginess, so feel free to try that too! Then, we’ll add about two large eggs, lightly beaten. These act as the binder to help the flour stick. Some people use just water, but I find the eggs make the batter richer and help it adhere better.
For the Glaze:
For our dipping sauce, which is just as important as the onion itself, we’ll need mayonnaise as the creamy base. About a cup of good quality mayo. Then, we’ll add some ketchup for sweetness and color, about two tablespoons. Horseradish adds a fantastic kick and a bit of zing – start with a tablespoon and add more to your taste. A teaspoon of Worcestershire sauce adds a depth of umami flavor that’s hard to beat. Finally, a little pinch of garlic powder and a tiny squeeze of lemon juice to brighten everything up. You can adjust all of these to your personal preference, that’s the beauty of homemade dipping sauce!
Step-by-Step Instructions
Step 1: Preheat & Prep Pan
First things first, you’ll want to get your frying setup ready. I usually use a large, heavy-bottomed pot or a Dutch oven for deep frying. You’ll need enough neutral oil, like vegetable or canola oil, to come about 2-3 inches up the side of your pot. Heat the oil over medium-high heat until it reaches about 350°F (175°C). It’s super important to have a thermometer for this; too hot and it’ll burn, too cool and it’ll be greasy. While the oil is heating, get a baking sheet lined with paper towels ready for when the onion comes out. This is where all that delicious grease will drain off.
Step 2: Mix Dry Ingredients
Grab a large bowl – and I mean *large*, you want plenty of room to toss the onion later. Into this bowl, you’re going to add your all-purpose flour, cornstarch, smoked paprika, garlic powder, onion powder, cayenne pepper, salt, and Black Pepper. Whisk all these dry ingredients together really well until they’re thoroughly combined. You want to make sure the seasonings are evenly distributed so you don’t get a bite that’s bland and then a bite that’s way too spicy. Getting this step right ensures every part of your Bloomin’ Onion is deliciously seasoned.
Step 3: Mix Wet Ingredients
In a separate, medium-sized bowl, whisk together your cold milk and your lightly beaten eggs. Make sure the eggs are well incorporated into the milk. The colder the milk, the better it is for creating that super crispy exterior when it hits the hot oil. I always make sure my milk is straight from the fridge, and sometimes I even pop it in the freezer for 10 minutes before I start. This is one of those small things that really makes a difference in the final crunch.
Step 4: Combine
Now, this is where the magic starts to happen for the batter. You’re going to pour the wet ingredients into the bowl with the dry ingredients. Whisk them together until you have a smooth, relatively thick batter. It should be about the consistency of pancake batter, maybe a little thicker. Don’t overmix it! A few small lumps are perfectly fine. Overmixing can develop the gluten too much, which can lead to a tougher coating. We’re going for light and crispy here!
Step 5: Prepare Filling
While your oil is heating up, it’s time to prep the dipping sauce. In a small bowl, combine your mayonnaise, ketchup, horseradish, Worcestershire sauce, garlic powder, and lemon juice. Stir everything together until it’s well combined and smooth. Taste it and adjust the seasonings as needed. If you want it spicier, add more horseradish or cayenne. If you want it tangier, a bit more lemon juice. This sauce is honestly so good, I’ve been known to just eat it with a spoon (don’t tell anyone!).
Step 6: Layer & Swirl
This is the fun part, but it requires a steady hand. Take your whole, unpeeled onion. You’re going to place it cut-side down on a cutting board. Starting about an inch from the root end, make vertical cuts all the way down to the board, stopping about half an inch from the bottom. Don’t cut all the way through! Space these cuts about half an inch apart. You should end up with about 12-16 ‘petals’. Now, carefully hold the onion together and invert it. Gently spread the petals apart with your fingers. Then, take your prepared batter and generously pour it over the onion, making sure to get the batter in between all those petals. Use a spoon or your fingers to ensure every nook and cranny is coated. You can even swirl it around a bit to get that classic Bloomin’ Onion look.
Step 7: Bake
Carefully lift the battered onion by the root and gently lower it into the hot oil. Be very cautious, as the oil will bubble up vigorously! Fry the onion for about 4-6 minutes per side, using tongs to carefully flip it, until it’s a deep golden brown and looks beautifully bloomed. The exact time will depend on your oil temperature and the size of your onion. Keep an eye on it! You want it cooked through but not burnt. The goal is that perfect crispy exterior.
Step 8: Cool & Glaze
Once the Bloomin’ Onion is a gorgeous golden brown, carefully lift it out of the oil and place it, cut-side down, onto the prepared paper towel-lined baking sheet. Let it drain for a minute or two. Then, carefully transfer it to a serving platter. Now for the glaze! You can either drizzle it over the top or serve it in a bowl on the side. If you want to drizzle, you can warm the dipping sauce slightly or just use it as is. Some people like to dollop a bit of the sauce right into the center of the onion for extra goodness!
Step 9: Slice & Serve
Once it’s drained a bit, your Bloomin’ Onion is ready to be sliced and served immediately. The best way to eat it is to use a knife to cut down through the petals, making them easier to pull off and dip. Serve it hot, right away, so everyone can enjoy that incredible crunch. The smell alone is enough to get everyone to the table!
What to Serve It With
This Bloomin’ Onion recipe is so versatile, it can fit into so many meals! For breakfast? Well, maybe not so much, unless you’re having a very decadent weekend brunch! But for brunch, oh yes! It’s fantastic served alongside some fluffy scrambled eggs, crispy bacon, and maybe some hollandaise sauce for a truly indulgent spread. For a light lunch, I love serving a smaller portion alongside a big, fresh green salad. The crunch of the onion is such a satisfying contrast to crisp greens and a vinaigrette. As a dessert? Not typically, unless we’re talking about a savory dessert course, but I find it’s best enjoyed as an appetizer or a hearty side. For a truly cozy snack, especially on a chilly evening, it’s perfect for sharing with friends or family while watching a movie. Pair it with some cold beers or a crisp white wine. We often make this for game nights, and it disappears in minutes! It’s also incredible alongside grilled steaks or burgers, adding that extra layer of flavor and texture to a classic barbecue meal. Think of it as a more exciting alternative to fries or onion rings.
Top Tips for Perfecting Your Bloomin’ Onion
Okay, let’s get into the nitty-gritty of making this the best Bloomin’ Onion it can be. First, the onion itself. Choose a large, firm sweet onion. The sweeter, the better, as it balances the savory coating and spicy sauce. When you’re cutting those petals, patience is key. You want them to be distinct but not completely separated from the base. If you cut too deep, the whole thing can fall apart. I usually aim for about 12-16 cuts. For the batter, the consistency is super important. Too thin and it won’t cling; too thick and it can be doughy. Aim for that thick pancake batter consistency. And remember my little secret: adding cornstarch to the dry ingredients makes a world of difference in crispiness! When it comes to frying, temperature is everything. I cannot stress enough how important using a thermometer is. If the oil isn’t hot enough, your onion will absorb too much oil and become greasy. If it’s too hot, the outside will burn before the inside is cooked. Aim for that consistent 350°F. Don’t overcrowd the pot; fry one onion at a time. This ensures the oil temperature stays stable and you get an even crisp on all sides. For variations, don’t be afraid to play with the spice level in the batter! Add more cayenne for a kick, or a pinch of chili powder for a different kind of heat. And the dipping sauce? It’s endlessly customizable. Some people add a bit of pickle relish for sweetness and tang, or even a dash of hot sauce for extra fire. I once tried adding a tiny bit of honey to the sauce, and it was surprisingly delicious! Just remember, the goal is that contrast: crispy outside, tender inside, and a sauce that complements without overpowering.
Storing and Reheating Tips
Honestly, this Bloomin’ Onion is best enjoyed fresh out of the fryer. The crispiness factor is just unbeatable when it’s piping hot. However, if you happen to have any leftovers (which is rare in my house!), you can store them. At room temperature, it’s best to eat it within a couple of hours. If you need to store it longer, pop it in an airtight container in the refrigerator. It will stay good for about 2-3 days, but the crispiness will definitely diminish. Reheating is a bit tricky. Microwaving is a definite no-go; it will make it soggy. Your best bet is to reheat it in a preheated oven at around 350°F (175°C) for about 10-15 minutes, or until it’s warmed through. You can also try reheating it in an Air Fryer, which might help bring back some of the crispiness. For the dipping sauce, it will keep in the refrigerator for about a week in an airtight container. Just give it a good stir before serving.
Frequently Asked Questions
Final Thoughts
There you have it, my absolute favorite Bloomin’ Onion recipe! I truly hope you give this a try. It’s one of those dishes that feels so rewarding to make at home, and the look on people’s faces when they see it is just priceless. It’s perfect for parties, holidays, or just when you need a little culinary adventure. If you love this recipe, you might also enjoy my recipes for Crispy Fried Pickles or my Loaded Potato Skins – they’re all crowd-pleasing appetizers that bring a smile to everyone’s face. I can’t wait to hear how your Bloomin’ Onion turns out! Please leave a comment below and let me know your thoughts, any variations you tried, or how it was received. Happy cooking!
Bloomin' Onion Recipe
Ingredients
Main Ingredients
- 1 large sweet onion
- 2 cups all-purpose flour
- 2 teaspoons paprika
- 1 teaspoon garlic powder
- 0.5 teaspoon onion powder
- 0.5 teaspoon cayenne pepper
- 1 teaspoon salt
- 0.5 teaspoon black pepper
- 2 cups milk
- 2 large eggs
- 4 cups vegetable oil for frying
For the Dipping Sauce
- 1 cup mayonnaise
- 2 tablespoons ketchup
- 1 tablespoon horseradish prepared
- 0.5 teaspoon paprika
- 0.25 teaspoon garlic powder
- 0.25 teaspoon onion powder
- 0.125 teaspoon cayenne pepper
Instructions
Preparation Steps
- Cut off the top 1 inch of the onion. Stand the onion on its cut side and cut off the bottom about 0.5 inch. Do not cut into the core.
- Make cuts into the onion starting from 0.5 inch from the root, going about 0.75 inch deep. Make 16-20 cuts evenly spaced around the onion. Rotate the onion and make another set of cuts, creating a grid pattern.
- Gently spread the onion petals apart to create the bloomin' effect. If the onion starts to fall apart, you can tie the base with kitchen twine.
- In a shallow dish, whisk together the flour, paprika, garlic powder, onion powder, cayenne pepper, salt, and black pepper.
- In another shallow dish, whisk together the milk and eggs.
- Dip the onion into the milk mixture, ensuring all parts are coated. Lift and let excess drip off.
- Place the onion in the flour mixture and coat thoroughly, pressing the flour into all the crevices. Shake off excess flour.
- Carefully place the coated onion, cut-side down, into a large pot or Dutch oven filled with about 2-3 inches of preheated vegetable oil (around 350°F or 175°C). Fry for 5-7 minutes, or until golden brown and crispy. Carefully flip and fry for another 2-3 minutes.
- Remove the bloomin' onion from the oil and drain on paper towels.
- For the dipping sauce, combine all sauce ingredients in a small bowl and mix well. Chill until ready to serve.
- Serve the bloomin' onion hot with the dipping sauce.