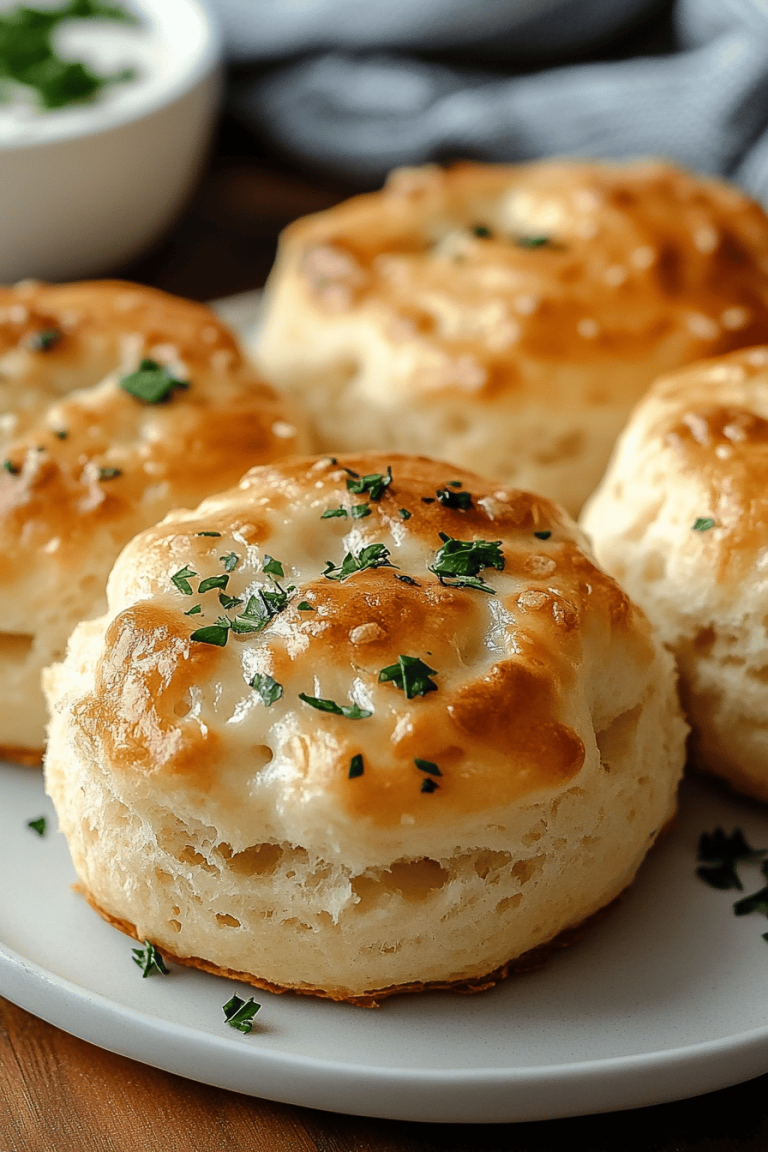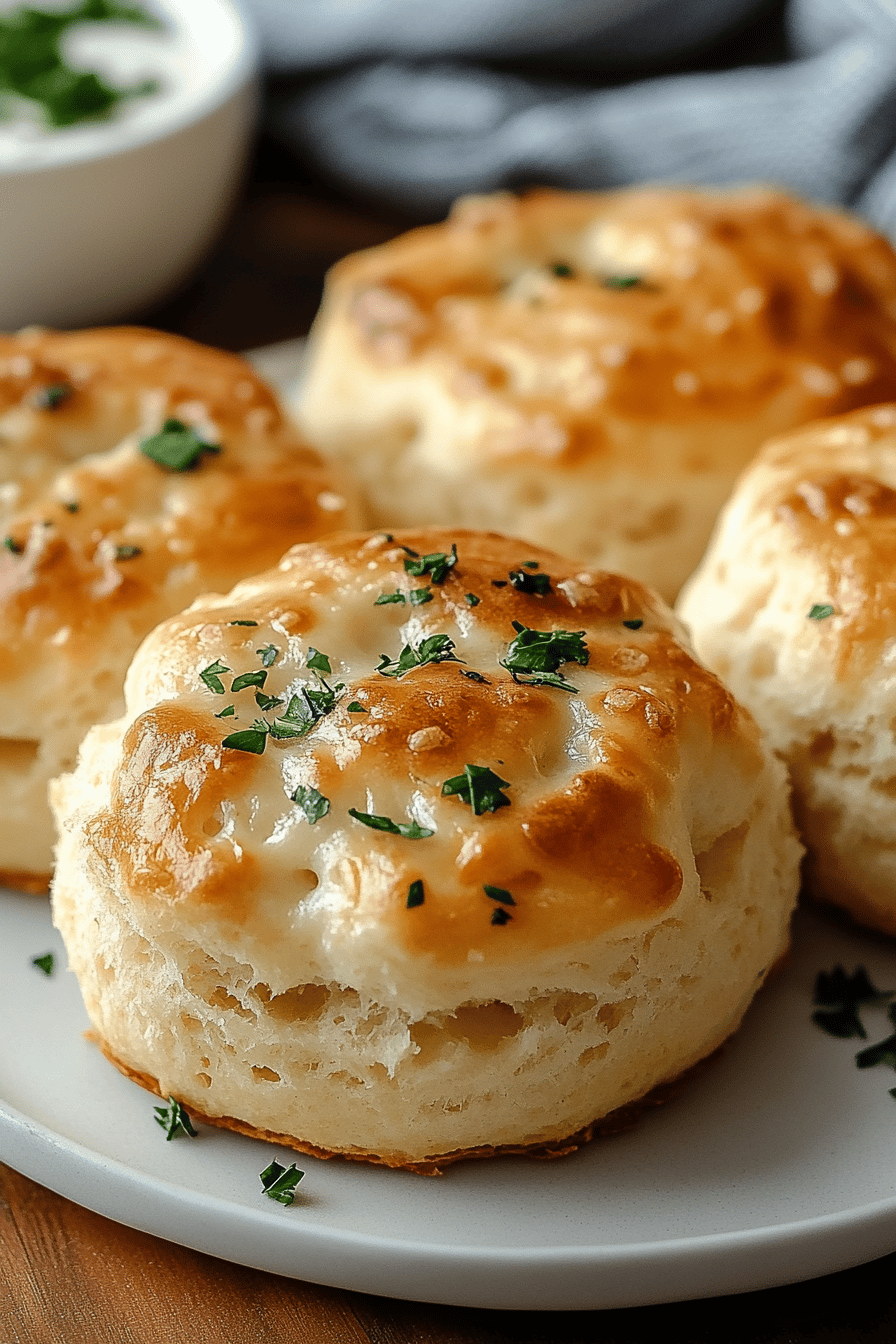
Angel Biscuits
Oh, you guys, I am SO excited to share this recipe with you today. This isn’t just *any* recipe; this is like a warm hug in baked form. It’s the kind of thing that makes your whole kitchen smell divine and brings smiles to everyone’s faces. I’m talking about Angel Biscuits, and let me tell you, they are pure magic. They’re so light and fluffy, almost like a cloud, with just the faintest hint of sweetness. I remember the first time I made them for my family; my youngest, who can be a bit picky, took one bite and his eyes just lit up. He kept saying, “Mom, more! These are the best!” That’s when I knew I had a keeper. They’re somehow both comforting and a little bit fancy, perfect for a lazy weekend breakfast or even a special occasion. Honestly, if you’ve ever loved those diner-style biscuits but wished they were a bit more… well, angelic, then you’re in for a treat. They’re a bit like a scone in their tenderness, but with the heartiness of a biscuit. It’s a delicious combination that’s hard to beat, especially when you’re craving something that feels truly special without being overly complicated.
What are angel biscuits?
So, what exactly *are* these little wonders called Angel Biscuits? Well, the name pretty much tells you, doesn’t it? They’re exceptionally light, tender, and airy biscuits that practically melt in your mouth. Think of them as the super-fluffy, slightly sweet cousins to your everyday Buttermilk Biscuits. The “angelic” part comes from how delicate they are – they aren’t dense or heavy at all. They get their incredible texture from a combination of ingredients and a very specific, gentle mixing method that I’ll get into in a bit. It’s not a complicated process, but it’s one where a little bit of care goes a long way. They’re the kind of biscuit that makes you want to close your eyes and savor every single bite. The subtle sweetness isn’t overpowering; it just rounds out the flavor beautifully, making them incredibly versatile. They’re essentially a delightful bread that feels like a treat, perfect for when you want something a little more special than toast but don’t want to spend hours in the kitchen.
Why you’ll love this recipe?
I could gush about these Angel Biscuits all day, but let me break down the main reasons why they’ve becomeflavor is just divine. They have a delicate, buttery taste with a whisper of sweetness that is utterly addictive. They’re not overly sweet, mind you, just perfectly balanced. The texture is where they truly shine – they are unbelievably tender and flaky, with a light, airy crumb. It’s like biting into a soft pillow. What I love most is how incredibly simple they are to make. Despite their fancy name and delicate texture, the actual hands-on time is minimal. You can whip these up surprisingly quickly, even on a weekday morning if you’re feeling ambitious! And talk about cost-efficientWhat are some pantry staples that you probably already have on hand, like flour, butter, and milk?versatility is off the charts. They are amazing with butter and jam for breakfast, fantastic alongside savory dishes for dinner, and even wonderful as a light dessert with a dollop of cream. They’re similar in spirit to a great scone or a classic buttermilk biscuit, but they manage to hit a sweet spot that’s uniquely their own. I’ve made these countless times, and they always disappear in minutes at my house. They’re truly a lifesaver when you need a crowd-pleaser that feels a little bit special without a lot of fuss. They’re just *good*. Plain and simple, but in the most delightful way possible.
How to Make Angel Biscuits
Quick Overview
Making these Angel Biscuits is a straightforward process that focuses on gentle handling and specific techniques to achieve that signature lightness. You’ll start by mixing your dry ingredients, then add cold butter until it’s crumbly, followed by your wet ingredients until just combined. The key is not to overwork the dough. Once mixed, you’ll gently shape and bake them until golden brown. The whole process, from start to finish, is surprisingly quick, often under an hour. It’s designed to be foolproof, so don’t fret if you’re new to baking! The resulting biscuits are incredibly light, tender, and melt-in-your-mouth delicious. They’re perfect for any occasion, really, and I’ve found they’re always a hit.
Ingredients
For the Main Batter:
All-Purpose Flour: 2 cups. I always opt for a good quality all-purpose flour. It provides the perfect structure without being too heavy. Make sure it’s spooned and leveled into your measuring cup, not scooped directly from the bag, to avoid packing too much in.
Granulated Sugar: 2 tablespoons. This is what gives them that subtle sweetness that makes them “angelic.” Don’t skip it, but don’t go overboard either; it’s just enough to round out the flavor.
Baking Powder: 1 tablespoon. This is your primary leavening agent, responsible for that wonderful lift. Make sure it’s fresh; expired baking powder is a biscuit’s worst enemy!
Salt: 1 teaspoon. Essential for balancing the sweetness and bringing out all the other flavors.
Cold Unsalted Butter: 1/2 cup (1 stick). This is CRUCIAL. It needs to be very cold, straight from the fridge. I like to cut it into small cubes. Cold butter creates steam pockets when it bakes, which leads to those lovely flaky layers.
Milk: 3/4 cup, plus more if needed. Whole milk is my preference for richness, but I’ve tested this with 2% and even almond milk (which made it surprisingly creamy!) and it still turned out great. Make sure it’s cold!
Heavy Cream: 1/4 cup. This adds extra richness and tenderness. Again, cold is key.
Step-by-Step Instructions
Step 1: Preheat & Prep Pan
First things first, get your oven preheating to a nice hot 400°F (200°C). While it’s warming up, grab a baking sheet and line it with parchment paper. This does two things: it prevents sticking and makes for super easy cleanup. You could also lightly grease your baking sheet if you don’t have parchment.
Step 2: Mix Dry Ingredients
In a large mixing bowl, whisk together the flour, sugar, baking powder, and salt. Give it a good whisk to make sure everything is evenly distributed. This ensures consistent leavening and flavor in every bite. You don’t want pockets of salt or baking powder!
Step 3: Cut in the Butter
Now, toss those cold, cubed butter pieces into the dry ingredients. Use a pastry blender, a fork, or even your fingertips to cut the butter into the flour mixture. You’re aiming for a coarse, crumbly texture, with some pieces of butter about the size of small peas. This is where the flakiness starts! I always do this until I can see no large chunks of butter, just nice little bits coated in flour.
Step 4: Mix Wet Ingredients
In a separate, smaller bowl or a liquid measuring cup, whisk together the cold milk and heavy cream. Make sure they’re well combined.
Step 5: Combine Dough (Gently!)
Pour the wet ingredients into the bowl with the dry ingredients and butter mixture. Using a fork or a spatula, gently stir just until the dough *barely* comes together. Seriously, stop mixing as soon as you don’t see any dry flour streaks. Overmixing is the enemy of tender biscuits! The dough will be a little sticky and shaggy, and that’s perfectly fine. This is the secret to their lightness.
Step 6: Shape the Biscuits
Turn the dough out onto a lightly floured surface. Gently pat or fold the dough a few times to bring it together. You’re not kneading here; you’re just coaxing it into a cohesive ball. Pat the dough into a rectangle about 3/4-inch thick. You can use a biscuit cutter to cut out rounds, or simply cut the rectangle into squares with a knife or bench scraper. I often just cut mine into squares because it’s faster and there’s less dough wasted, plus they bake up beautifully.
Step 7: Bake to Golden Perfection
Carefully place your shaped biscuits onto the prepared baking sheet, leaving a little space between them. They’ll puff up a bit as they bake. Pop them into the preheated oven and bake for 12-15 minutes, or until they are beautifully golden brown on top and cooked through. The smell that fills your kitchen at this point is just incredible!
Step 8: Cool Slightly & Serve Warm
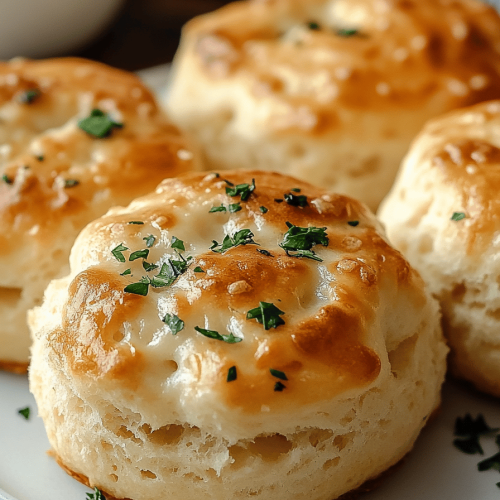
Once they’re done, remove the baking sheet from the oven. Let the biscuits cool on the baking sheet for just a minute or two. They are best served warm, so don’t wait too long! You can brush them with a little melted butter right out of the oven for extra flavor and shine if you like.
Step 9: Enjoy!
Serve your amazing Angel Biscuits immediately! They are truly at their best when they’re fresh out of the oven. Just be prepared for them to disappear quickly!
What to Serve It With
These Angel Biscuits are so wonderfully versatile, they truly fit into almost any meal. I’ve got a few favorite ways to serve them that I think you’ll enjoy too!
For Breakfast: My absolute favorite way to have them is simply split open, slathered with good quality butter, and a generous dollop of my homemade strawberry jam. The sweet and buttery combination is just heavenly. They’re also fantastic alongside scrambled eggs and crispy bacon. For a slightly more decadent breakfast, try them with a smear of Cream Cheese and a drizzle of honey. The way they soak up a bit of coffee if you dunk them? Pure bliss!
For Brunch: These biscuits really shine at brunch. Serve them alongside smoked salmon and cream cheese, or with a side of poached eggs and hollandaise sauce. They make an elegant addition to a buffet spread, offering a lighter, more delicate bread option. They’re also a perfect accompaniment to a quiche or a frittata. For drinks, a mimosa or a sparkling cider would be lovely.
As Dessert: Yes, dessert! When they’re still warm, split them and fill them with fresh berries and a dollop of lightly sweetened whipped cream. It’s like a quick, deconstructed berry shortcake. Another idea is to serve them with a warm fruit compote – apple or peach works wonderfully. A drizzle of maple syrup or a light dusting of powdered sugar also makes them feel a bit more dessert-like.
For Cozy Snacks: On a chilly afternoon, there’s nothing better than a warm Angel Biscuit. I love them with a simple spread of honey or a bit of apple butter. They’re also surprisingly good with a mild cheddar cheese. If you’ve had a particularly long day, a biscuit with a cup of tea is my go-to comfort food. They’re just so comforting and satisfying without feeling heavy.
My family traditions often involve these biscuits for Sunday brunch, served with a side of my dad’s famous fried chicken. The contrast between the savory chicken and the light, airy biscuit is just perfect. They’re truly a recipe that can be dressed up or down, always making the meal feel a little more special.
Top Tips for Perfecting Your Angel Biscuits
I’ve made these Angel Biscuits so many times that I’ve picked up a few tricks along the way. Don’t worry if your first batch isn’t absolutely perfect; baking is a journey, and these tips are meant to help you get there faster!
Butter is Your Best Friend (When Cold!): I can’t stress this enough: your butter NEEDS to be very cold. If it’s even slightly soft, it will just blend into the flour and you’ll lose that crucial flakiness. Pop your butter in the freezer for about 15-20 minutes before you start. And when you’re cutting it into the flour, work quickly. My fingers can warm butter up fast, so I often use a pastry blender or two knives if my hands feel too warm.
Don’t Overmix, Ever: This is the cardinal rule for tender biscuits. As soon as the wet and dry ingredients start to combine and you no longer see dry flour, STOP mixing. The dough should look shaggy and a bit rough. If you overwork it, you’ll develop the gluten too much, resulting in tough, dense biscuits instead of light, airy ones. It’s better to have a few unincorporated bits than to overmix.
Gentle Handling is Key: When you turn the dough out onto the counter and pat it into shape, be gentle. Don’t press down too hard. Similarly, when cutting them out, use a quick, decisive press rather than twisting the cutter, which can seal the edges and prevent them from rising evenly. I often use a sharp knife to cut mine into squares, which is just as effective and requires minimal handling.
Fresh Leavening Agents Matter: Baking powder loses its potency over time. If your biscuits aren’t rising like they should, check the expiry date on your baking powder. To test if it’s still good, put a teaspoon in a little hot water; it should bubble up vigorously. If it doesn’t, it’s time for a new container!
Know Your Oven: Ovens can vary wildly. What works for me might be slightly different for you. Keep an eye on your biscuits, especially the first time you make them. If they start browning too quickly on top, you can loosely tent them with foil for the last few minutes of baking. Conversely, if they’re not browning enough, your oven might run a little cooler, so you may need to bake them for a minute or two longer.
Milk Temperature: Just like the butter, cold milk and cream are important. They help keep the butter cold as long as possible during the mixing process, contributing to better layers. I usually keep my milk and cream in the fridge until I’m ready to use them.
Flavor Variations: While these are divine as is, I love to experiment! A little pinch of dried herbs like chives or rosemary can be lovely for savory biscuits. For a touch of sweetness, a sprinkle of cinnamon or a tiny bit of orange zest in the dry ingredients is a nice variation. Don’t be afraid to play around once you’ve mastered the basic recipe!
Storing and Reheating Tips
The beauty of these Angel Biscuits is that they’re truly best enjoyed fresh. However, life happens, and sometimes you have leftovers (though I can’t imagine how!). Here’s how I store and reheat them to keep them as delicious as possible:
Room Temperature Storage: If you have a few leftover biscuits and plan to eat them within a day or two, simply store them in an airtight container or wrap them tightly in plastic wrap at room temperature. They will start to lose a bit of their crispness and tenderness after the first day, but they’re still perfectly good. I find they hold up best if they haven’t been cut open yet.
Refrigerator Storage: For longer storage, up to 3-4 days, the refrigerator is your best bet. Place cooled biscuits in an airtight container or wrap them well in plastic wrap and then foil. While refrigeration helps them last longer, it can sometimes make them a bit tougher. The key is to reheat them properly to bring back some of their original glory.
Freezer Instructions: These biscuits freeze remarkably well! Once they’ve cooled completely, wrap individual biscuits (or stacks of them) tightly in plastic wrap, then in a layer of aluminum foil, and finally place them in a freezer-safe bag. They should keep well for up to 2-3 months. This is a lifesaver for busy mornings when you want a warm biscuit without the fuss of making a whole batch.
Reheating is Key:
For room temperature or refrigerated biscuits, the best way to reheat is in a warm oven. Place them on a baking sheet in a preheated oven at around 300°F (150°C) for 5-10 minutes, or until warmed through. This helps to crisp them up again.
For frozen biscuits, you can reheat them directly from frozen. Place them on a baking sheet in a 350°F (175°C) oven for about 10-15 minutes, or until heated through. You might want to add a couple of minutes if they’re still a bit frosty in the center.
Avoid the microwave if at all possible, as it tends to make biscuits rubbery and tough. The oven is your friend here!
Glaze Timing Advice: If you’ve made a glaze, it’s best to add it just before serving or just before reheating if you’re reheating a whole batch for a special occasion. Glaze can sometimes get sticky or melt if stored for too long, especially in the fridge. If you’re freezing them, I’d recommend making and applying the glaze after reheating to ensure it looks and tastes its best.
Frequently Asked Questions
Final Thoughts
So there you have it – my beloved Angel Biscuits recipe! I truly hope you give these a try. They’re more than just a recipe to me; they’re about creating those little moments of joy and connection in the kitchen. The way they turn out so light and fluffy, even with simple ingredients, always amazes me. They’re the perfect example of how a little bit of care and attention can lead to something truly wonderful. If you’re looking for a breakfast treat that’s comforting, relatively easy, and utterly delicious, these are it. They’re a fantastic starting point if you’re new to biscuit-making, and a guaranteed winner if you’re an old pro. I find myself reaching for this recipe when I want to impress guests, or frankly, just when I need a little bit of deliciousness in my day. They’re so versatile, making them a true kitchen workhorse that feels like a treat every time. Give them a go, and I can’t wait to hear what you think! Let me know in the comments below how yours turned out, or if you have any special variations you love to add. Happy baking, and enjoy every single bite!
Angel Biscuits
Ingredients
Main Ingredients
- 4 cups all-purpose flour
- 0.125 cup granulated sugar
- 2.5 teaspoons instant yeast
- 1 teaspoon salt
- 0.5 cup butter, cold and cubed
- 1.5 cups buttermilk
Instructions
Preparation Steps
- In a large bowl, whisk together the flour, sugar, yeast, and salt.
- Cut in the cold butter using a pastry blender or your fingertips until the mixture resembles coarse crumbs.
- Gradually add the buttermilk, stirring until just combined. The dough will be shaggy.
- Turn the dough out onto a lightly floured surface and gently knead for about 30 seconds, just until it comes together. Do not overwork.
- Pat or roll the dough to about 0.75 inches thick. Cut out biscuits using a 2-inch round cutter.
- Place the biscuits on an ungreased baking sheet. Cover loosely with plastic wrap and let rise in a warm place for 30-45 minutes, or until doubled in size.
- Preheat oven to 425°F (220°C).
- Bake for 12-15 minutes, or until golden brown.
- Serve warm, with butter or your favorite toppings.