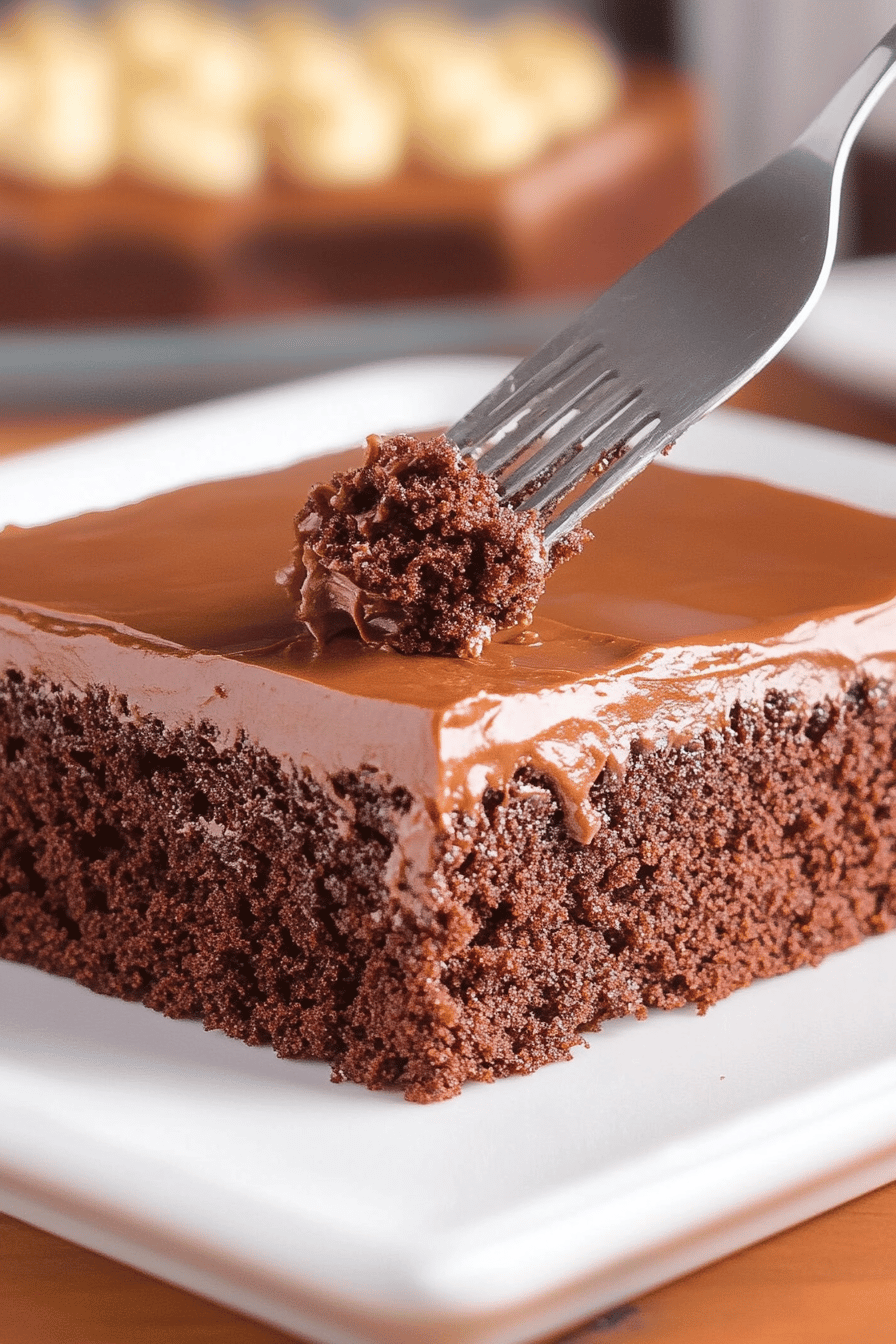
Texas Tornado Cake
Oh, you guys, I am SO excited to share this recipe with you today. This Texas Tornado Cake isn’t just a dessert; it’s a hug in cake form, a little slice of sunshine on a cloudy day. It’s the kind of cake that makes the whole house smell amazing, and frankly, it’s the reason my kitchen is always covered in a light dusting of flour. My kids practically beg for this, and honestly, who can blame them? It’s got this incredible, moist crumb with a swirl of pure magic running through it. If you’ve ever had a really good spiced cake or a cinnamon swirl bread, you’ll get the idea, but this Texas Tornado Cake takes it to a whole new level. It’s surprisingly simple, which is a lifesaver on those busy weeknights when all you want is something sweet and comforting but don’t have hours to spend in the kitchen. I’ve tinkered with this recipe for years, trying to get it just right, and I think I’ve finally nailed it. It’s become my ultimate comfort bake, the one I pull out when I need a little pick-me-up or when unexpected guests drop by.

What is Texas Tornado Cake?
So, what exactly is this “Texas Tornado Cake” I keep raving about? Well, think of it as a super moist, tender cake with a delightful spiced sugar swirl that weaves its way through every single bite. It’s not a heavy, dense cake, nor is it a light, airy Angel Food. It’s right there in the middle, perfectly balanced. The “tornado” part comes from how you swirl the filling into the batter, creating beautiful, mesmerizing patterns that look almost artistic. It’s a bit like a cinnamon swirl coffee cake, but with its own unique character and flavor profile that just screams comfort and warmth. It’s the kind of cake that feels special enough for a celebration but is so easy to make that it’s perfect for an everyday treat. The name itself just sounds fun and a little wild, doesn’t it? It hints at the delightful chaos of flavors and textures that you’re about to experience.
Why you’ll love this recipe?
There are so many reasons why this Texas Tornado Cake has become a staple in my kitchen, and I just know you’re going to fall in love with it too. First off, the flavor is absolutely divine. It’s perfectly spiced with warm notes of cinnamon and a hint of nutmeg that just wrap you up in a cozy blanket. The cake itself is incredibly moist, thanks to a secret ingredient (well, not so secret anymore!) that keeps it tender and flavorful for days. Speaking of moist, I’ve actually experimented with adding a bit of Sour Cream, and it made it even creamier, so don’t be afraid to play around! And the swirl? Oh, the swirl! It’s a sweet, slightly gritty, spiced ribbon of pure joy that elevates this cake from ordinary to extraordinary. What I love most, though, is how surprisingly simple it is. You don’t need any fancy equipment or complicated techniques. It’s all done in a couple of bowls, and the swirling part is actually really fun, almost therapeutic! It’s budget-friendly too, using common pantry staples that most of us already have on hand. Plus, it’s incredibly versatile. Serve it for breakfast with a steaming mug of coffee, as a delightful brunch centerpiece, or as a comforting dessert after dinner. It’s also fantastic for those spontaneous moments when you’re craving something sweet but don’t want to commit to a full-on, multi-layer bake. This cake is a lifesaver for those moments!
How do you make Texas Tornado Cake?
Quick Overview
Making this Texas Tornado Cake is a breeze, honestly! You’ll mix up a simple, moist Cake Batter, prepare a quick spiced sugar filling, layer them together with a fun swirl, and then bake it until golden brown and wonderfully fragrant. The whole process is designed to be straightforward and forgiving, meaning even if you’re new to baking, you’ll achieve fantastic results. It’s the kind of recipe that builds your confidence in the kitchen.
Ingredients
For the Main Batter:
2 ½ cups all-purpose flour. I always use unbleached flour for a better texture. Make sure it’s sifted if you want it extra tender, though honestly, I often skip this step and it’s still great.
1 ½ teaspoons baking soda. This is crucial for the lift!
½ teaspoon salt. Balances out all the sweetness.
1 teaspoon ground cinnamon. The star spice!
½ teaspoon ground nutmeg. Just a little hint for warmth.
1 cup (2 sticks) unsalted butter, softened. Make sure it’s truly soft, not melted. It makes a huge difference in how it creams.
1 ¾ cups granulated sugar. This gives us that lovely sweetness.
2 large eggs. At room temperature, if possible. It helps them incorporate better.
1 teaspoon vanilla extract. Pure vanilla extract, please! It’s worth it.
1 cup buttermilk. This is key for that incredible moisture. If you don’t have buttermilk, you can make your own by adding 1 tablespoon of white vinegar or lemon juice to 1 cup of regular milk and letting it sit for 5-10 minutes.
For the Filling:
1 cup packed light Brown Sugar. The brown sugar adds a lovely caramel note.
2 tablespoons all-purpose flour. This helps thicken the filling slightly.
1 tablespoon ground cinnamon. Generous amount here for maximum flavor.
¼ teaspoon ground cloves (optional, but highly recommended!). Adds a little extra spice depth.
For the Glaze:
1 ½ cups powdered sugar. Sifted is best for a smooth glaze.
3-4 tablespoons milk (any kind works – whole milk, almond milk, even water in a pinch). Start with less and add more until you reach your desired consistency.
½ teaspoon vanilla extract (optional). For an extra layer of flavor.
Step-by-Step Instructions
Step 1: Preheat & Prep Pan
Preheat your oven to 350°F (175°C). Grease and flour a 9×13 inch baking pan. I usually use butter for greasing and then a little bit of flour, tapping out any excess. This ensures the cake doesn’t stick. You could also line it with parchment paper for extra insurance!
Step 2: Mix Dry Ingredients
In a medium bowl, whisk together the 2 ½ cups of all-purpose flour, 1 ½ teaspoons baking soda, ½ teaspoon salt, 1 teaspoon ground cinnamon, and ½ teaspoon ground nutmeg. Set this aside.
Step 3: Mix Wet Ingredients
In a large bowl, cream together the softened 1 cup of unsalted butter and 1 ¾ cups granulated sugar until light and fluffy. This might take a few minutes with an electric mixer. Beat in the 2 large eggs one at a time, then stir in the 1 teaspoon vanilla extract. Gradually beat in the 1 cup of buttermilk.
Step 4: Combine
Gradually add the dry ingredients to the wet ingredients, mixing on low speed (or by hand) until just combined. Be careful not to overmix! Overmixing can lead to a tougher cake. A few streaks of flour are okay; they’ll disappear as you fold.
Step 5: Prepare Filling
In a small bowl, combine the 1 cup packed light brown sugar, 2 tablespoons all-purpose flour, 1 tablespoon ground cinnamon, and the optional ¼ teaspoon ground cloves. Stir it all together until well combined. This mixture will be spread over the batter.
Step 6: Layer & Swirl
Spread about half of the cake batter evenly into the prepared baking pan. Sprinkle about half of the cinnamon-sugar filling mixture over the batter. Dollop the remaining cake batter over the filling, then sprinkle the rest of the filling on top. Now for the fun part: take a knife or a skewer and gently swirl the filling into the batter. Don’t over-swirl; you want distinct ribbons of filling, not a muddy mess. Aim for about 6-8 swirls through the pan.
Step 7: Bake
Bake for 30-35 minutes, or until a wooden skewer or toothpick inserted into the center of the cake comes out clean. The top should be golden brown and look beautifully set. Every oven is a little different, so keep an eye on it!
Step 8: Cool & Glaze
Let the cake cool in the pan on a wire rack for at least 15-20 minutes before glazing. While it’s cooling, whisk together the 1 ½ cups powdered sugar, 3 tablespoons of milk, and ½ teaspoon vanilla extract in a small bowl. Add more milk, a teaspoon at a time, until you get a smooth, pourable glaze. Drizzle the glaze over the warm cake. It will melt slightly and create a lovely finish.
Step 9: Slice & Serve
Allow the glaze to set for a few minutes before slicing. I like to cut it into squares or rectangles. Serve it warm or at room temperature. It’s absolutely wonderful on its own, but you can also serve it with a dollop of whipped cream or a scoop of vanilla ice cream!
What to Serve It With
This Texas Tornado Cake is so versatile, it fits into almost any occasion. For a cozy breakfast, I love to serve it warm with a strong cup of coffee. The rich, spiced flavors are the perfect start to the day. It’s a step up from your usual muffin but still totally acceptable for a weekday treat if you ask me! For brunch, it’s a showstopper. I’ll cut it into slightly smaller pieces and arrange them artfully on a platter, perhaps with some fresh berries or a light dusting of powdered sugar. It pairs beautifully with mimosas or a sparkling cider. As a dessert, it’s pure comfort. Serve a generous slice with a scoop of good quality vanilla bean ice cream, or a dollop of homemade whipped cream. The warm spices and sweet glaze are the perfect end to any meal. And for those “just because” moments, when you need a little something sweet to brighten your day, it’s perfect for a cozy snack. I often have a slice with a cup of herbal tea in the afternoon. My family has a tradition of having a slice with a glass of cold milk after school – it’s a simple pleasure that always makes them smile. It’s also fantastic paired with a warm apple cider or a spiced chai latte.
Top Tips for Perfecting Your Texas Tornado Cake
I’ve made this Texas Tornado Cake more times than I can count, and through all those bakes, I’ve picked up a few tricks that I think can help you achieve cake perfection. First, for the zucchini prep, while this recipe doesn’t use zucchini (oops, I got ahead of myself and was thinking of my other favorite cake!), the principle of moisture control is still key. For the ingredients that *are* in this cake, ensure your butter is truly softened. If it’s too cold, it won’t cream properly, and if it’s too warm, it’ll be greasy. Room temperature eggs also emulsify much better into the batter, leading to a smoother, more cohesive cake. When it comes to mixing the batter, remember the golden rule: do not overmix! Overmixing develops the gluten in the flour, which can result in a tough, dense cake. Mix until *just* combined. A few small lumps of flour are fine; they’ll work themselves out during baking. For the swirl customization, don’t go crazy trying to make perfect patterns. The beauty of a tornado cake is its rustic, swirled look. A few gentle passes with a knife or skewer are all you need to create those lovely ribbons. You can even do figure-eights for a more dynamic swirl! If you’re looking for ingredient swaps, you can absolutely play with the spices. A little cardamom or even a pinch of ginger can add a lovely new dimension. For baking, always do the toothpick test. Ovens vary, so what takes 30 minutes in mine might take 25 or 35 in yours. Insert a toothpick into the center – if it comes out clean, it’s done. If it has wet batter, bake for a few more minutes. If it has moist crumbs, you’re good to go. For glaze variations, if you want a thinner glaze, just add a tiny bit more milk. If you want it thicker, add a bit more powdered sugar. You can also add a splash of lemon juice instead of vanilla for a brighter flavor profile. Trust me, these little things make a big difference!
Storing and Reheating Tips
One of the best things about this Texas Tornado Cake is how well it keeps. If you happen to have any leftovers (which is rare in my house!), you can store it at room temperature for up to 2-3 days. Just make sure it’s covered tightly with plastic wrap or in an airtight container. The moisture in the cake helps it stay fresh. If you need to store it for longer, the refrigerator is your friend. Wrapped well in plastic wrap and then foil, or in a good airtight container, it will keep for about a week. I find that the flavors actually meld and deepen a bit in the fridge, which is lovely. If you’re a serious planner or just want to get ahead, this cake freezes beautifully! Let the cake cool completely, then wrap it tightly in a double layer of plastic wrap, followed by a layer of aluminum foil. It can stay in the freezer for up to 3 months. When you’re ready to enjoy it, let it thaw overnight in the refrigerator, then bring it to room temperature. If you want to reheat it, you can gently warm individual slices in the microwave for about 10-15 seconds – just enough to take the chill off. I usually don’t bother reheating, as it’s delicious at room temperature, but a little warmth can be nice on a cold day. As for the glaze timing, I always recommend glazing the cake *after* it has cooled for a bit. If you glaze a super hot cake, the glaze will just melt and run off. For refrigerated or frozen cakes that you’re bringing back to room temp, you can re-glaze it if the original glaze has gotten a bit hard, or just enjoy it as is!
Frequently Asked Questions
Final Thoughts
So there you have it – my beloved Texas Tornado Cake! I really hope you give this recipe a try. It’s more than just a cake; it’s a little bit of happiness, a reminder of cozy afternoons, and a fantastic way to bring smiles to the faces of your loved ones. It’s proof that delicious, comforting treats don’t need to be complicated. If you love this cake, you might also enjoy my Brown Butter Pecan Cake or my Spiced Apple Bread – they have that same comforting, homemade feel. I can’t wait to hear what you think! Please leave a comment below and let me know how your Texas Tornado Cake turned out, or if you’ve discovered any amazing variations. Happy baking!
Texas Tornado Cake
Ingredients
Cake Batter
- 1.5 cups all-purpose flour
- 1 teaspoon baking soda
- 0.5 teaspoon salt
- 0.5 cup unsalted butter, softened
- 1 cup granulated sugar
- 2 large eggs
- 1 teaspoon vanilla extract
- 1 cup buttermilk
Cinnamon Swirl
- 0.75 cup packed brown sugar
- 1 tablespoon ground cinnamon
- 2 tablespoon unsalted butter, melted
Instructions
Preparation Steps
- Preheat oven to 350°F (175°C). Grease and flour a 9x13 inch baking pan.
- In a medium bowl, whisk together the flour, baking soda, and salt.1.5 cups all-purpose flour
- In a large bowl, cream together the softened butter and granulated sugar until light and fluffy.1.5 cups all-purpose flour
- Beat in the eggs one at a time, then stir in the vanilla extract.1.5 cups all-purpose flour
- Gradually add the dry ingredients to the wet ingredients, alternating with the buttermilk, beginning and ending with the dry ingredients.1.5 cups all-purpose flour
- In a small bowl, combine the brown sugar and cinnamon for the swirl. Stir in the melted butter until well combined.1.5 cups all-purpose flour
- Pour half of the cake batter into the prepared pan. Sprinkle half of the cinnamon-sugar mixture over the batter. Dollop the remaining batter over the cinnamon-sugar. Sprinkle the remaining cinnamon-sugar mixture on top.
- Bake for 30-35 minutes, or until a wooden skewer inserted into the center comes out clean.
- Let the cake cool in the pan for 10 minutes before inverting it onto a wire rack to cool completely.